Cross Processing in Photoshop
What is Cross Processing you ask? Cross processing is a technique traditionally used in film processing to produce interesting and unpredictable colour effects.
Different chemicals are used to process Negative film from Slide film, and when using the chemicals for Slide Film on Negative film, wild and unusual colour variations occur. You can also achieve similar results by processing Slide Film in Negative chemicals.
With Photoshop you can achieve similar results with much less mess and much less fuss.. as well as with more predictable results. It is much easier to experiment with your results in Photoshop than it is with chemicals and film!
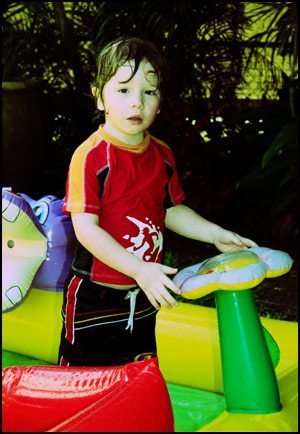
Lets start with our original photo.

From the bottom of your layers palette choose, New Fill or Adjustment layer

Select Curves from the menu that appears.
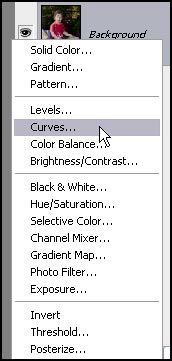
This will bring up your Curves Adjustment Layer window.
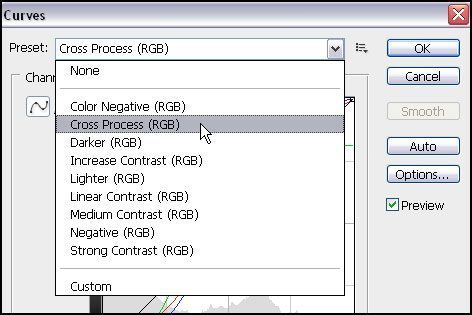
Within CS3 and possibly earlier versions of Photoshop, there is a Cross Processing Preset. This may work perfectly for your photo depending on the effect you desire, subject and the colors in your photo, but in this case I find it a bit too green for my photo.
For the purpose of this tutorial I am going to adjust RGB colours individually.
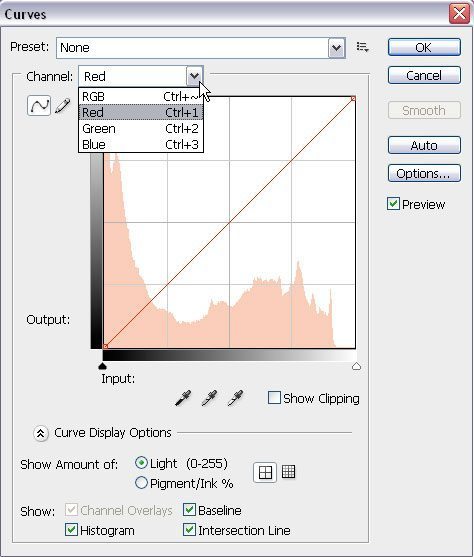
Select the Red Channel and adjust the line to form a curve above the diagonal. This will require some experimentation, as each photo will provide different results, but in the photo below the output setting is 192 and input 203 for the top curve (below the diagonal) and Output 64 and Input 98 for the bottom curve showing above the diagonal line.

Next I will adjust the green settings. You will again need to experiment and see what looks good on your photo. My green curves are going in the opposite direction to the red.
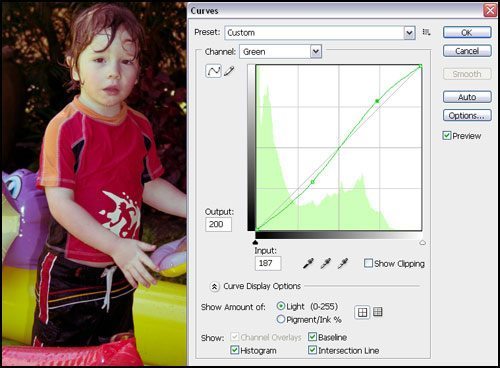
The final curve is the blue one.

I have made this one a more exaggerated version of the red curve.
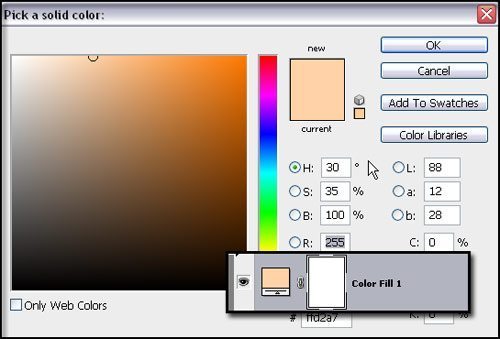
At this point I feel the image needs a little warmth so I am going to add a colour fill. I experimented a little with the colour to see what looked good.
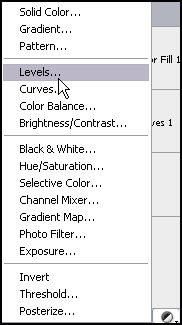
Click on the symbol at the bottom of your layers palette that looks like a half black and white circle to create a new adjustment layer and click on Solid Color.

I used the colour picker to pick a light orange colour and clicked on OK, creating a new colour fill layer.
Again you will need to experiment, but for this photo, I adjusted the blend mode to multiply and Opacity to 53%.

At this point the photo needs a bit more POP as it is a bit dull. Cross Processed images tend to have high contrast often with blown out highlights and dark shadows.
So to achieve this effect I have added a new Levels Adjustment Layer.
At this point, I moved the right hand white adjustment icon, to the left, which gives a bit more punch and contrast to the image. If you wanted to experiment a little more you could adjust each colour channel separately, but doing the RGB channel suited me for this photo.
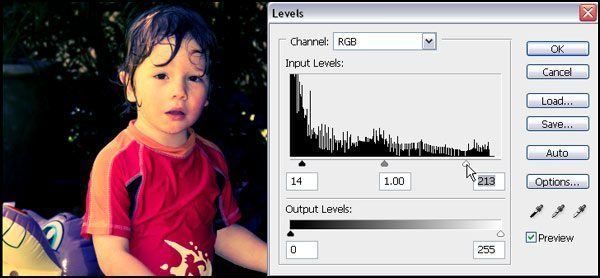
Much closer now.. but not quite there…I still want the highlights to look a little more blown out.
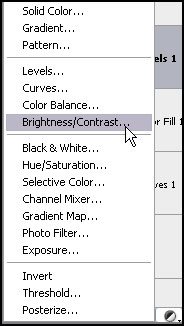
So another adjustment layer, this time Brightness/Contrast.
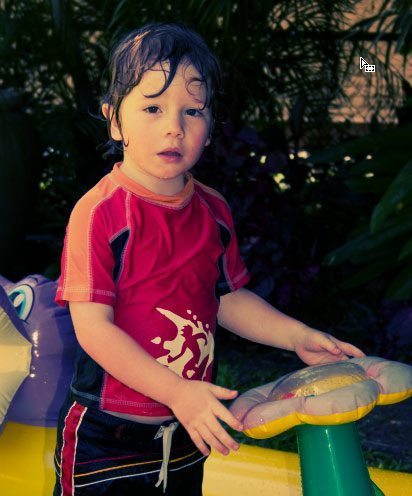
I think we might have it now!
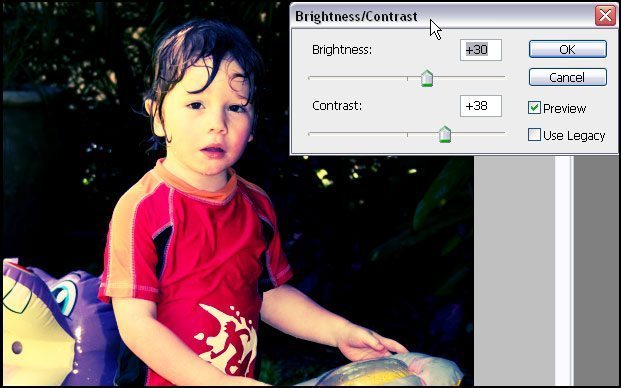
This to me, looks like a classic Cross Processed Image.

Don’t be afraid to experiment, and every photo will look different. The key is not to get too hung up on technique, and do what you think looks good. Experimenting with colour curves is a great way to become more familiar with editing your images and can provide some very striking effects!
© Clikchic Designs 2009