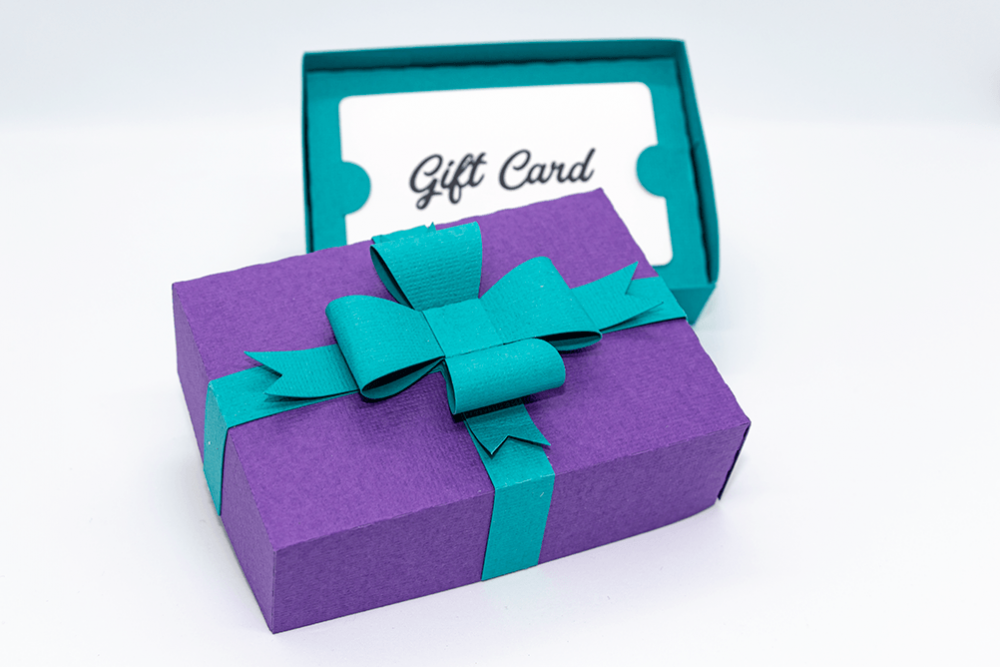
This super cute Gift Card Box is easy to assemble and perfect for giving gift cards to loved ones in style. The cutting file is now available in the Silhouette Design Store here. Use cardstocks to suit the occasion!
The Gift Card Box has been designed with Heavy Cardstocks in mind. It is possible to use lighter cardstocks but the fit may be slightly looser. I have made the Gift Card Box with copy paper and while a little loose still looks great. For best results use medium to heavy cardstocks. The cardstocks used in the following photos and video are heavy cardstocks. The Gift Card Box fits on 8.5×11″, A4 or 12×12″ paper and can be cut on both Silhouette Portrait or Silhouette Cameo Machines. The gift card holder fits the standard gift card size which is the size of a standard credit card or ATM card. The Gift Card Box Cutting File finishes at approx 108x76x46mm including the ribbon.
Scroll to end of tutorial to watch video of assembly or continue reading written instructions below.
First cut all the pieces in cardstock colours of your choice. The pieces for the bottom and bottom gift card insert are shown as the same colour (teal) in the cutting file. The top is shown in purple. The ribbon parts are shown in teal. Start by assembling the bottom pieces. Fold each of the scored sides and side tabs. Place adhesive on each tab on the side of the cardstock that will face the outside of the box. Once adhesive is applied, attach each tab to the corresponding side of the box ensuring the right angles are flush. Repeat for each tab.
Repeat for the other bottom piece and the top. Insert the gift card holder into the bottom box piece. It may be easier to first insert the gift card before inserting the card holder into the bottom box piece. The gift card mockup I use in the video below was slightly bigger than standard so it was a little trickier to insert than a regular gift card.
Attach the two ribbon crosses together so that they sit flush in the center. The smaller ribbon cross should be on top with ribbon ends of the smaller ribbon cross visible.
There are two shapely bow pieces and a small piece to fold over the top bow. With each shapely bow piece attach one end of the piece to the center of the underside using craft glue taking care to place the end just before the curve starts on the other side. Repeat with the other side attaching the end to the piece already stuck down placing the end before the curve starts on the other side. Ensure pieces are firmly adhered. Place a dab of craft glue in the middle of the crossed bows and adhere the center of the bow to the center of the cross ensuring the bow is placed with the straight section of bow in the center.
Assemble the second bow piece in the same way. Once complete attach the small bow piece to the center of top bow with craft glue and also glue the sides to the underside of the bow. Once firmly attached, place a dab of craft glue on top of the bow attached to the crossed ribbons and adhere the second bow so that it faces the direction of the opposite length of the crossed ribbons. Once firmly attached, fold the sides along the score lines for each side of the cross ribbon. Place adhesive on the underside of the crossed ribbon and on the ends of each piece. While taking care to place in the center of the lid piece, and ensuring each side sits flush with the box corners adhere the ribbon to the top and sides of the box top.
You can now place the box top on the box bottom! See the video below of assembly. Note that the video is done with different coloured cardstocks.
Subscribe to the Clikchic Designs Newsletter and get a FREEBIE! There are ongoing freebies as well. Don't worry, we won't inundate you with emails.
Subscribe To Our Newsletter
Subscribe to receive the latest news and updates from Clikchic Designs. Get a FREEBIE just for subscribing!
You have Successfully Subscribed!