You can produce some interesting selective blur effects with the Lens Blur filter in Photoshop. It is a technique originally created with a specialized camera and sometimes used in advertising images. Following is a quick tutorial on how to create a similar Lens Blur effect in Photoshop. Photoshop gives us a lot more control after the image is taken and how the blur is applied. It is a very effective technique great for emphasising a focal point or drawing the eye to a specific area of your photo.
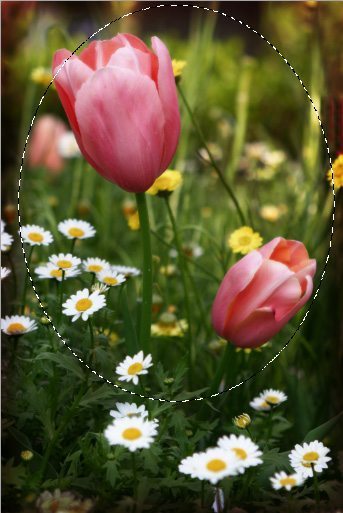
First, create a selection on you photograph with the Elliptical Marquee tool. (situated on the rectangular marquee button).
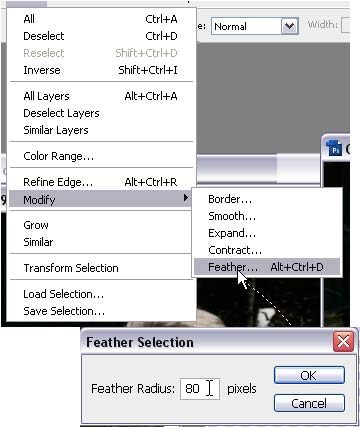
Now feather the selection using Feather Selection in the Select – Modify – Feather Selection.
Type in 80 as a feathering range. (can vary depending on photo size)
Click on ok. Your selection may not change much on the screen but it will now be a feathered selection.
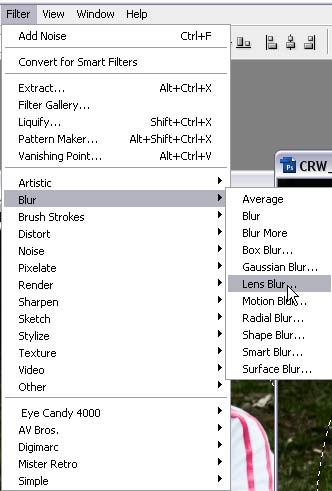
Click on Filter – Blur – Lens Blur. This will bring up a window for adjusting your lens blur settings.
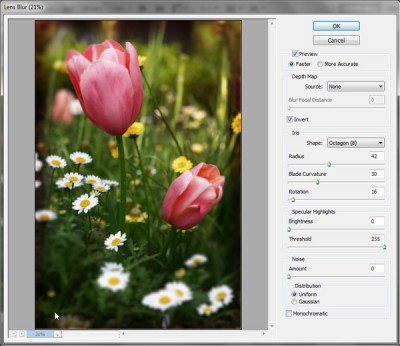
Within this window you can adjust your settings. Select invert so that the outside of your subject is blurred. Below are the settings I used, you can adjust yours and experiment with your own settings to get an effect you are happy with.
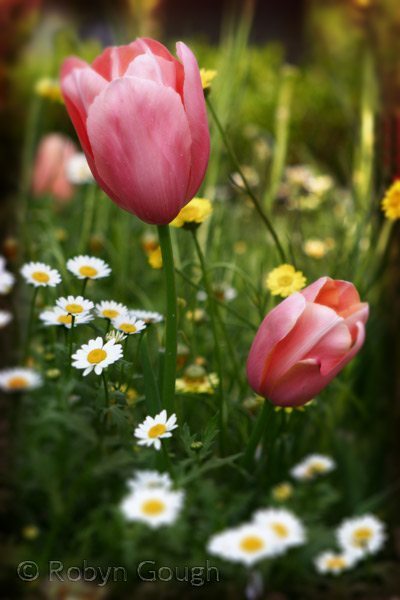
And here is the final image. I love this effect and I am sure you will find many uses for it as well.
All rights reserved
© Clikchic Designs 2009
Do not reproduce without express written permission
Subscribe to the Clikchic Designs Newsletter and get a FREEBIE! There are ongoing freebies as well. Don't worry, we won't inundate you with emails.

Hi Robyn,
It might be my computer, but there is no link here…. it only says “”.
Just thought you should know.
Hugs,
Maureen
Not sure what you mean Maureen, you mean the Selective Blur tutorial isn’t showing?