Anyone who joins the online digiscrapping communities will notice the popularity of blinking avatars and ‘blinkies’. This tutorial teaches you how to easily create you very own blinking avatars and blinkies in Photoshop Elements. This tutorial was written in PSE4, if there are any changes in later versions, please do let me know so I can update the tutorial.
Creating Blinkie’s in Photoshop Elements 4+
You will be amazed at how easy it is to create blinkie’s in PSE4. It works a little differently to Photoshop CS, so if you are using PSCS check out our article on creating blinkies in Photoshop CS+.
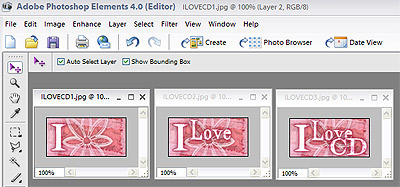
First we need to start with the images we wish to use for each frame of the animation. In PSE each frame of the animation must be a single layer. Below I have saved each combination of layers as a jpg file to enable each frame to be combined into a single file. Each file must have exactly the same dimensions. Open each of the .jpg files you intend to use for each frame.
Once you have all your frames ready, you need to compile them into several layers of one file.
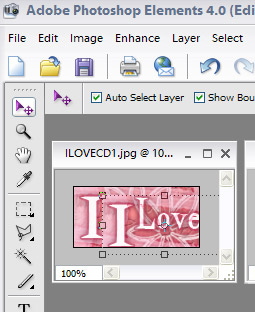
To do so click on and drag the second frame on top of the first frame. Then drag the third on top of the second. Do this as many times as you have frames in order that you wish them to appear. Make sure each layer is lined up correctly. For this blinkie there are only going to be 3 frames.
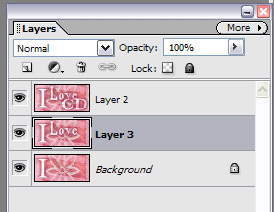
Once you have done this, you will see the three layers in your layers menu. Make sure that each frame is in the correct order. If they are not, you can correct them by dragging the incorrect layer into the correct position on your layers palette.
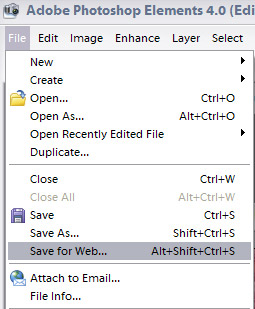
you have your layers ready to go it is time to Save For the Web. In the file menu, choose Save For Web.
A new window will open up as below.
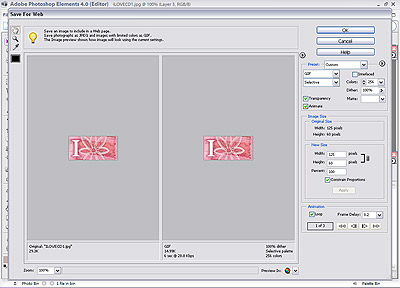
span style=”font-family: Verdana; color: rgb(0, 0, 0); font-size: x-small;”>The Optimised File Format needs to be set to GIF. Click in the Animate Box to select Animate. Other settings at the top of the screen can be left as is. IF you wish to compress your file size to make it smaller you may wish to adjust the colour setting to a smaller number.
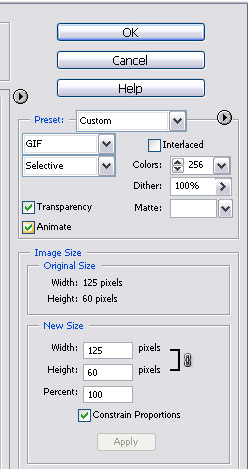
If you wish to adjust the viewing size of your image you can do so using the settings in the ‘New Size’ section.
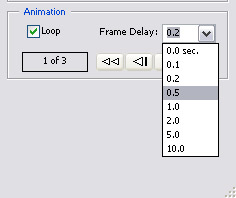
Ensure that the loop box is checked. I recommend a 0.5 sec delay as an optimum length of time to set the frame delay at.
Once you have set the frame delay click on ok and save the file to a easy to find place on your hard drive. Your blinkie is now ready for use.
This article is © Clikchic Designs (clikchic) 2006 All Rights Reserved Not to be reproduced in any way without written permission.
Subscribe to the Clikchic Designs Newsletter and get a FREEBIE! There are ongoing freebies as well. Don't worry, we won't inundate you with emails.