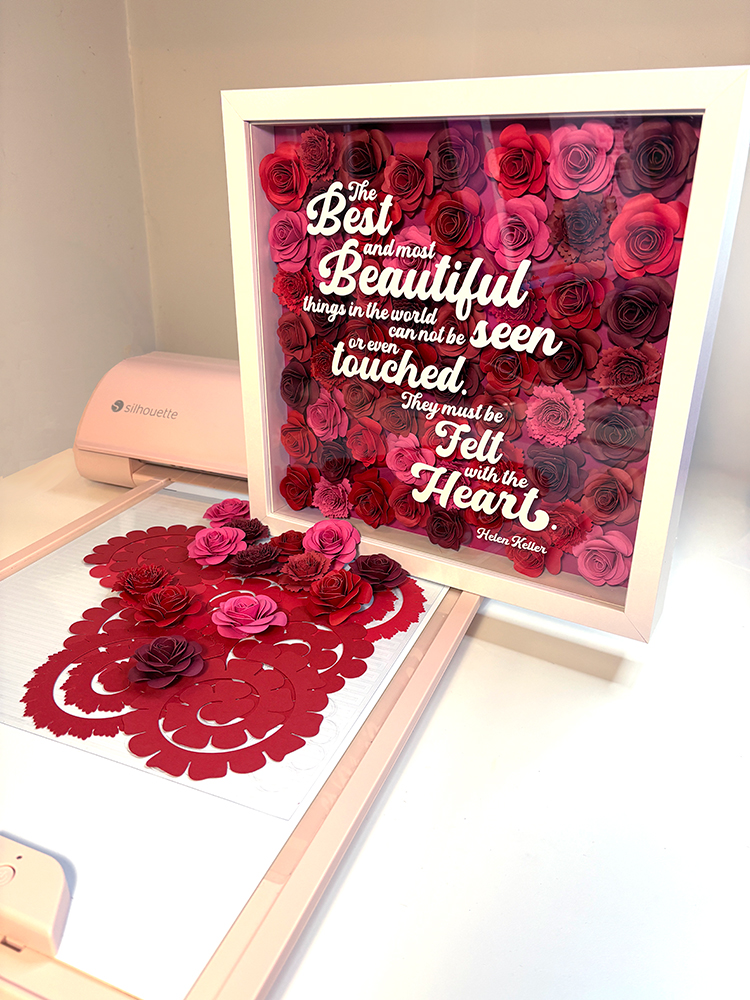
How to Make a Rolled Paper Flower Shadow Box
I had an idea to make a shadowbox of rolled flowers with my Mum’s Favorite quote for her birthday. My Mum has alzheimers, but I thought at least her carers will be able to appreciate the work. I loved the finished design so much I decided to make one for my Mother In Law for Mother’s Day as well. This project is wonderful for all sorts of occasions and all sorts of quotes.
A shadow box packed with rolled paper flowers makes a beautiful piece of wall art, a heartfelt gift, or a show-stopping display.
This tutorial walks you through how to create one from scratch using your Silhouette cutting machine, a handful of cardstock colours, and a few basic supplies.
If you are new to rolled paper flowers, start with the How to Make Rolled Paper Flowers tutorial first. This project builds on those skills, so it helps to have a few practice flowers under your belt before you begin.
What You Will Need
Shadow box supplies:
- Shadow box frame with a glass or acrylic front panel (the one shown is a standard 30cm x 30cm / 12″ x 12″ white frame)
- Cardstock in your chosen colour palette (65-80 lb / 176-230 gsm works best for rolling)
- Hot glue gun and glue sticks
- Quilling tool or tweezers
- Scissors or a craft knife
- Optional: ink, chalk, or paint to edge your flowers for added depth
For the sentiment:
- White or light-coloured adhesive vinyl (for cut lettering on the glass panel)
- Transfer tape
- Sentiment SVG of your choice
Designs Used in This Project
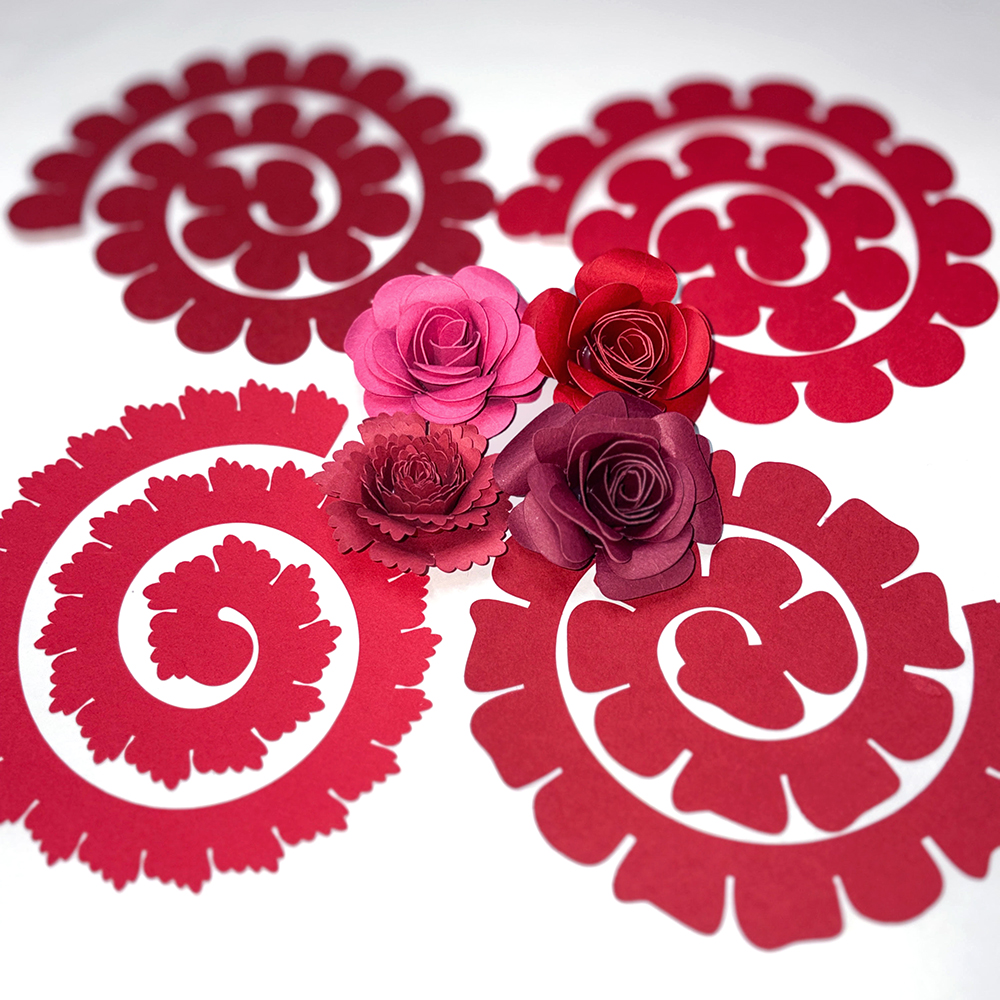
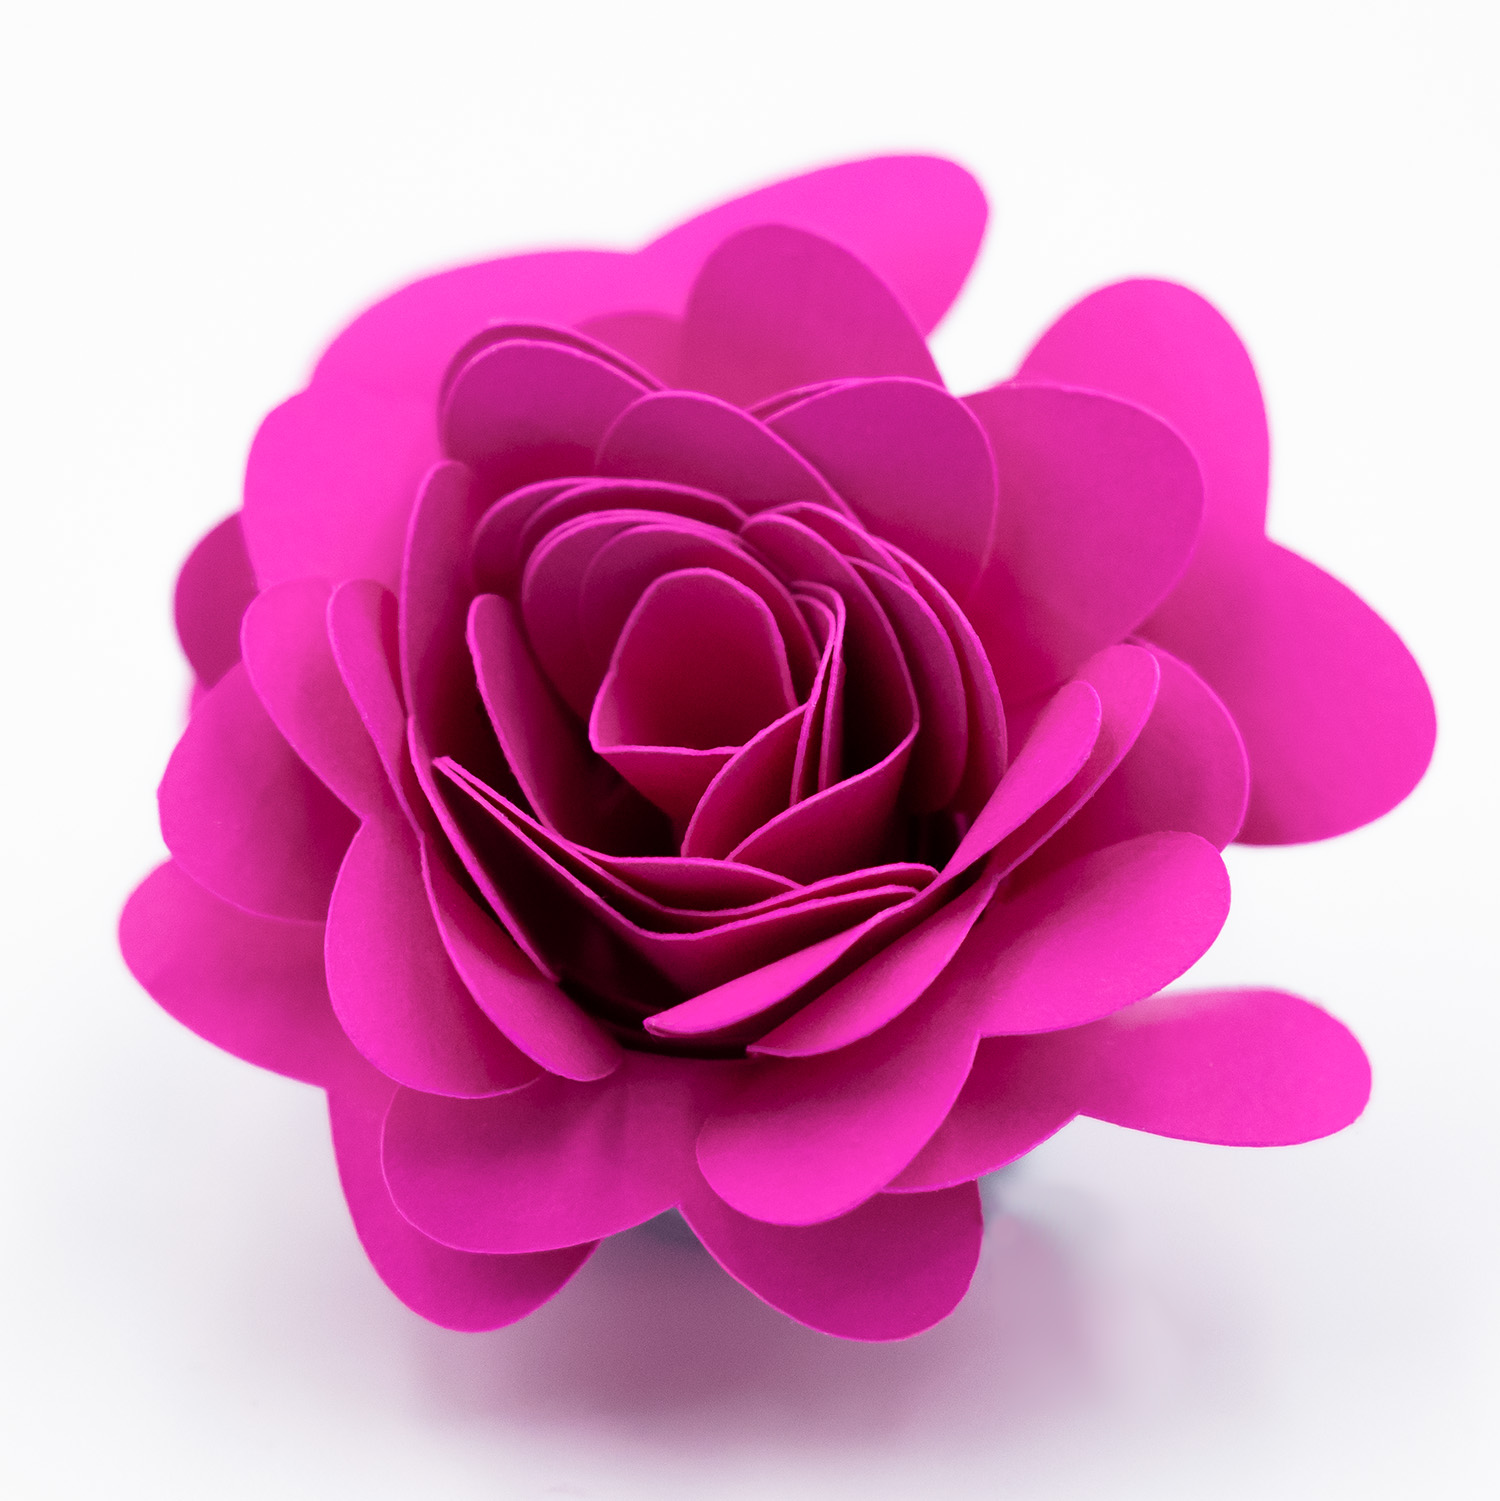
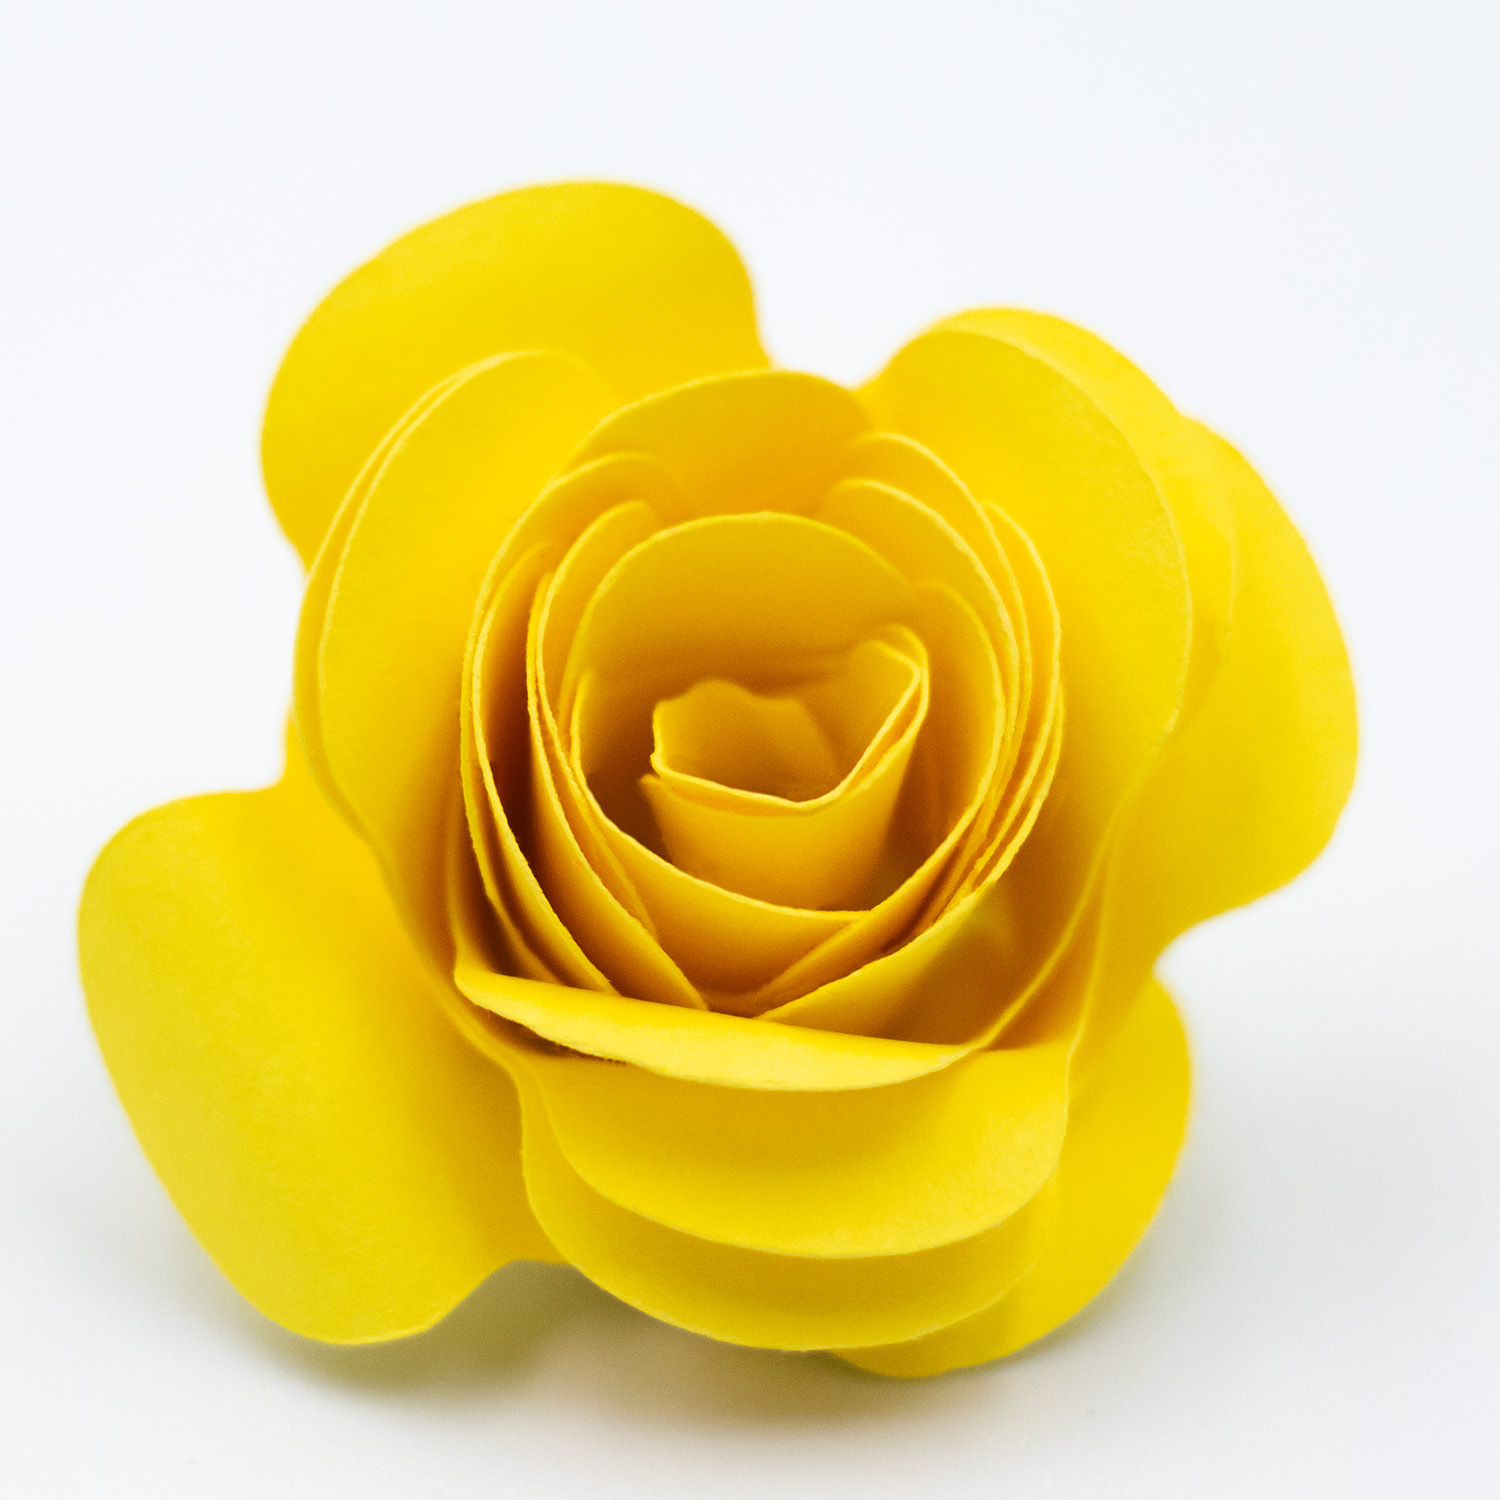
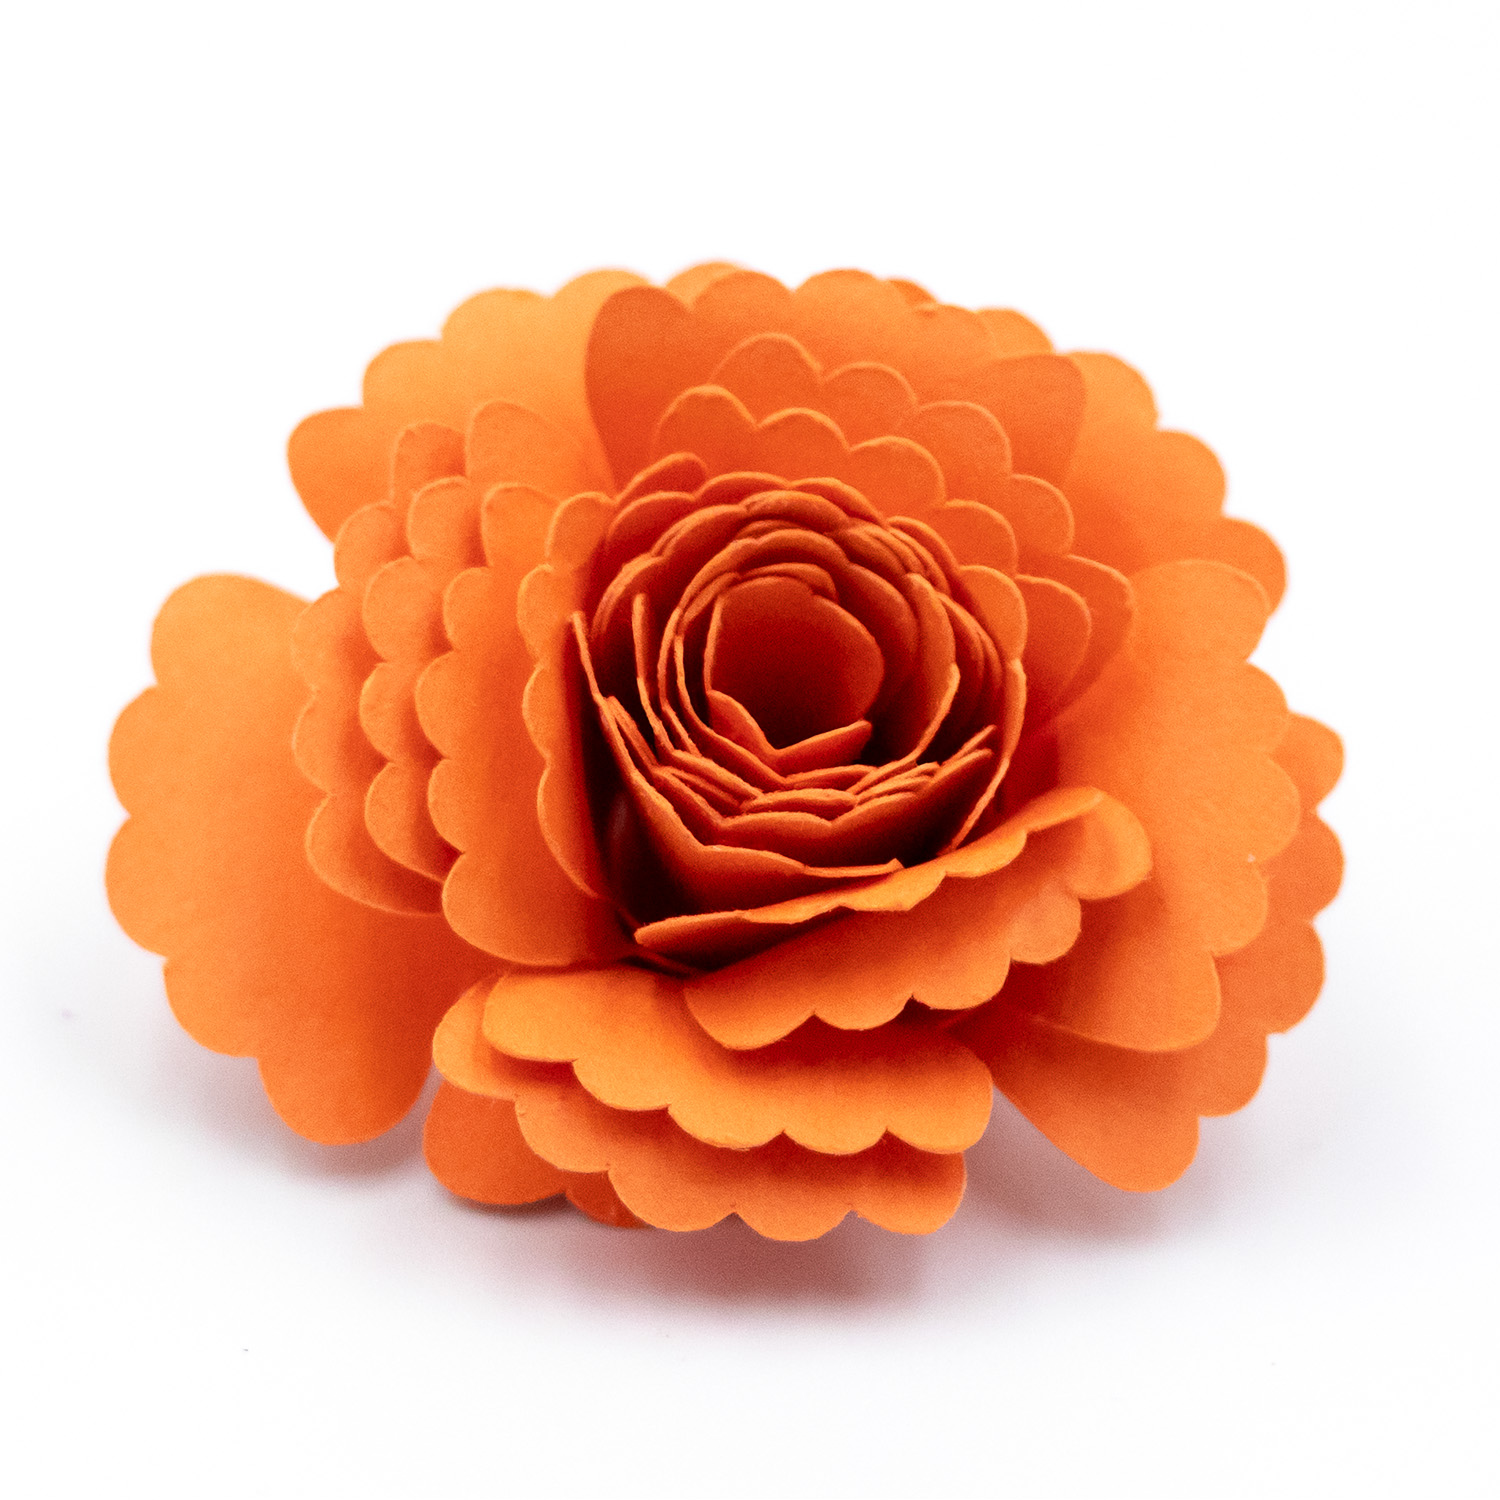
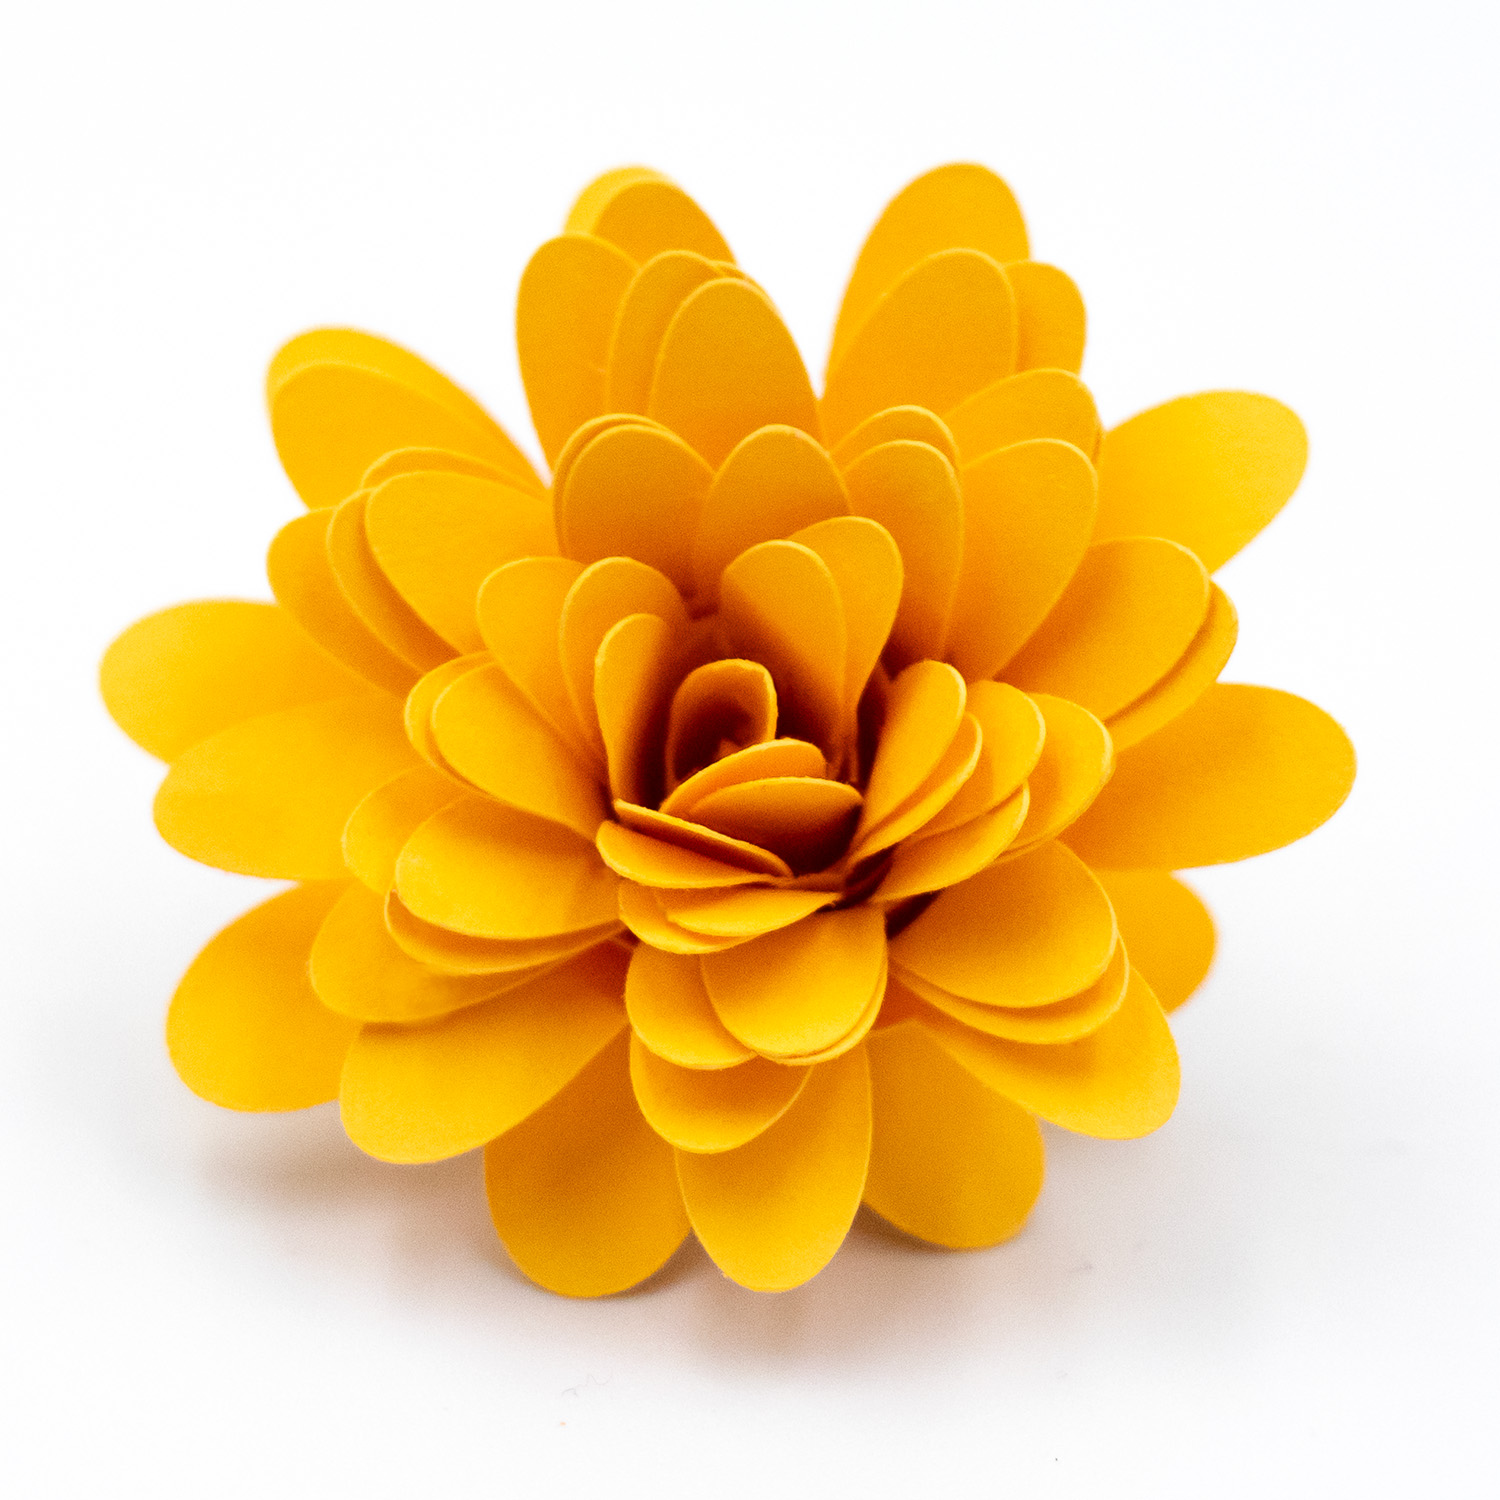
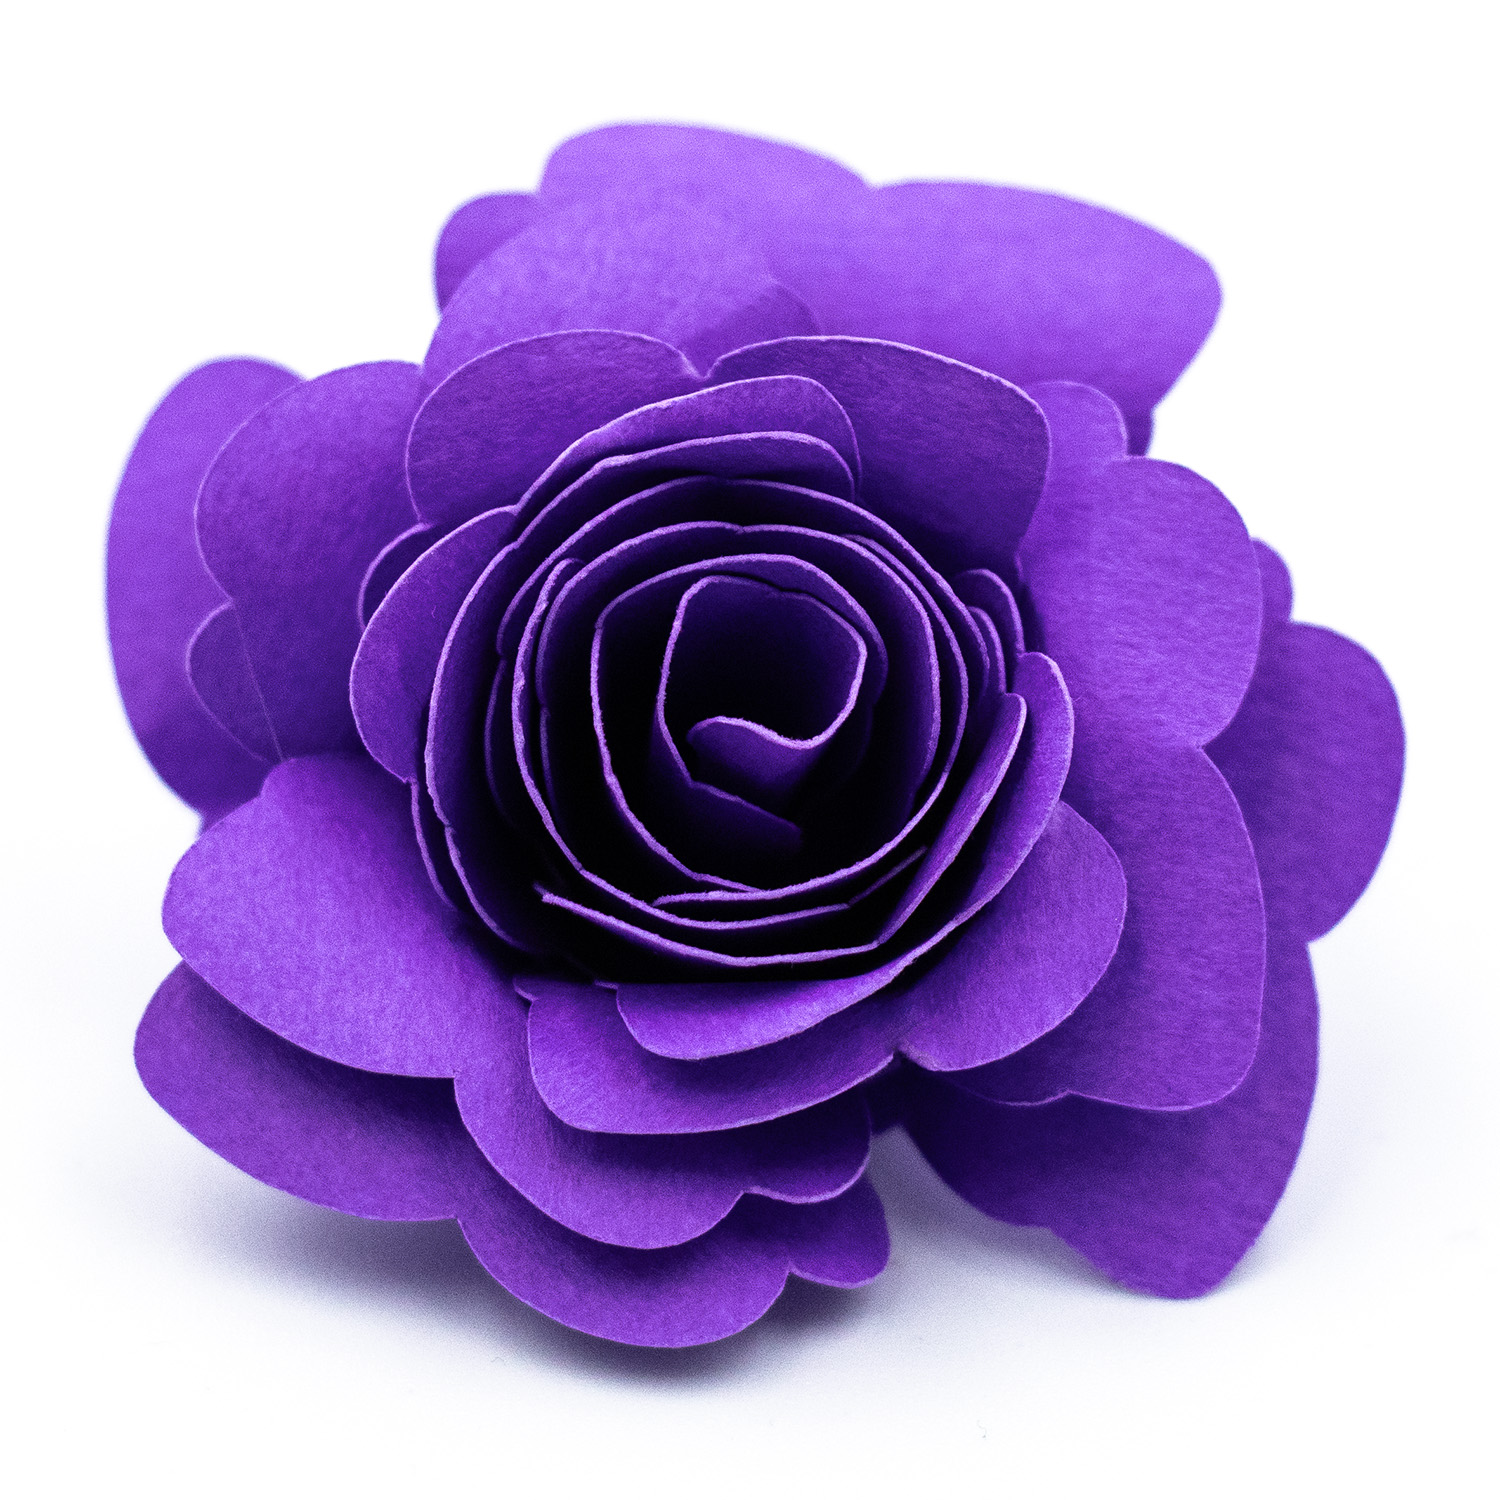
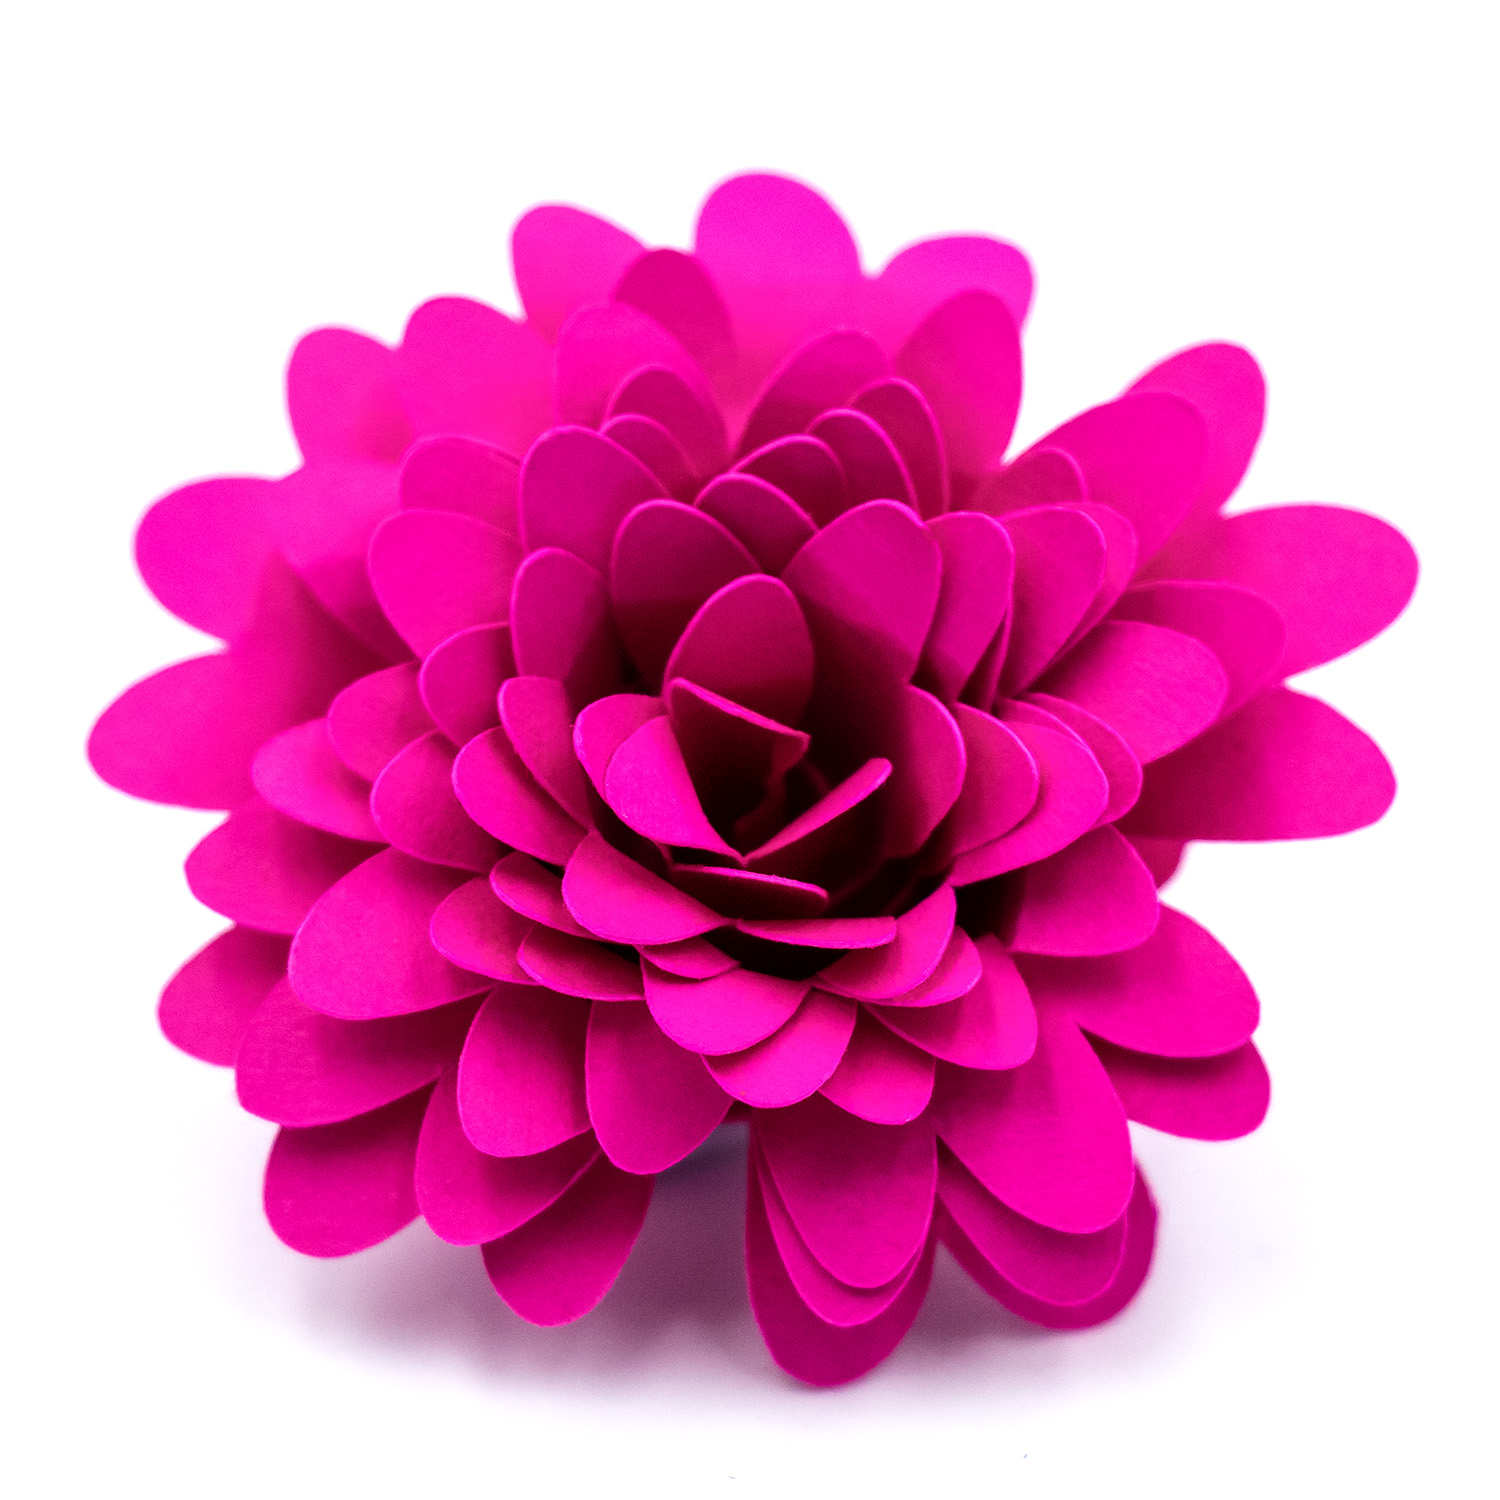
For this shadow box, I used four of my rolled flower designs. Mixing petal shapes is the key to getting that full, lush look rather than everything looking identical.
Flowers used:
- Asymmetrical Scalloped Petals Rolled Flower — the irregular scallop gives a slightly wild, organic look that fills gaps beautifully
- Wide Oval Petal Rolled Flower — a classic smooth rose-like result, great as the main blooms
- Mixed Petal Rolled Flower — variety within a single spiral adds visual interest
- Deep Round Petals Rolled Flower — the deeper rounded petals create a more dramatic, rose-style bloom
I cut flowers in three shades: deep red, mid red, and hot pink. The contrast between the deep burgundy and the bright pink keeps the eye moving across the finished piece.
Step-by-Step Instructions
Step 1: Plan Your Colour Palette
Before you cut anything, decide on your colours. For a cohesive look, choose two to three shades within the same colour family. For the shadow box shown, I used deep red, mid red/burgundy, and pink cardstock.
Cut a small test flower in each colour to check how they look together before committing to a full batch.
Step 2: Cut Your Flowers
Open your rolled flower SVG files in Silhouette Studio®. For a 30cm x 30cm shadow box, you will need a lot of flowers – the one shown used approximately 65 to 75 blooms in varying sizes. I cut approx 80 flowers for the shadow box. The number you require will in the end depend on how tightly rolled your flowers are and how tightly you pack them into the frame. This purely comes down to personal taste. Having a several spares comes in handy when it comes to gluing them down.
A few tips for this step:
- Fit all four flowers on a letter sized page to save time. They will fit at purchased file size with some manoeuvring. Or fit however many you can on your chosen page size. Having them all on one page also ensures a good variety of shapes for each colour sheet.
- Cut more than you think you need. It is easier to have extras than to stop mid-arrangement to cut more.
- Roll at varying levels of tightness to ensure varying sizes to fill gaps.
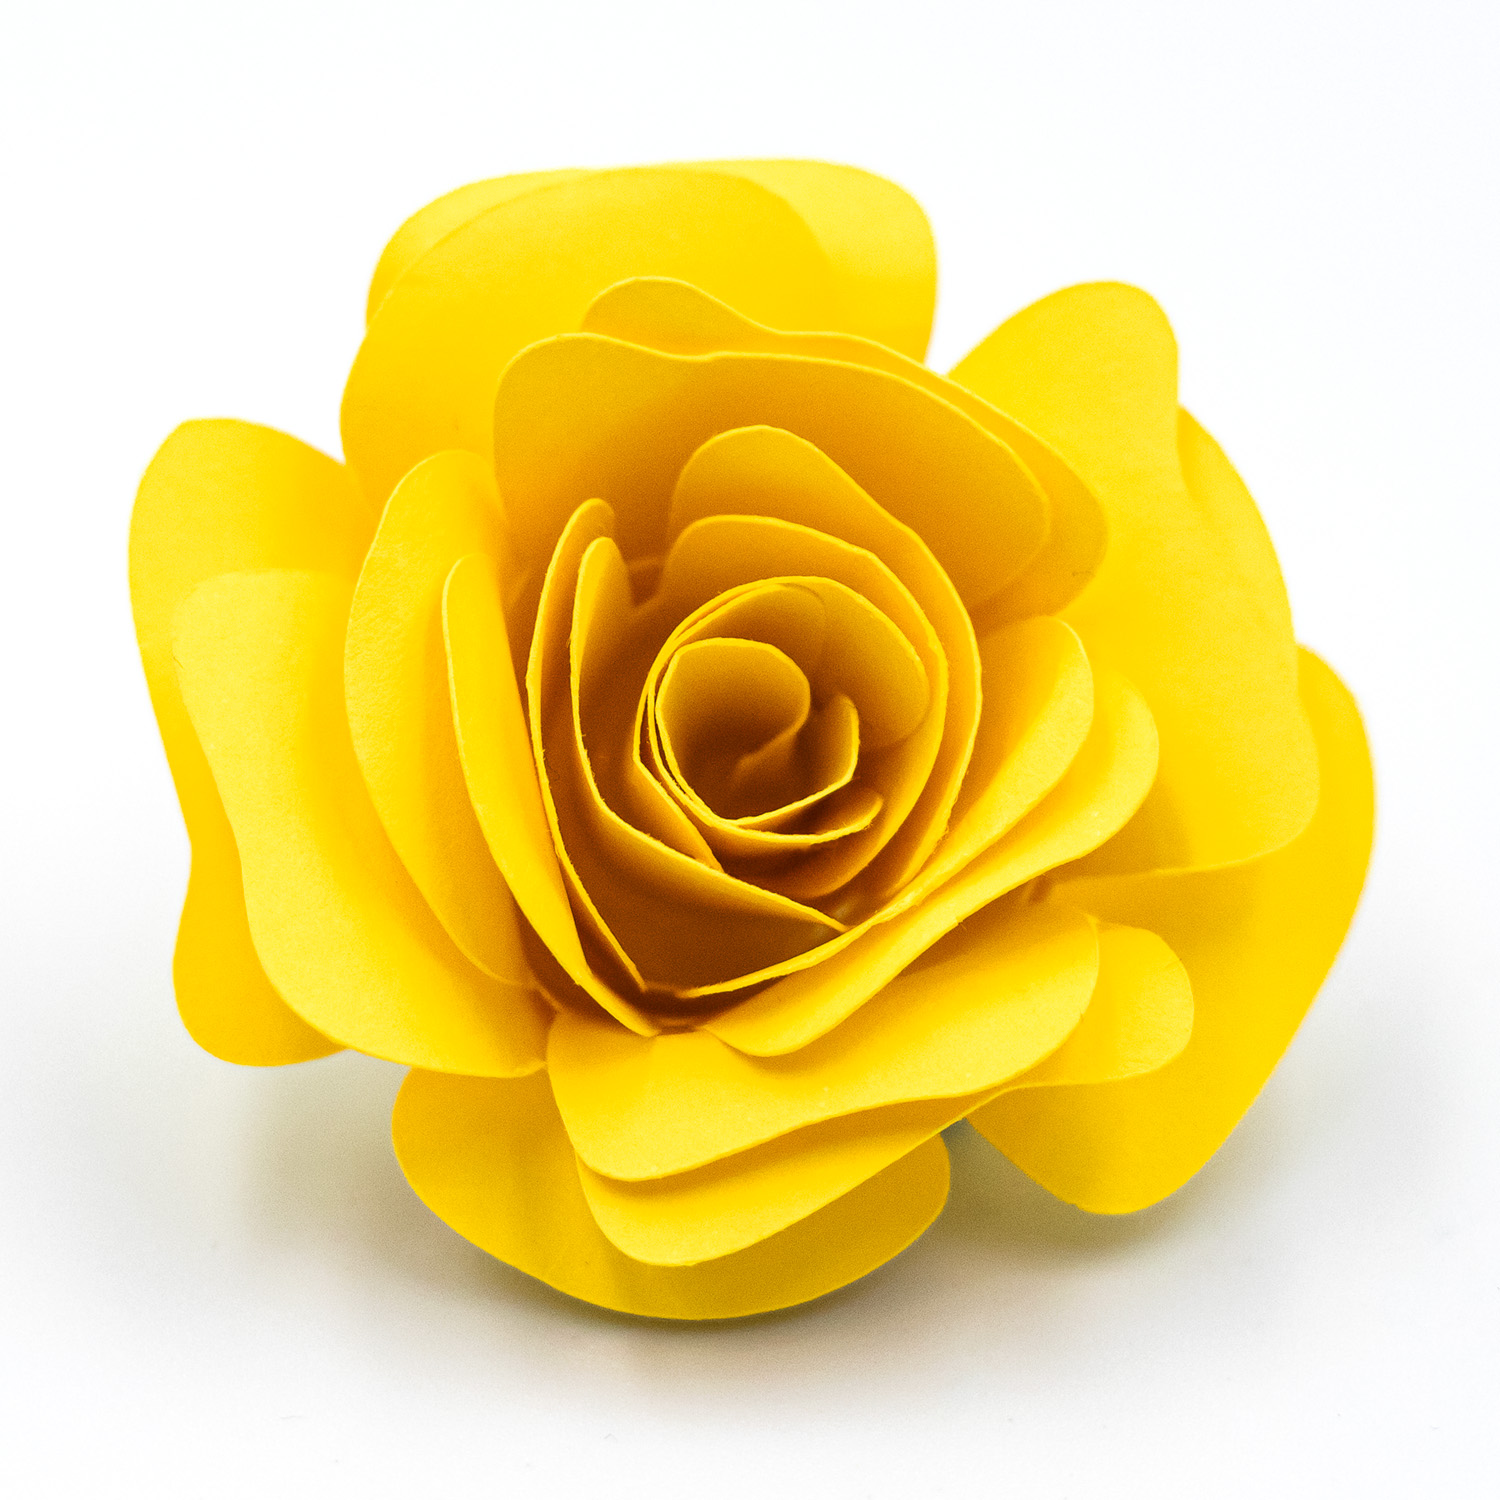
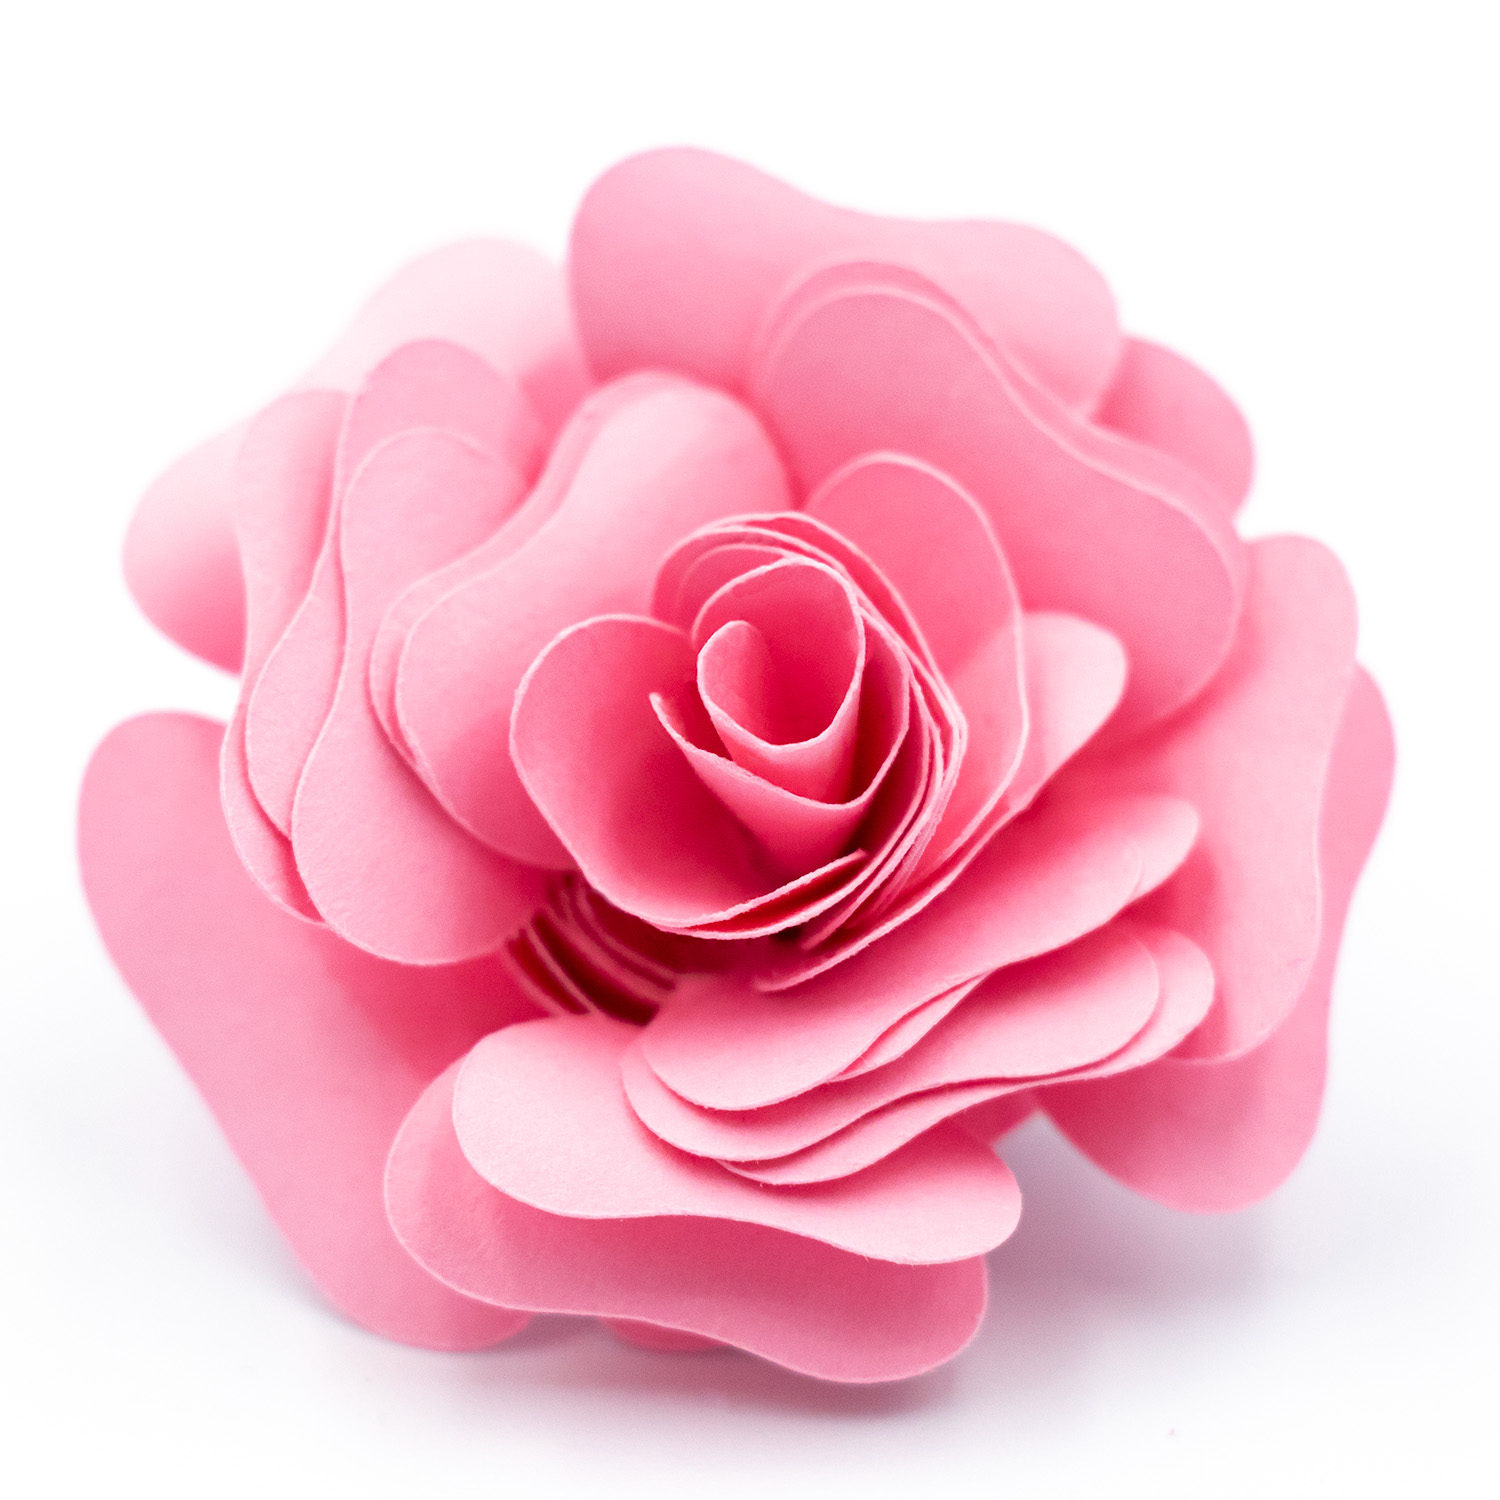
Step 3: Roll Your Flowers
Follow the rolling method from the How to Make Rolled Paper Flowers tutorial. The basic steps are:
- Start rolling from the outer edge of the spiral using a quilling tool or tweezers.
- Roll inward toward the centre, keeping the base edge as even as you can.
- Let the roll relax slightly before gluing, so the petals open up naturally.
- Apply hot glue to the base of the flower and adhere flat circle at end of spiral. Don’t be too concerned if flat circle isn’t spot on in centre, you won’t see it.
For a shadow box, I recommend rolling most flowers to a medium tightness. Very tight rolls look like buds; looser rolls look more like open blooms. A mix of both adds variety.
Step 4: Ink or Colour the Edges (Optional)
One of the easiest ways to add depth is to ink the edges of your flowers before rolling. Use an ink pad, soft pastel, chalk, or a slightly darker paint shade and lightly brush along the outer edges of the spiral.
You can also do this after rolling if you prefer a subtler effect.
Step 5: Prepare Your Sentiment
The sentiment for this project was cut from white adhesive vinyl and applied to the outside of the glass or acrylic panel. If you prefer the inside of the glass you will need to flip the design so it is backwards.
- Design or select your sentiment SVG in Silhouette Studio®. Size it to fit comfortably within your shadow box frame.
- Cut the sentiment from white vinyl.
- Weed the excess vinyl carefully.
- Apply transfer tape and transfer the sentiment to the outside face of the glass or acrylic panel.
- Smooth out any bubbles and remove the transfer tape slowly.
If you feel confident enough to try it applying the sentiment to the inside of the glass gives a clean, embedded look once the flowers are in behind it.
Step 6: Arrange Your Flowers
This is the most satisfying step where the project comes together.
Remove the backing panel from your shadow box and set it flat on your work surface. Place a coloured piece of cardstock on the backing panel. This will serve as a pretty contrast to your flowers. I chose a deep pink shade for mine. You might find it easiest to temporarily tape the shadow box insert to the backing panel with the cardstock in between to help frame the flowers. Begin placing flowers without gluing, starting from the outer edges and working inward. Vary the sizes and colours as you go, and mix petal styles to avoid repetition.
A few arrangement tips:
- Work from the outside edges toward the centre, or toward where your sentiment will be.
- Aim to fill every gap, you want a lush, full look with minimal cardstock backing visible through the flowers.
- Alternate deep and light shades rather than clustering similar colours together. Try to keep the colours somewhat random for a more natural look.
- Stand the arrangement up occasionally to check how it looks from a viewing angle, since it will look different vertical than it does flat on the table.
Step 7: Glue the Flowers Down
Once you are happy with the arrangement, glue the flowers in place one at a time. Hot glue works best — it grabs quickly and holds well. You may find the arrangement shifts somewhat as you glue. It is handy to have spare flowers in case gaps appear.
Start by gluing the largest flowers first, then fill in smaller ones around them. If any gaps appear as you go, cut and roll a few extra small flowers to tuck in.
Step 8: Assemble the Shadow Box
Once all the flowers are glued and the glue has cooled completely:
- Place the flower-covered backing panel back into the frame.
- Place the glass or acrylic panel (with the vinyl sentiment applied) over the flowers.
- Secure the frame backing as per your frame’s instructions.
The glass sits just above the flowers, so the sentiment appears to float in front of the blooms.
Tips
- Frame depth matters. Standard shadow box frames have a depth of around 3-4 cm. If your flowers are particularly full or tall, check the frame depth before you start. Tighter-rolled flowers will fit more easily.
- Hot glue dries fast. Work in small sections and have your spare flowers within arm’s reach before you start gluing.
- Use a mix of petal styles. Using all the same petal shape makes the arrangement look repetitive. Mixing two to four styles creates a much richer result.
- Paper weight counts. Too light and the flowers go floppy; too heavy and they are difficult to roll. 65-80 lb / 176-230 gsm cardstock is the sweet spot. Lighter cardstocks are easier to curl and don’t give unsightly folds as easily.
- Cardstock from craft stores works well. You do not need specialty paper — standard double-sided cardstock in coordinating colours is ideal.
Shop the Rolled Flower Designs
[Suggested image: collage of all available rolled flower designs]
All rolled flower designs below are compatible with Silhouette Studio® and available from the Silhouette Design Store.


Designs used in this project:
- Asymmetrical Scalloped Petals Rolled Flower
- Wide Oval Petal Rolled Flower
- Mixed Petal Rolled Flower
- Deep Round Petals Rolled Flower
Full range of rolled flower designs:
- Asymmetrical Scalloped Petals Rolled Flower
- Wide Oval Petal Rolled Flower
- Mixed Petal Rolled Flower
- Deep Round Petals Rolled Flower
- Almost Heart Shaped Petals Rolled Flower
- Asymmetrical Scalloped Petals Rolled Flower
- Rounded Scalloped Petals Rolled Flower
- Heart Shaped Petals Rolled Flower
- Open Round Petal Rolled Flower
- Gently Pointed Petals Rolled Flower
- Spiky Petal Rolled Flower
- Round Petal Rolled Flower
- Scalloped Petal Rolled Flower
- Wavy Petals Rolled Flower
- Long Oval Petals Rolled Flower
- Sculpted Petal Rolled Flower
- Full Bloom Triple Petal Rolled Flower
Have you made a rolled paper flower shadow box? I would love to see it. Share a photo in the comments or tag me on Instagram. I would love to share your masterpiece with my followers.
Don’t forget to follow Clikchic Designs in the Silhouette Design Store for easy to find updates on latest designs.
This post contains affiliate links. If you purchase through them, I may earn a small commission at no extra cost to you.