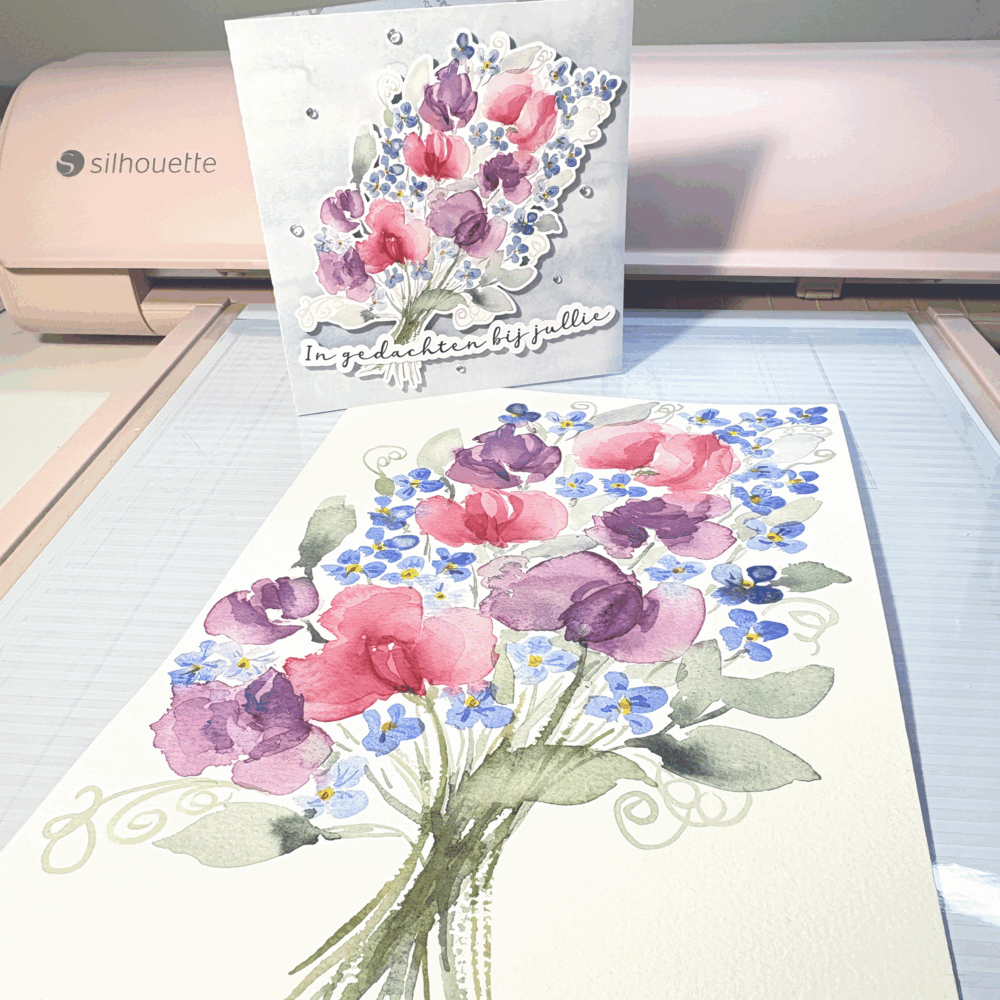
The Sweet Pea Forget Me Not Watercolor Floral Bouquet pairs soft pink and purple sweet peas with delicate blue forget me nots, painted by hand and set up as a print and cut file for Silhouette Studio®. It was originally designed with sympathy cards in mind. Sweet peas traditionally represent a fond goodbye, and forget me nots symbolise lasting remembrance, so the floral bouquet meaning sits comfortably on a “Thinking of You” or “In Sympathy” card.
The muted colour palette is the reason it doesn’t stop there. The same file works just as well for a birthday card, a scrapbook layout, or a gift tag, without ever looking out of place.
On a Sympathy Card
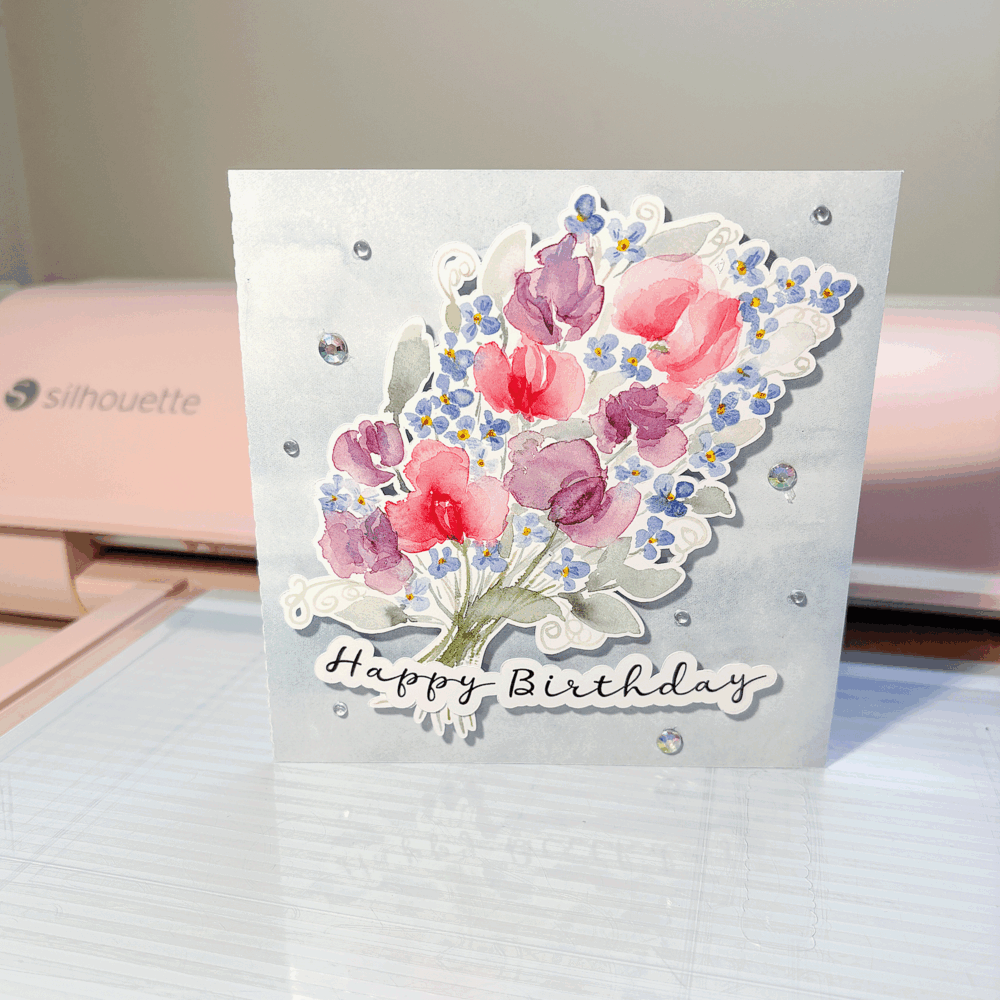
For the cards shown here, I paired the bouquet with the Crystal Sea Blue Watercolor Background and a few clear and iridescent gems. The soft grey blue tone keeps the focus on the florals and suits the tone of a sympathy or thinking of you card.
Also shown is the original hand painted watercolor artwork, scanned and edited into a print and cut file for Silhouette Studio®.
Beyond Sympathy
A “Happy Birthday” sentiment and a couple of extra rhinestones turn the same bouquet into a birthday card. Cut it larger and it becomes a page anchor for a scrapbook layout, or cut it smaller for a gift tag. It also suits thank you and anniversary cards, particularly in a rose gold or blush colour scheme.
Getting Started in Silhouette Studio®
Open the print and cut file in Silhouette Studio®
Print the design onto white or cream cardstock using your home printer
Load the printed sheet onto your cutting mat and register the print and cut marks
Send to cut and let your machine do the rest
Layer onto your card base or page with foam tape for extra dimension
A bunch of balloons is one of those birthday card elements that works for almost anyone. These three hand-painted watercolor balloon bunch print and cut designs give you a versatile, large-scale focal point that suits a wide range of backgrounds and card styles. The sample cards below show all three palette options across seven different backgrounds, and the range of looks you can achieve from a single design might surprise you.
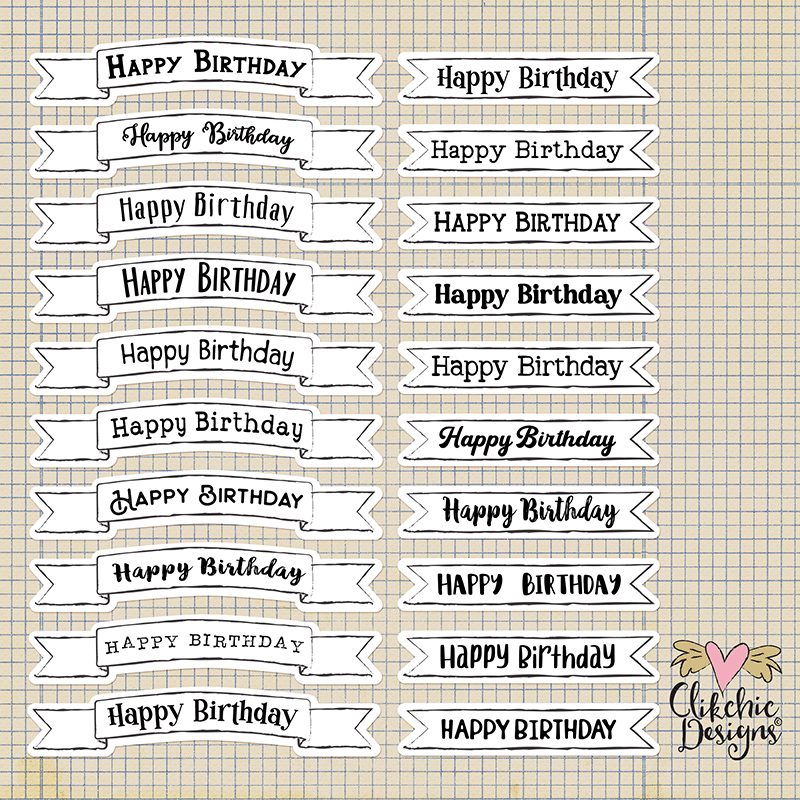
All the printable backgrounds used on the cards in this post are my own designs, also available in the Silhouette Design Store. The Happy Birthday banners are from the Doodled Happy Birthday Banners Sentiments, which coordinates with all three balloon designs. Keep reading to see each palette design in action and find the full supplies list for every card.
About the Designs
Three color palette options are available: bright tones, cool tones, and warm tones. Each is a large hand-painted watercolor bunch of balloons tied together with hand-drawn black string. Designed at a large size so you can use them at full size for a bold card focal point, or scale them down in Silhouette Studio® for smaller cards, tags, and layered projects.
The Cards
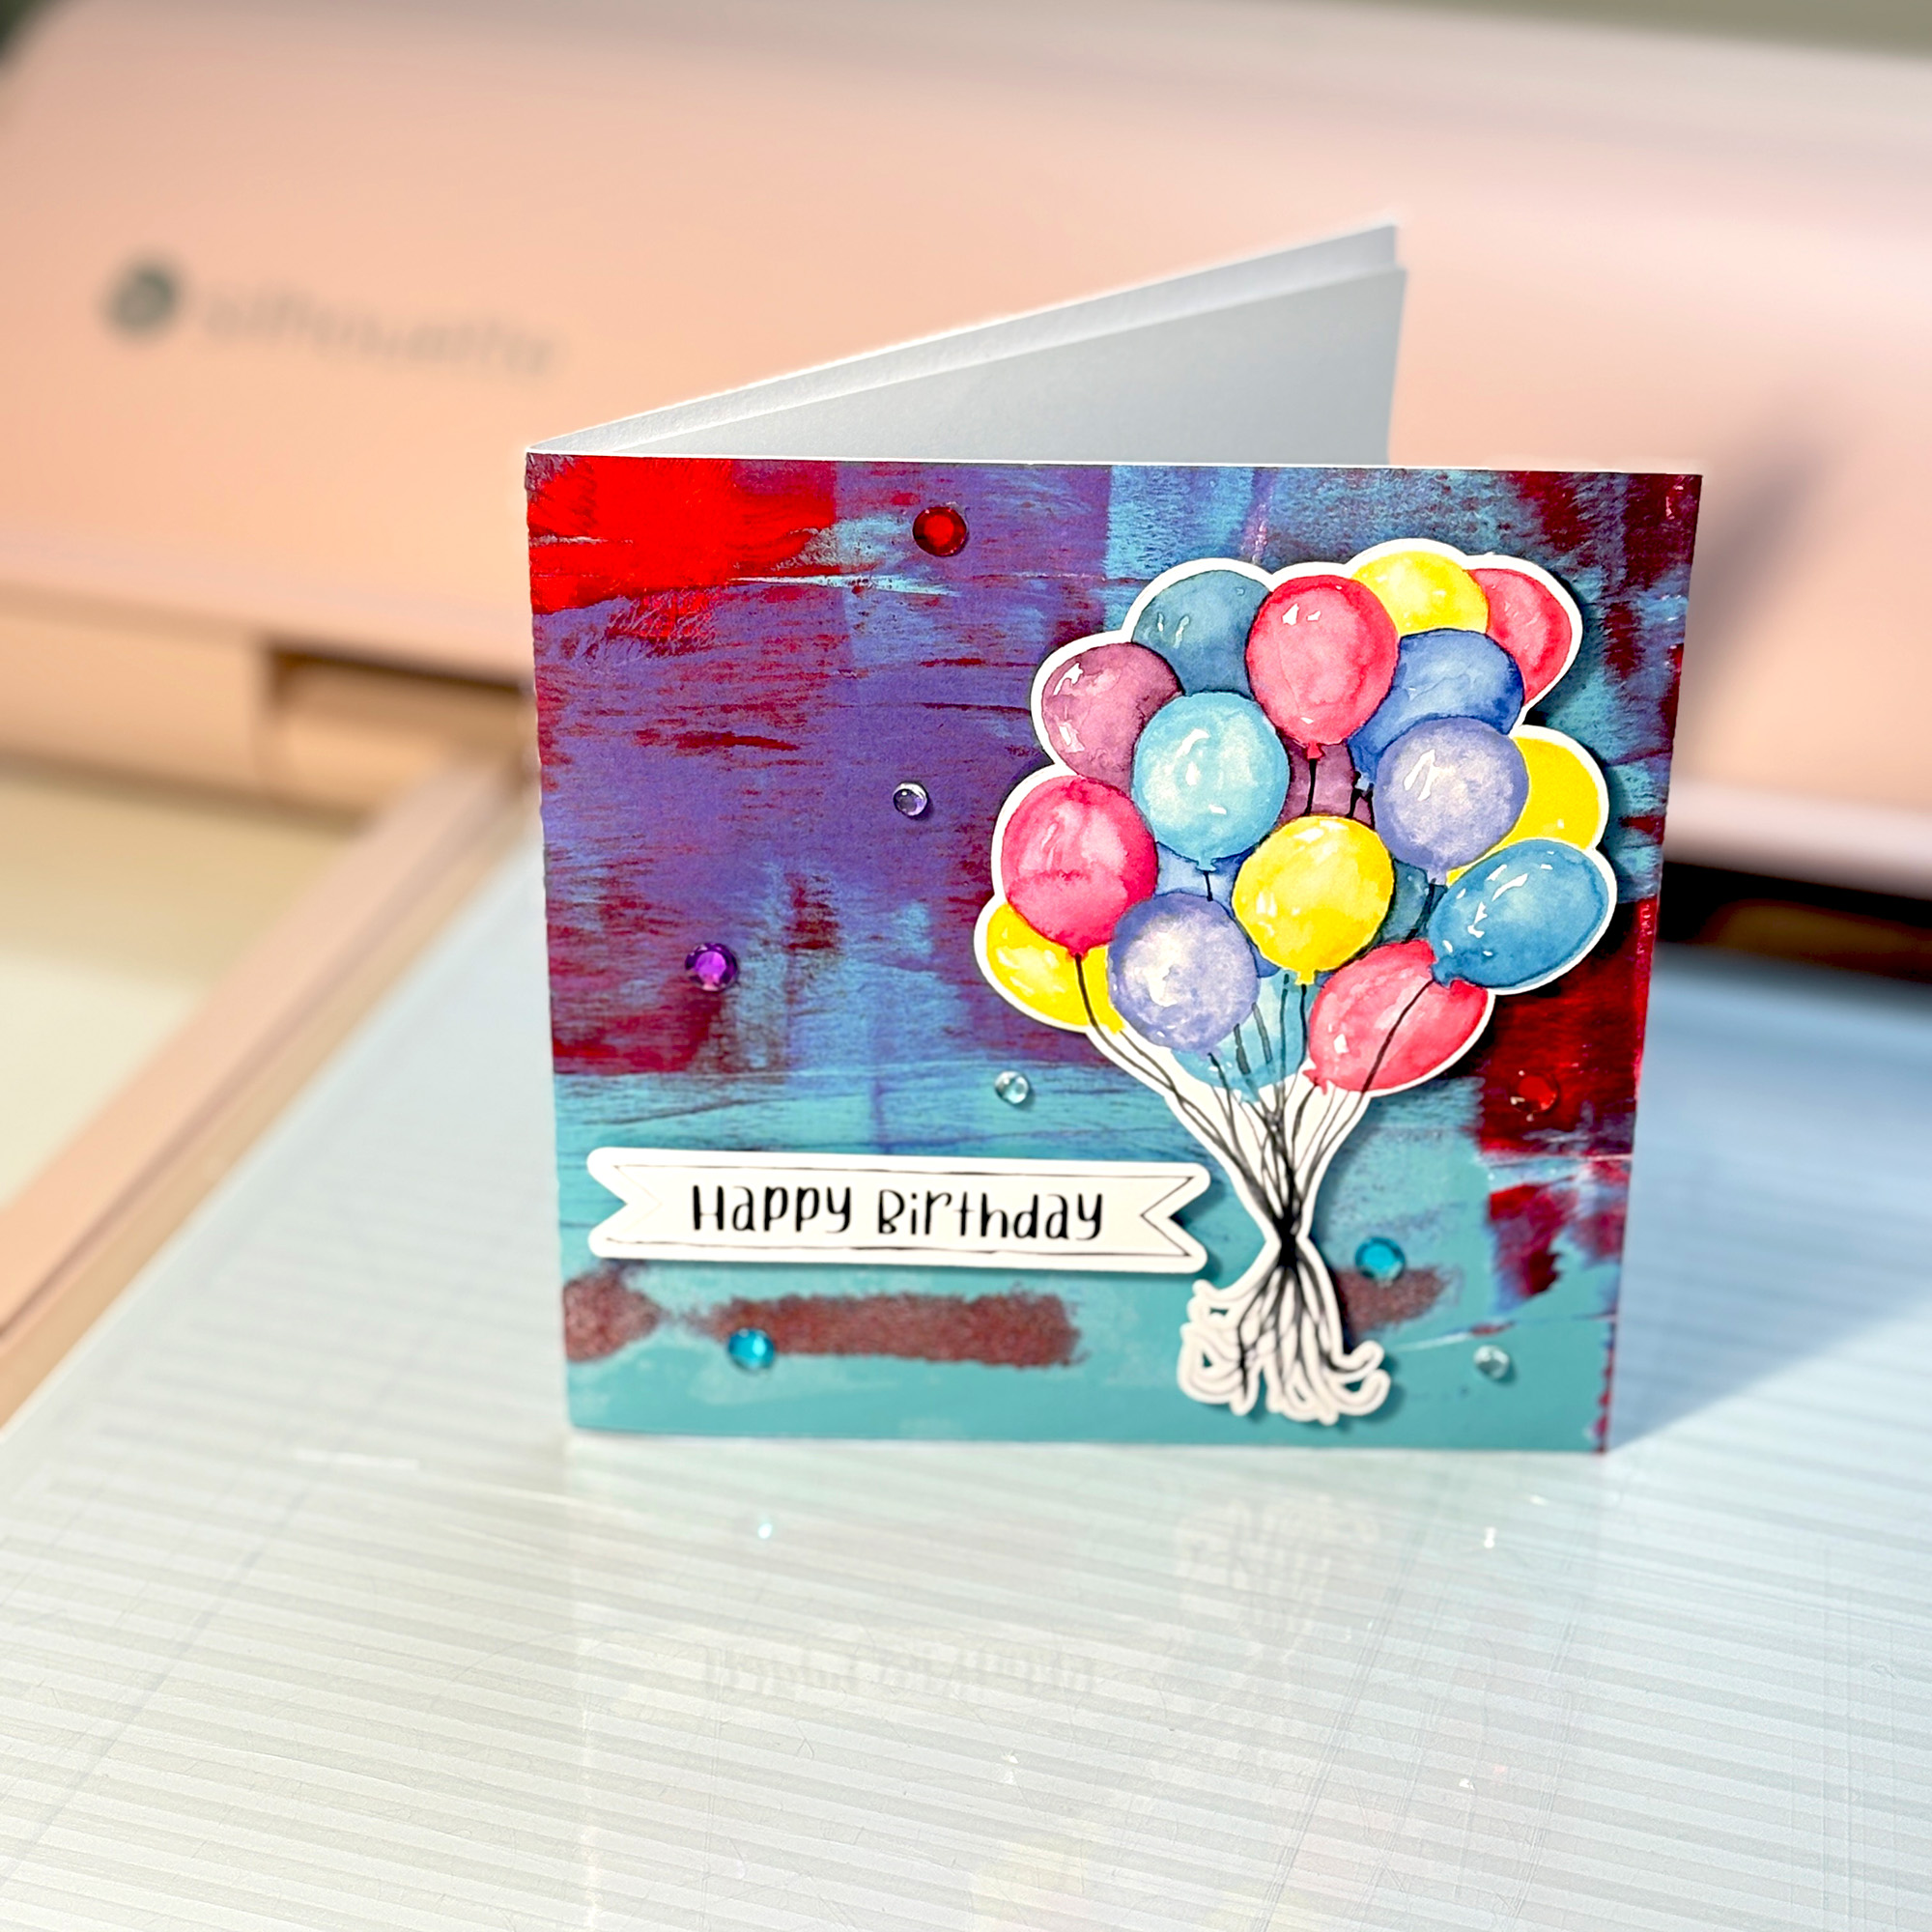
Bright Tones Colorful Balloons Bunch
The bright tones palette features pink, yellow, teal, blue and purple balloons. It is the most vibrant of the three sets and suits backgrounds with strong colour and movement. The two cards below show how differently it reads depending on what sits behind it.
The first card pairs the bright tones balloon bunch with a soft mixed-media background in pink, purple, blue and gold. The background uses a clipping mask for a decorative shaped edge. The layered watercolour tones behind the balloons give this card a loose, painterly feel, and the scattered mixed-colour rhinestones keep the finish light and festive.
The second card uses a bold brushstroke background in dark purple, red and teal. The deeper tones make the bright balloon colours pop more than they do against the softer background, and the contrast gives the card a more dramatic feel while still reading as celebratory.
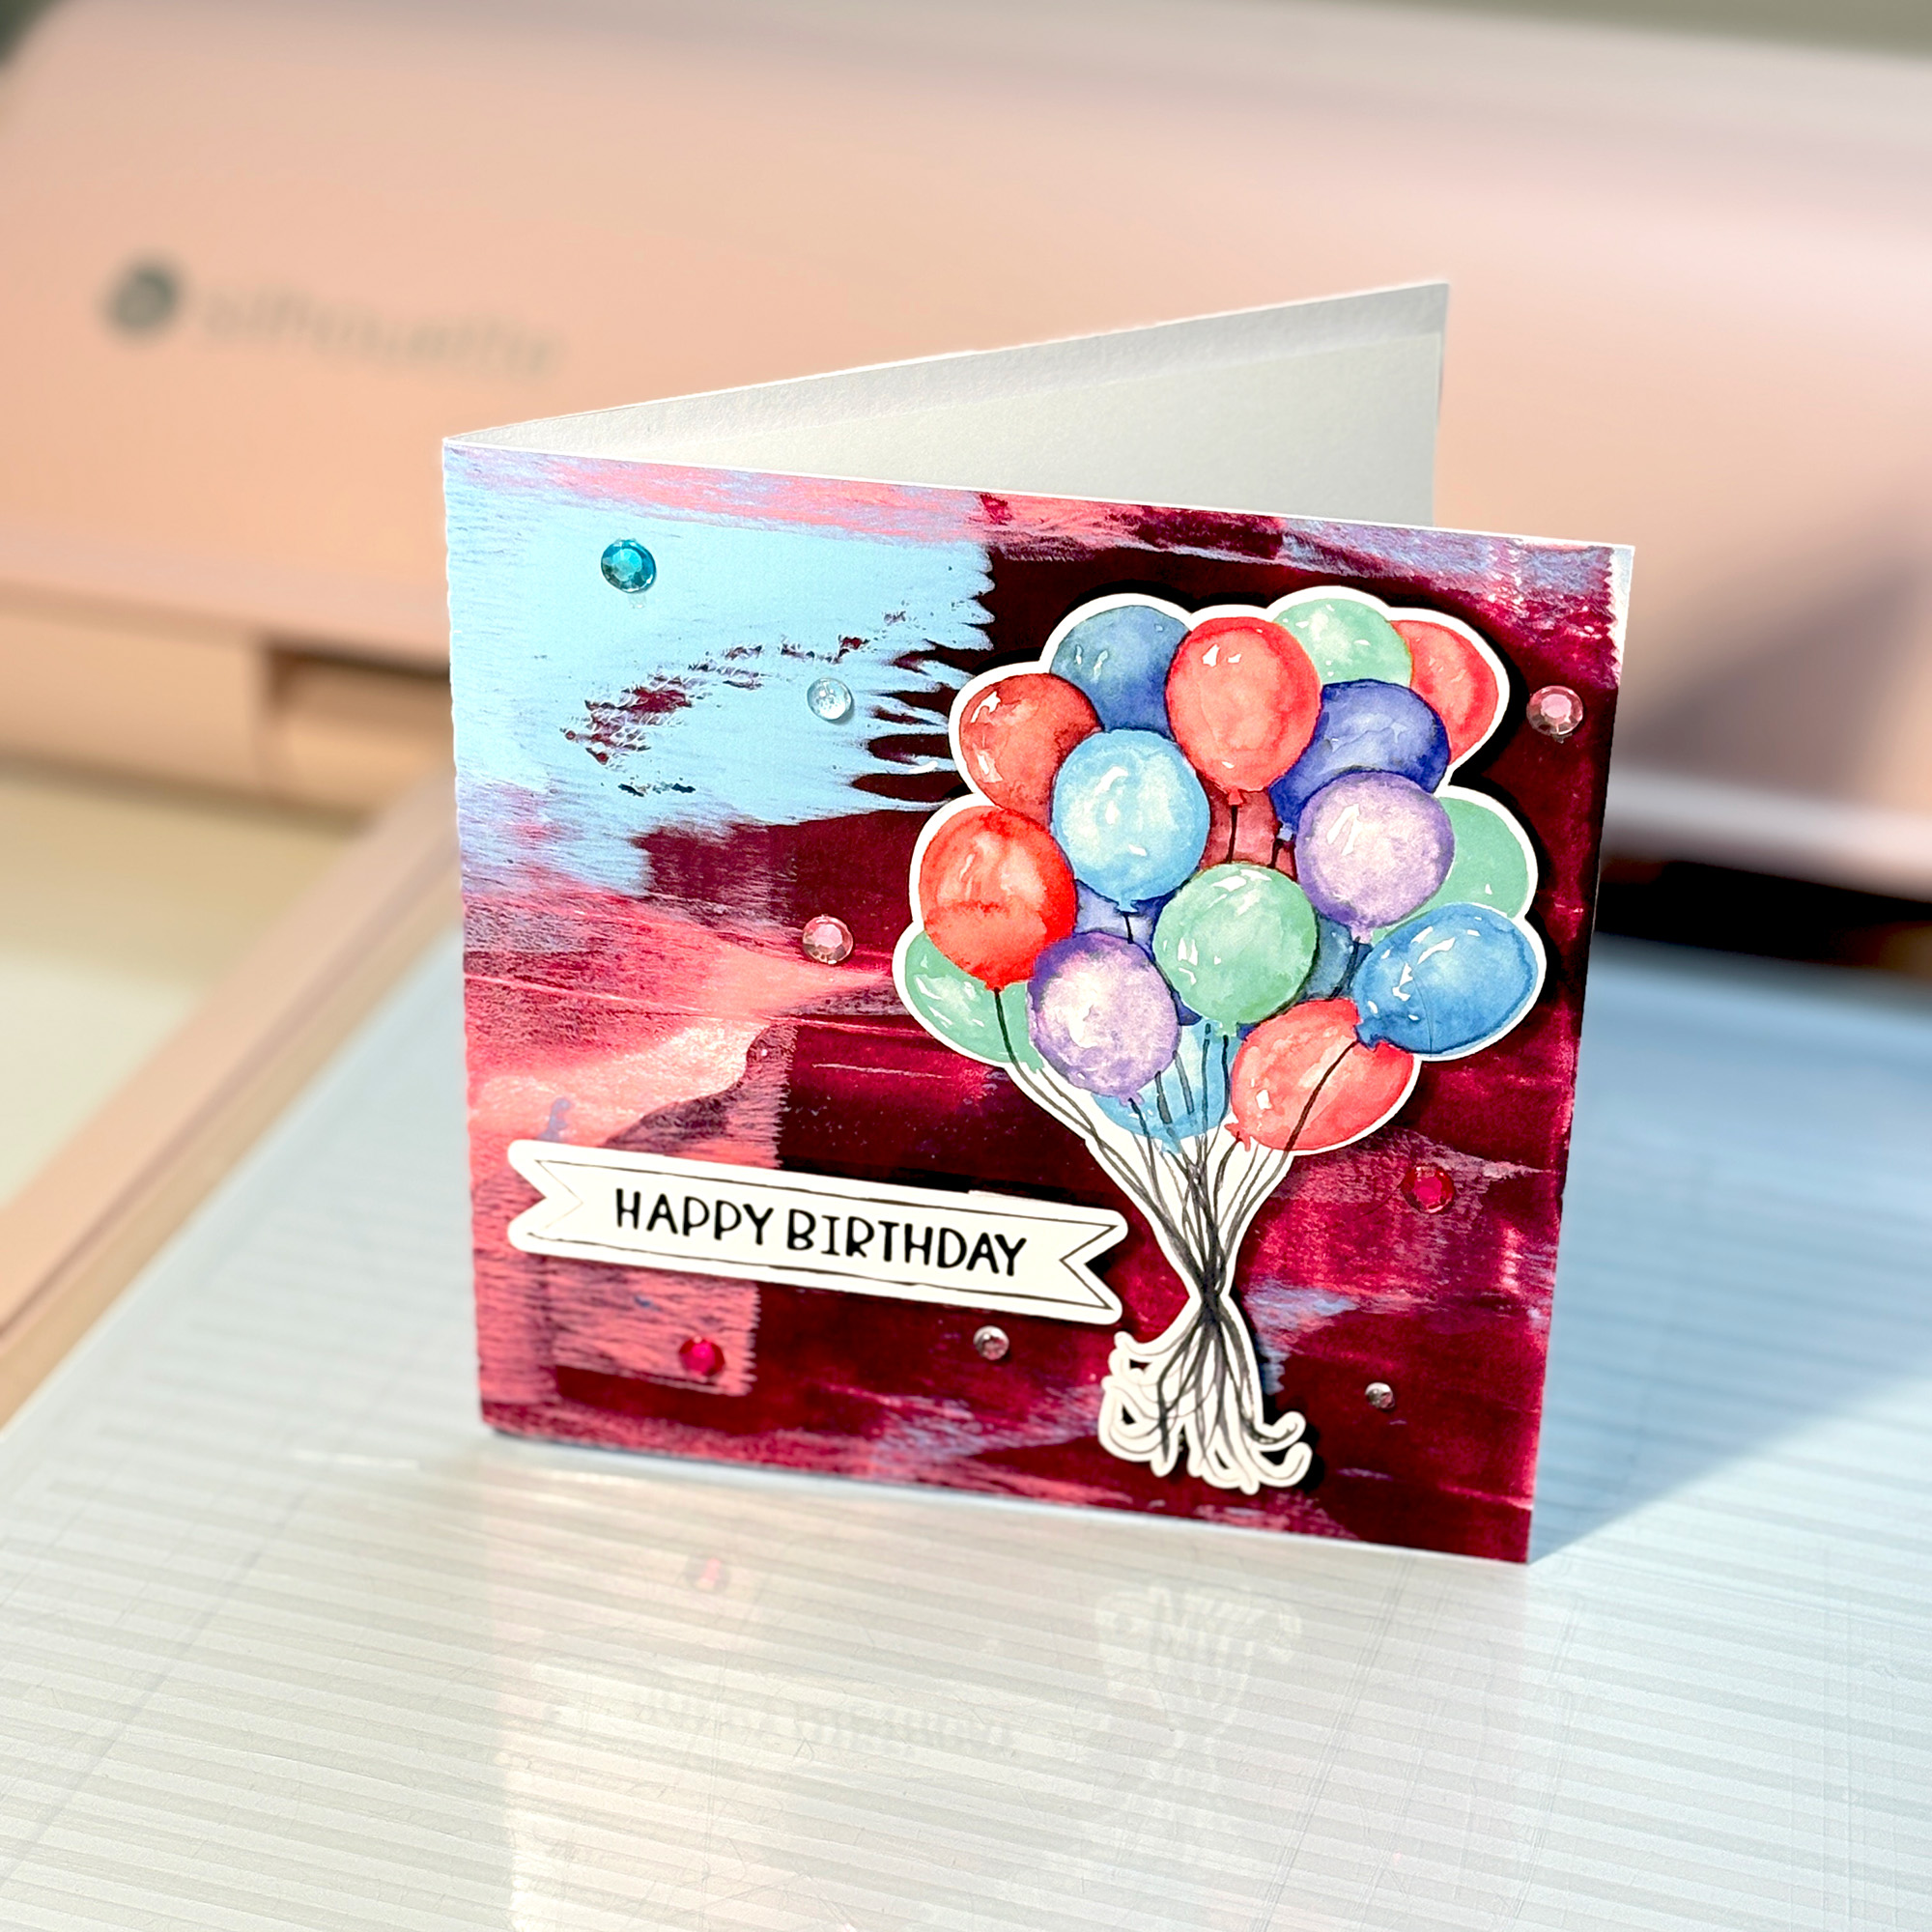
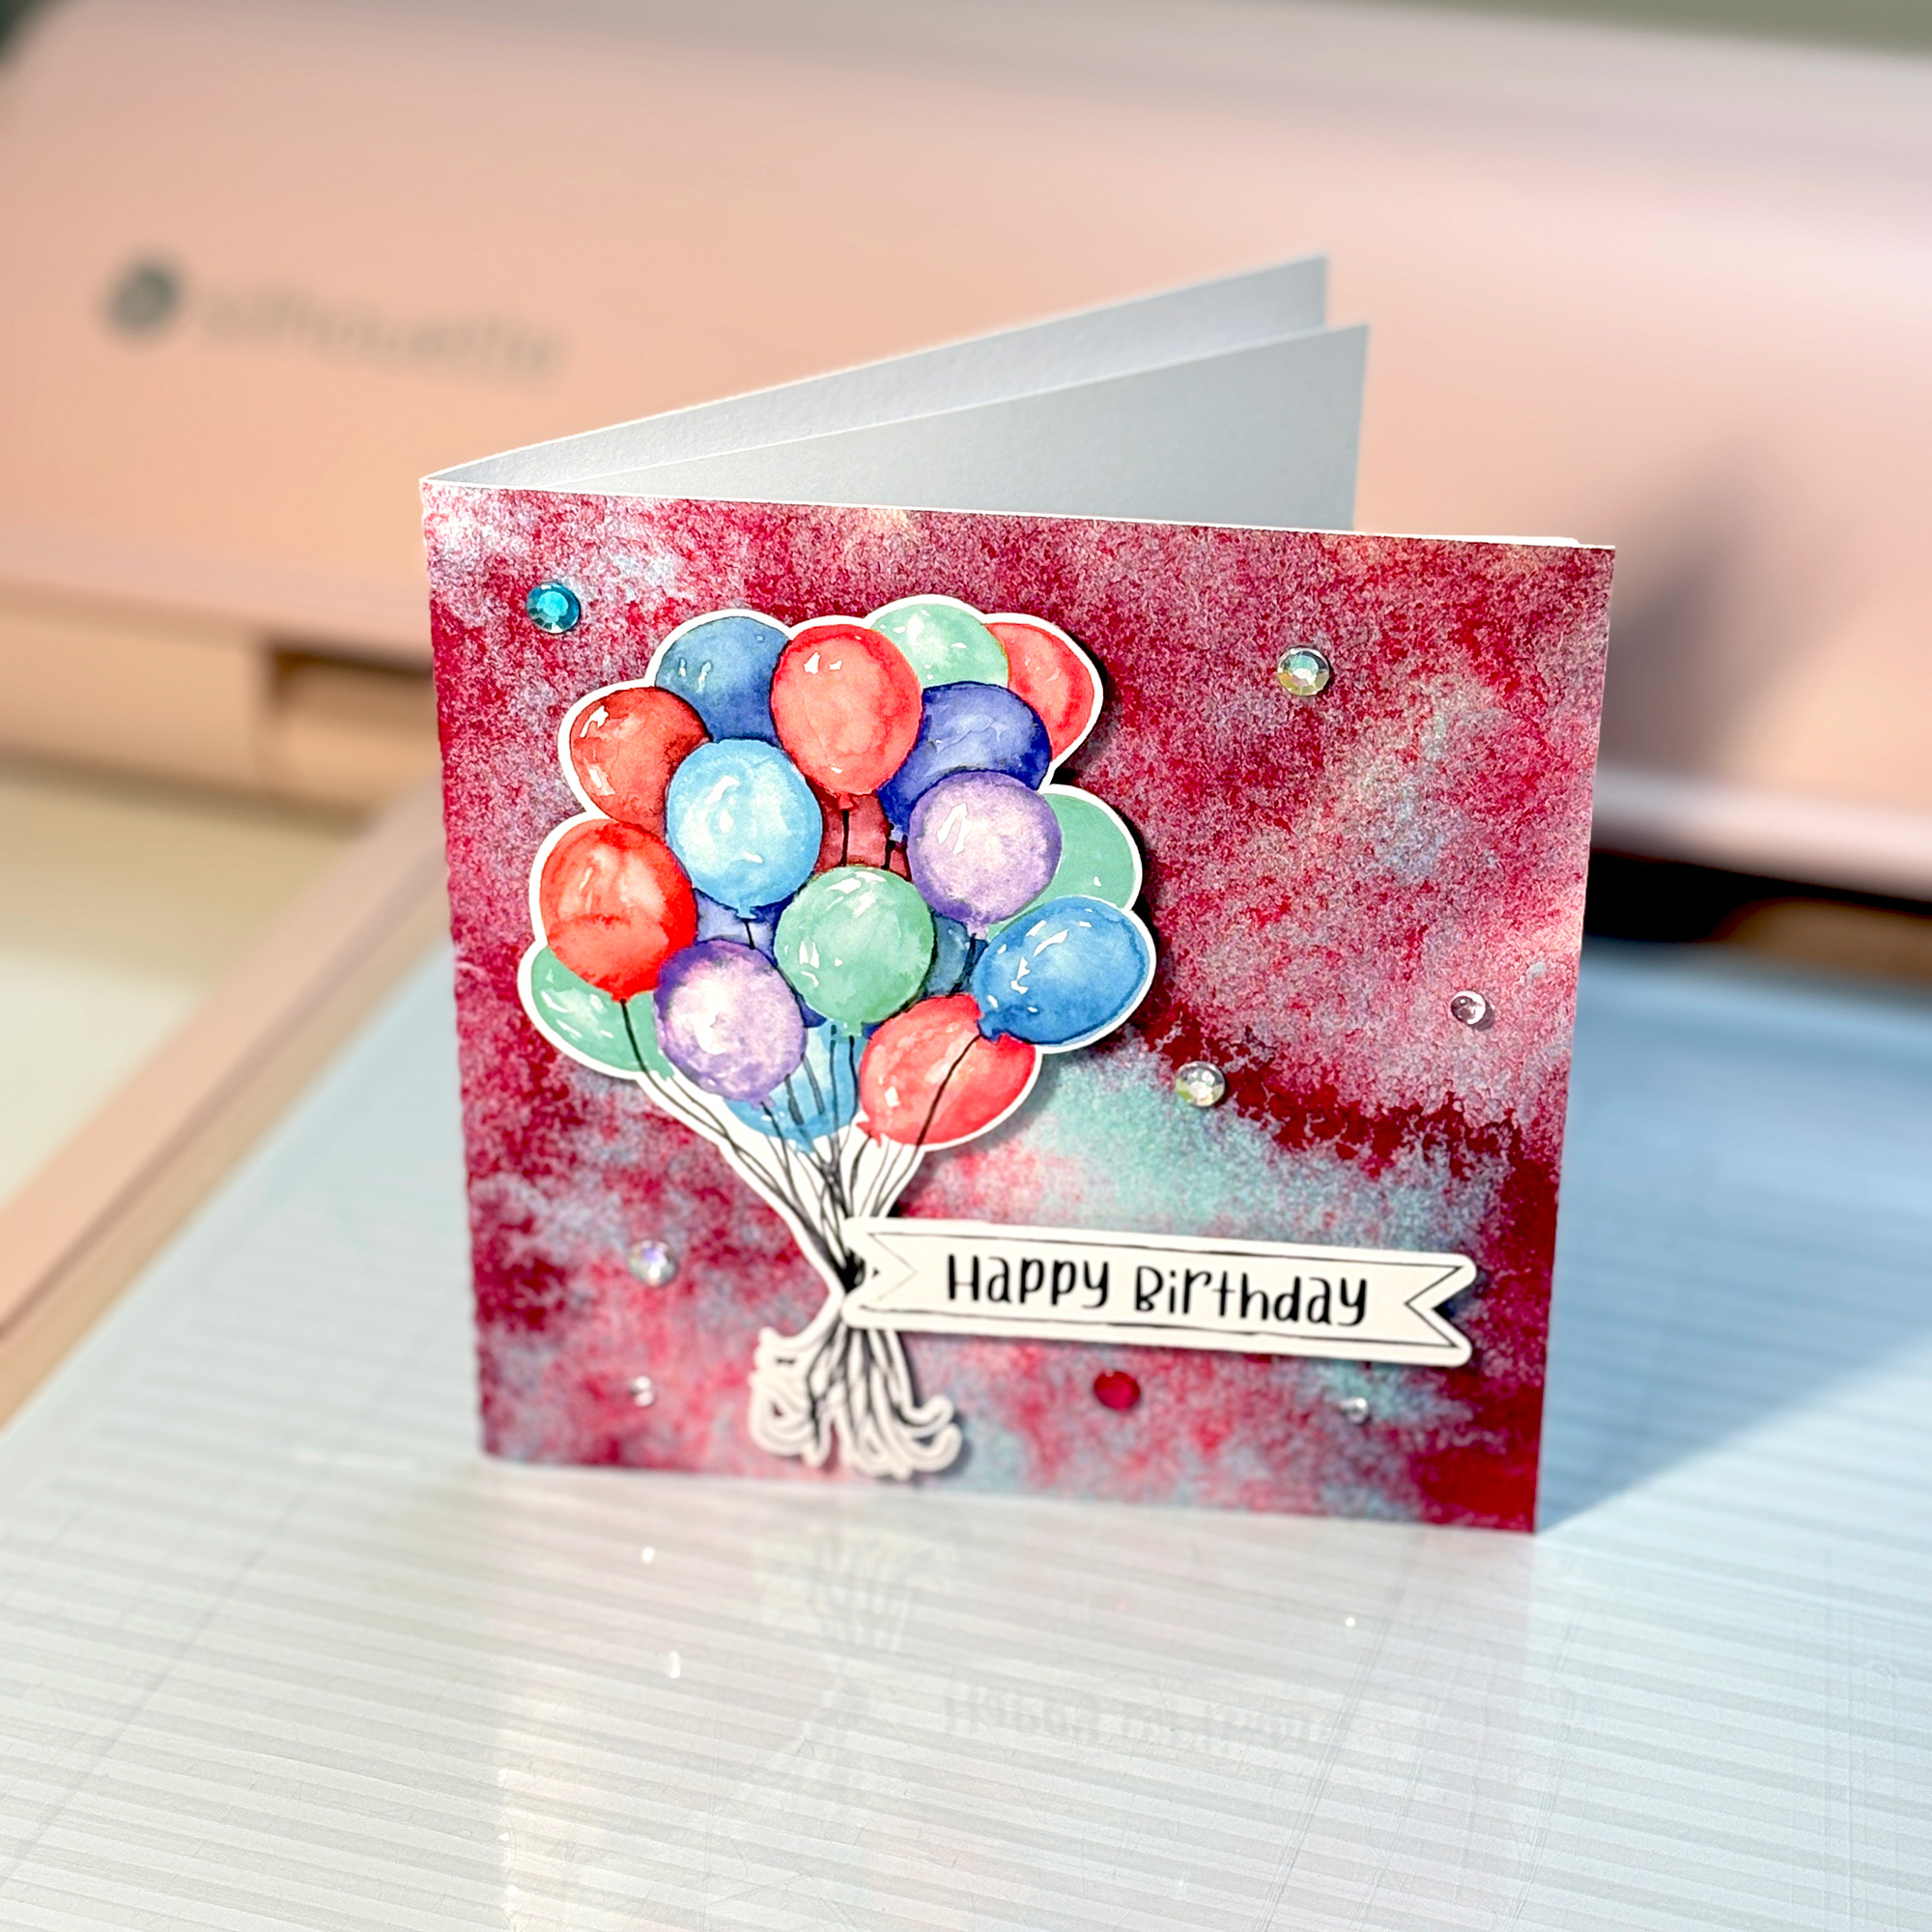
The cool tones palette features red, green, blue and purple balloons. It is a more balanced, classic combination that suits a wider range of background styles. The three cards below show it across three very different backgrounds.
The first cool tones card uses a burgundy and light blue painted background. The contrast between the warm burgundy and cool blue in the background echoes the balloon palette nicely, and the result feels bold without being busy. Red and pink rhinestones scattered across the lower half tie the warm tones together.
The second cool tones card pairs the balloon bunch with a red and turquoise granulated watercolour background. The granulated texture adds depth and interest to the background without competing with the balloons, and the teal in the background picks up the green tones in the design beautifully.
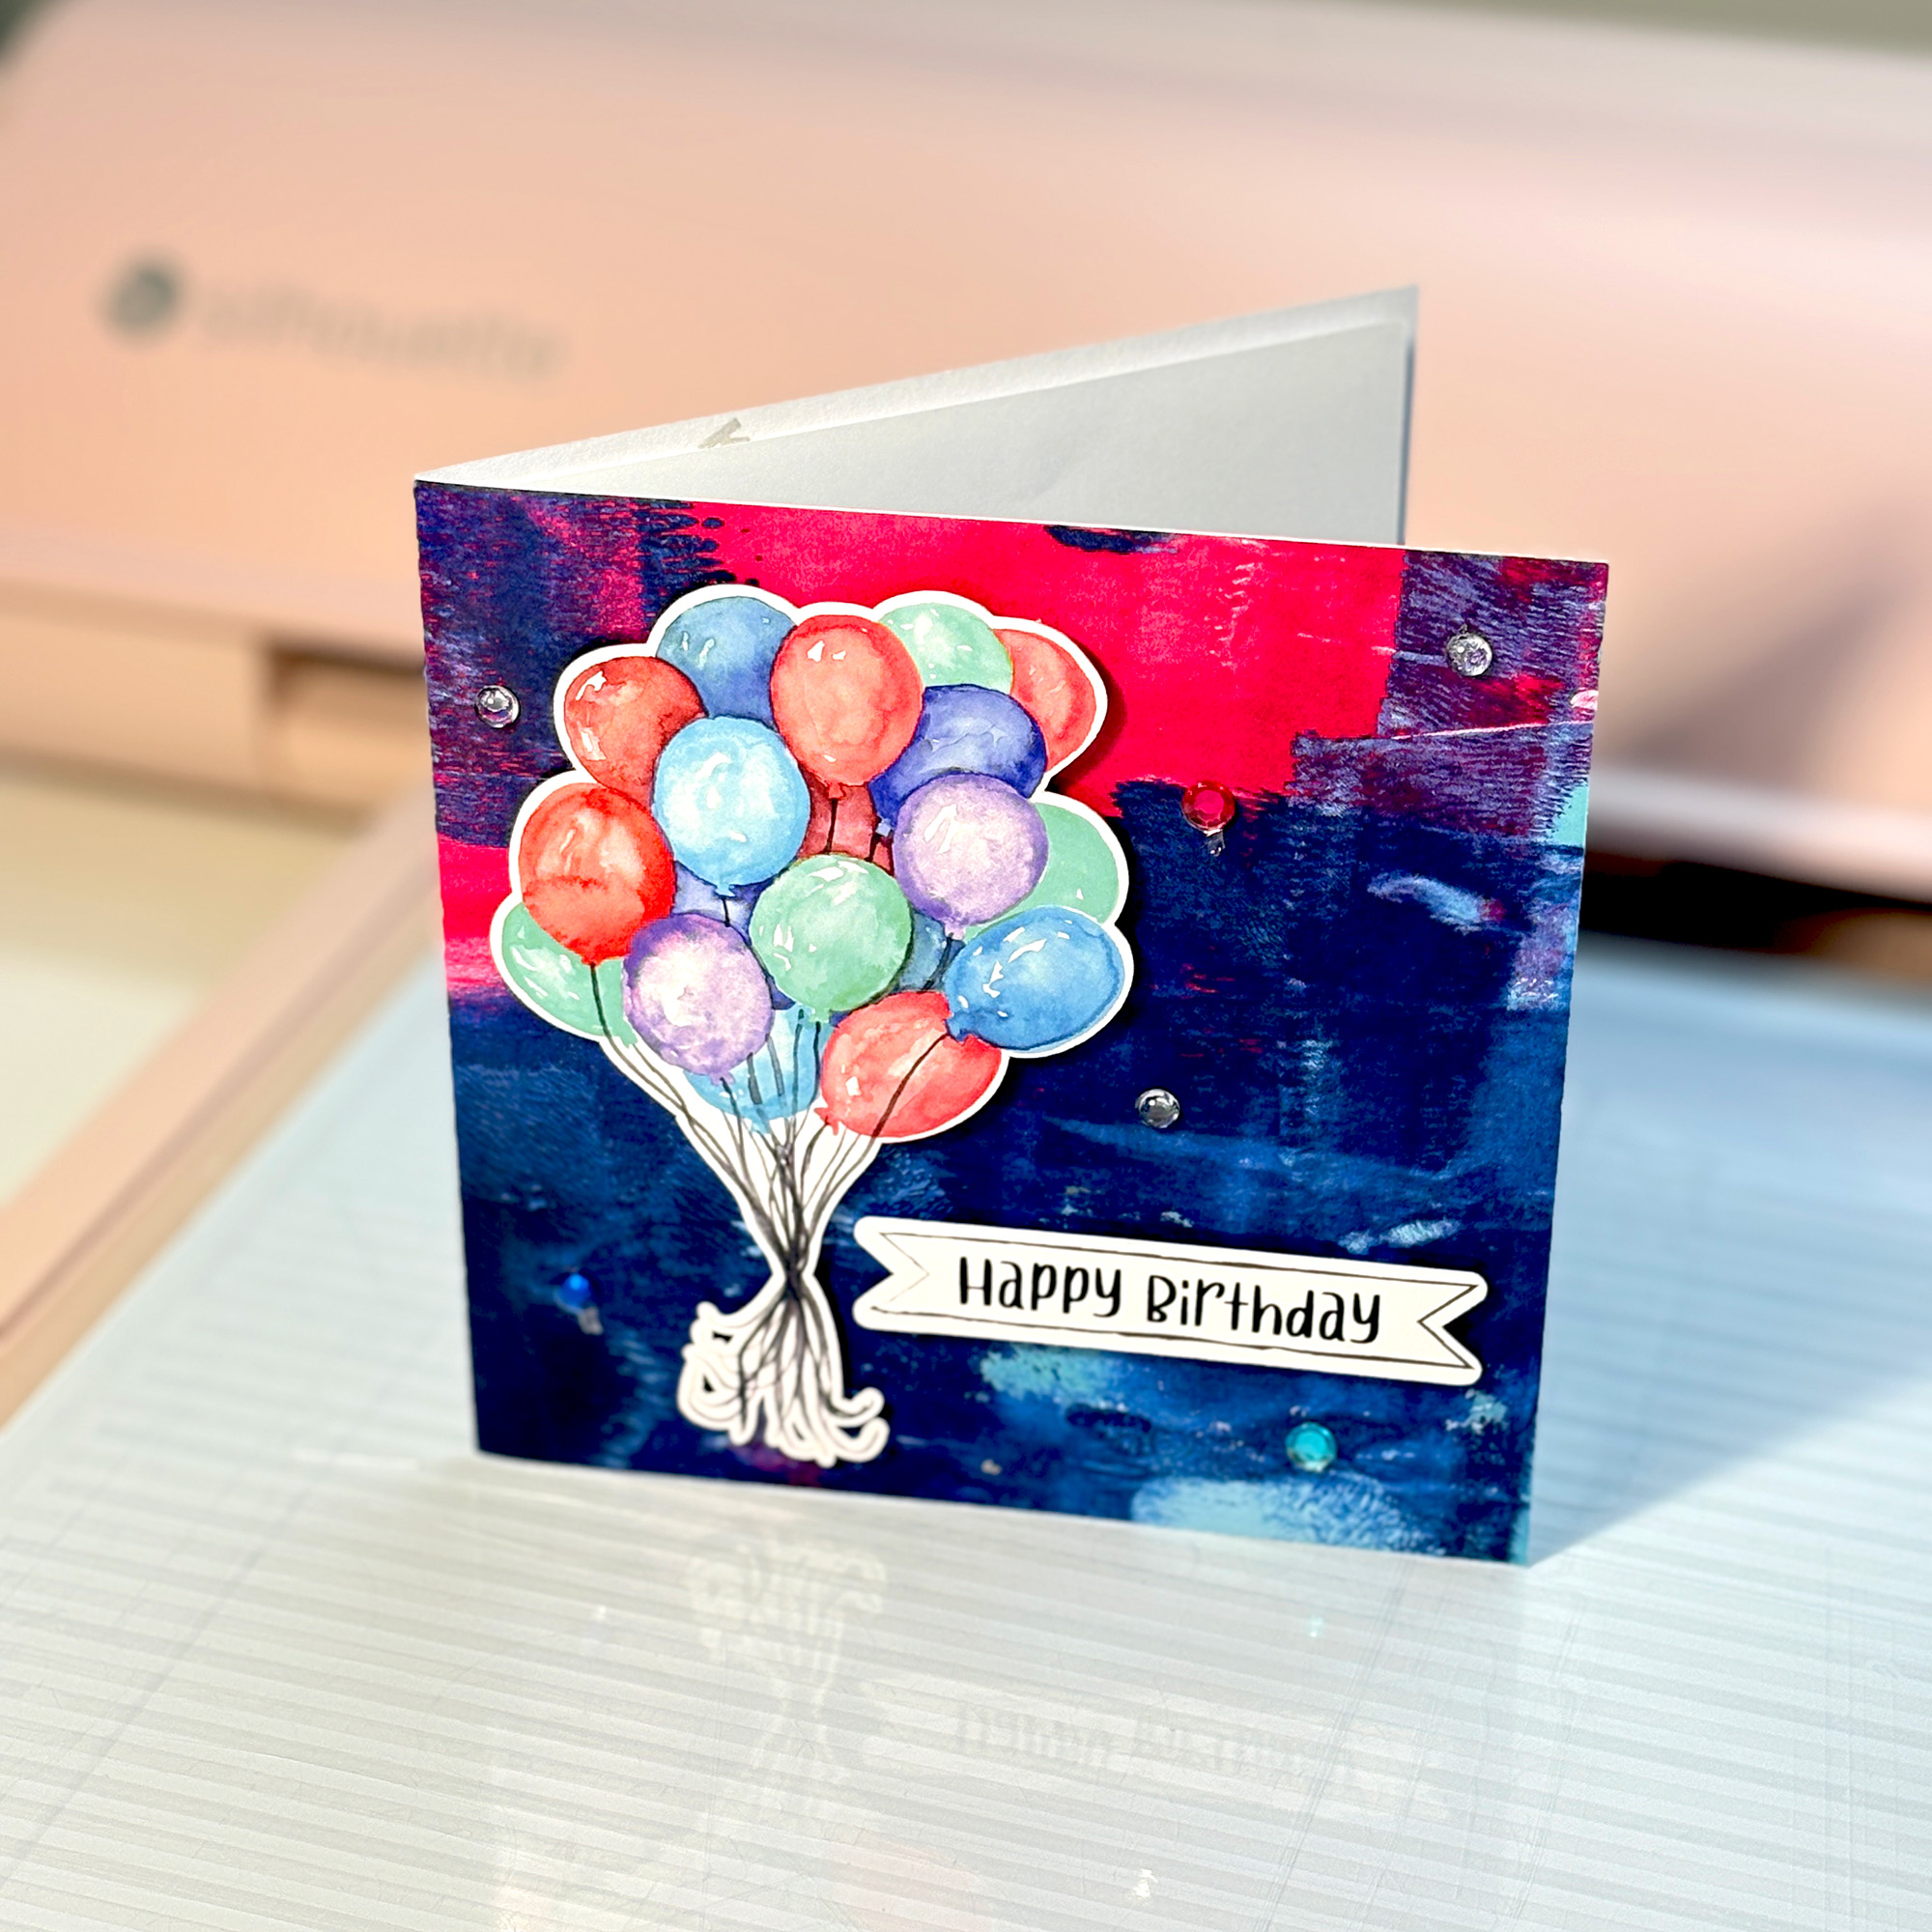
The third cool tones card uses a navy and pink painted background in bold brushstroke style. The deep navy gives the card real presence and the balloons sit against it with excellent contrast. Clear rhinestones keep the embellishment minimal so the design speaks for itself.
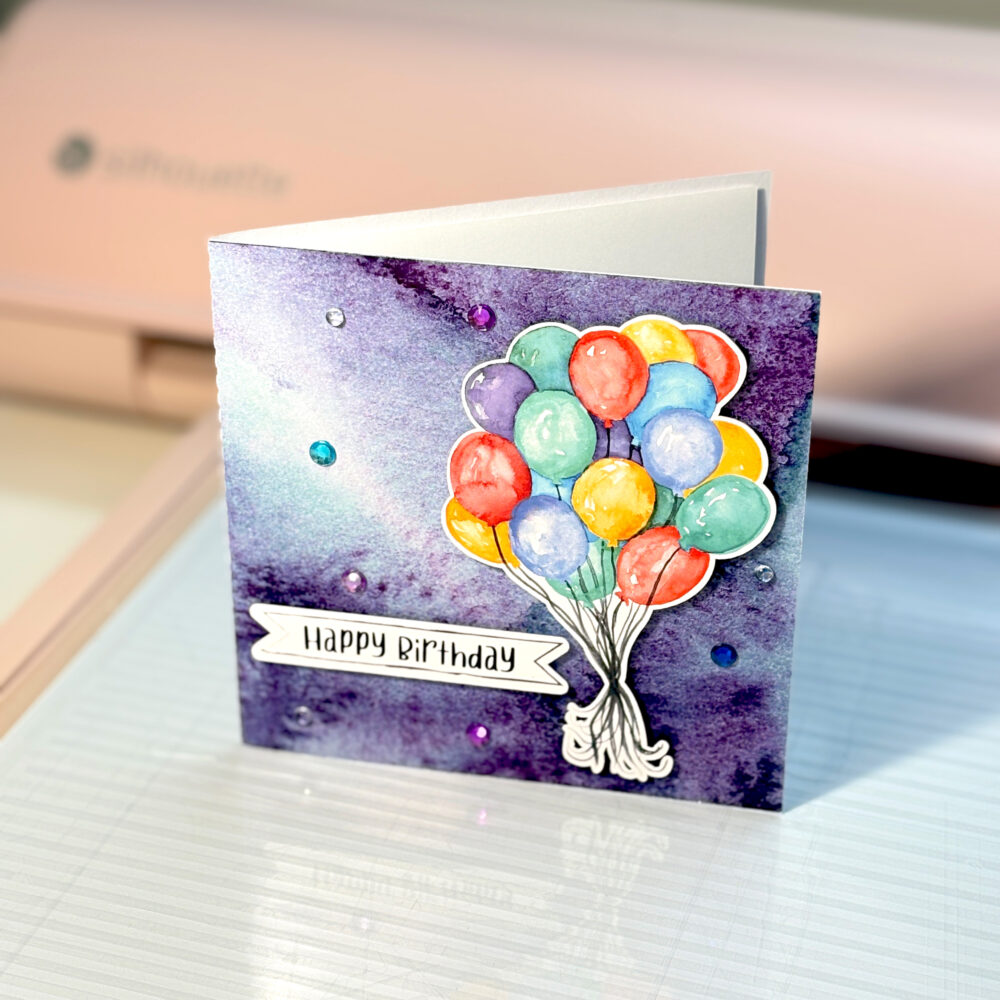
The warm tones palette features red, orange, green, teal, blue and purple balloons. It has the most colours of the three sets and the broadest tonal range, which makes it particularly versatile across different background styles. The two cards below show it on two different deep purple backgrounds with quite different textures.
The warm tones card uses a deep purple watercolour wash background. The rich purple brings out the red and orange in the balloon bunch and gives the card a luxurious, considered feel. Scattered rhinestones in mixed colours finish it without adding clutter.
All the printable backgrounds used on the sample cards in this post are my own designs, available in the Silhouette Design Store. Each is a print and cut design you can use to fill a standard card front shape in Silhouette Studio. I sometimes use a clipping mask in Silhouette Studio® to apply a decorative shaped edge to the background for an extra layer of detail.
Birthday cards have a way of feeling same-same when you reach for the same elements every time. These hand-painted watercolor birthday cake print and cut designs give you something a little more unexpected to work with, and right now they are on sale in the Silhouette Design Store. Four designs, two icing colours, two topper options, and a range of card looks that show just how much the background does the heavy lifting.
All the printable backgrounds on the sample cards in this post are my own designs, also available in the Silhouette Design Store. The Happy Birthday banners are from the Doodled Happy Birthday Banners Sentiments set, which coordinates with all four cake designs. Keep reading to see each one in action, and find the full supplies list for every card shown.
About the Designs
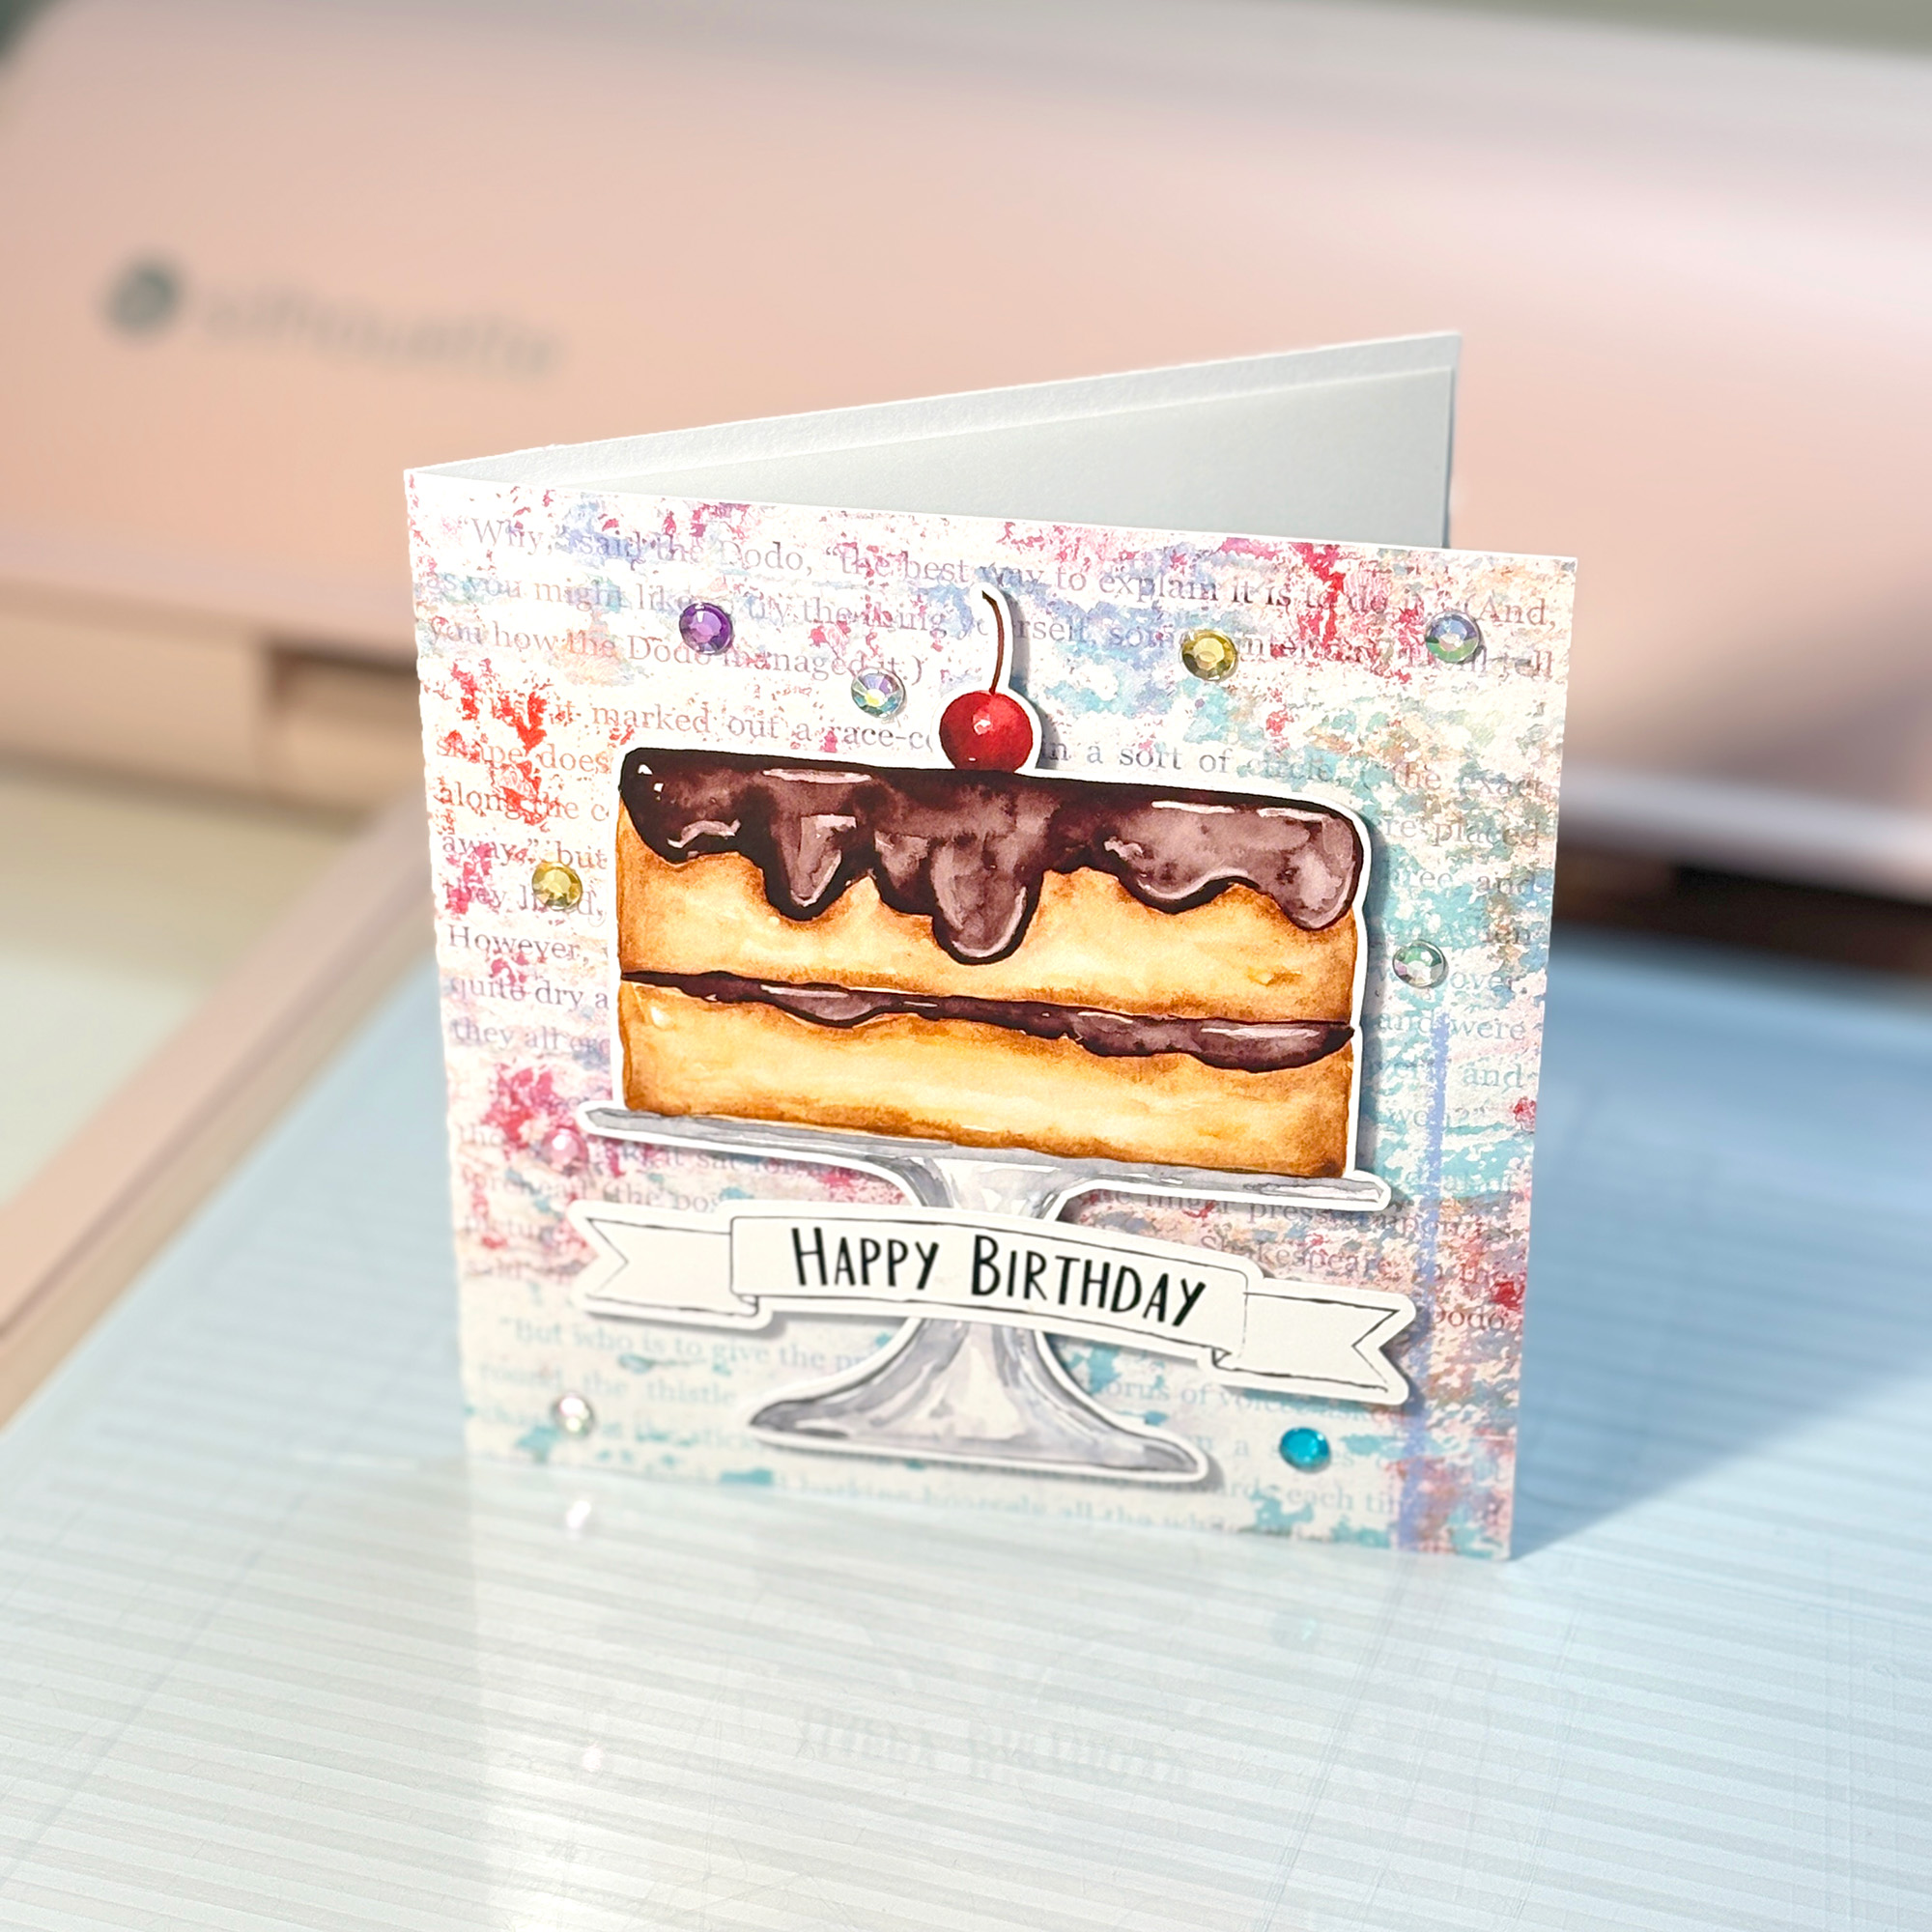
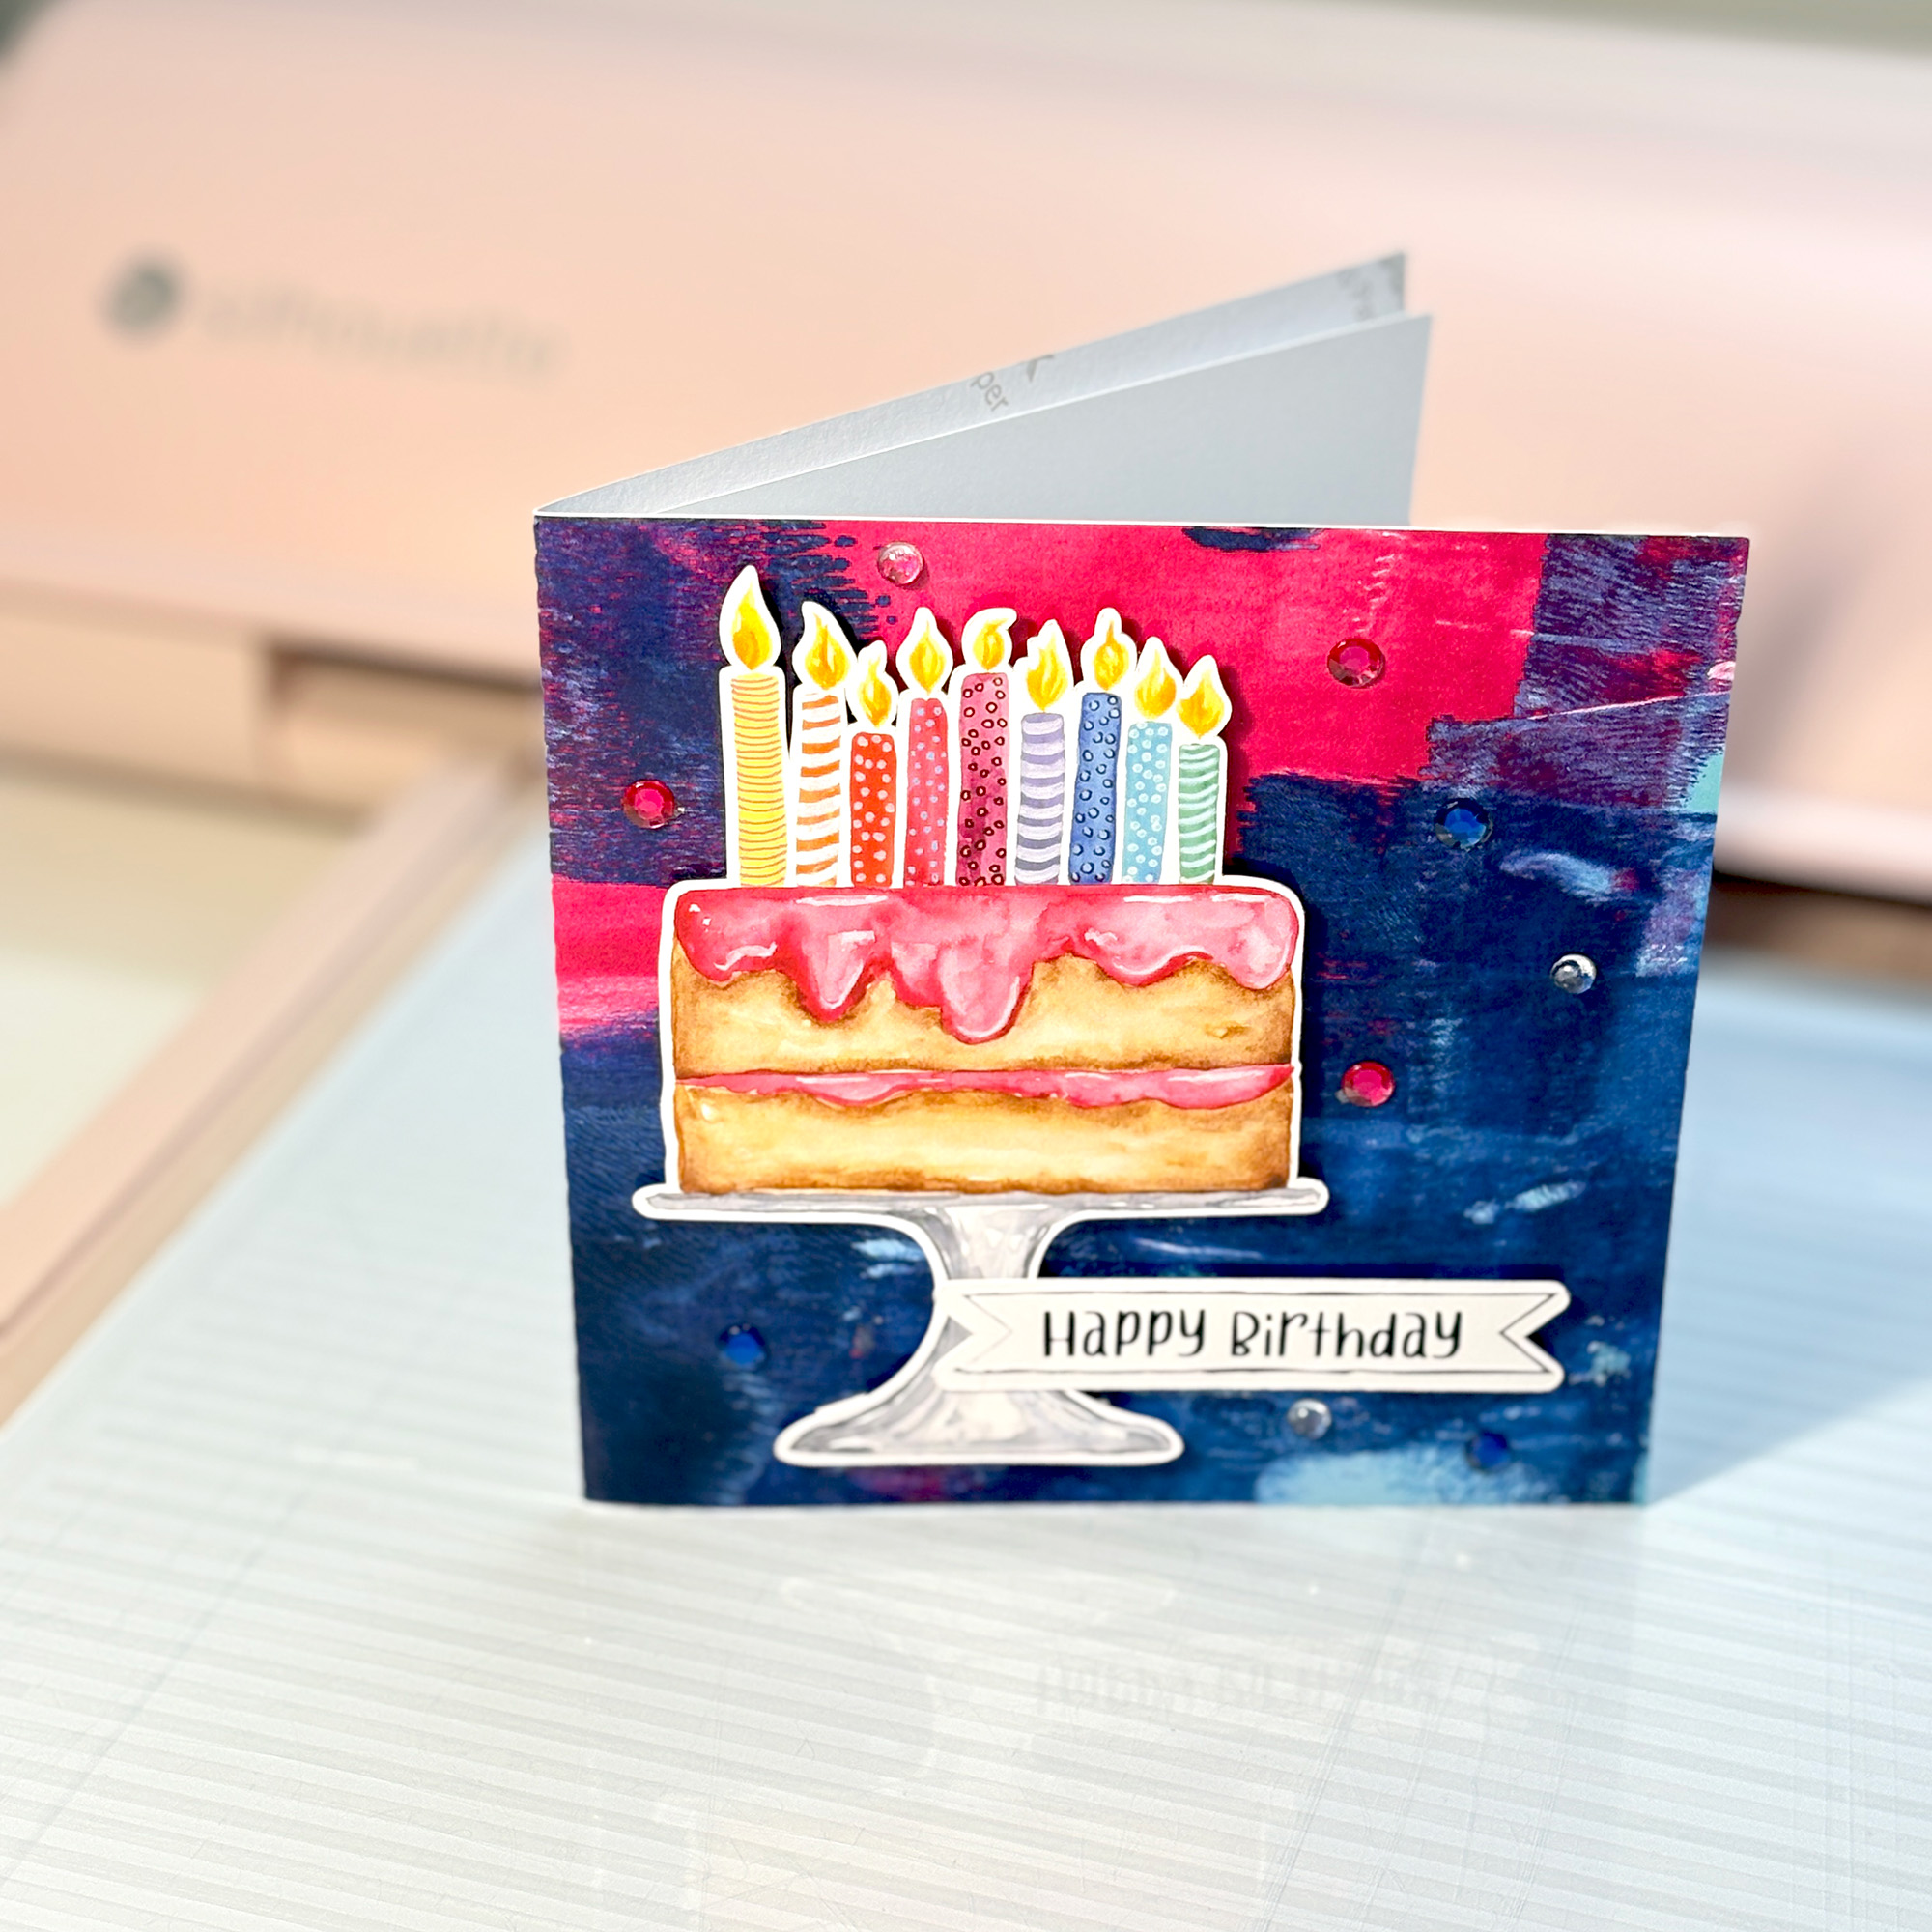
The collection comes in four flavours: chocolate ganache or bright pink strawberry icing, each topped with either nine whimsical patterned rainbow candles or a glossy red cherry. Four combinations that suit different card moods and colour palettes. Within each icing colour, one version is topped with nine whimsical patterned candles in rainbow colours, and one is finished simply with a glossy red cherry. That gives you four quite different looks from the same basic cake shape, which makes them easy to mix and match across projects.
All four are sized large so you can use them at full size for a bold scrapbooking focal point or scale them down in Silhouette Studio® for smaller cards, tags, and layered projects.
The Cards
Birthday Cake with Chocolate Ganache and Candles
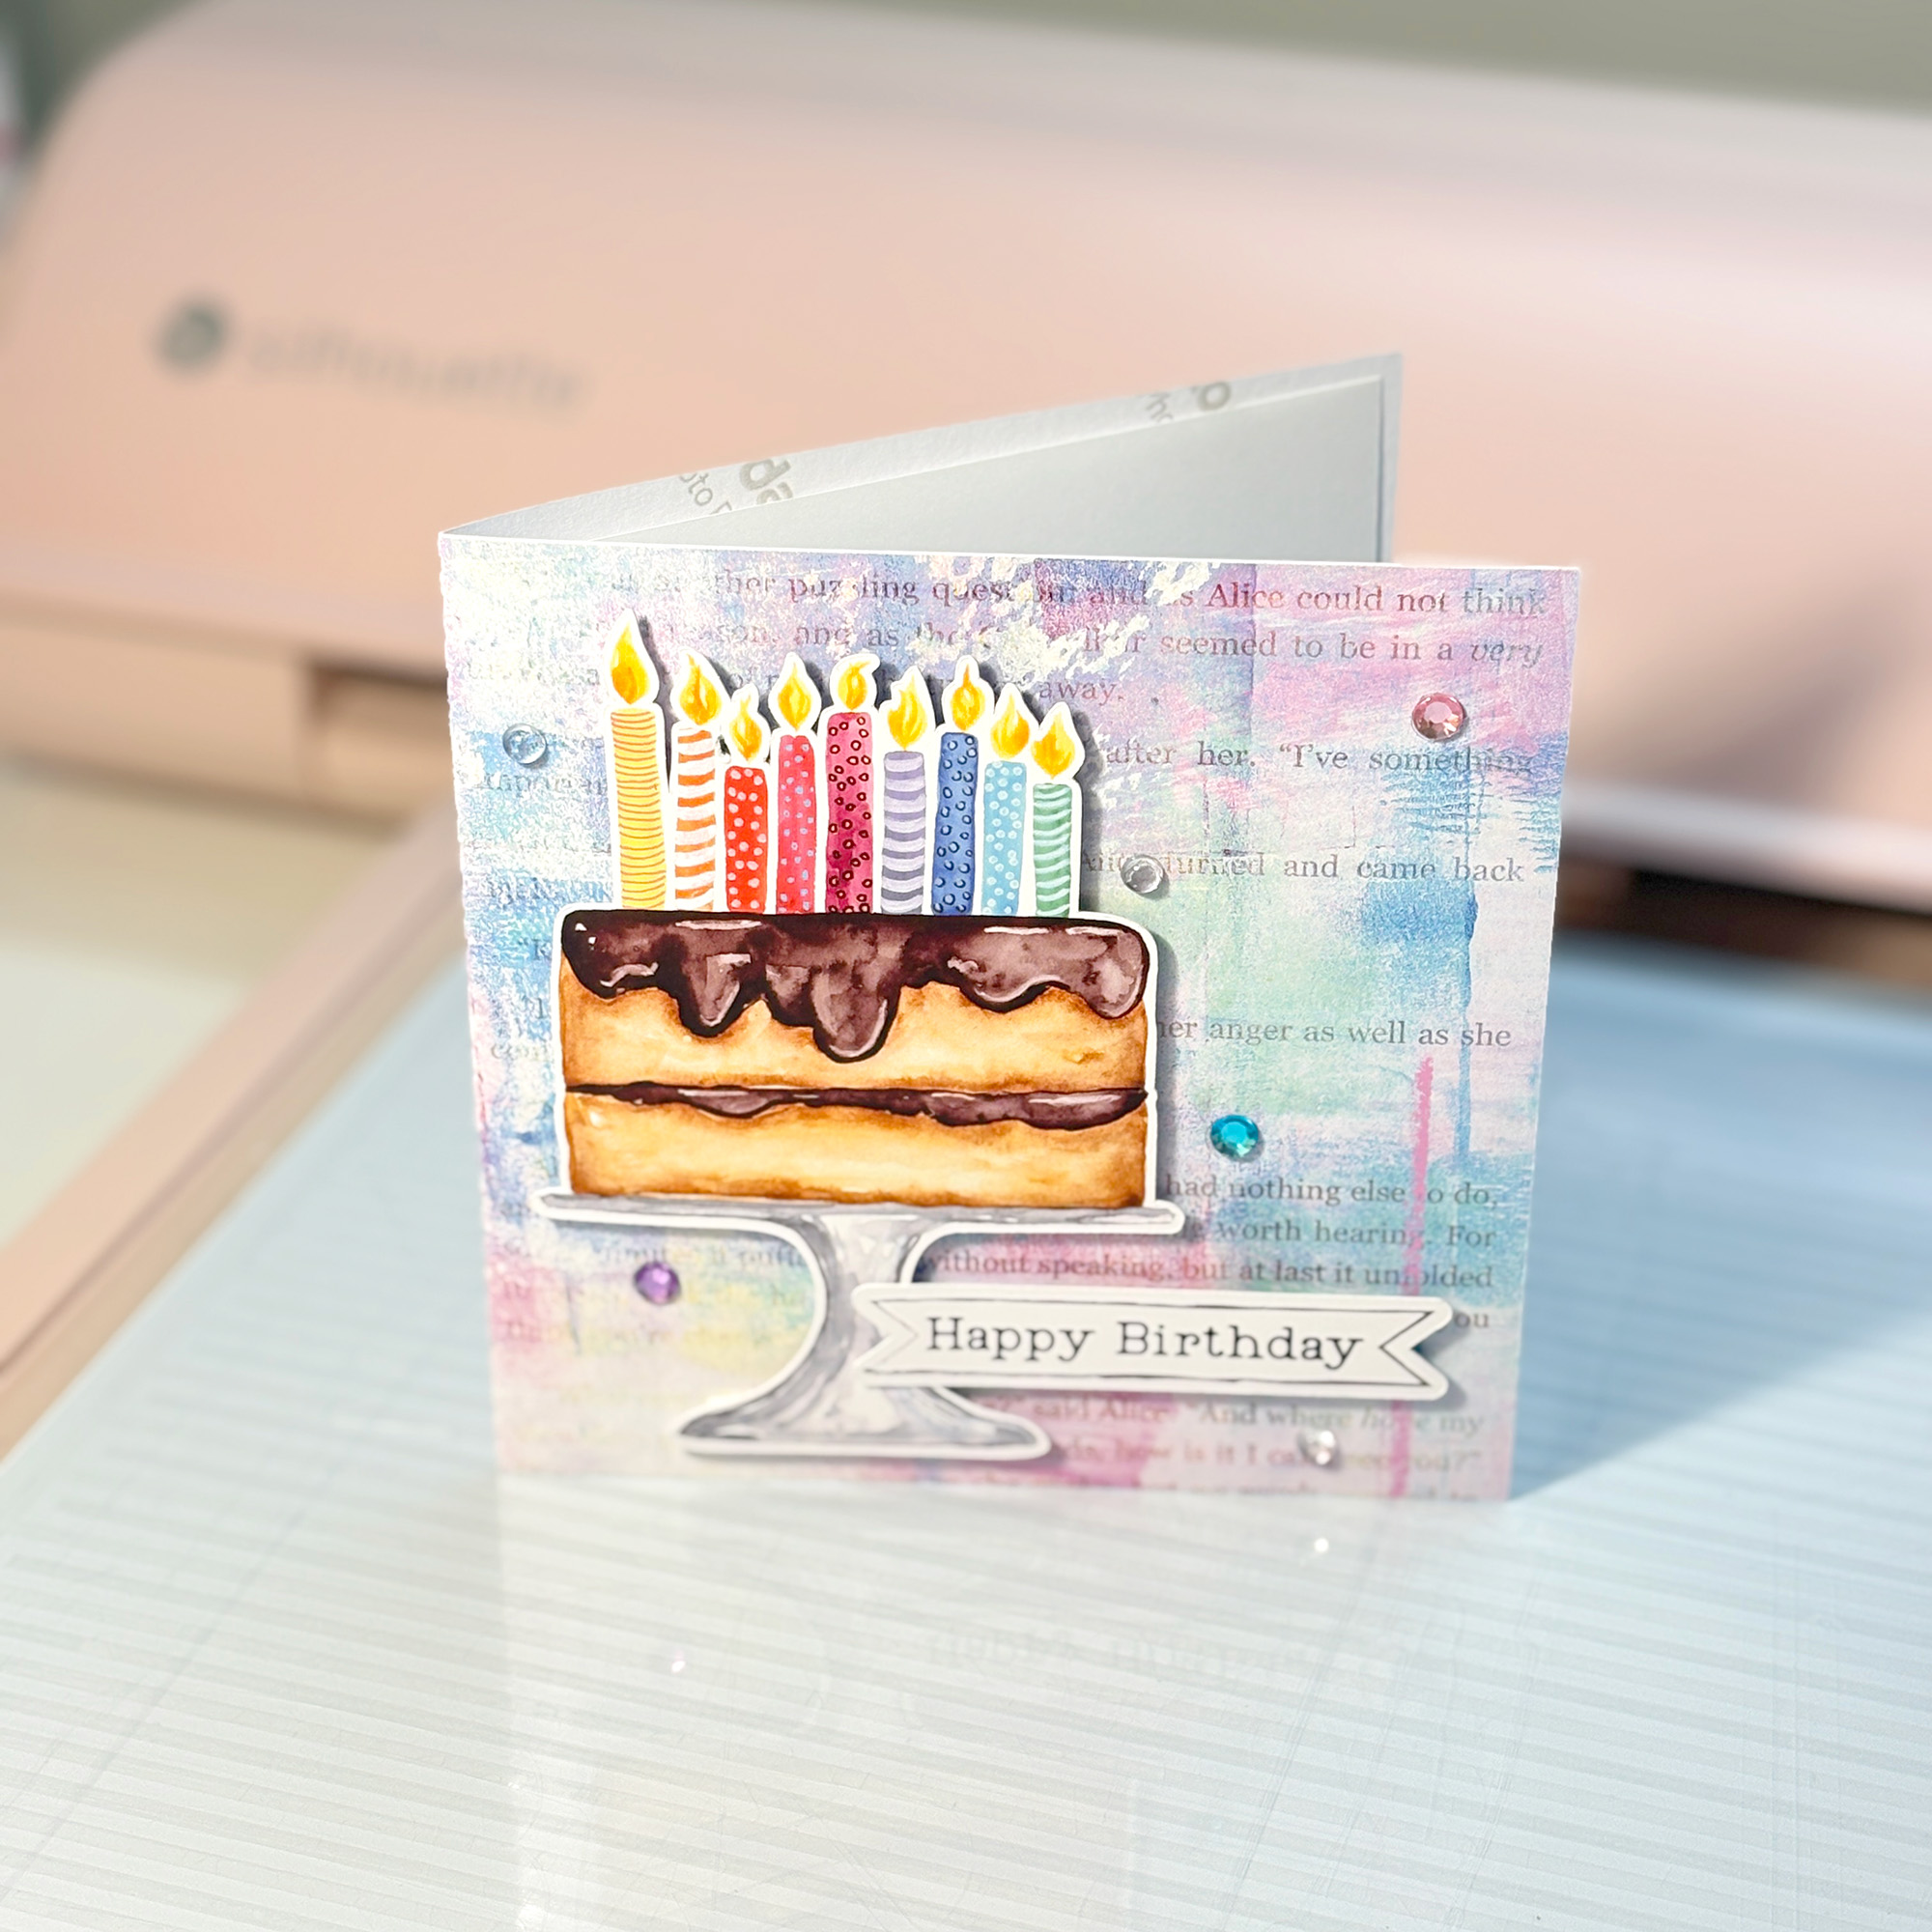
The chocolate ganache cake with candles sits beautifully against a pastel mixed-media background with Alice in Wonderland text layered through it. The cool blue, purple and pink tones in the background let the warm ganache and rainbow candles take centre stage without competition. Scattered rhinestones in mixed colours finish the card without overworking it.
The candles on this cake design are the same style as the Whimsical Patterned Birthday Candles, which are available separately if you want to use them as standalone elements on other projects.
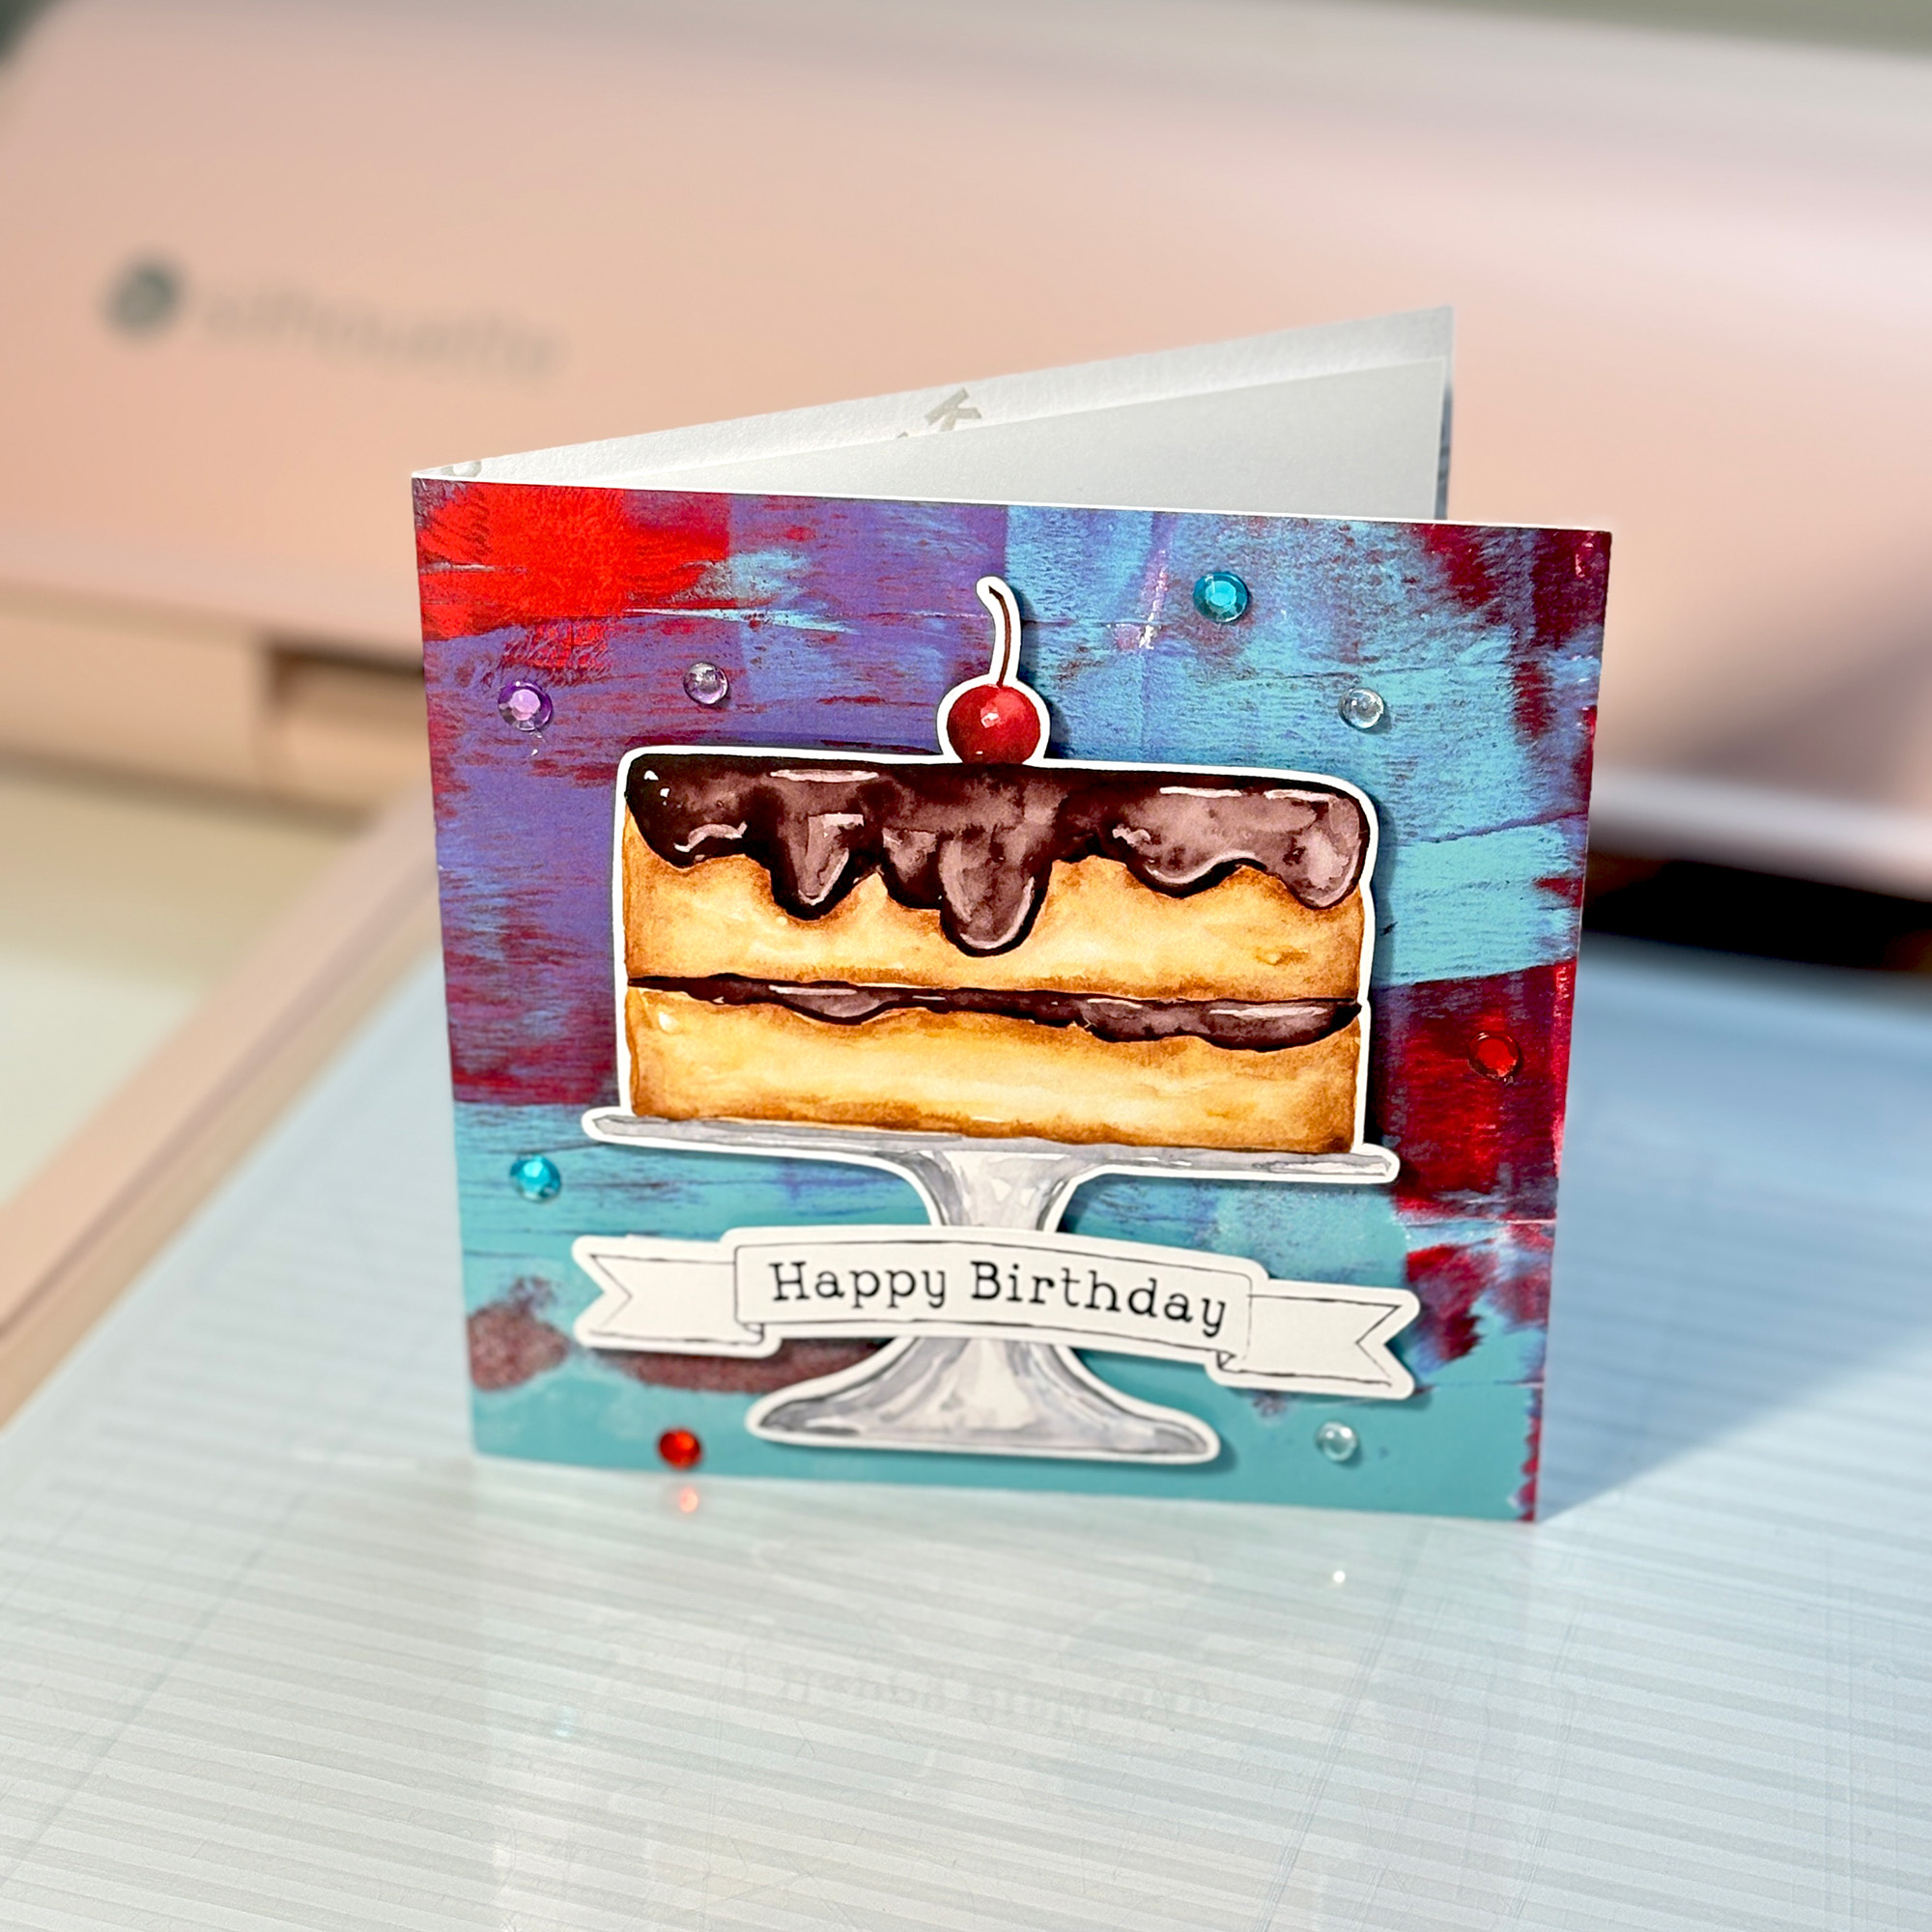
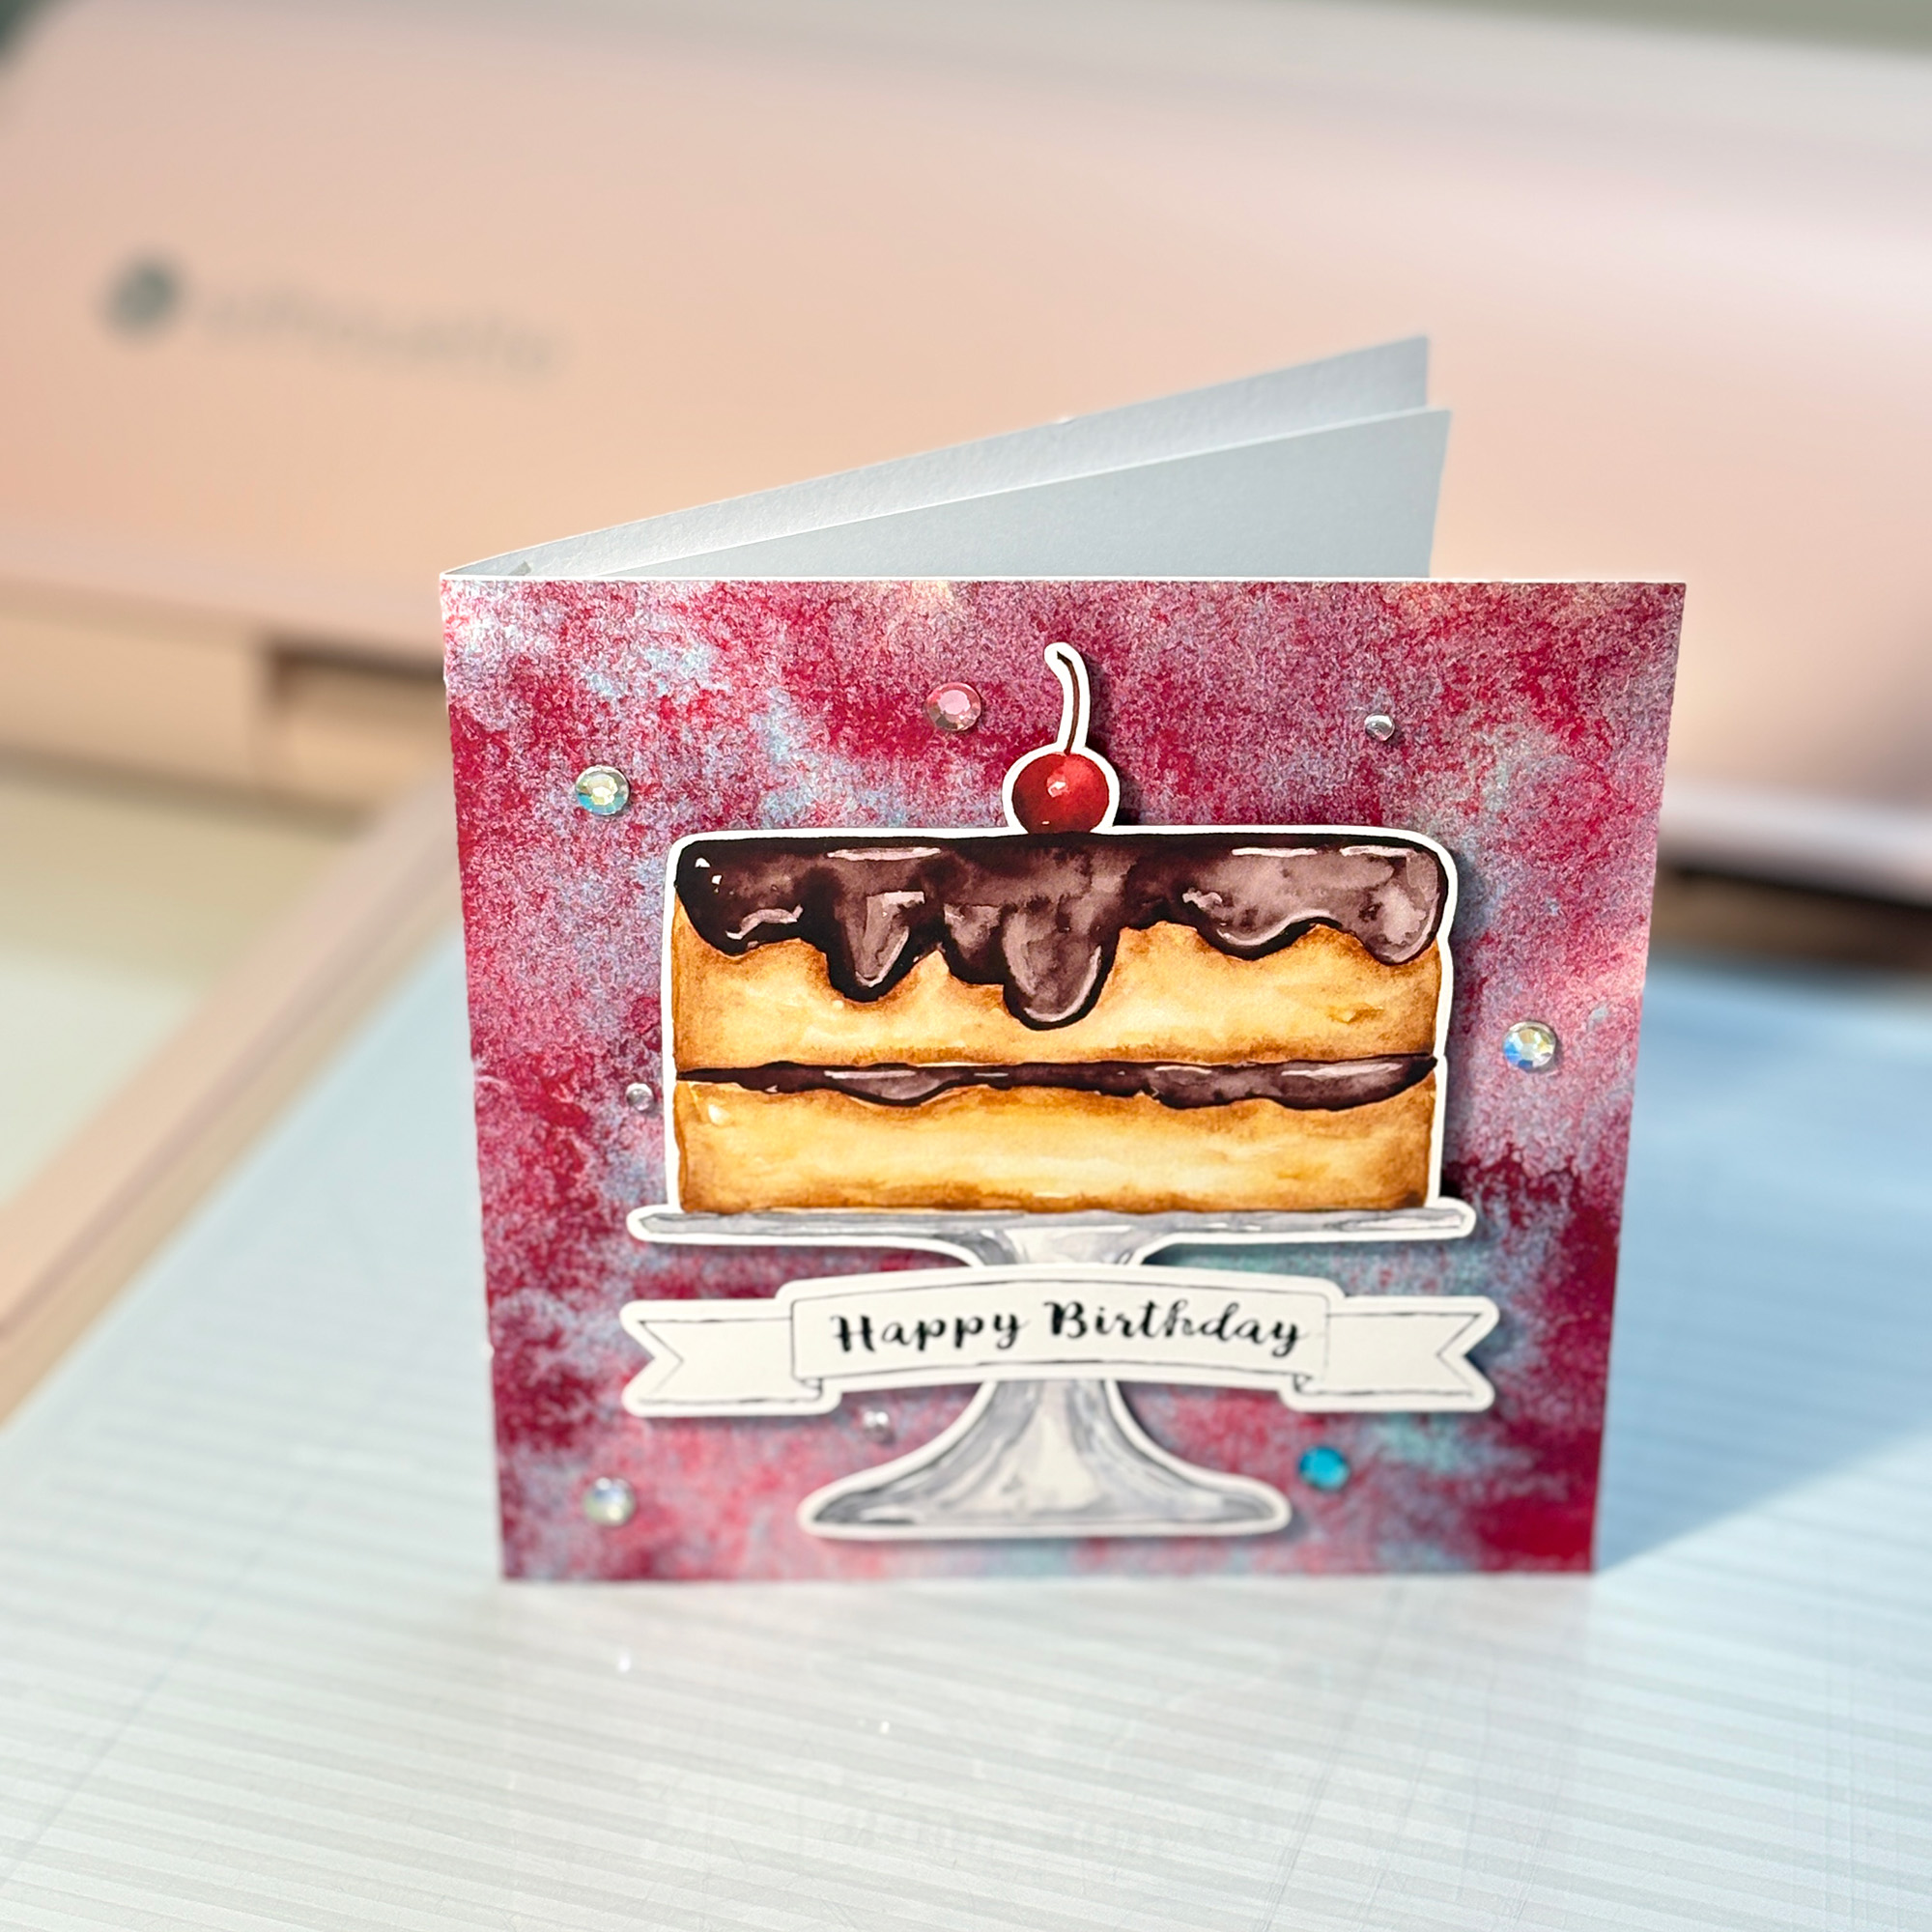
The cherry version of the chocolate ganache cake shows how much range a single design can have across different backgrounds. The first card pairs it with a bold painted background in deep red, turquoise and purple, giving the card a rich, high-contrast look. The second combines an Alice Lavender Pink Pastel Background with a colourful splattered background in pinks, teals and muted tones, keeping things playful and detailed without being busy. The Third uses a soft speckled pink, red and turquoise mixed-media texture that brings a warmer, more delicate feel.
All three use a Doodled Happy Birthday Banner from the same set, which shows how versatile the banner design is across very different card styles.
The pink icing cake with candles is shown here on a bold dark background in deep navy and magenta. The combination is striking and the bright pink icing reads really well against the darker tones. Two cards using the same design and the same background show how small changes in layout and embellishment placement give you slightly different results each time.
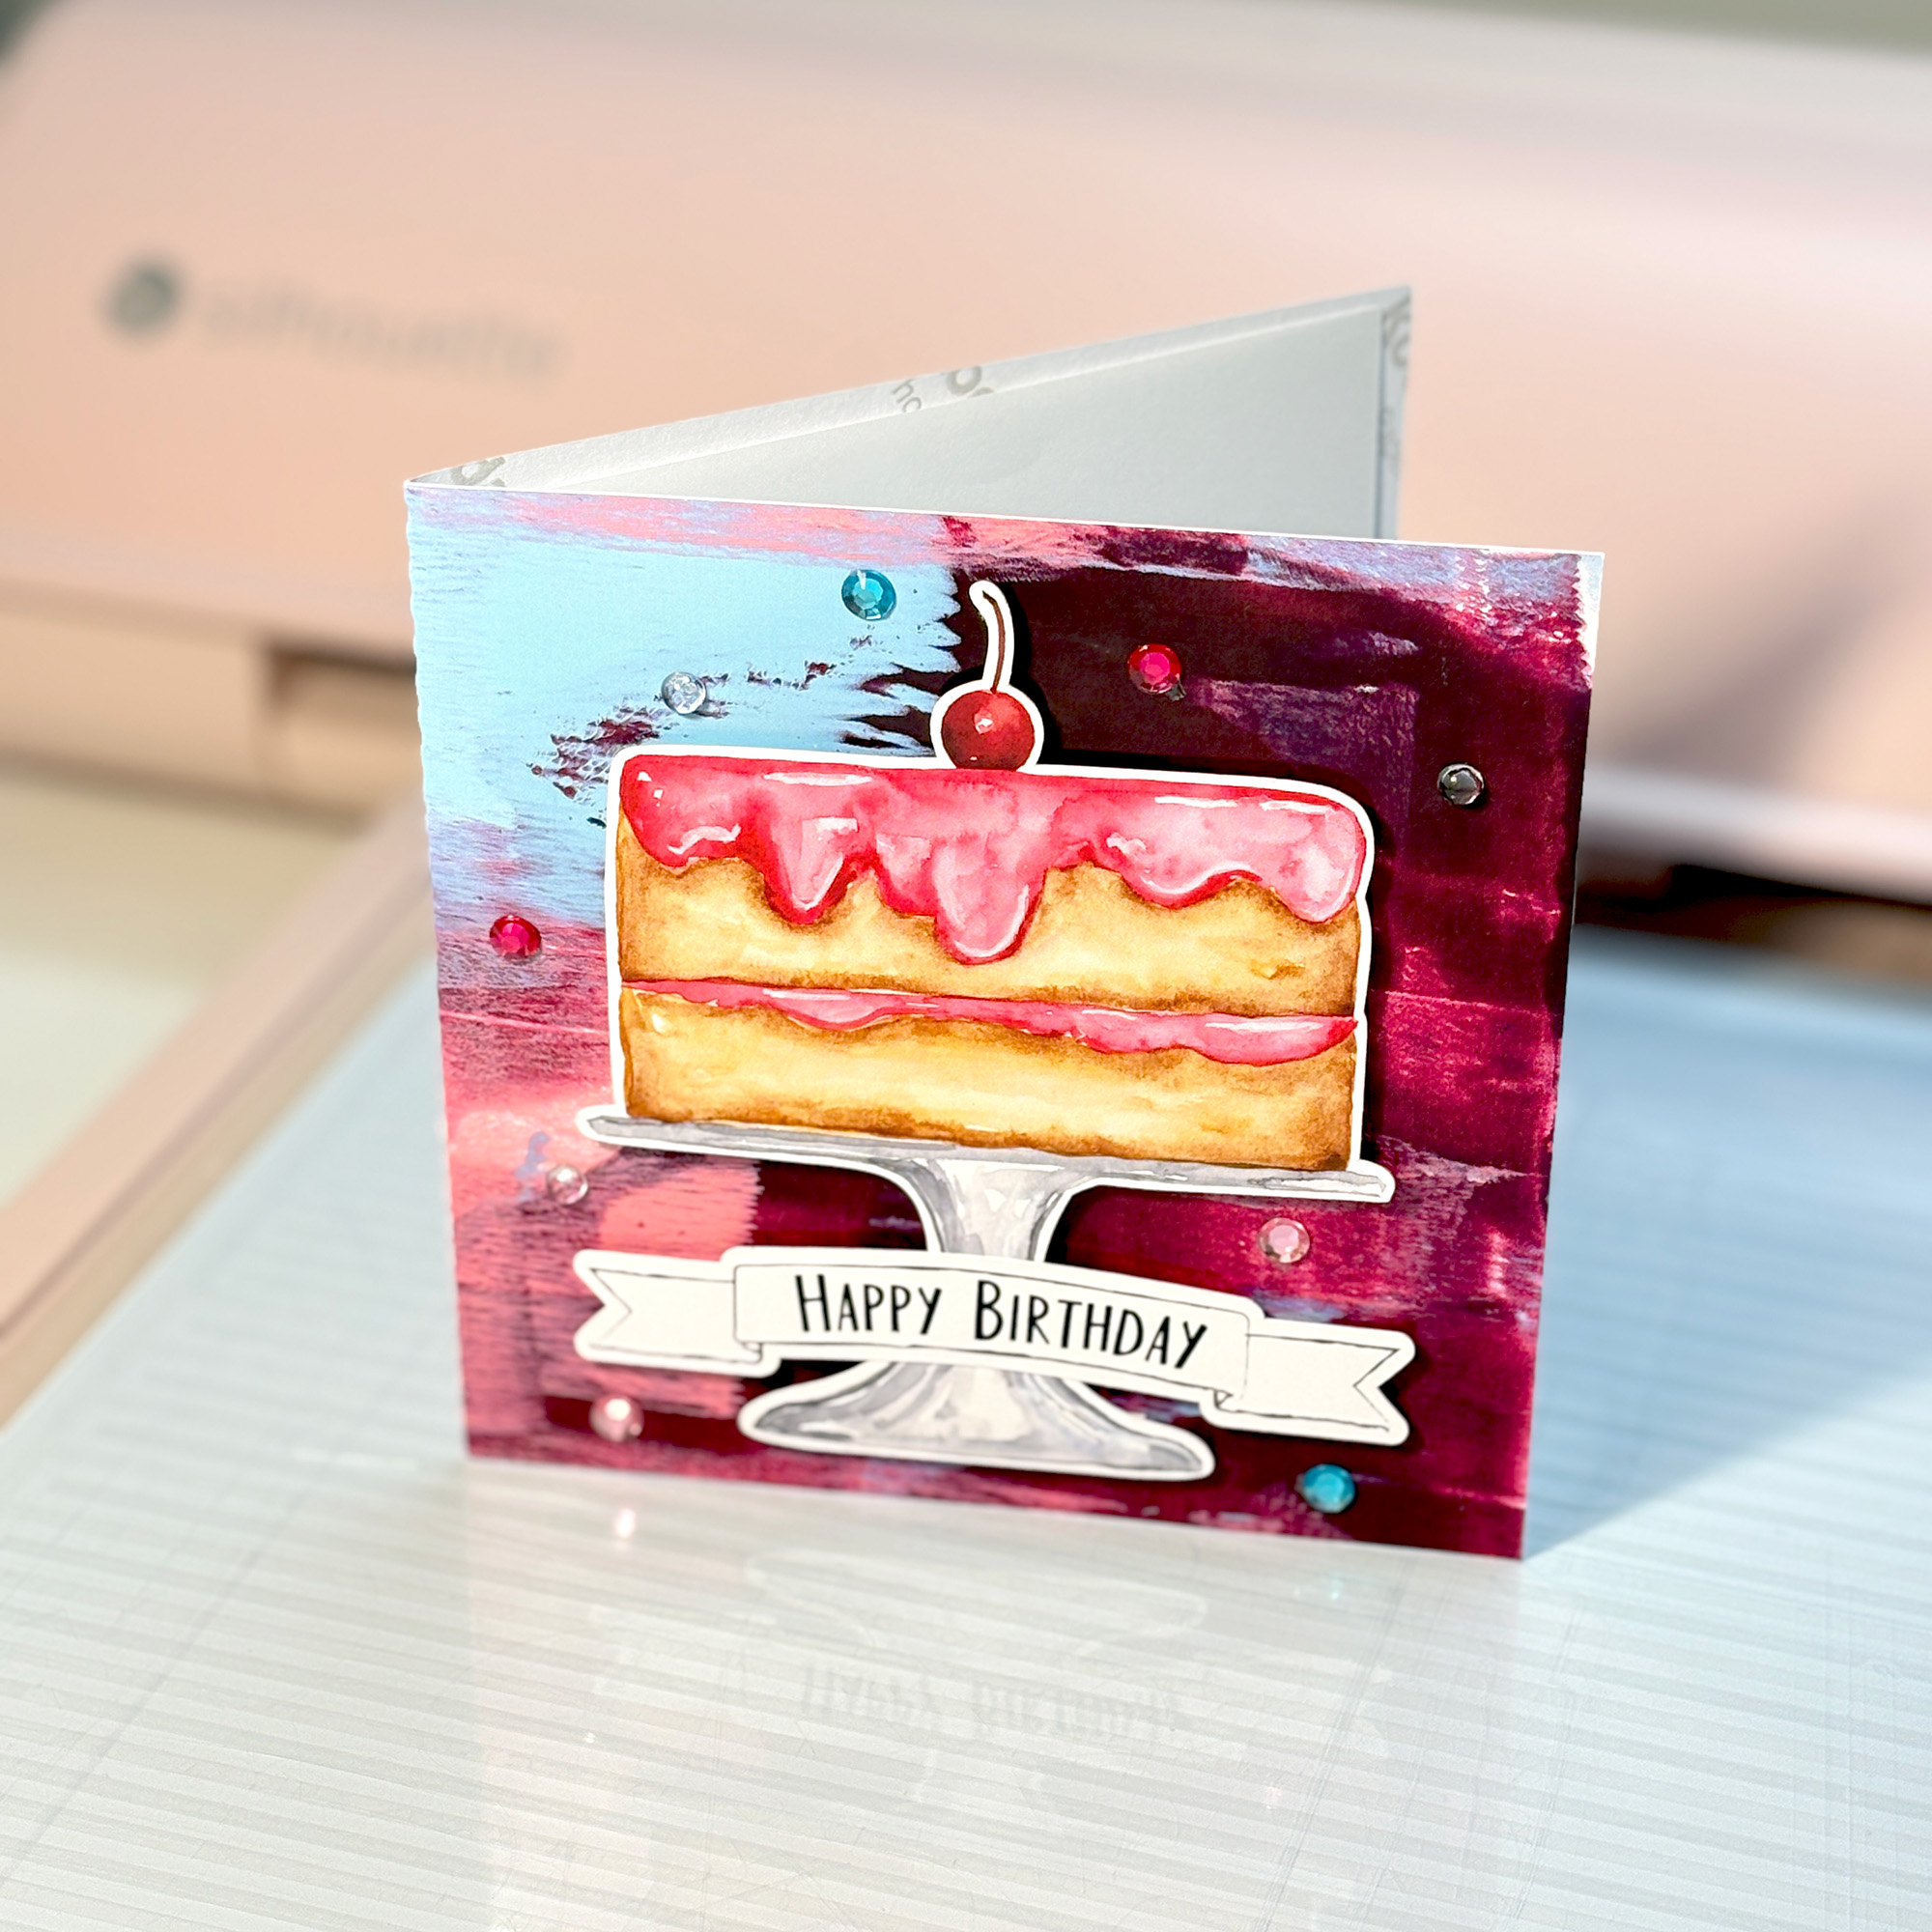
The pink icing cherry cake is shown here on a painted background in deep plum, burgundy and teal. The berry tones in the background pick up the pink icing beautifully, and the red cherry provides just enough contrast at the top to anchor the design. A mix of pink, red and clear rhinestones scattered across the card keeps it feeling festive without overdoing it.
All the printable backgrounds used on the sample cards in this post are my own designs and are available in the Silhouette Design Store. Each is a print and cut design sized to fill a standard card front and works as a complete backdrop straight off the mat.
The Happy Birthday banners on every card in this post come from one set that includes several banner styles. It is designed to sit comfortably alongside print and cut focal elements and scale to suit different card sizes in Silhouette Studio®.
All four birthday cake designs are currently on sale in the Silhouette Design Store. If you have been thinking about adding birthday cake elements to your print and cut collection, now is a good time to grab them.
If you have been looking for a birthday card design that goes beyond a standard sentiment and a bow, these watercolor party hat print and cut designs might be exactly what you need. Seven hand-painted designs are now live in the Silhouette Design Store, and the sample cards below show just how many different looks you can pull from a single hat design depending on the background you choose.
All the printable backgrounds used on the cards in this post are my own designs, also available in the Silhouette Design Store.
The Doodled Happy Birthday Banners are a separate print and cut set that coordinates with all seven hats. Keep reading to see each design in action and find the full supplies list for every card.
About the Designs
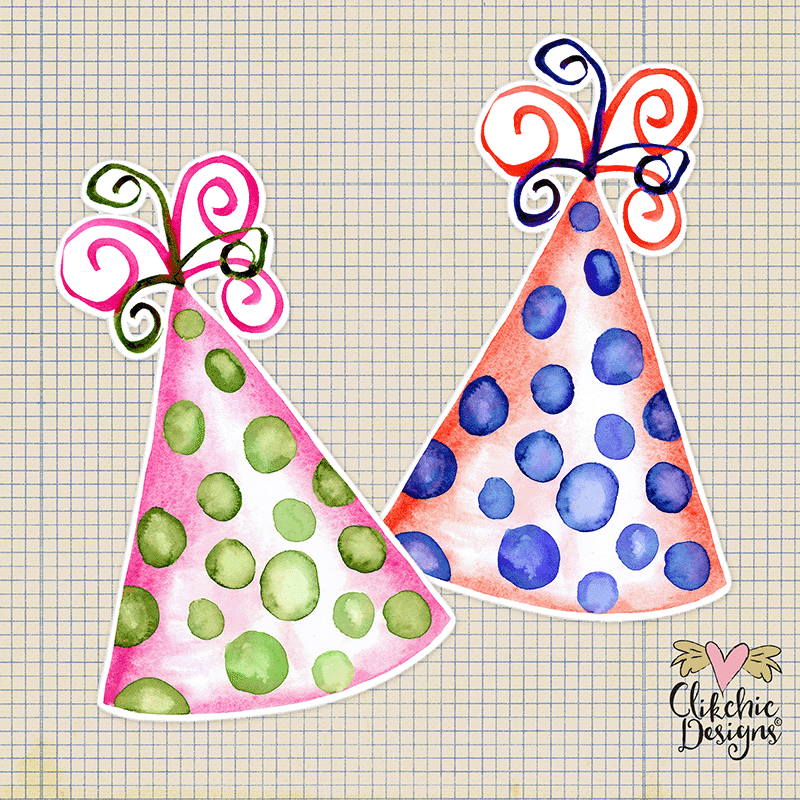
There are two distinct styles in this collection. Five of the hats feature a polka dot body with a pair of doodled curly ribbon streamers at the top. The other two are wide rainbow-banded hats with an explosive burst of multicolour curly streamers that really fill out a card front. All seven are hand-painted watercolor print and cut designs sized large so you can use them at full size for a bold focal point or scale them down in Silhouette Studio® for tags, smaller cards, or layered projects.
The Cards
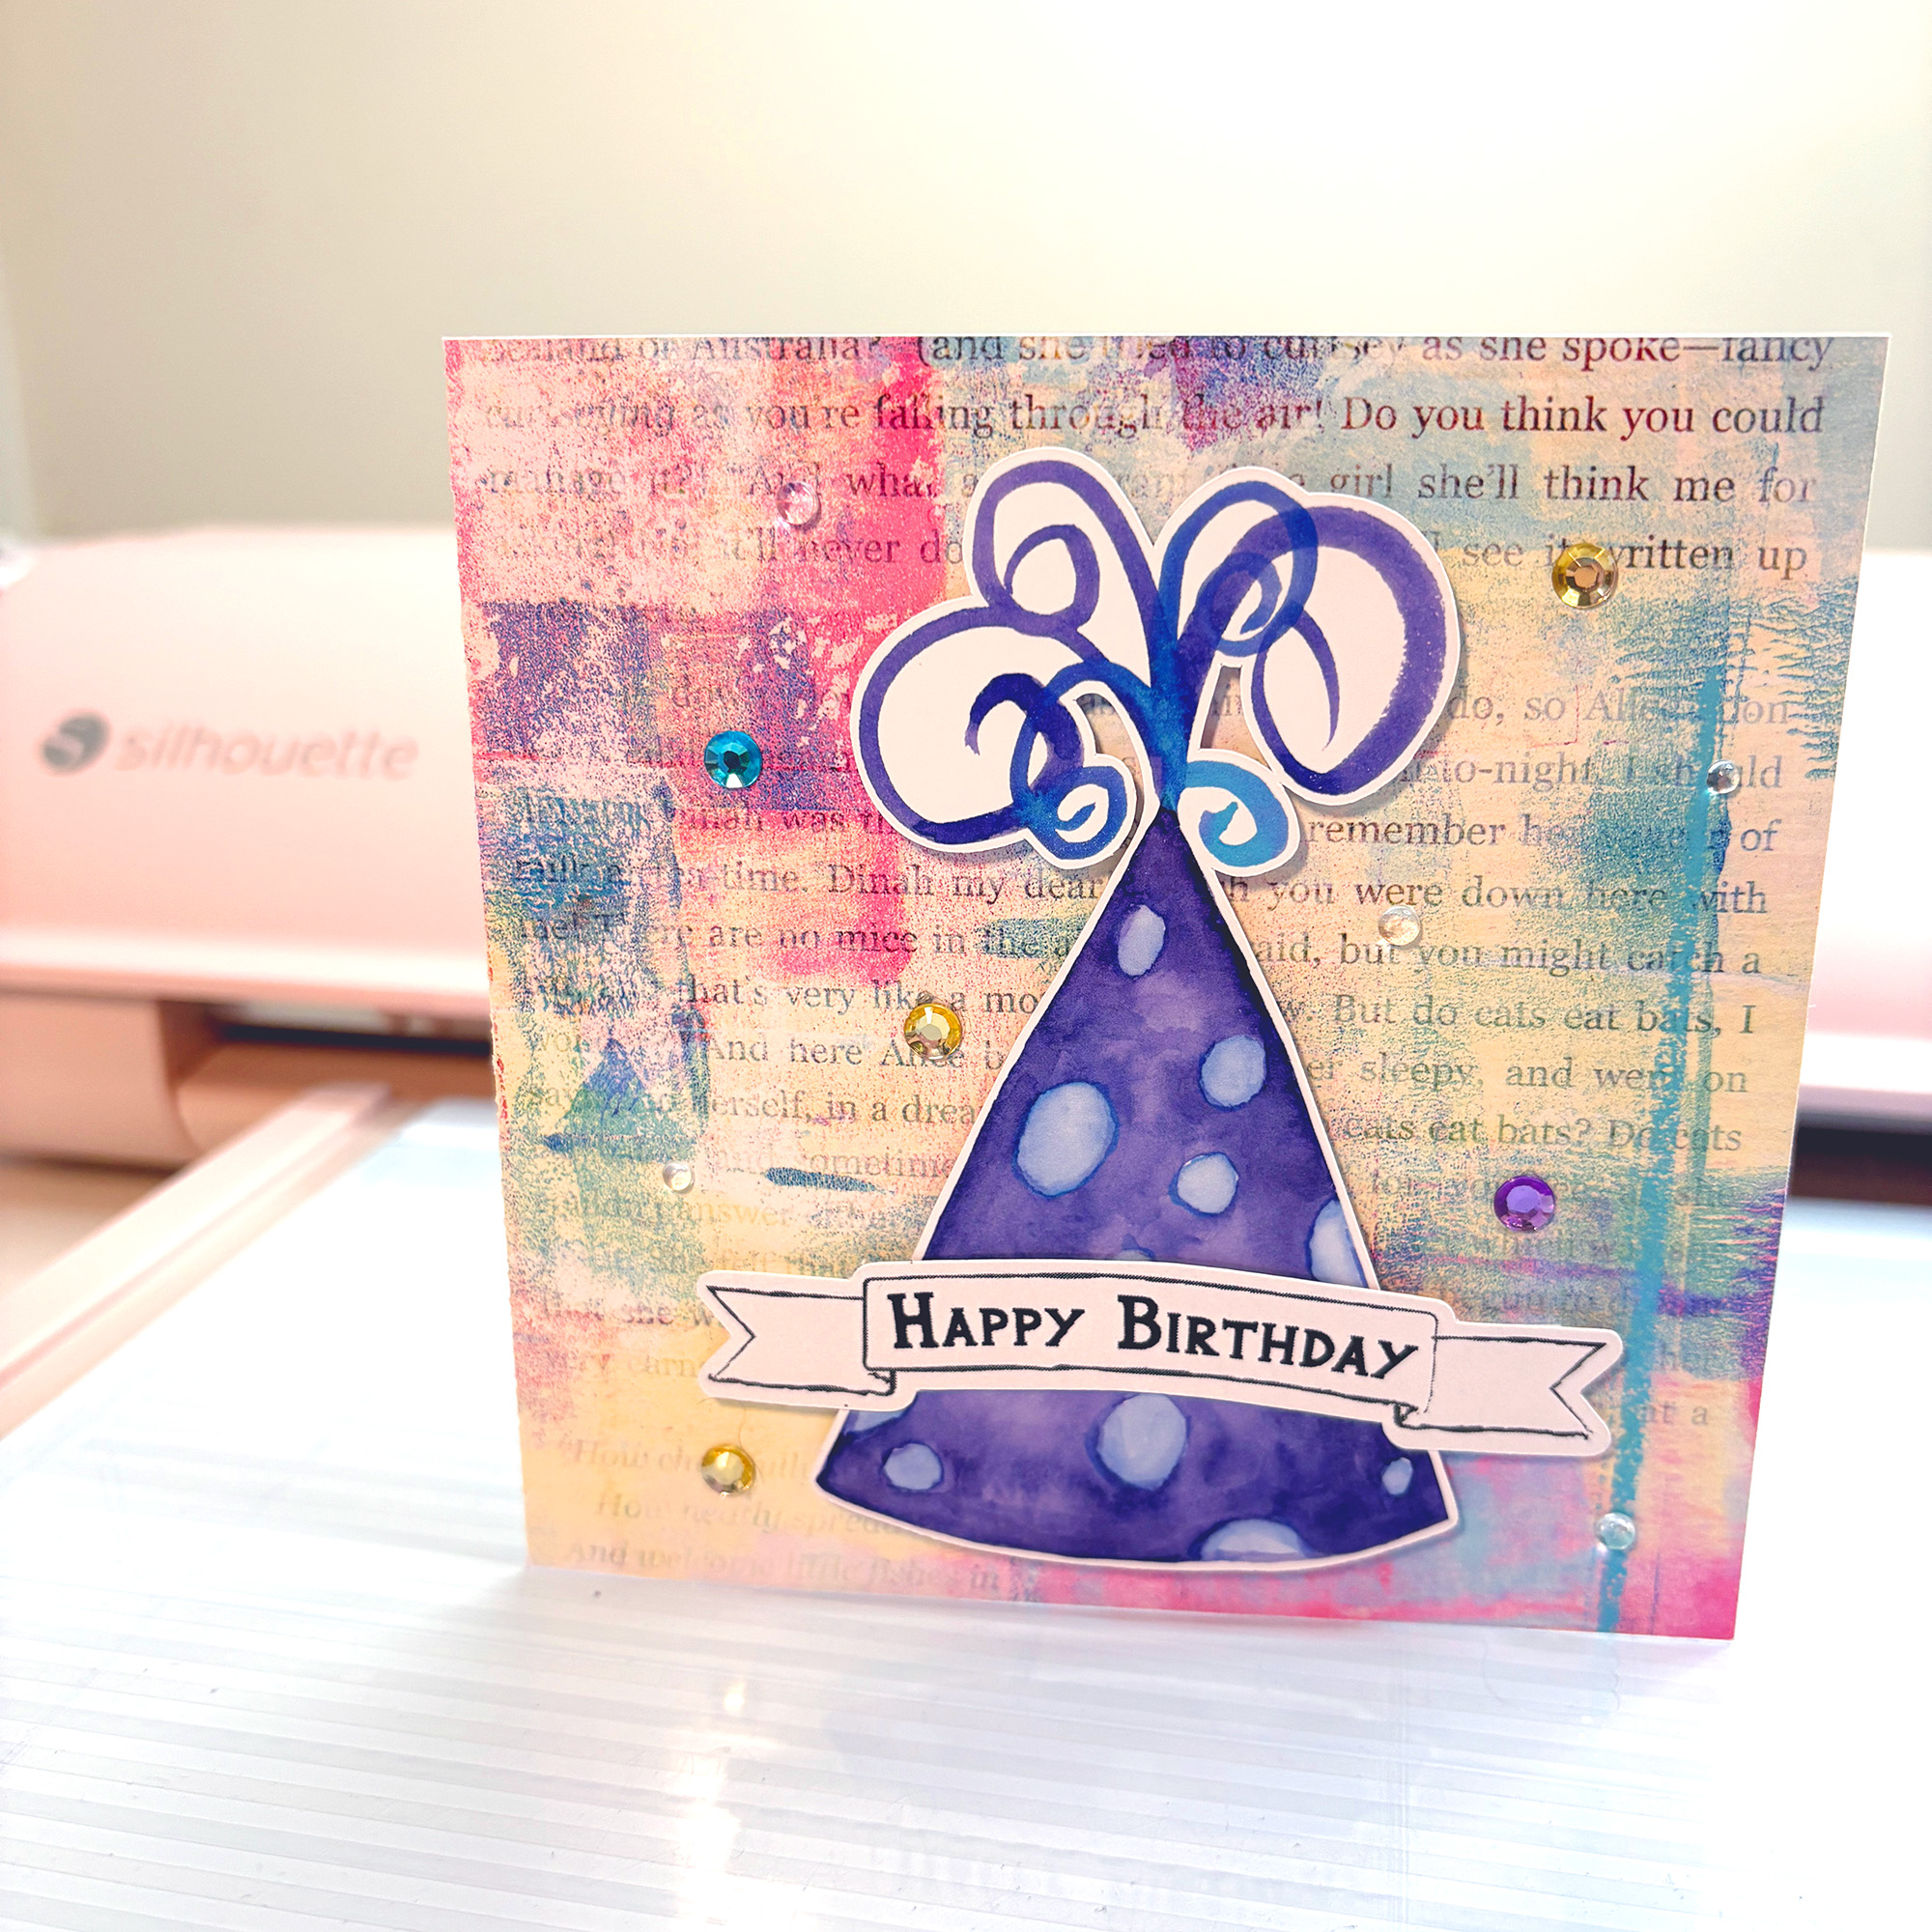
Blue Purple Polka Dot Party Hat
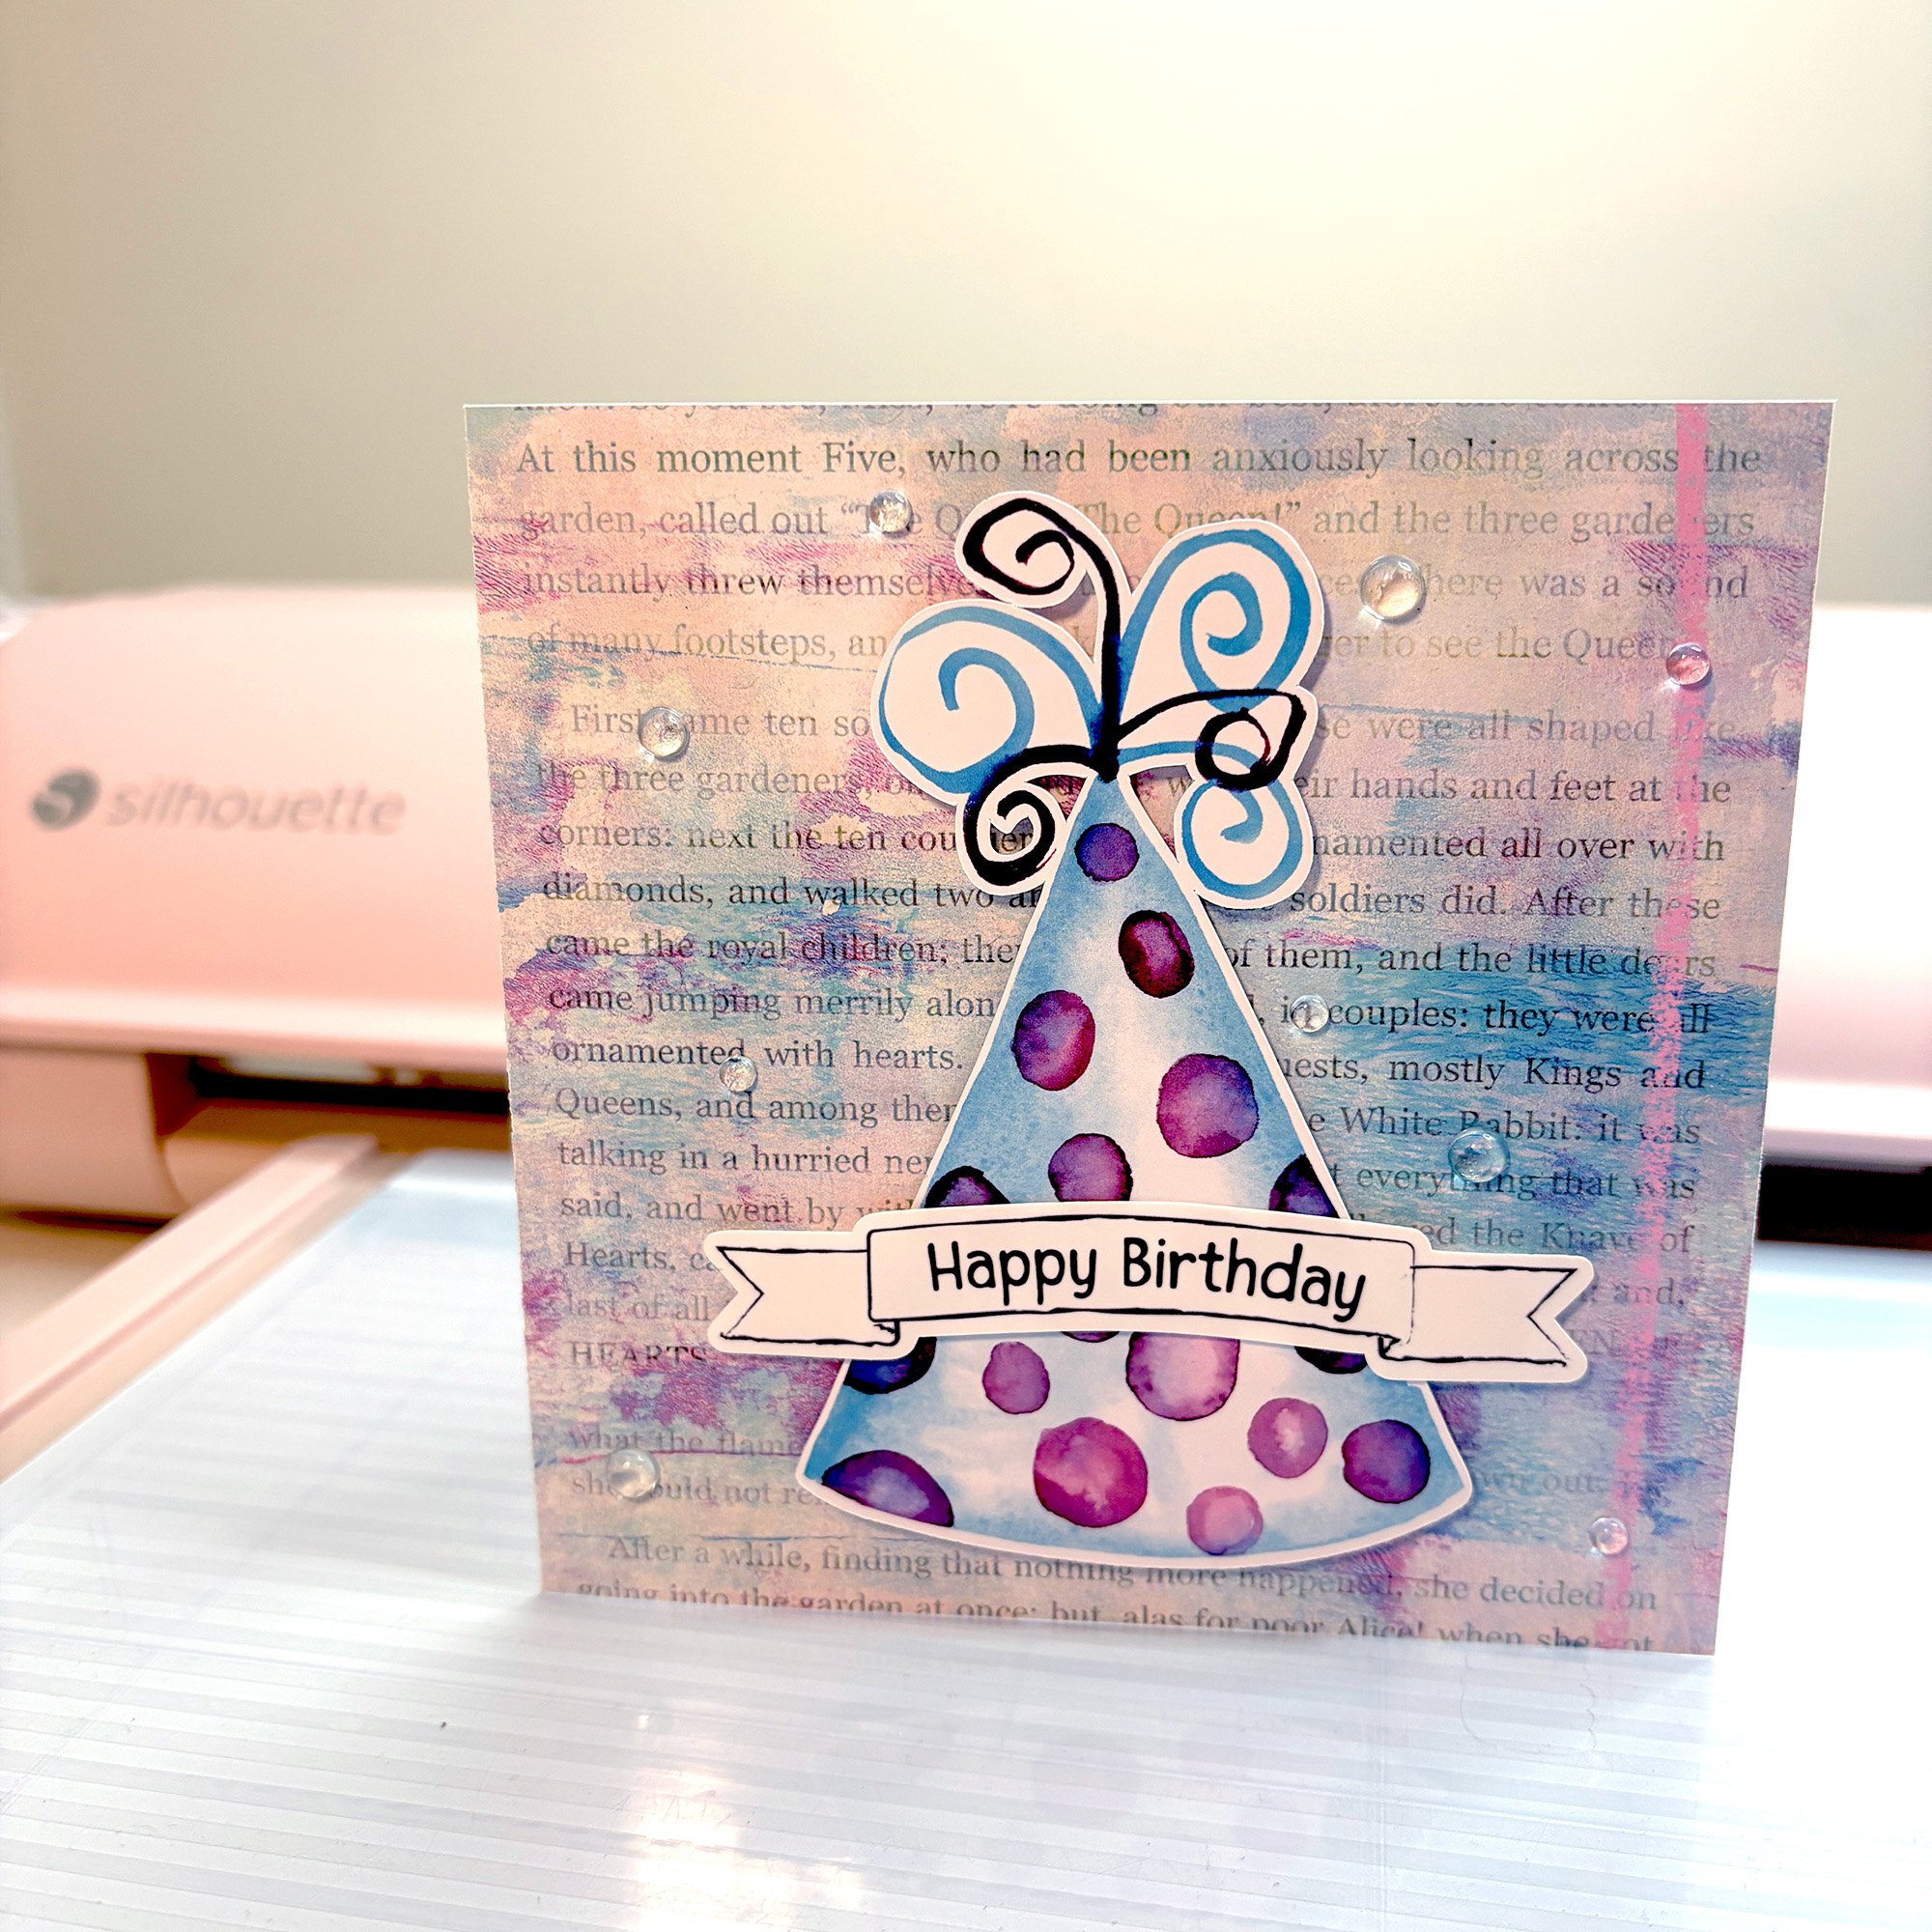
The soft blue hat with purple and pink polka dots works beautifully against a mixed-media background with layered text and painted colour. The clipping mask on the background gives the card a shaped decorative edge that frames the hat without competing with it. Clear gems add a finishing touch without overcomplicating the design.
The deep purple hat with pale blue dots takes on a completely different feel against a bright multi-coloured painted background in pinks, yellows and blues. This one uses scattered rhinestones in mixed colours for a party-ready finish. It is a good example of how much the background influences the mood of the finished card.
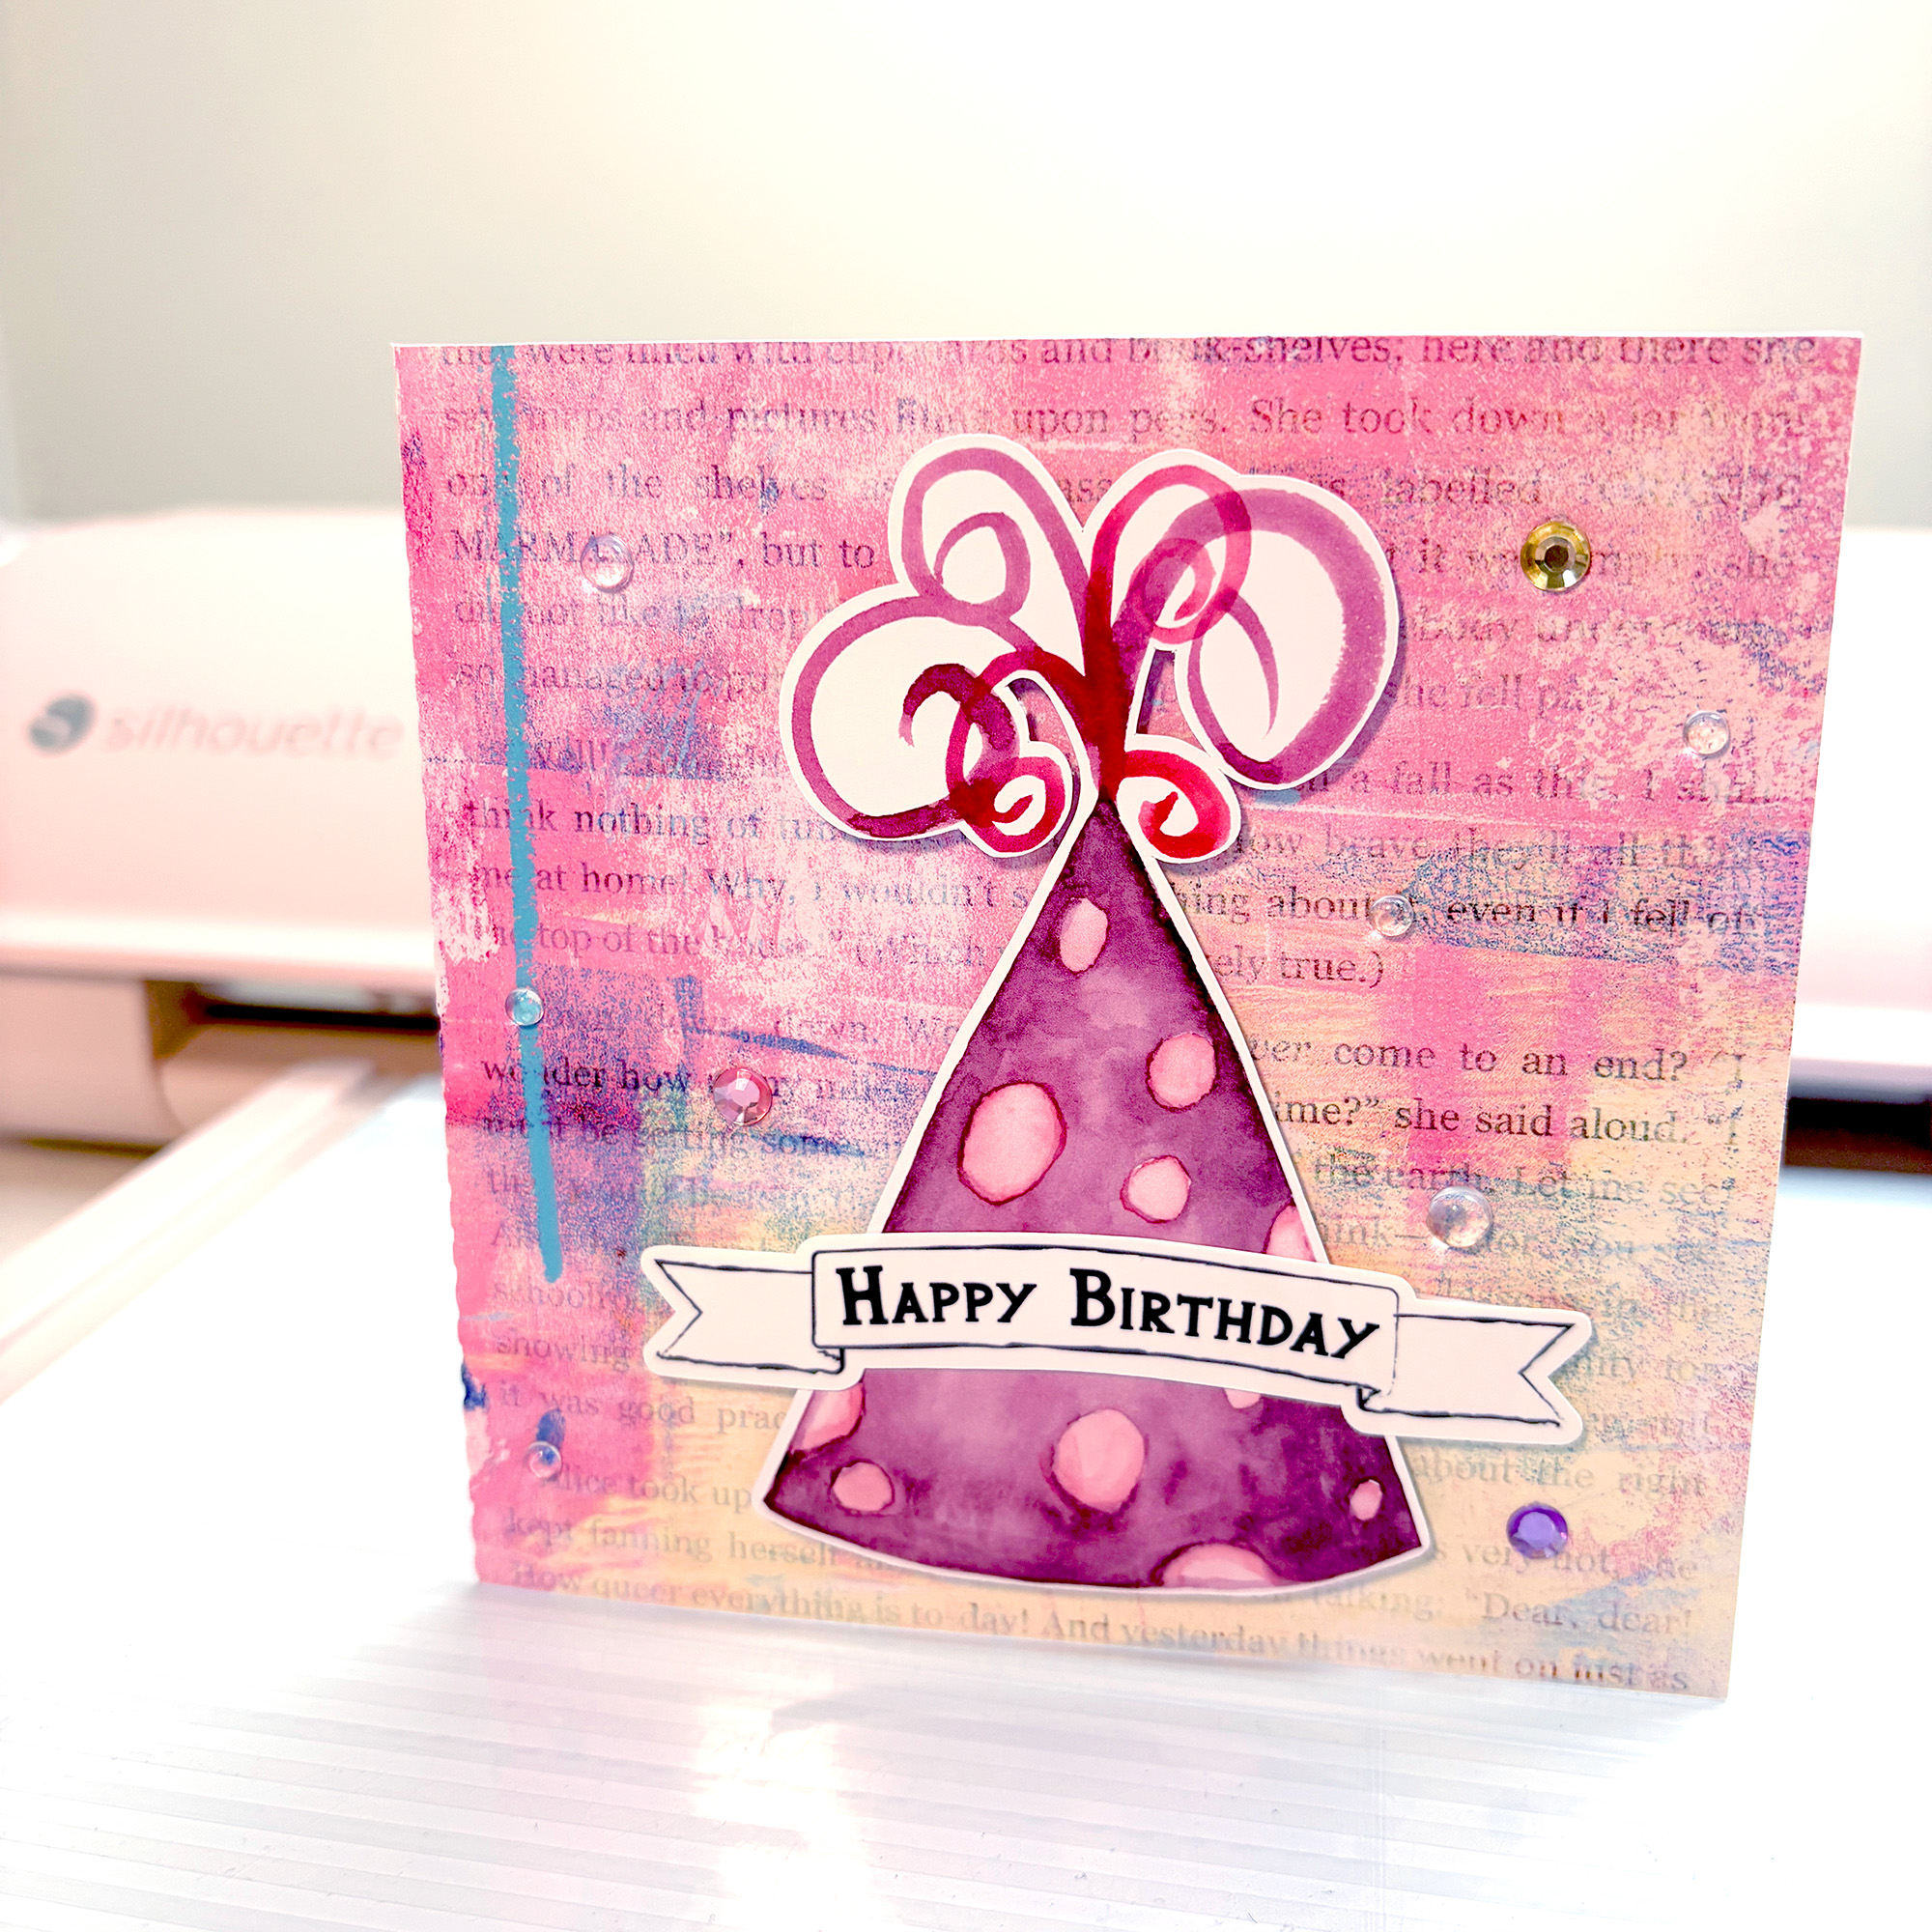
The plum and pink combination is one of my favourites in the polka dot set. Paired here with a soft pink and lilac mixed-media background with text overlay, the hat sits beautifully without the two elements fighting for attention. The loosely painted magenta streamers at the top tie the hat colour back into the background perfectly.
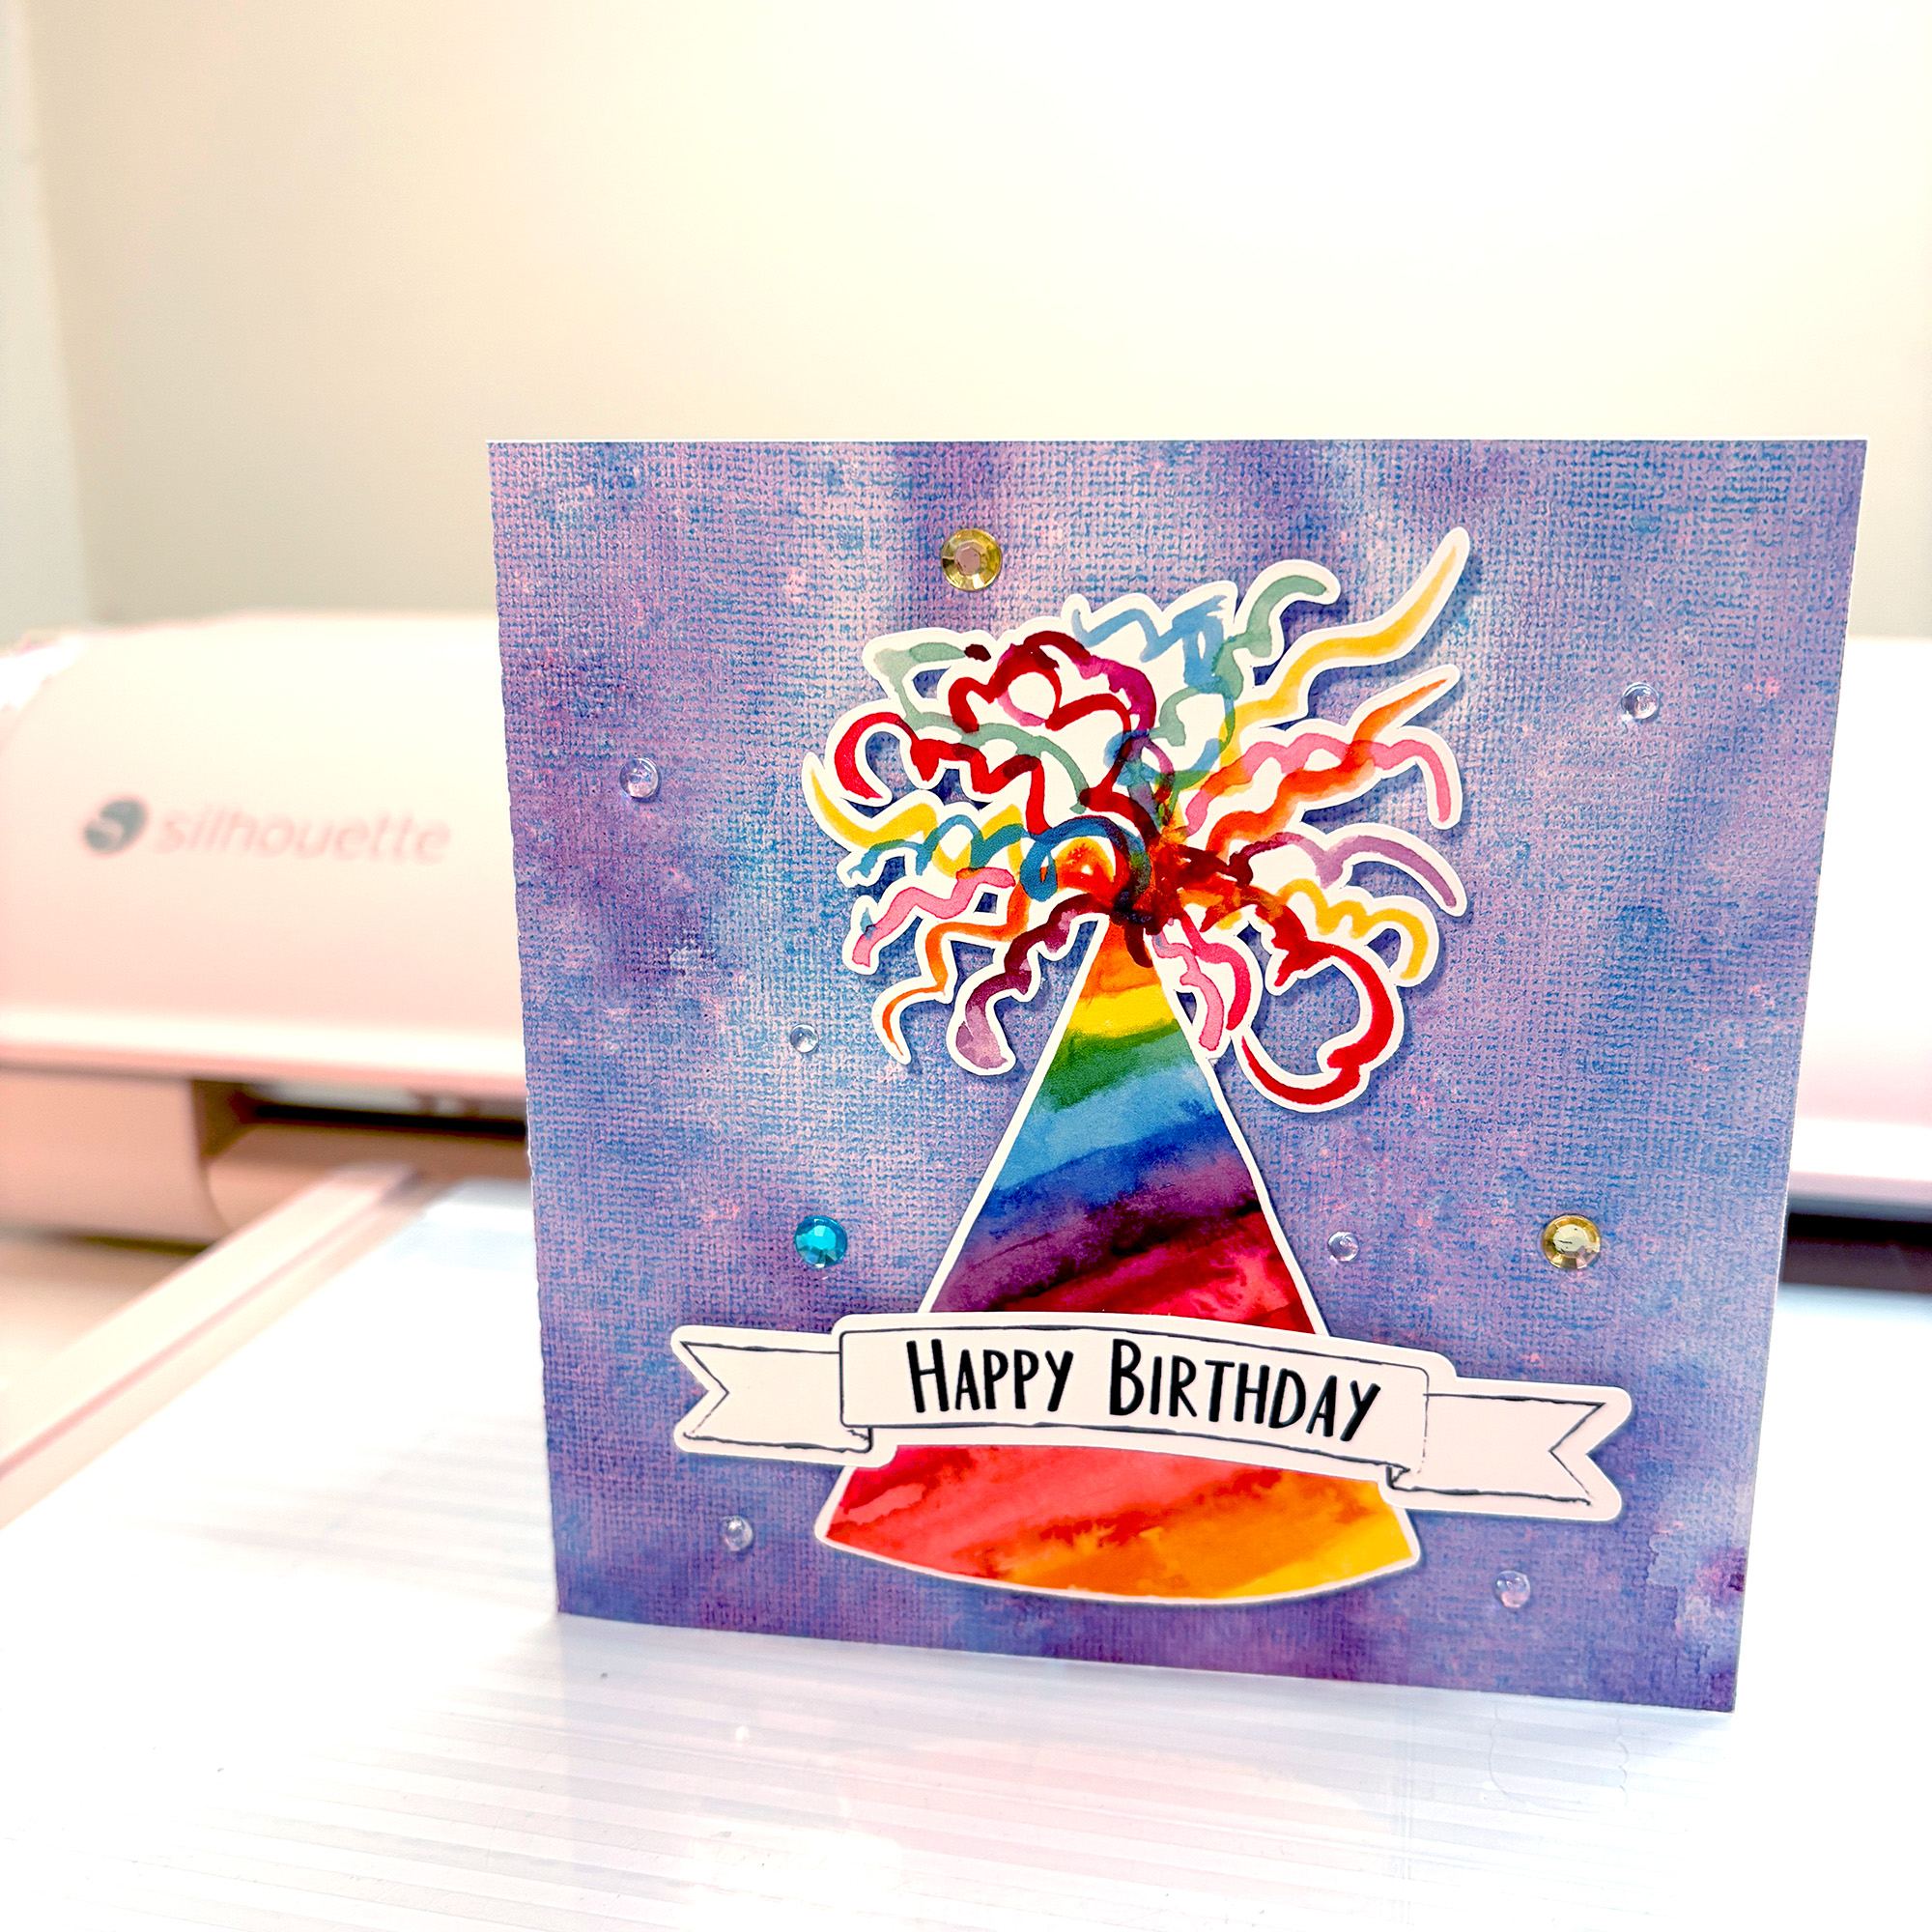
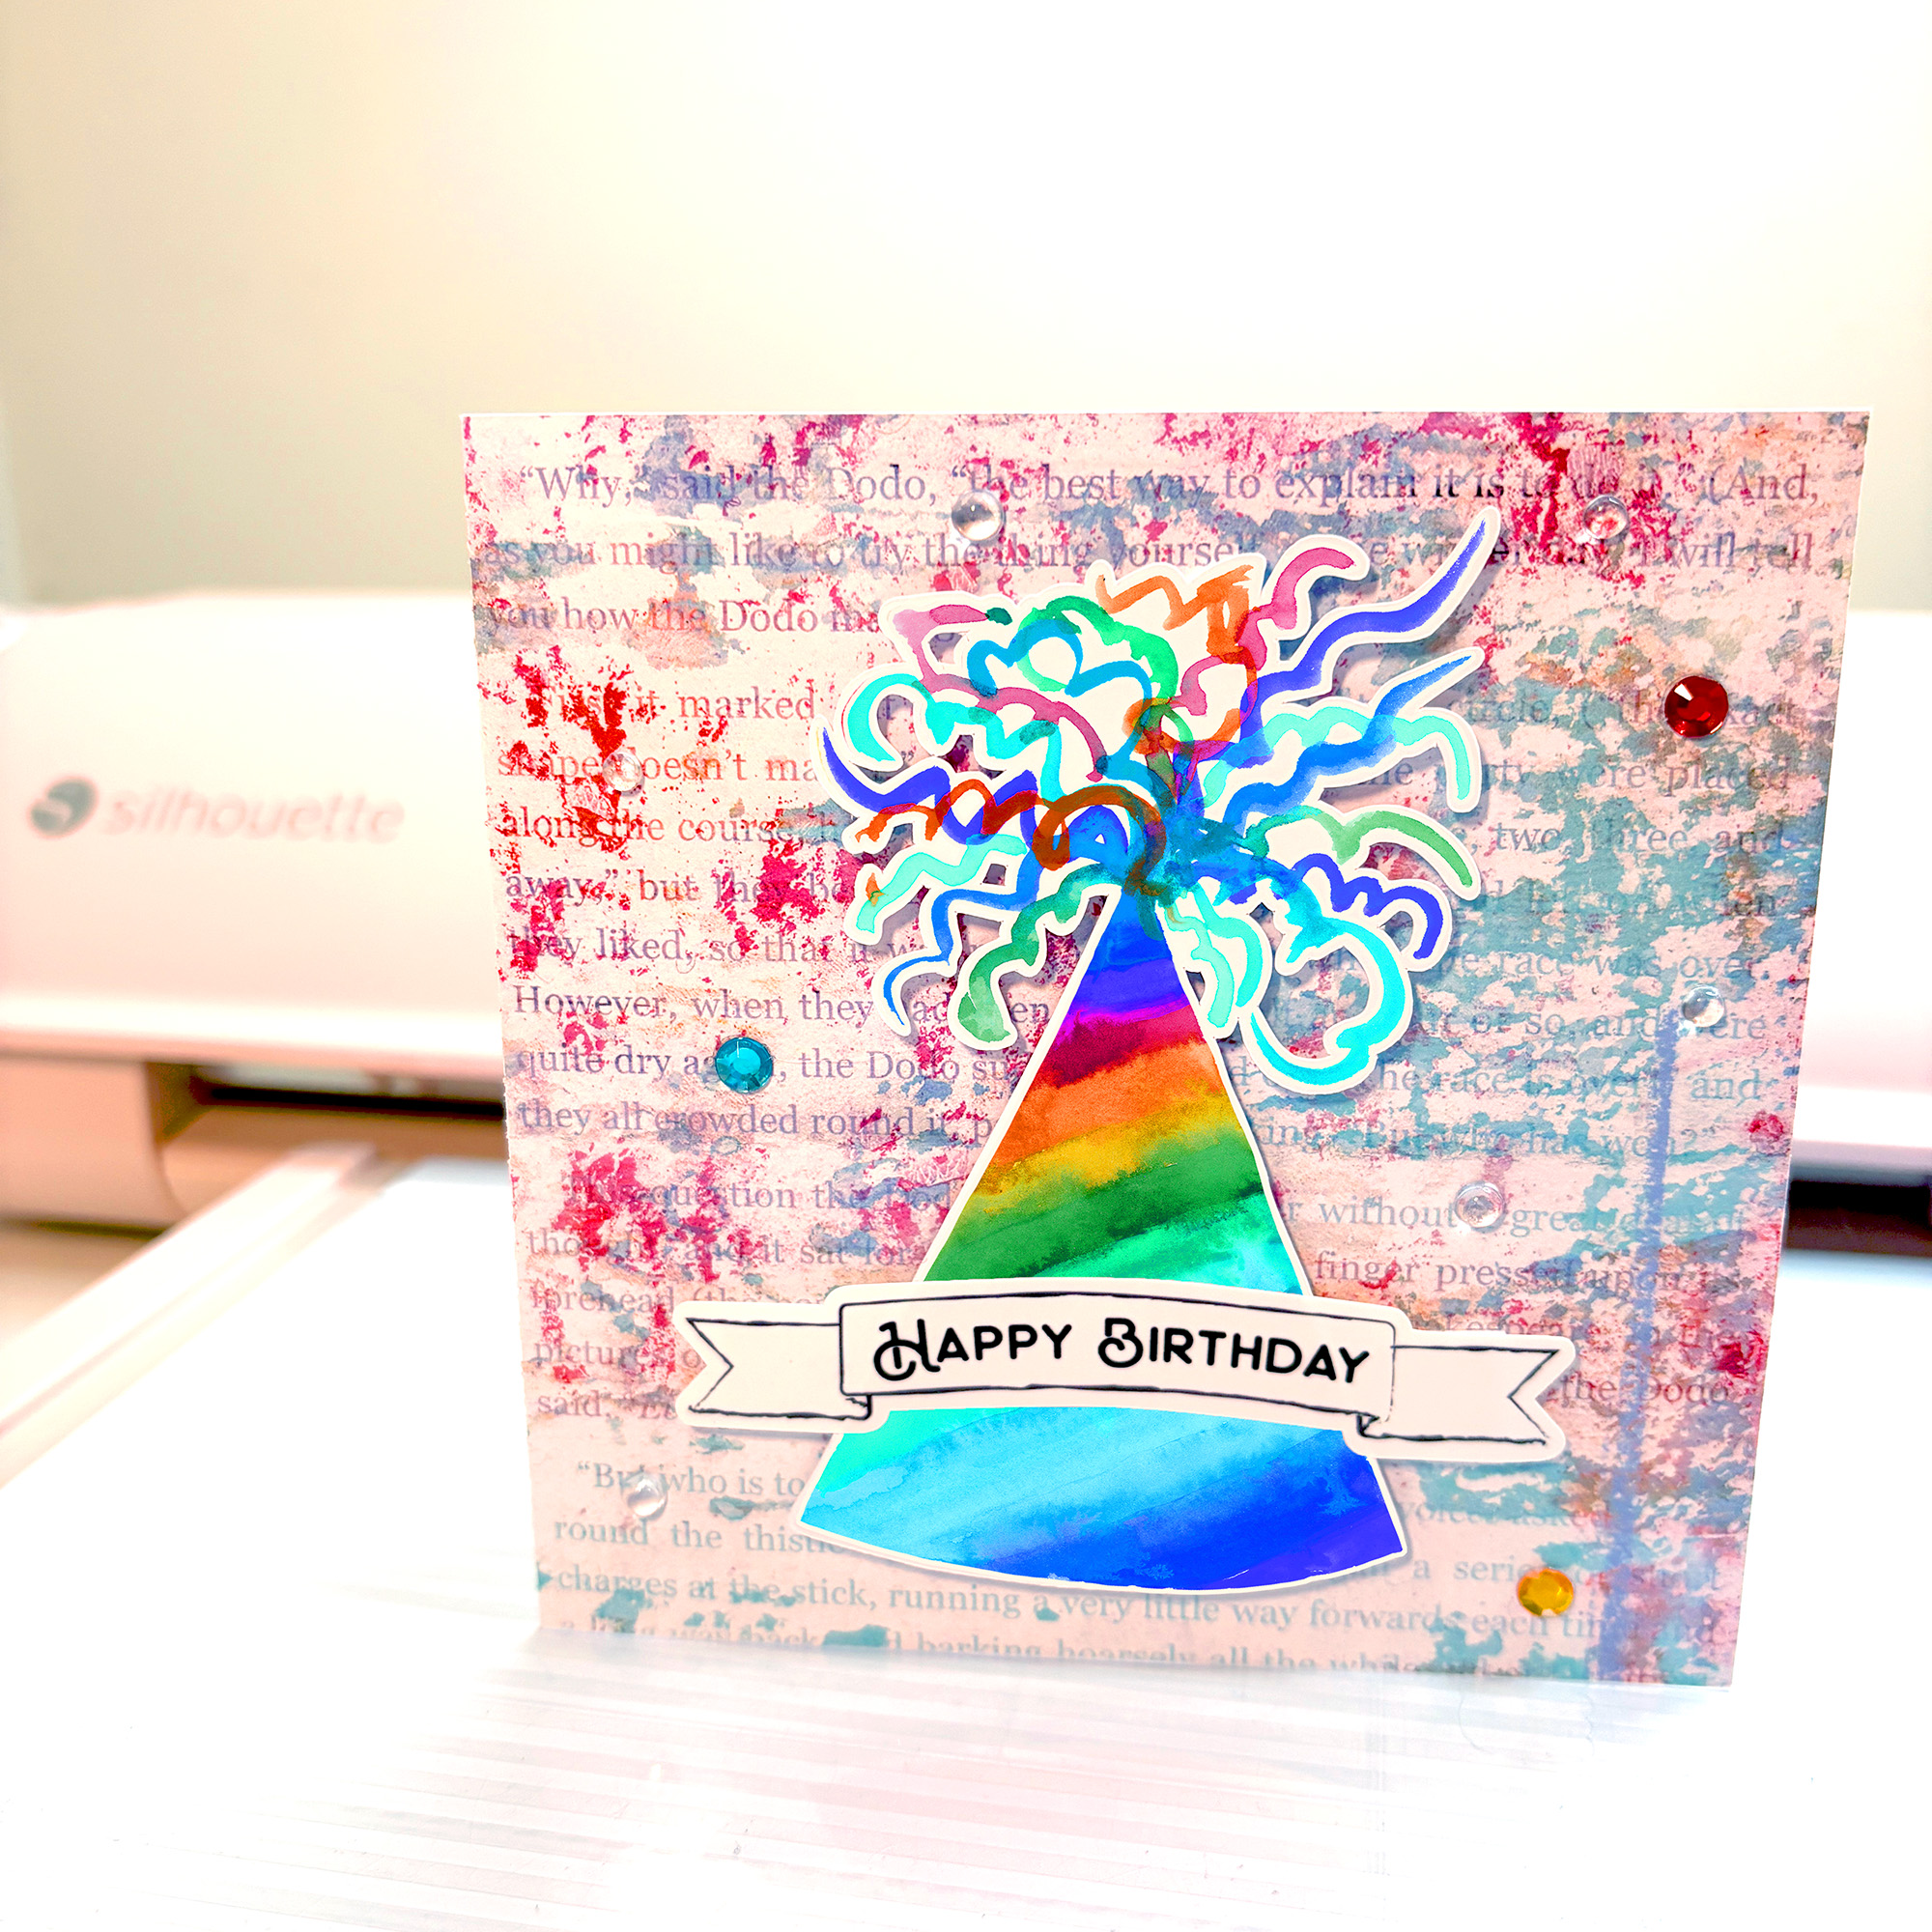
The rainbow blues hat is full of vibrant colour and different just how differently it reads depending on your background choice. The first uses a cool blue and purple watercolor wash that lets the hat’s own colour range carry the card. The second pairs it with a soft blue speckled texture that gives the multicolour streamers room to really pop.
This design also works well for pride celebration projects. The rainbow bands suit a range of colour palettes beyond the traditional birthday context.
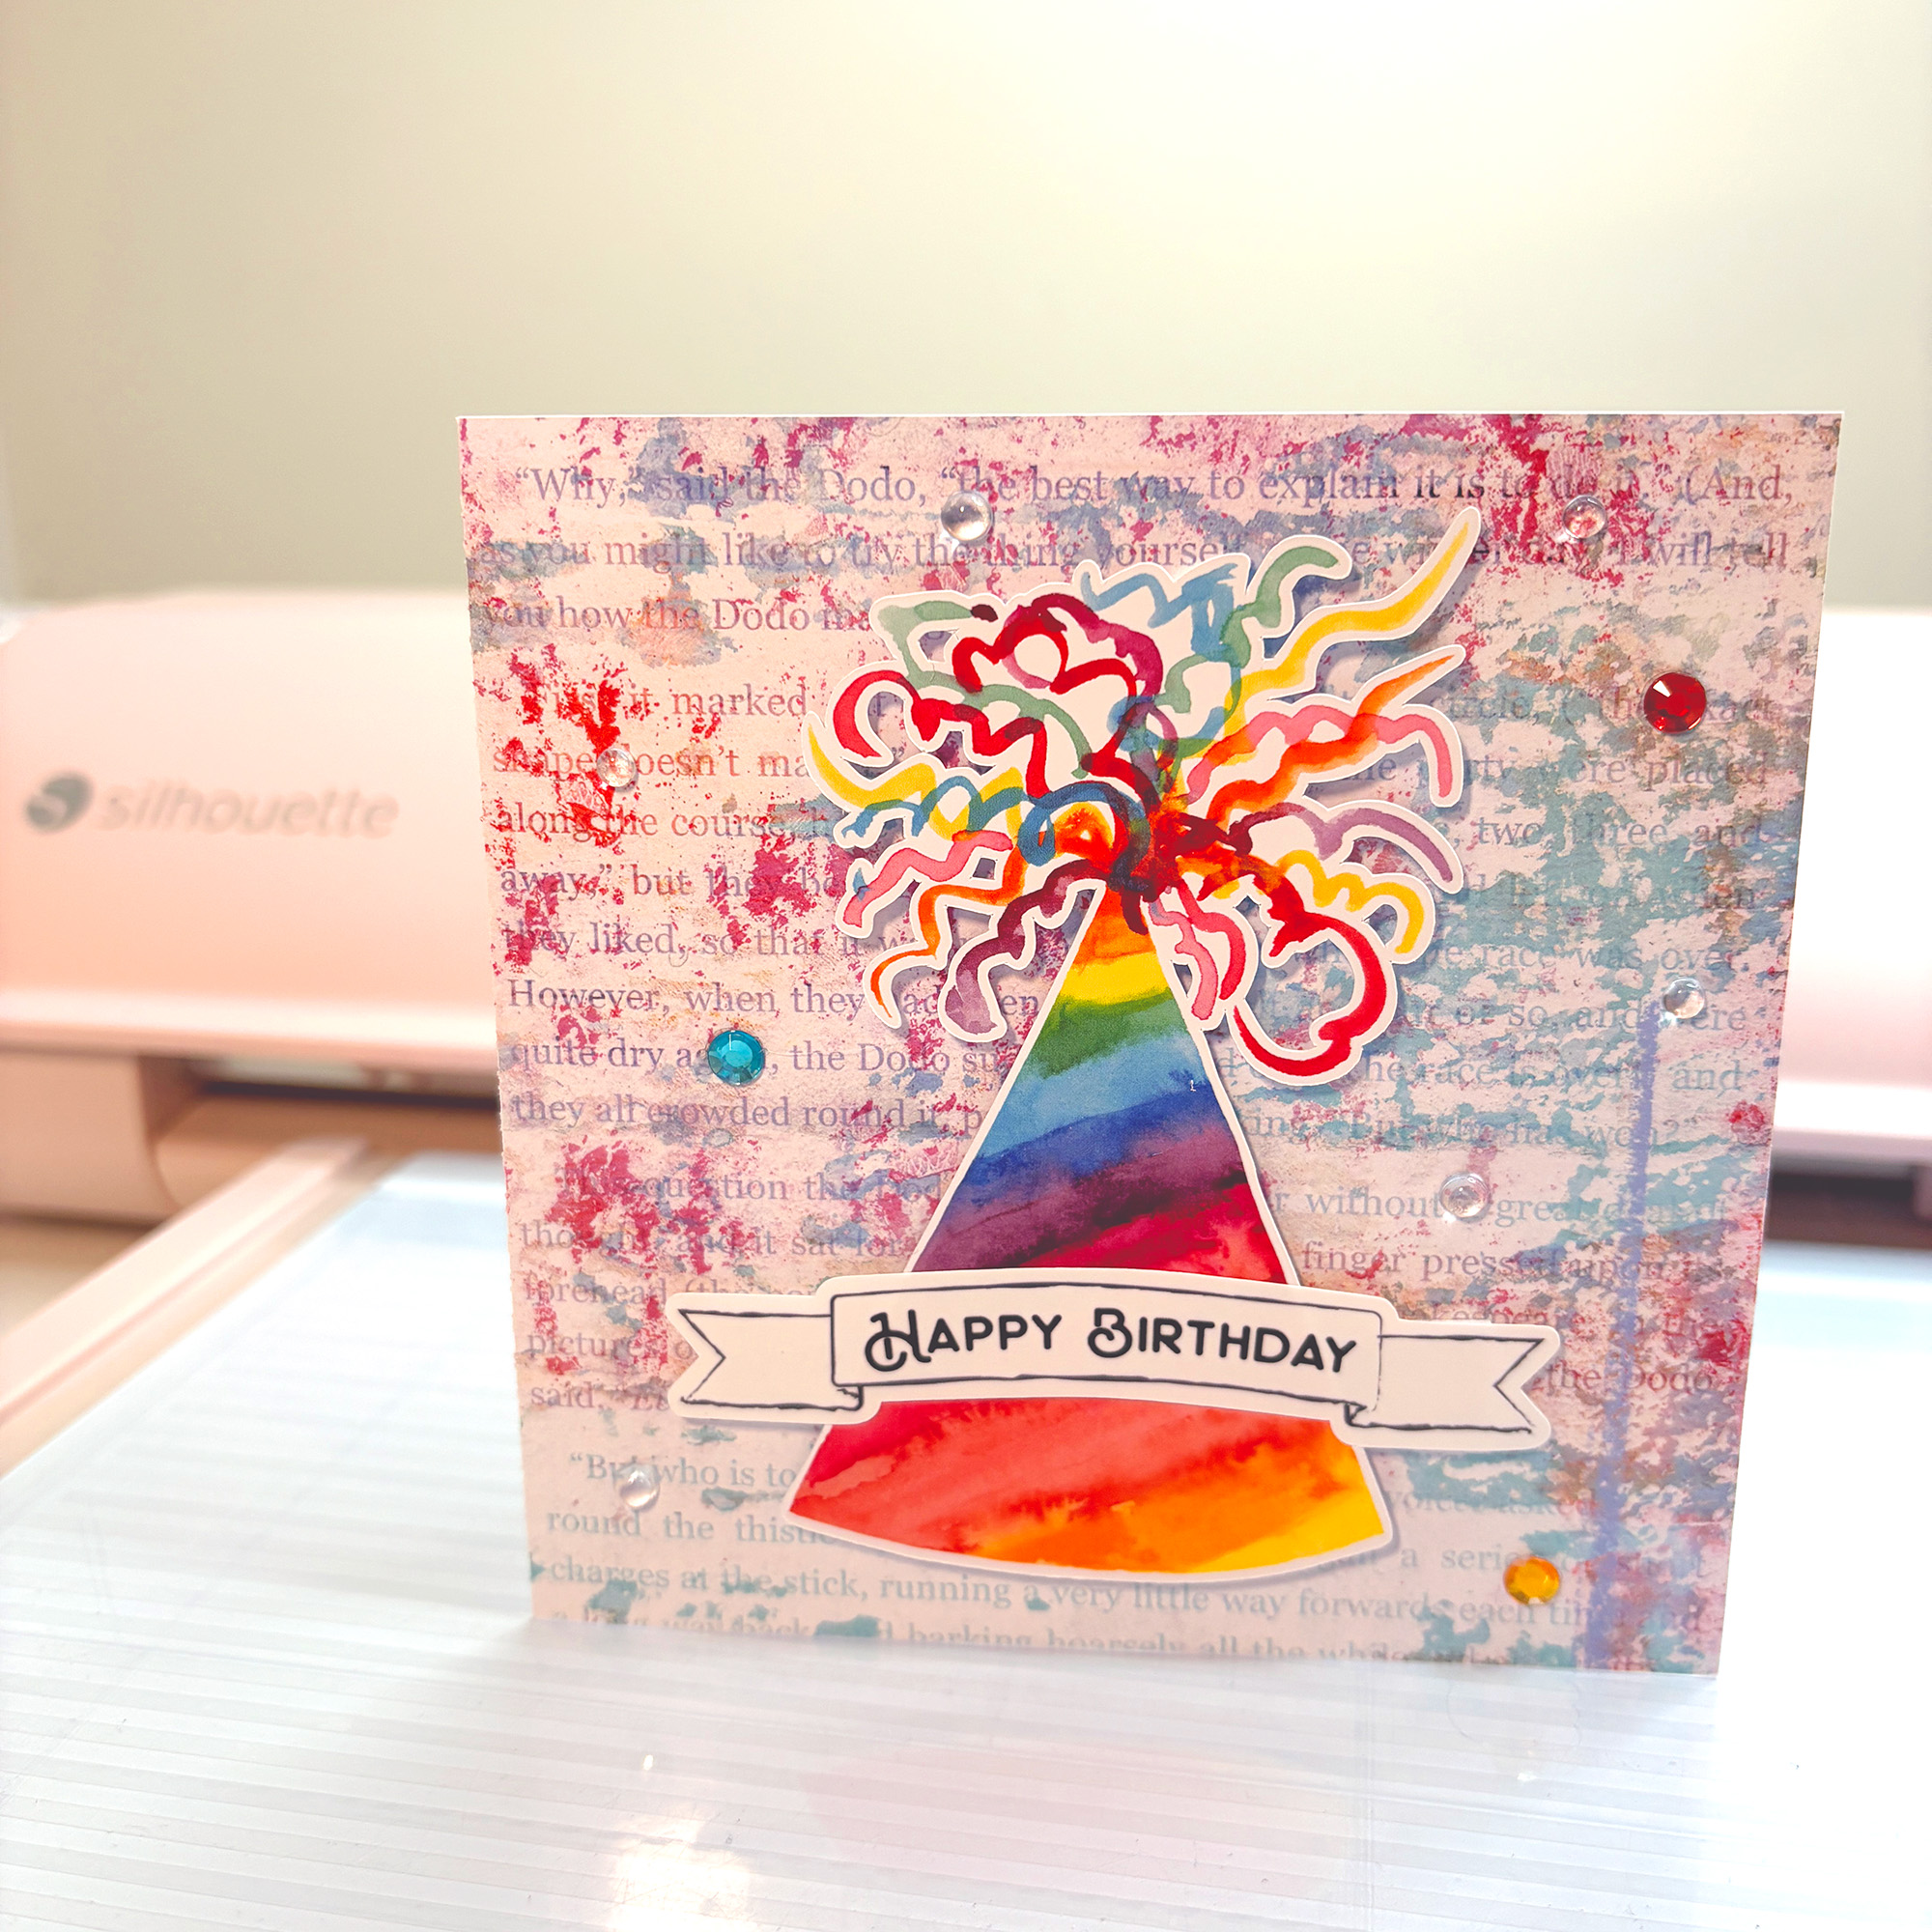
The cool-toned rainbow hat flows from cobalt blue and turquoise at the base up through green, yellow, orange and purple, finished with a wild burst of multicolour streamers. Shown here on an Alice in Wonderland text background in a soft pink and mixed-media palette. The warm tones in the hat pick up the pinks and reds in the background without being an exact match, which keeps the card from feeling flat. Red rhinestones scattered across the card tie the whole design together.
Hot pink with olive green polka dots is an unexpected pairing that works really well in print. The pink and green streamers keep the colour story consistent from top to bottom. A bright floral or botanical printed background would suit this one well. No card sample yet, but it is ready to shop now.
Orange Blue Polka Dot Party Hat
The warm orange-red hat with soft blue polka dots and red and navy streamers is a bold, high-contrast combination that would suit a vivid painted background or a darker textured paper. No card sample for this one yet, but it is available now in the store.
The Happy Birthday banners seen on every card in this post come from one set with several banner styles to choose from. It is designed to coordinate with print and cut focal elements and is available separately in the store.
All the printable backgrounds used on the sample cards in this post are my own designs and are available in the Silhouette Design Store. Each one is a printable design sized to fill a standard square card base as a print and cut design. I like to have the background design cover both the front and back of the card but the options are endless in how you can style the background for your cards.
Browse the Full Collection
All seven party hat designs are now live in the Silhouette Design Store.
Four new hand-painted watercolor birthday candle print and cut SVG sets are now available in the Silhouette Design Store. If you have been looking for colourful, ready-to-print candle designs that work equally well on birthday cards and as cake toppers, these sets are worth a look.
About the Designs
All four sets are hand-painted watercolor designs, print and cut ready for use in Silhouette Studio®. They are designed at a large size to maximise your usage options. Use them at full size for a bold statement on a cake topper, or scale them down in Silhouette Studio® to suit smaller card formats, tags, or smaller cake toppers. Each design includes a white offset cut line for a clean, professional finish straight off the mat.
The backgrounds you see on the sample cards are my own printable background designs, also available in the Silhouette Design Store. Some of the cards use a clipping mask on the background to give a decorative shaped outline to the printed paper. The Happy Birthday banners are a separate design (SKU D-375342) and pair with all four candle sets.
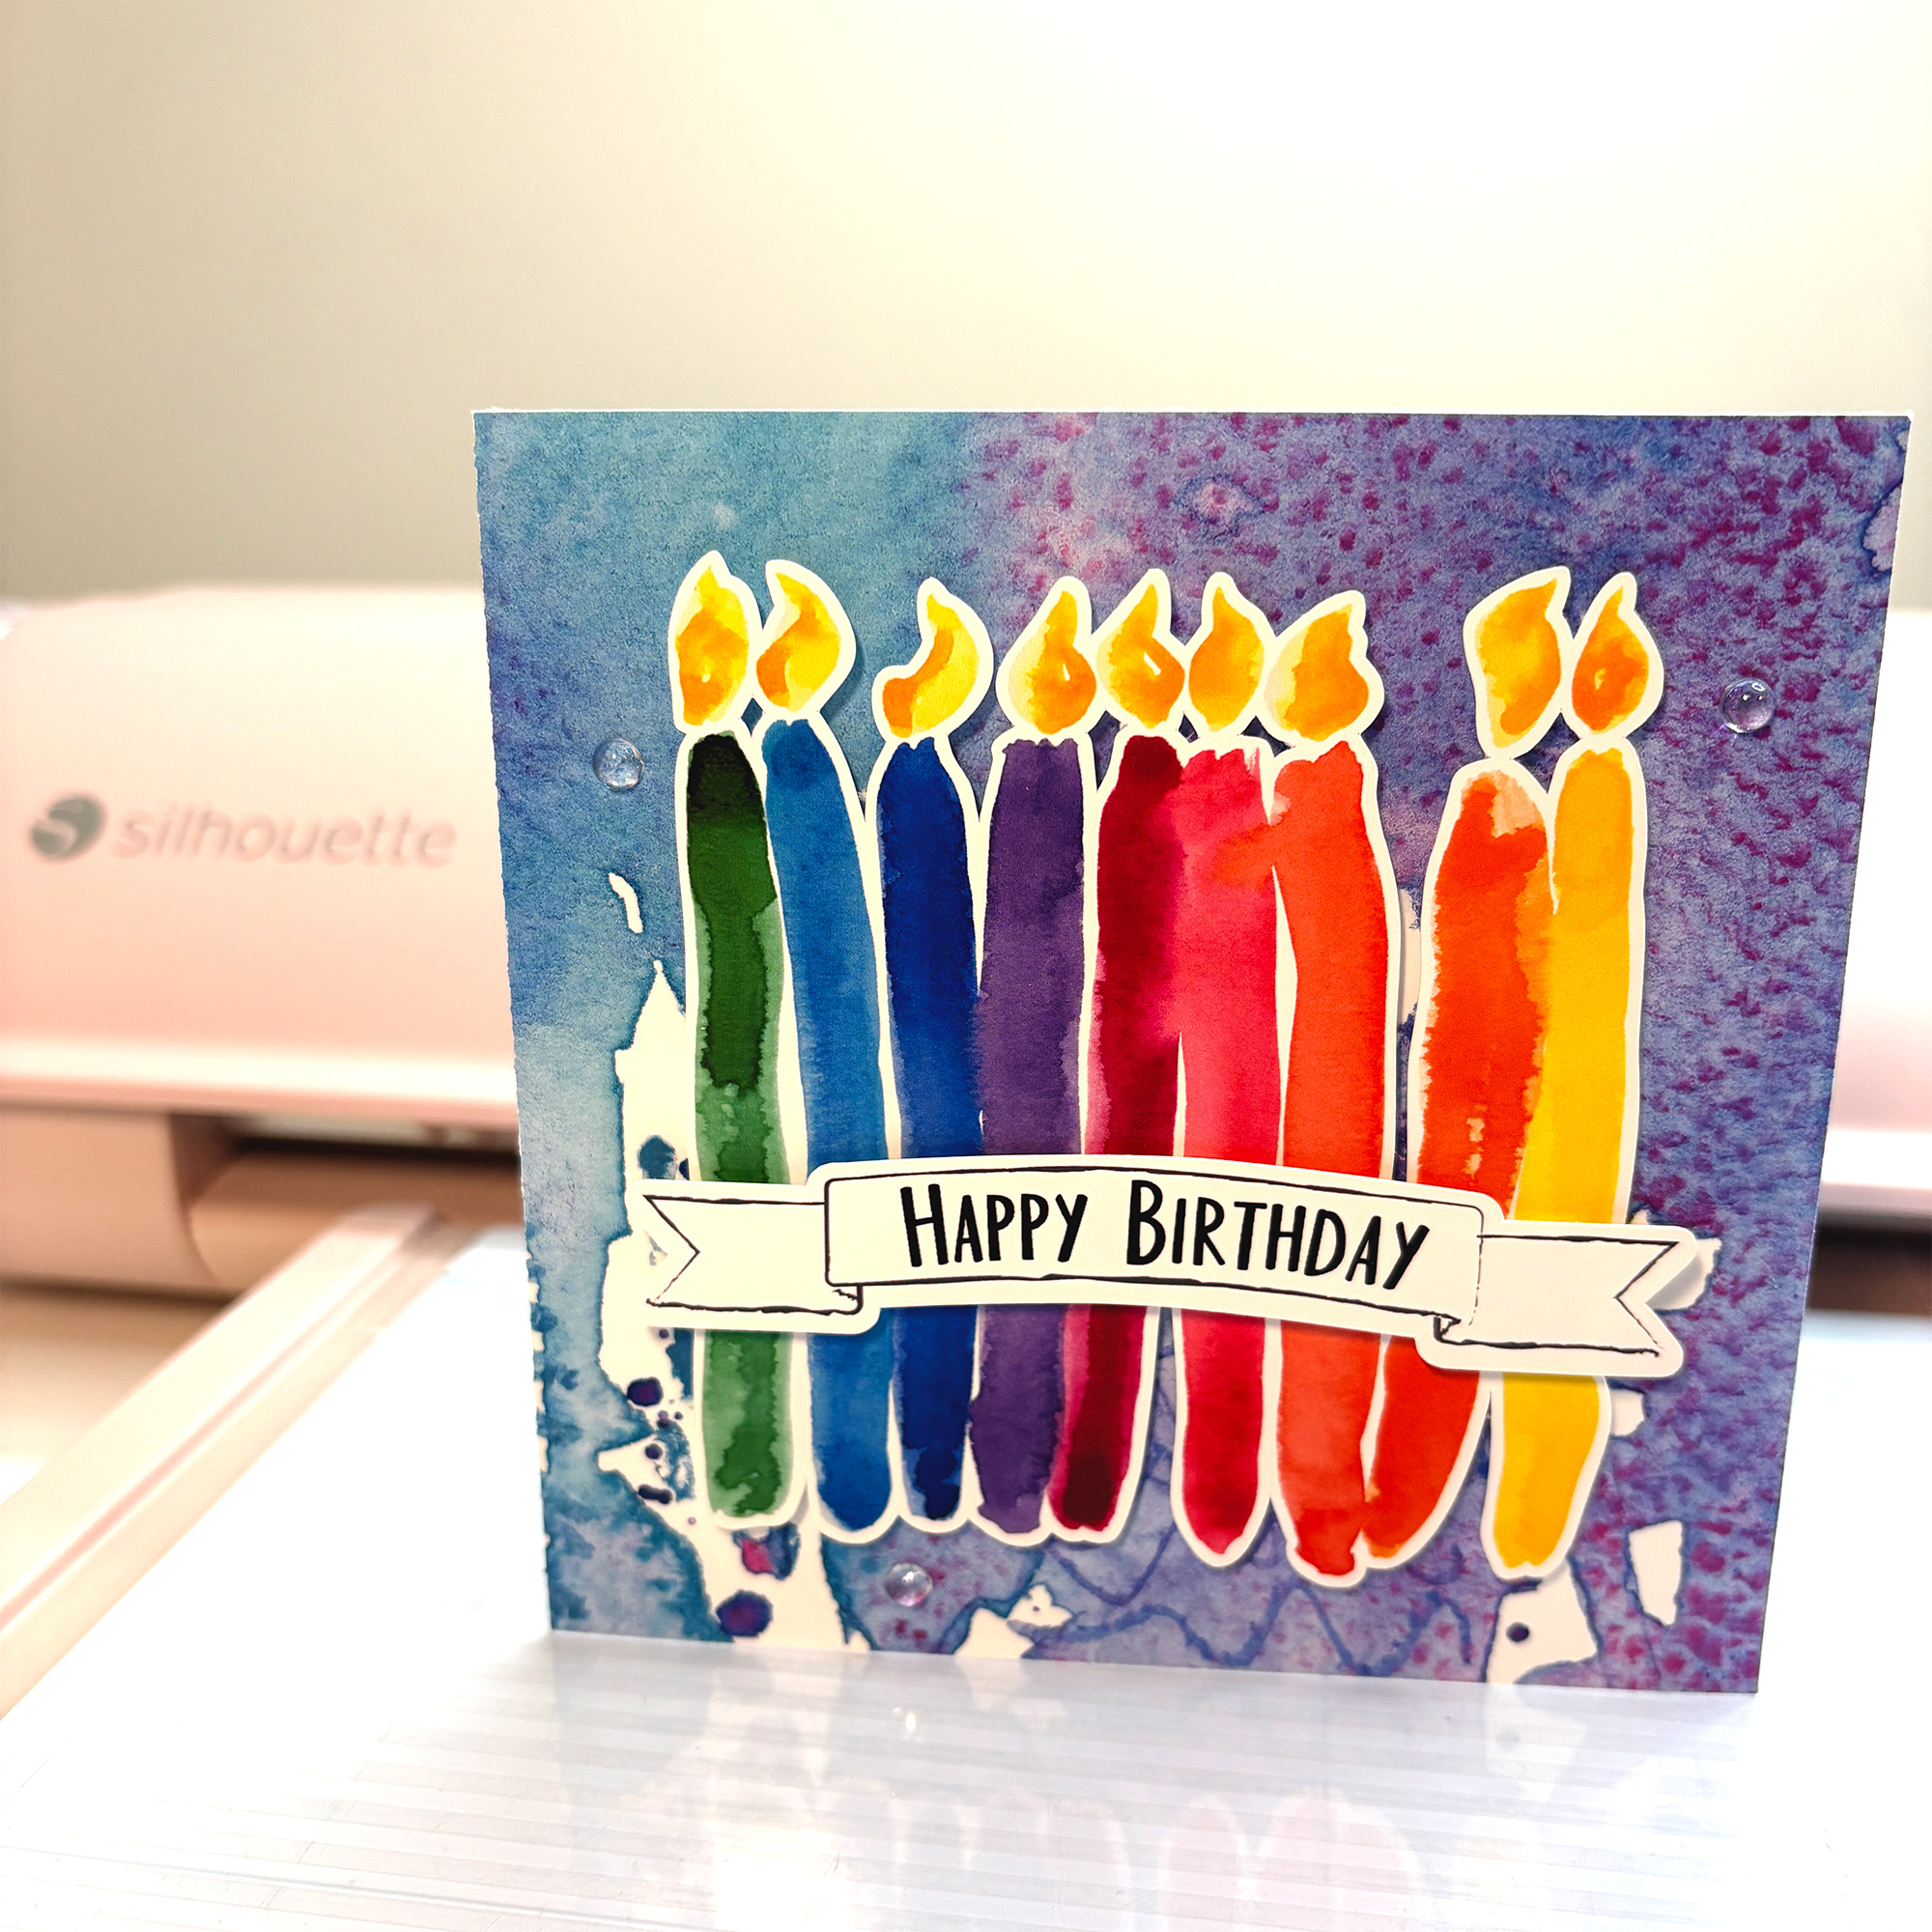
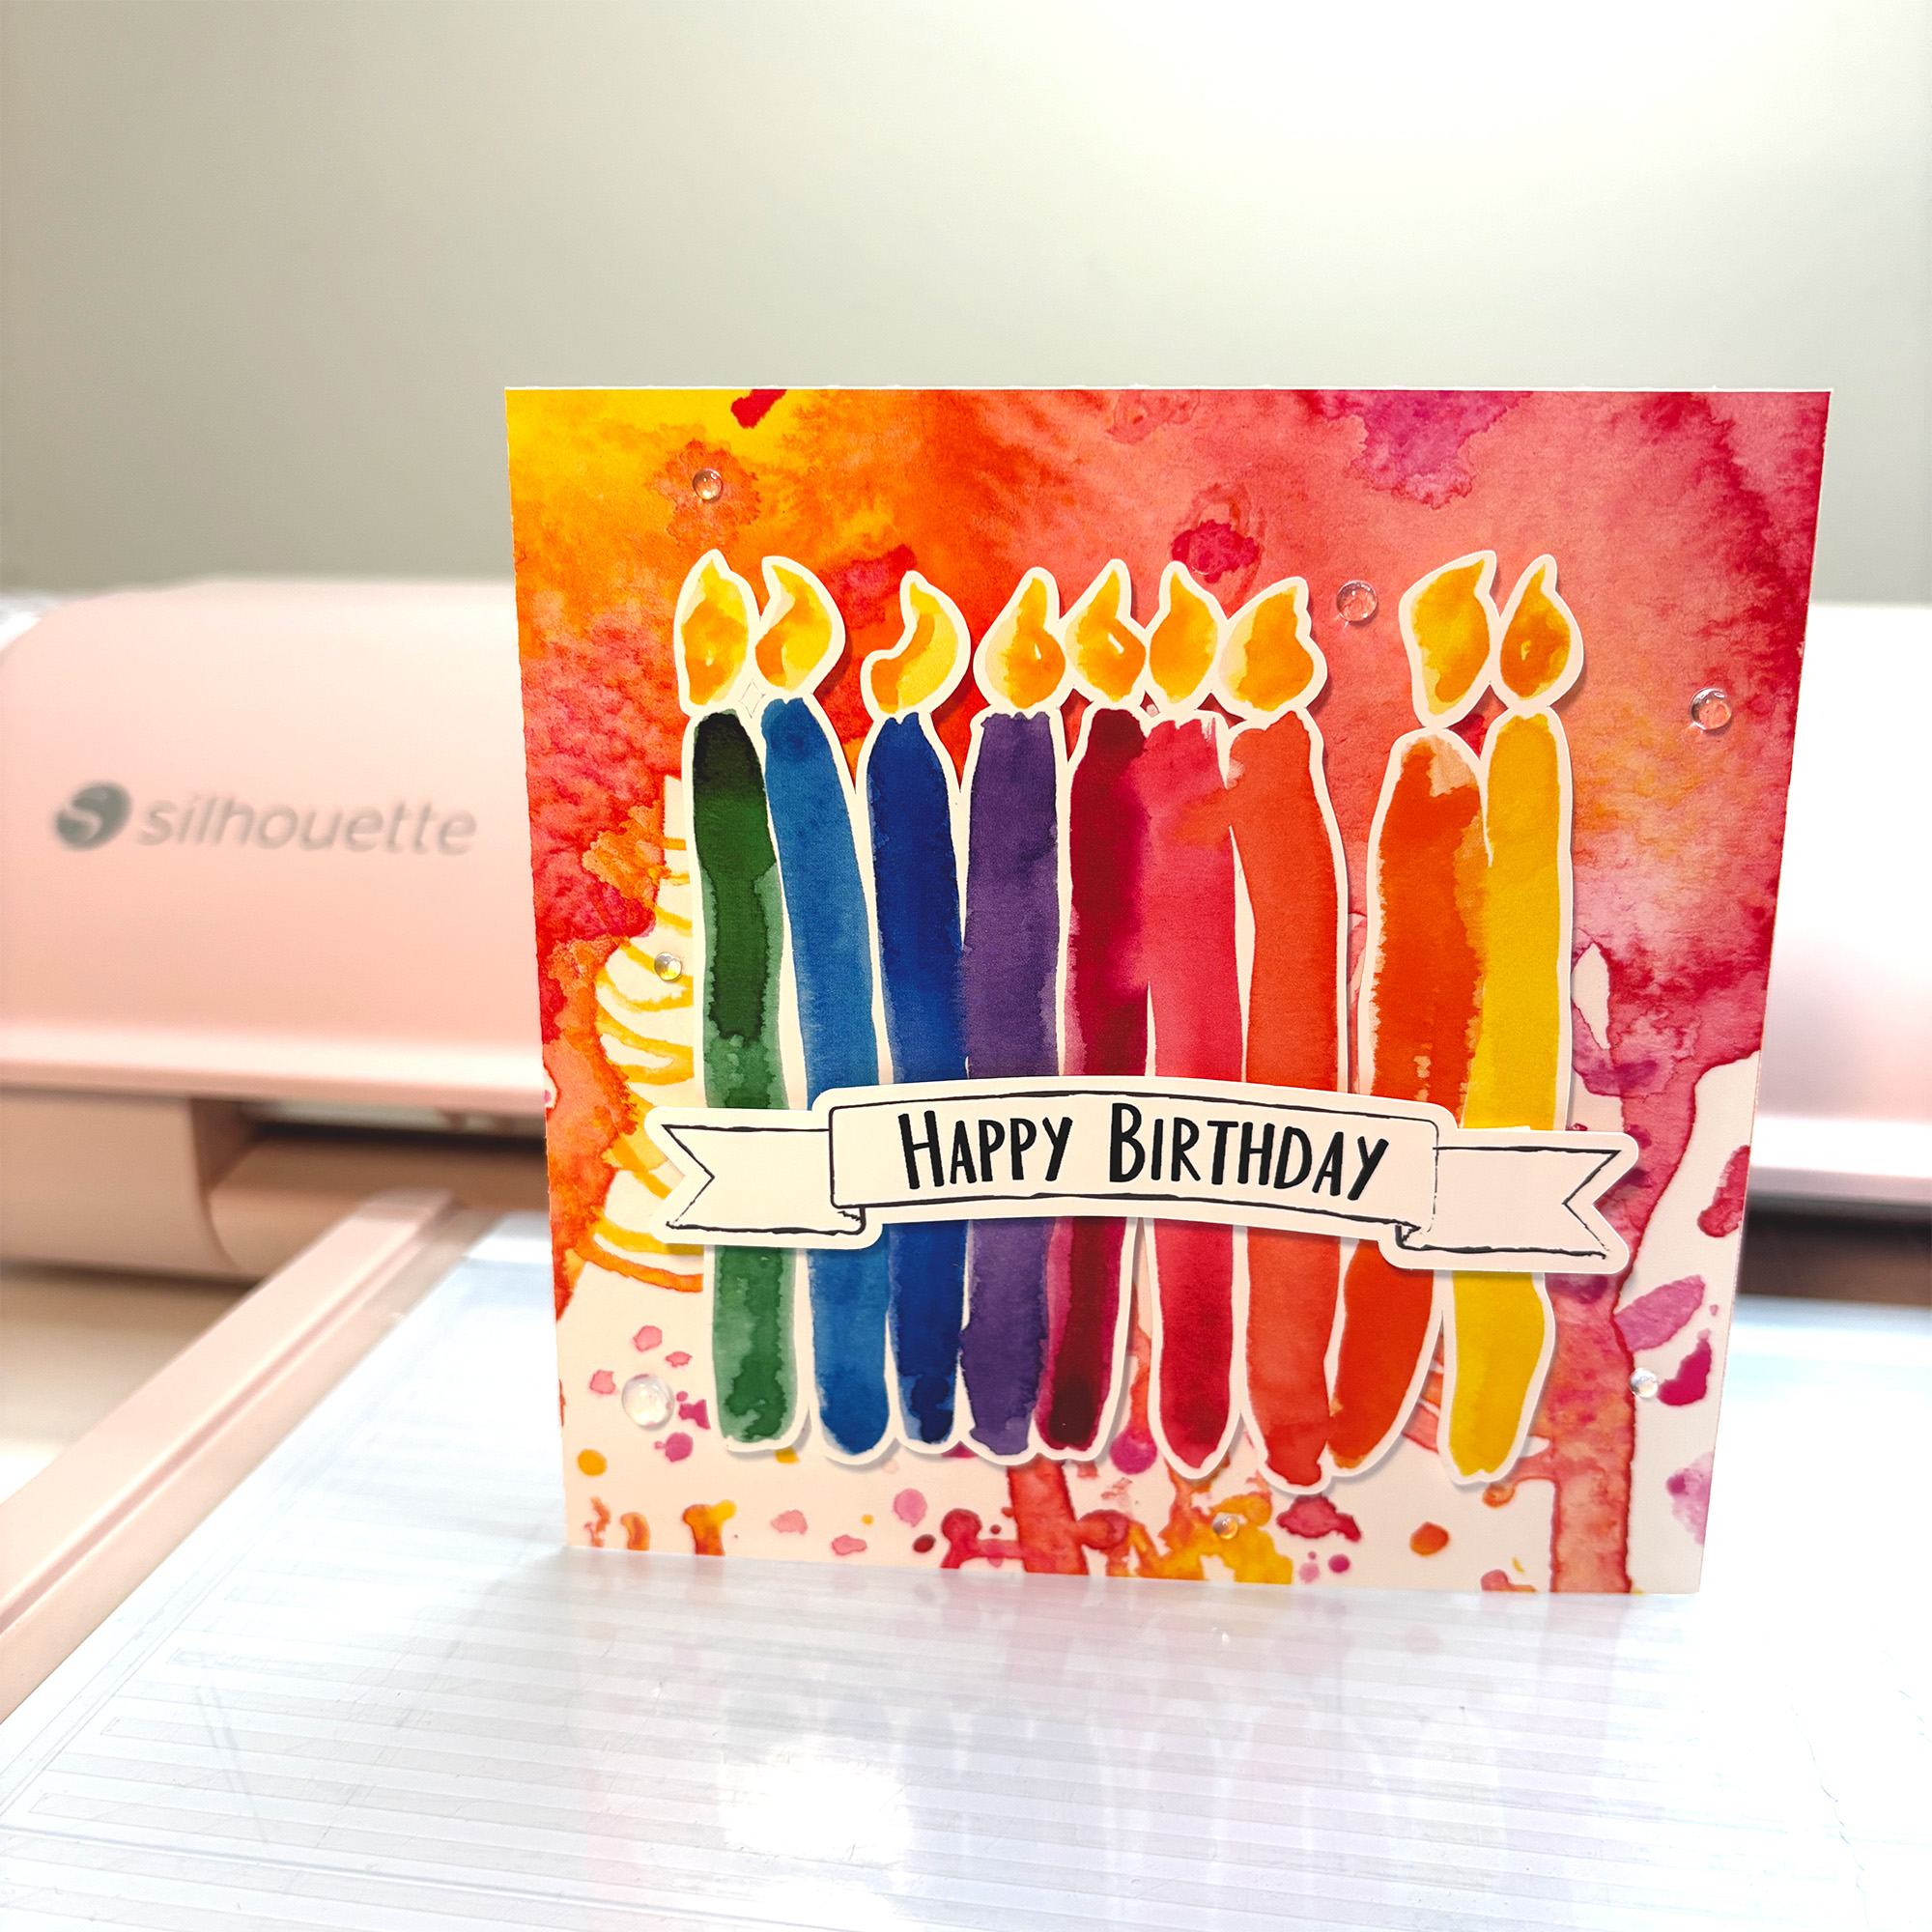
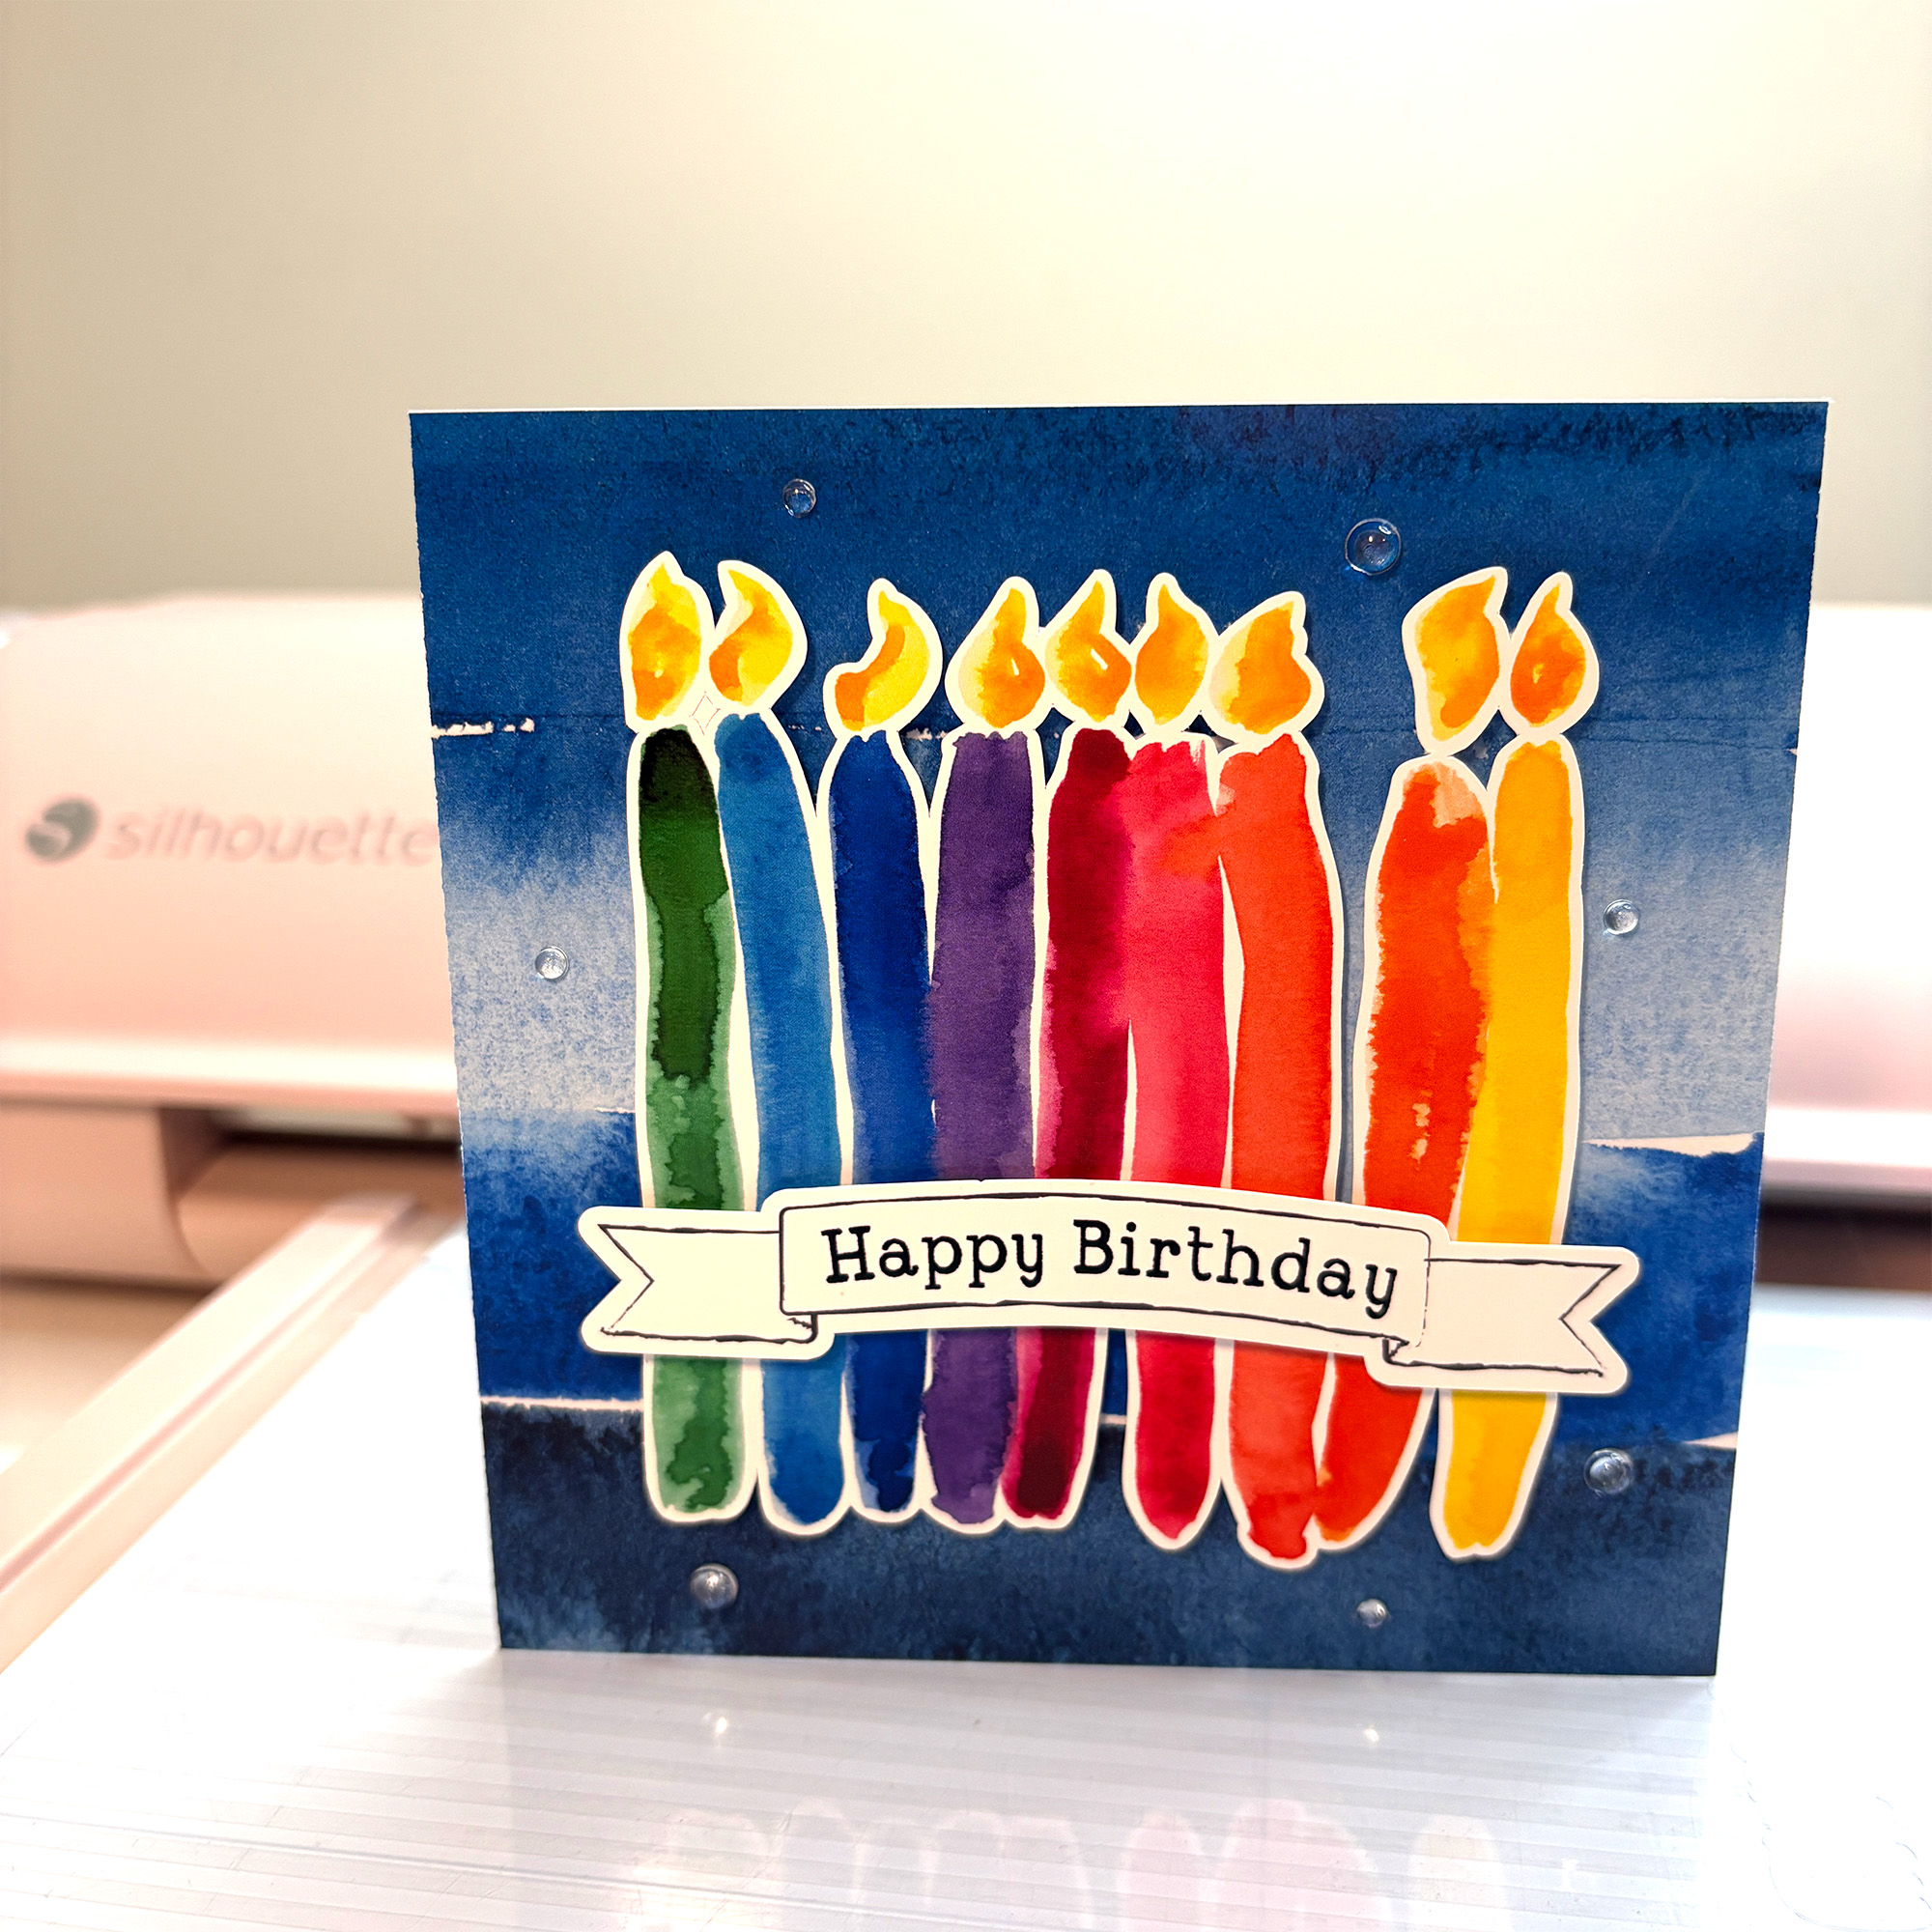
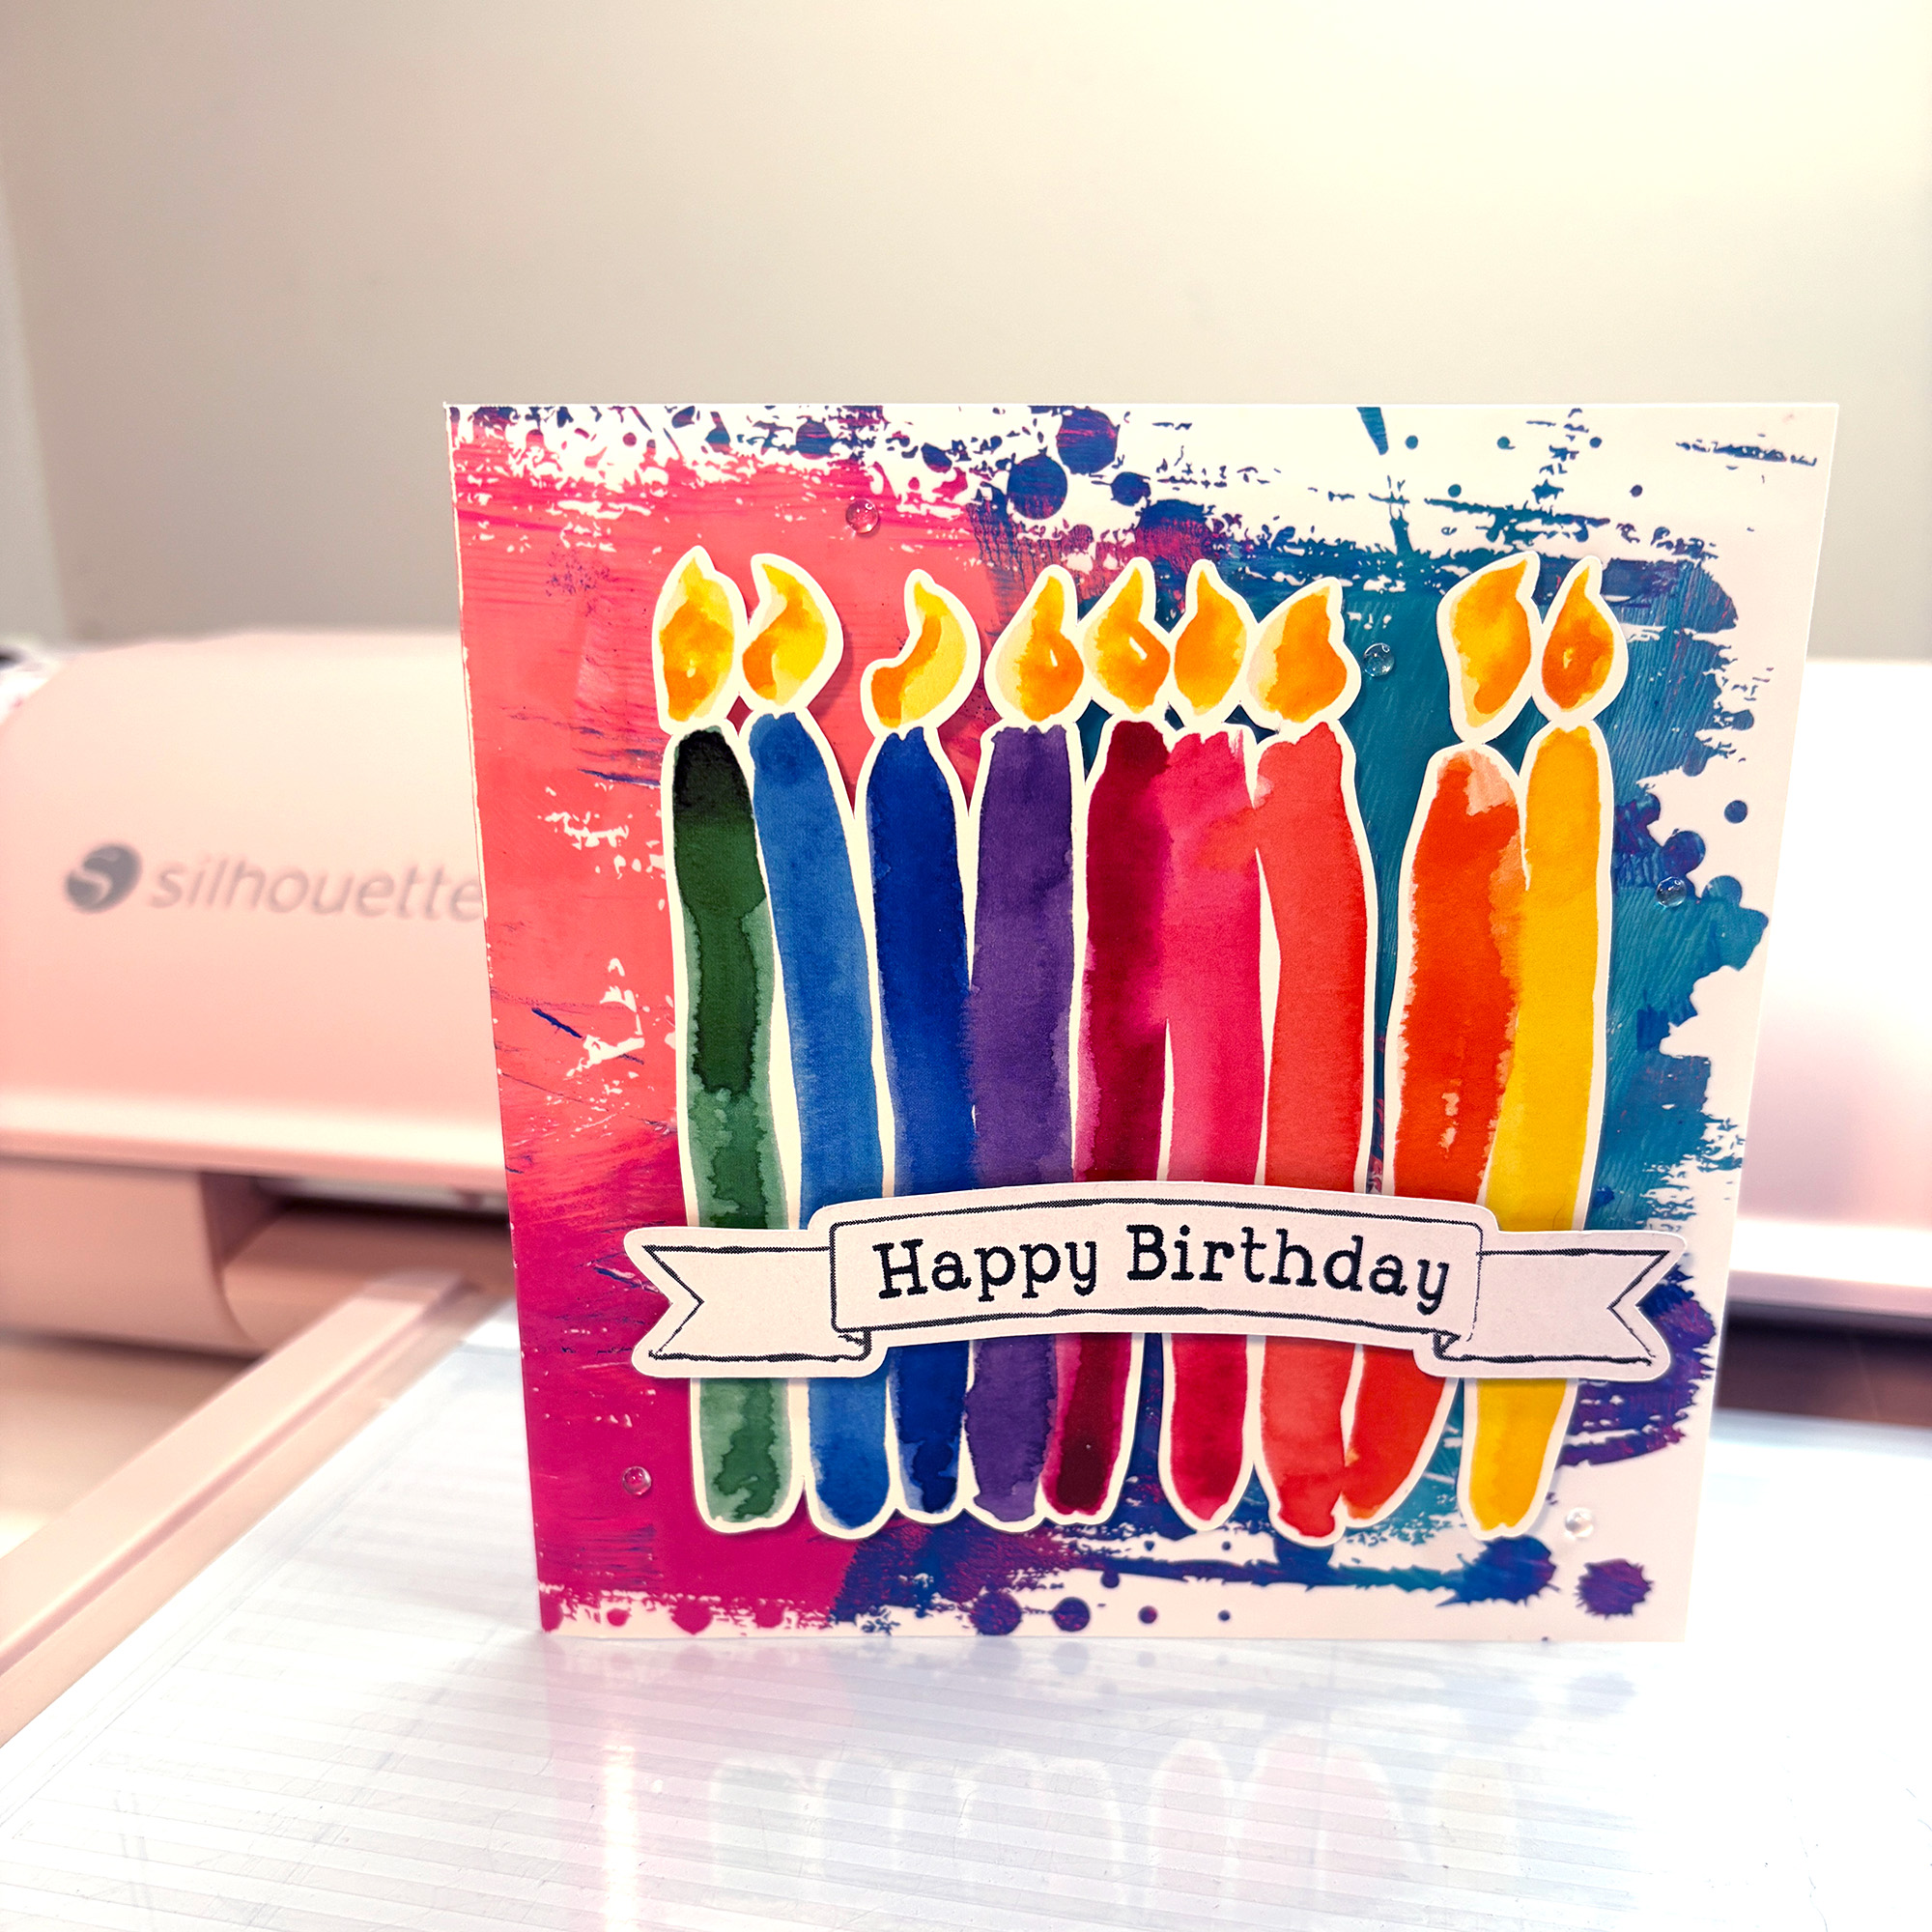
Nine tall, abstract watercolor candles in green, teal, blue, purple, magenta, red, orange and yellow with golden flames. The loose, gestural painted style gives these a lively, painterly feel. Shown here on five different printed backgrounds also available in store at Silhouette ranging from bold ink splatter to a soft mixed-media grunge texture and the last one features a Dotted Mess Urban Grunge Clipping Mask used for some extra grunge.
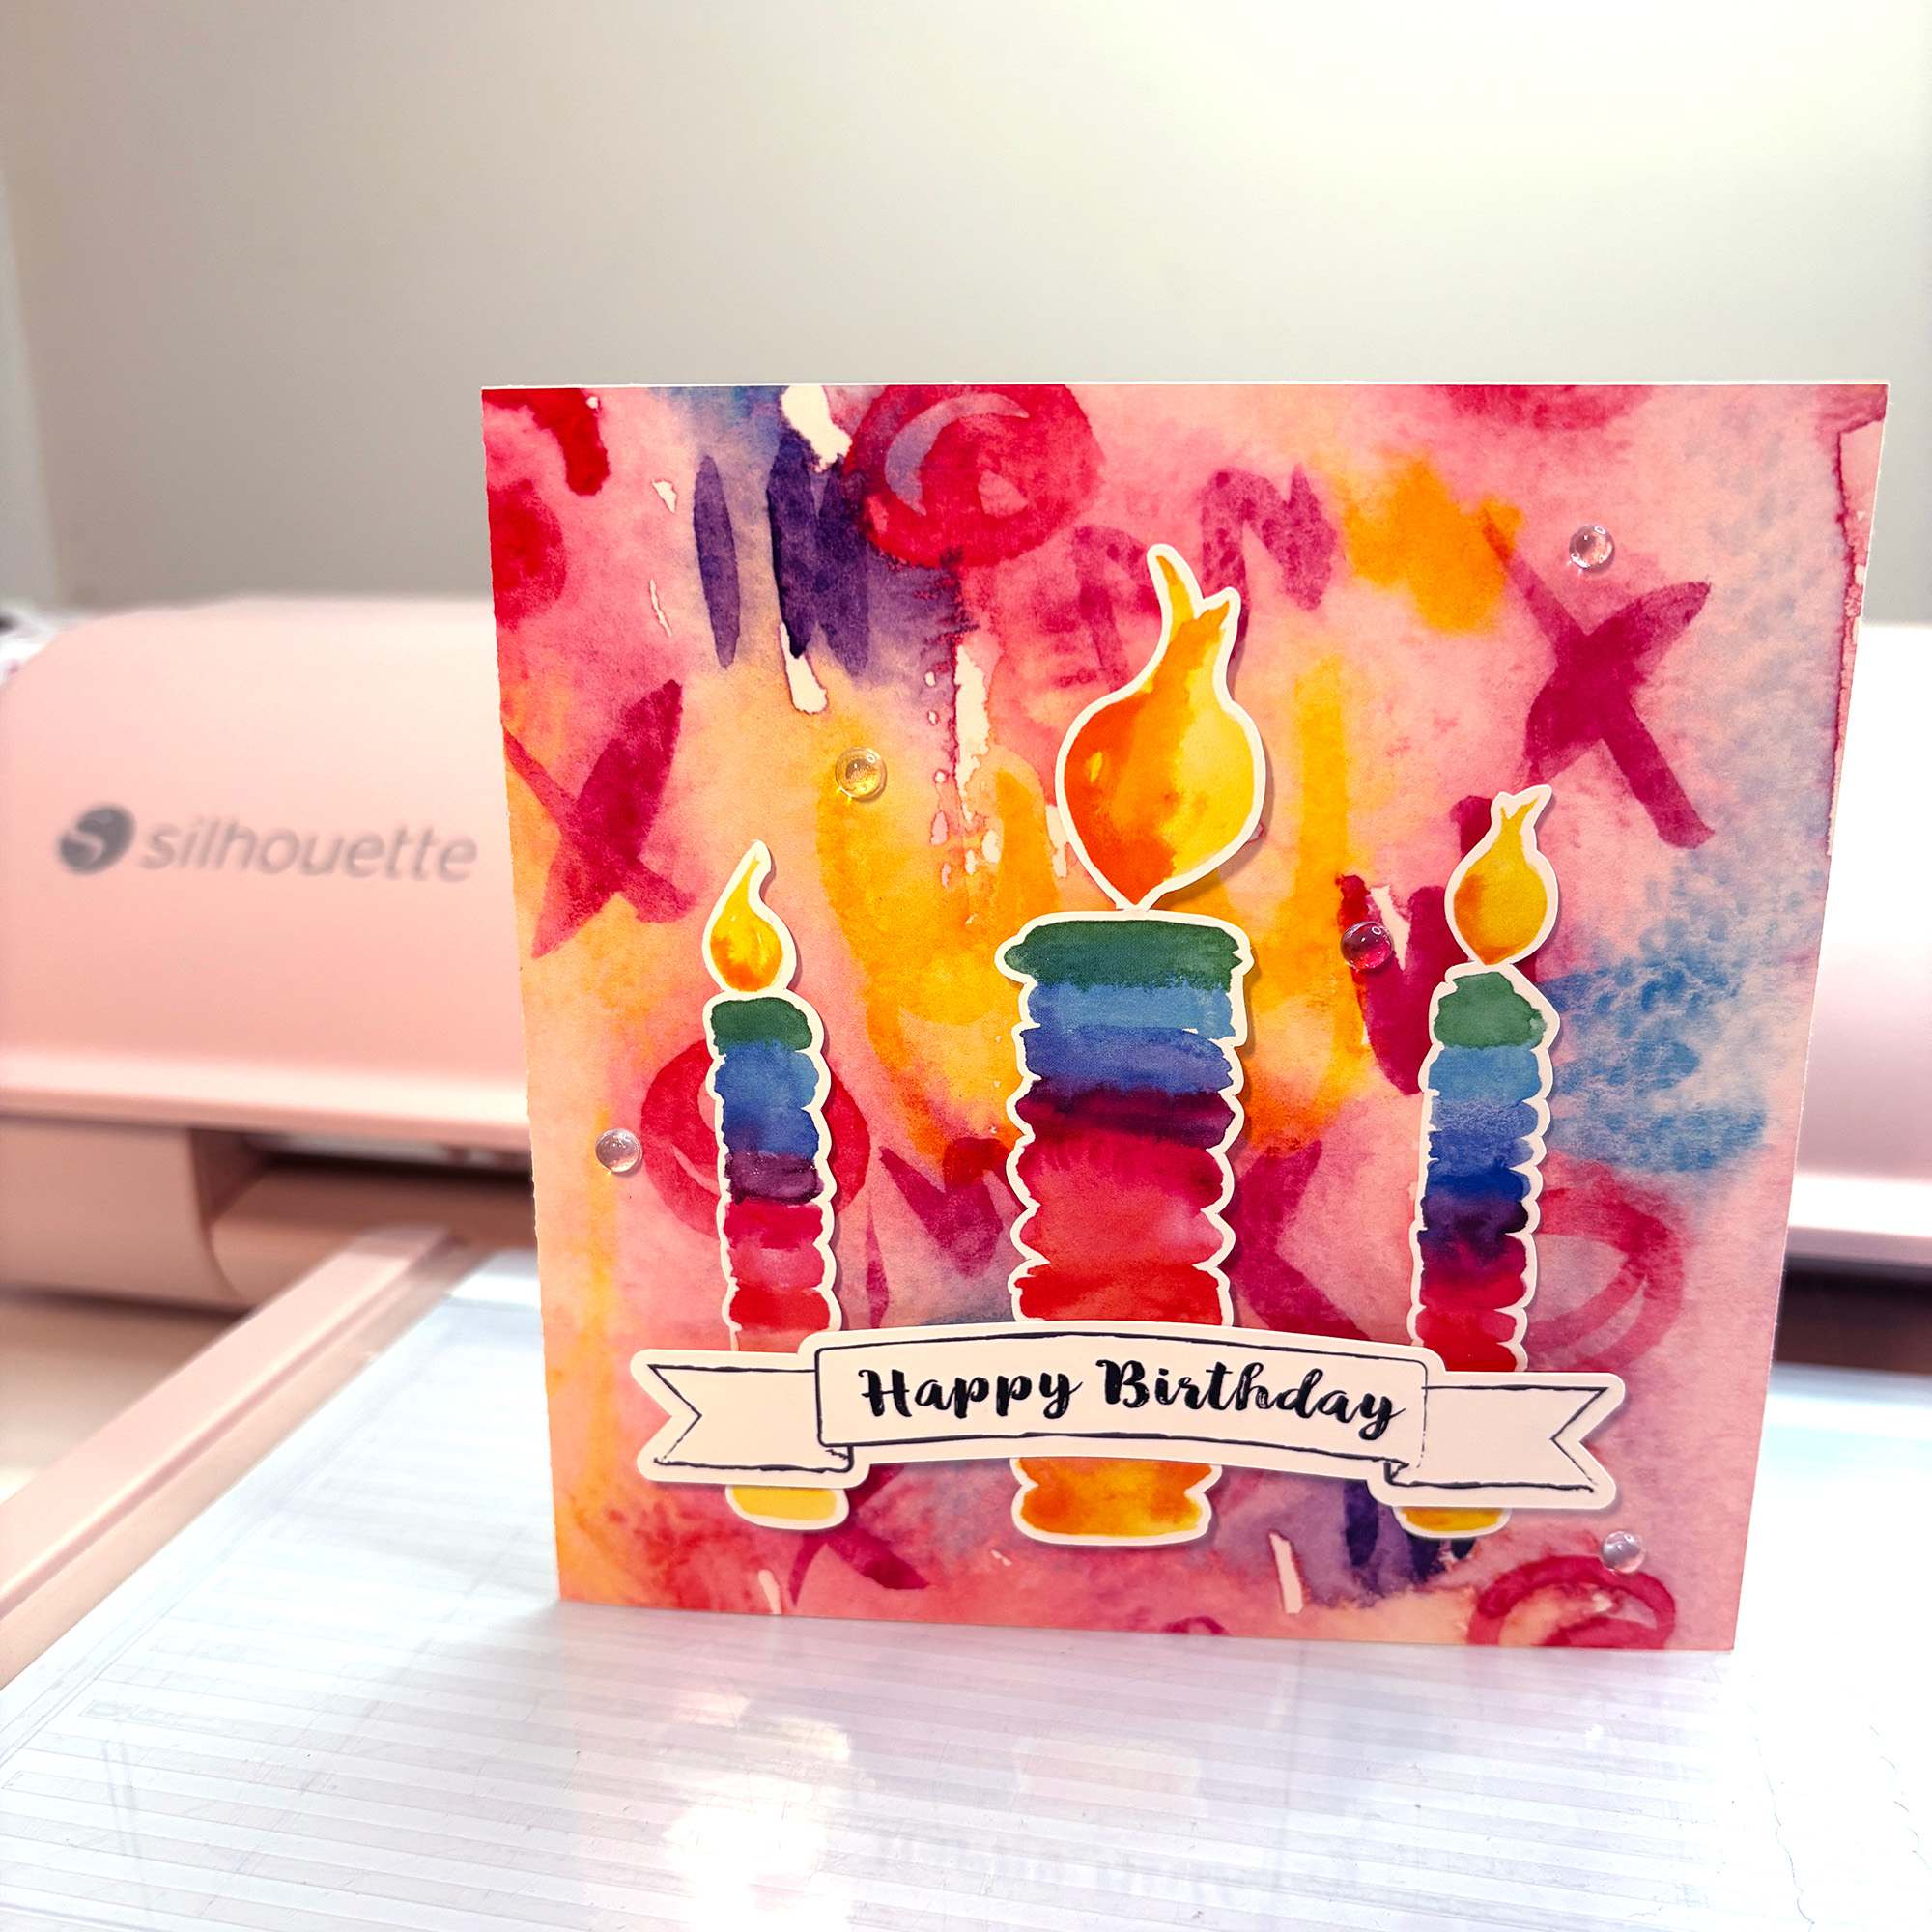
Three chunky rainbow-banded candles in different heights with bold glowing flames. Each candle flows through green, blue, purple, pink, red, orange and yellow in horizontal bands and featuring a Watercolor Marks Magenta and Yellow Printable Background. Great for when you want fewer, larger elements on a card or as a cake topper trio.
Six Colored Watercolor Birthday Candles SVG (SKU D-1344629)
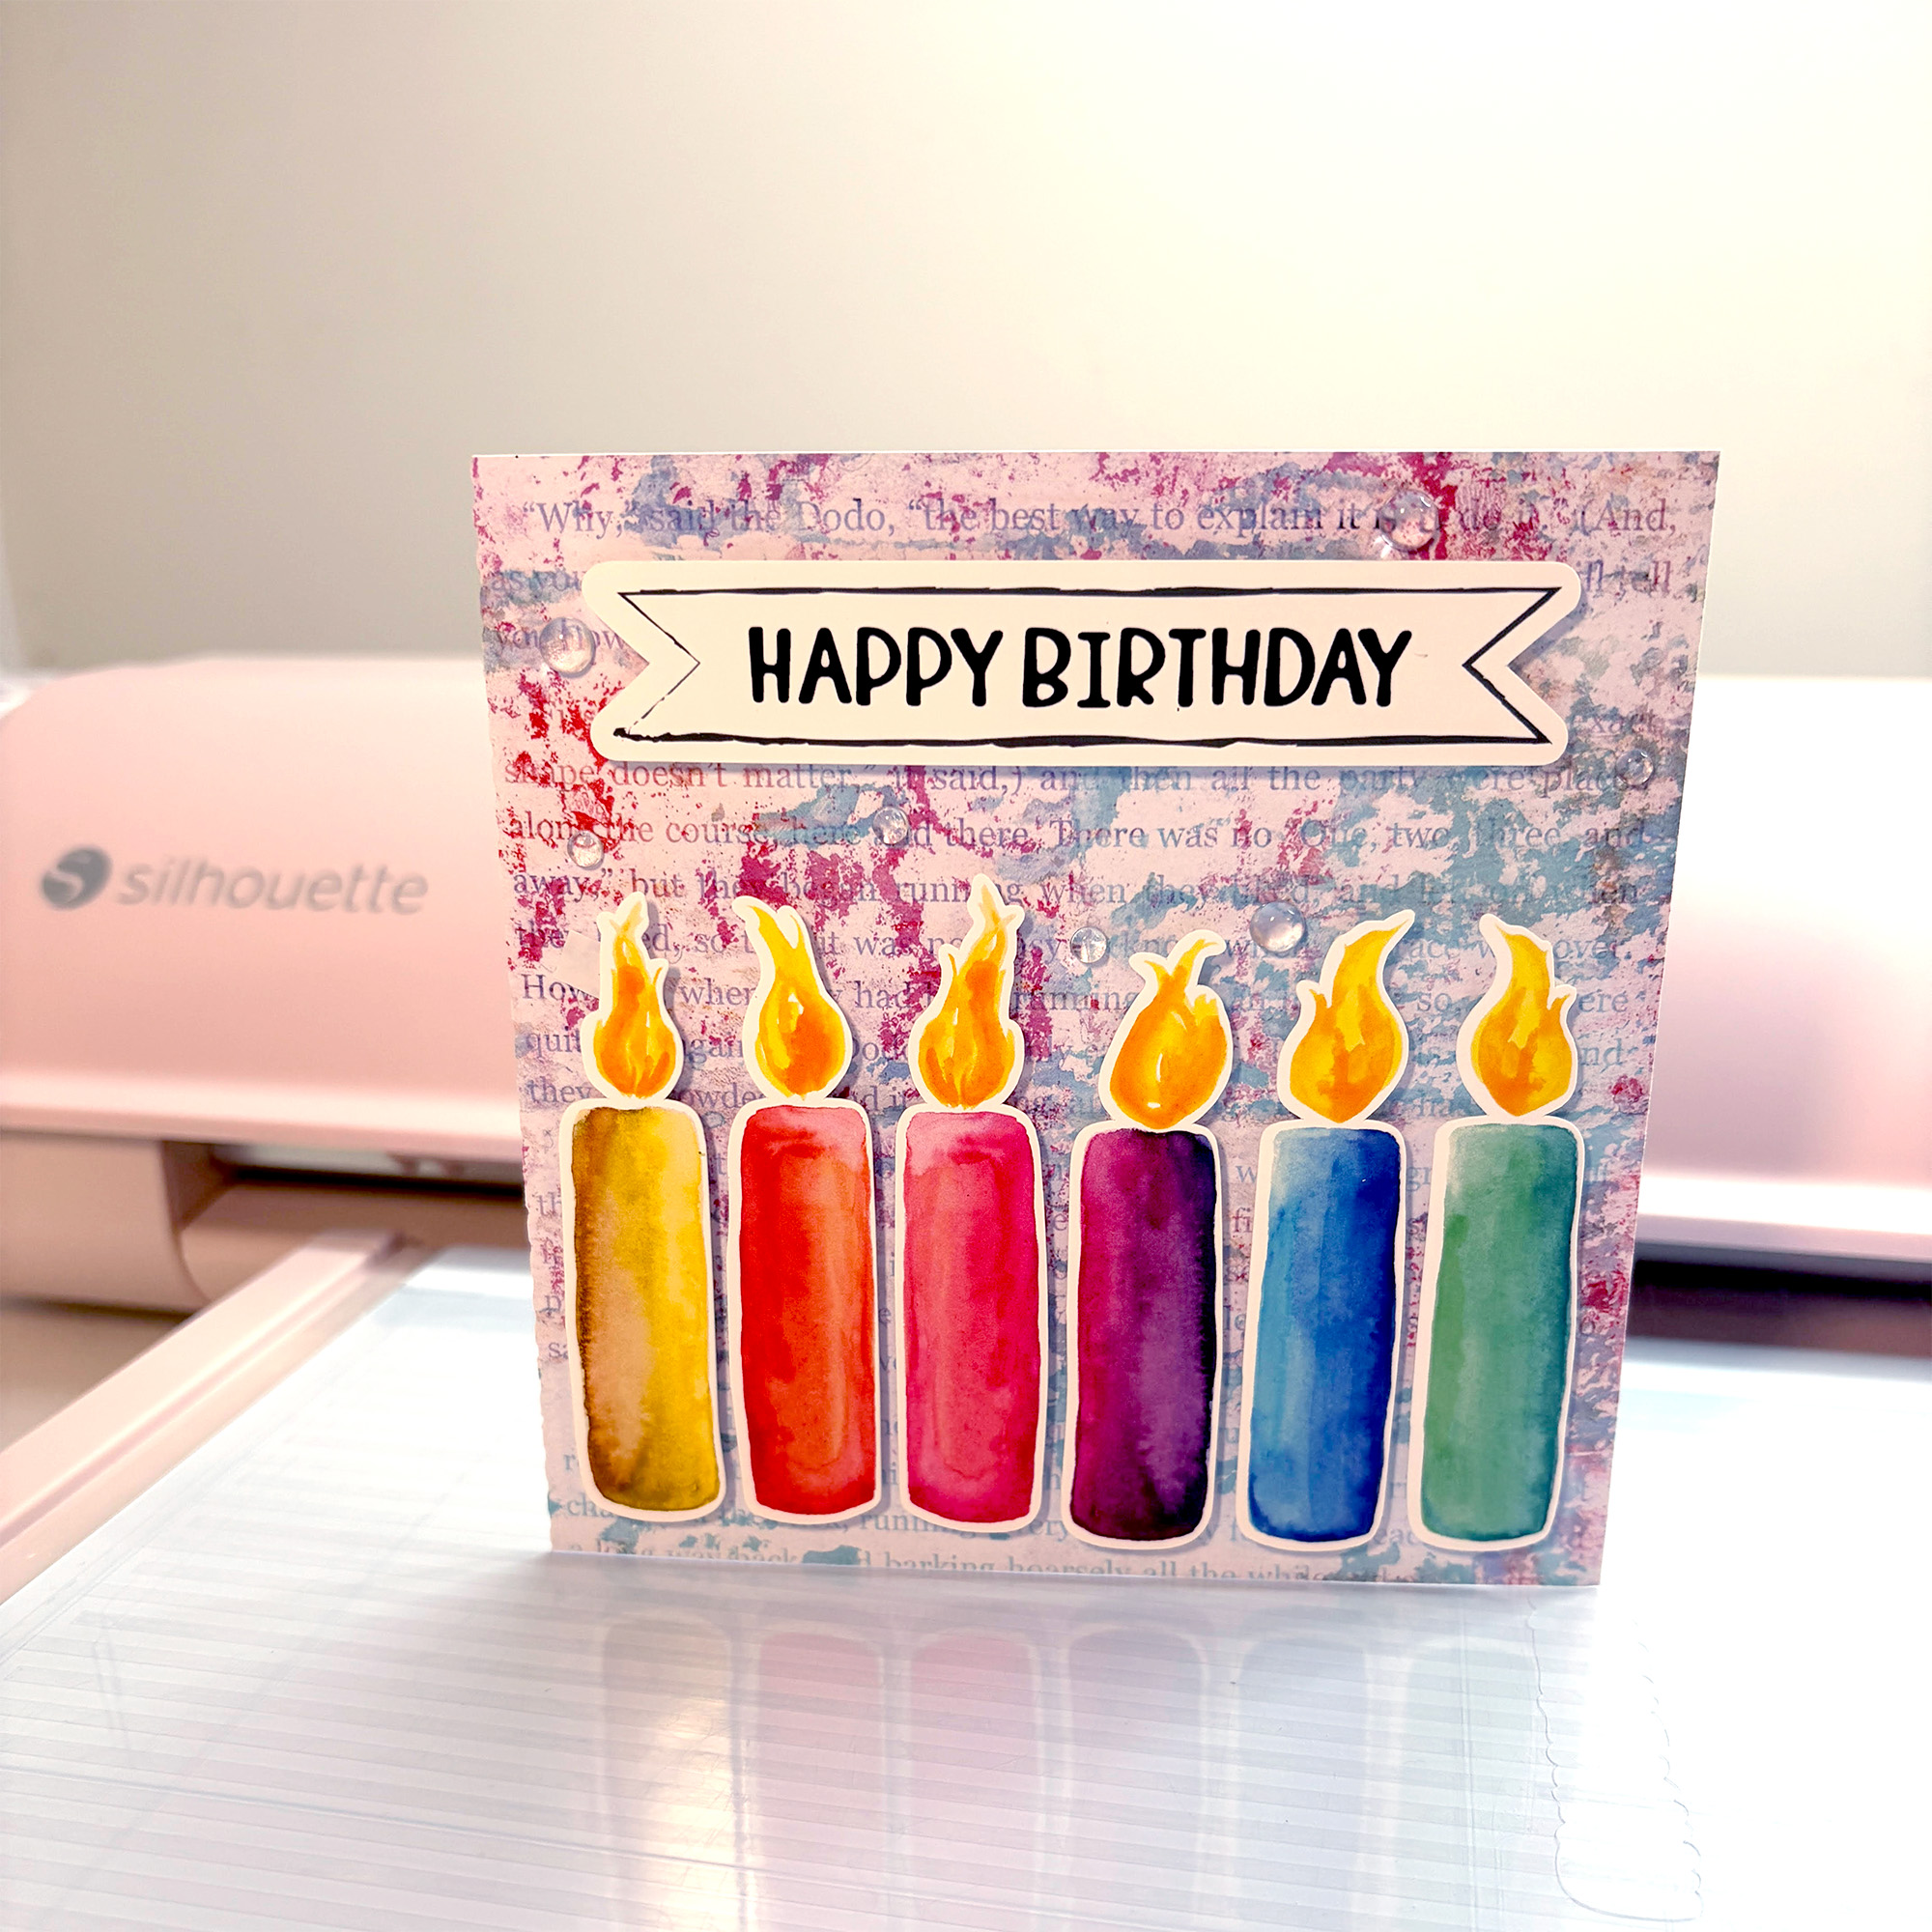
Six solid watercolor candles in pink, purple, blue, red, green and yellow with bright golden flames. Each candle has a soft painterly wash with natural watercolor variation. Shown here on an Alice in Wonderland Lavender Pink background, which clips the candles beautifully for a decorative shaped edge.
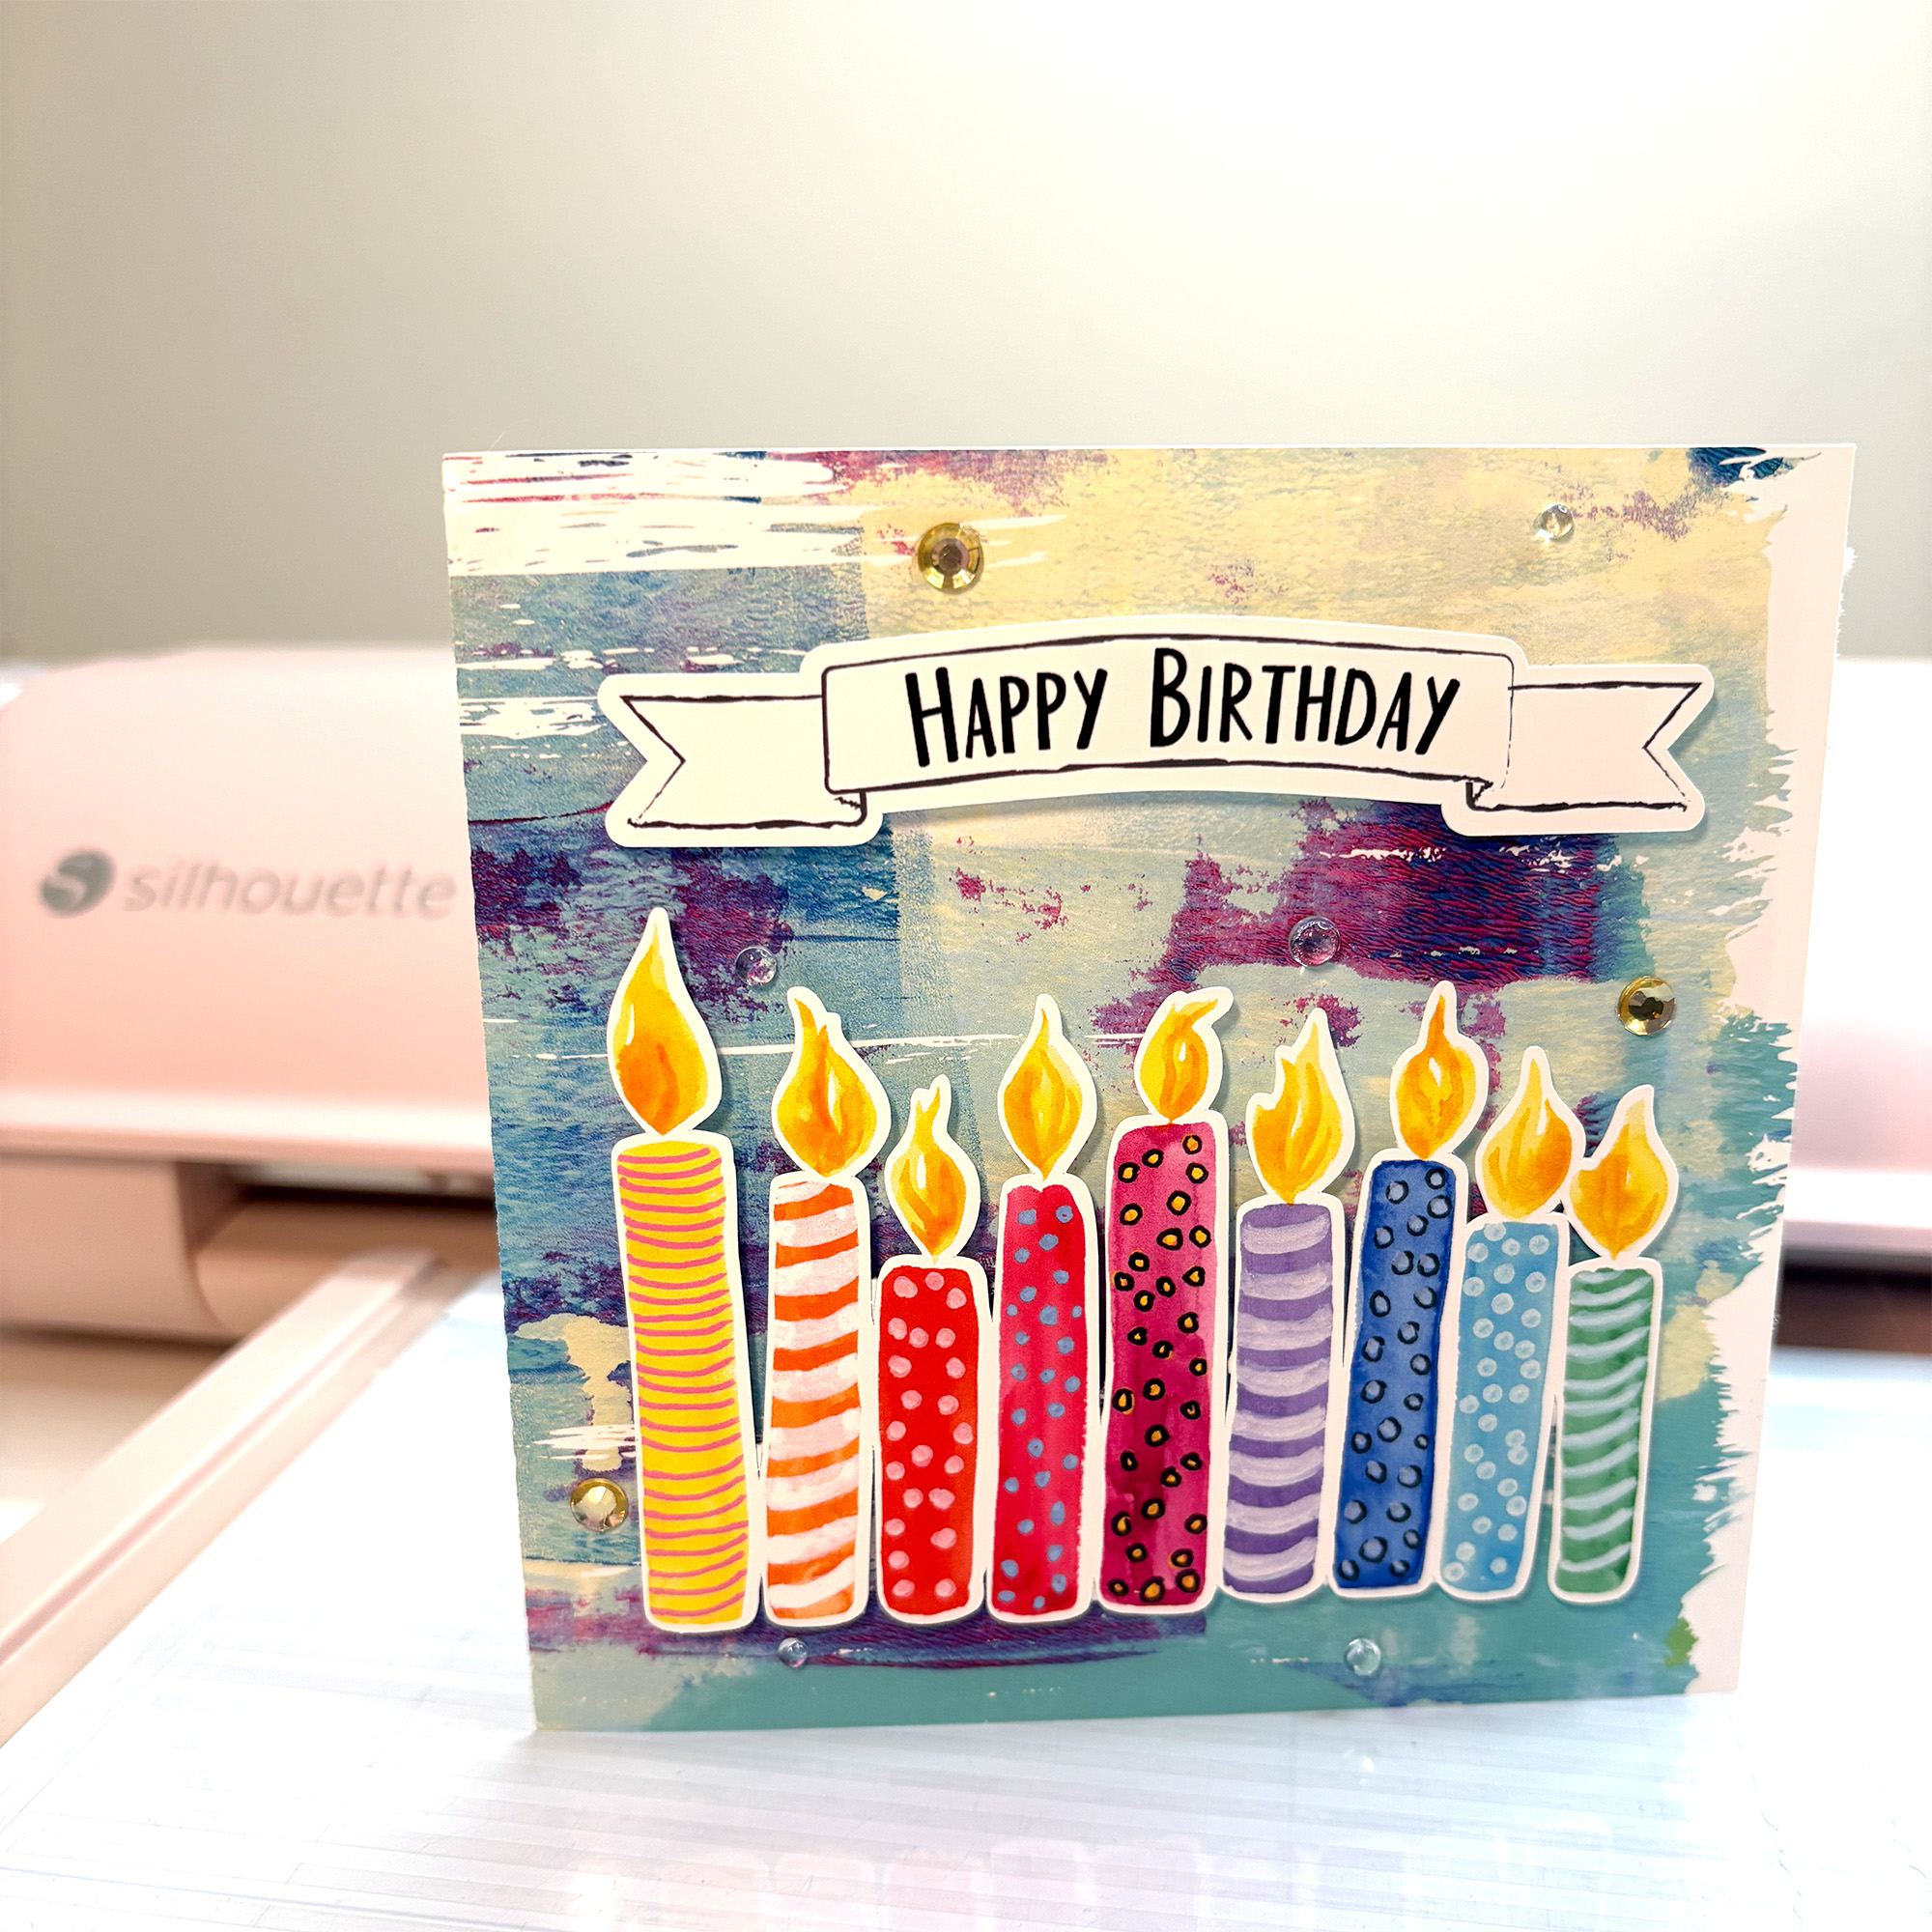
Nine watercolor candles in rainbow colours with a mix of stripes and polka dots across yellow, orange, red, pink, magenta, purple, blue, teal and green. Each candle has a bold golden flame and a playful hand-painted look. Shown here on two different painted backgrounds, one in bold red tones and one in a cool mixed-media palette.
The Banners That Pair Beautifully with All of Them
The Doodled Happy Birthday Banner Sentiments seen on the sample cards are from my Doodled Happy Birthday Banners Sentiments set (SKU D-375342). There are several banner styles in the set, so you can mix and match across projects.
The candles work well in a range of projects beyond the standard birthday card:
As cake toppers, print and cut the candles, apply to your base design on on their own and then attach to a thin skewer or toothpick. The large design size means they can have good presence even on a full-size cake .
On cards, layer the candles over a printed background, add a Happy Birthday banner from SKU D-375342, and finish with a few clear gems for a quick but polished result. The sample cards shown here all used my own printable backgrounds from the Silhouette Design Store.
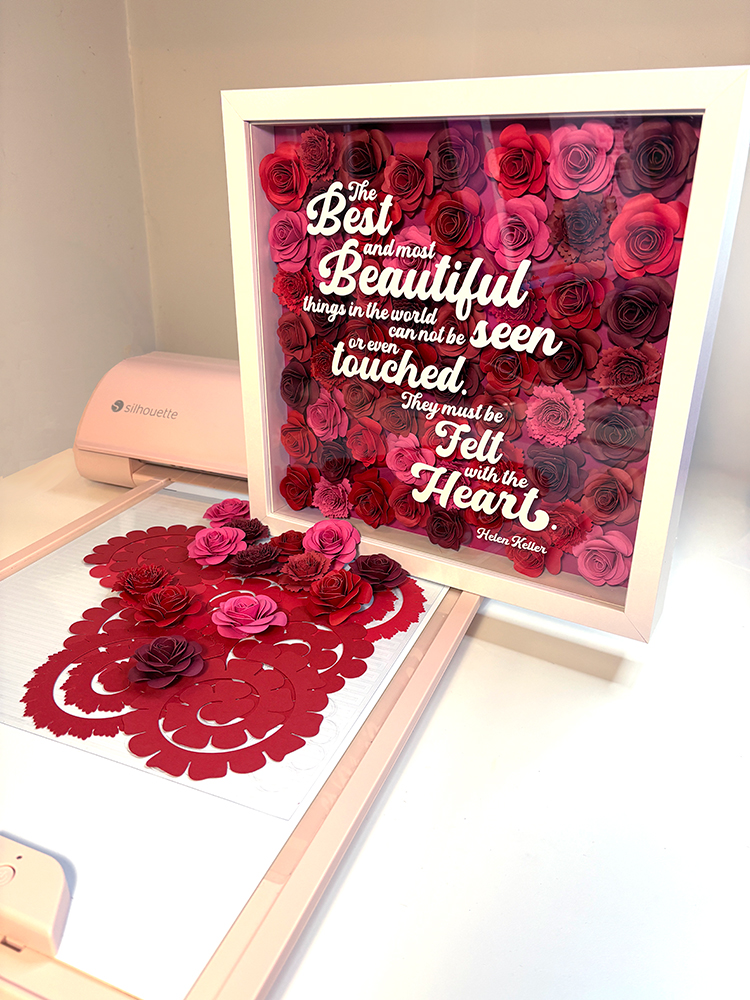
I had an idea to make a shadowbox of rolled flowers with my Mum’s Favorite quote for her birthday. My Mum has alzheimers, but I thought at least her carers will be able to appreciate the work. I loved the finished design so much I decided to make one for my Mother In Law for Mother’s Day as well. This project is wonderful for all sorts of occasions and all sorts of quotes.
A shadow box packed with rolled paper flowers makes a beautiful piece of wall art, a heartfelt gift, or a show-stopping display.
This tutorial walks you through how to create one from scratch using your Silhouette cutting machine, a handful of cardstock colours, and a few basic supplies.
If you are new to rolled paper flowers, start with the How to Make Rolled Paper Flowers tutorial first. This project builds on those skills, so it helps to have a few practice flowers under your belt before you begin.
What You Will Need
Shadow box supplies:
Shadow box frame with a glass or acrylic front panel (the one shown is a standard 30cm x 30cm / 12″ x 12″ white frame)
Cardstock in your chosen colour palette (65-80 lb / 176-230 gsm works best for rolling)
Hot glue gun and glue sticks
Quilling tool or tweezers
Scissors or a craft knife
Optional: ink, chalk, or paint to edge your flowers for added depth
For the sentiment:
White or light-coloured adhesive vinyl (for cut lettering on the glass panel)
Transfer tape
Sentiment SVG of your choice
Designs Used in This Project
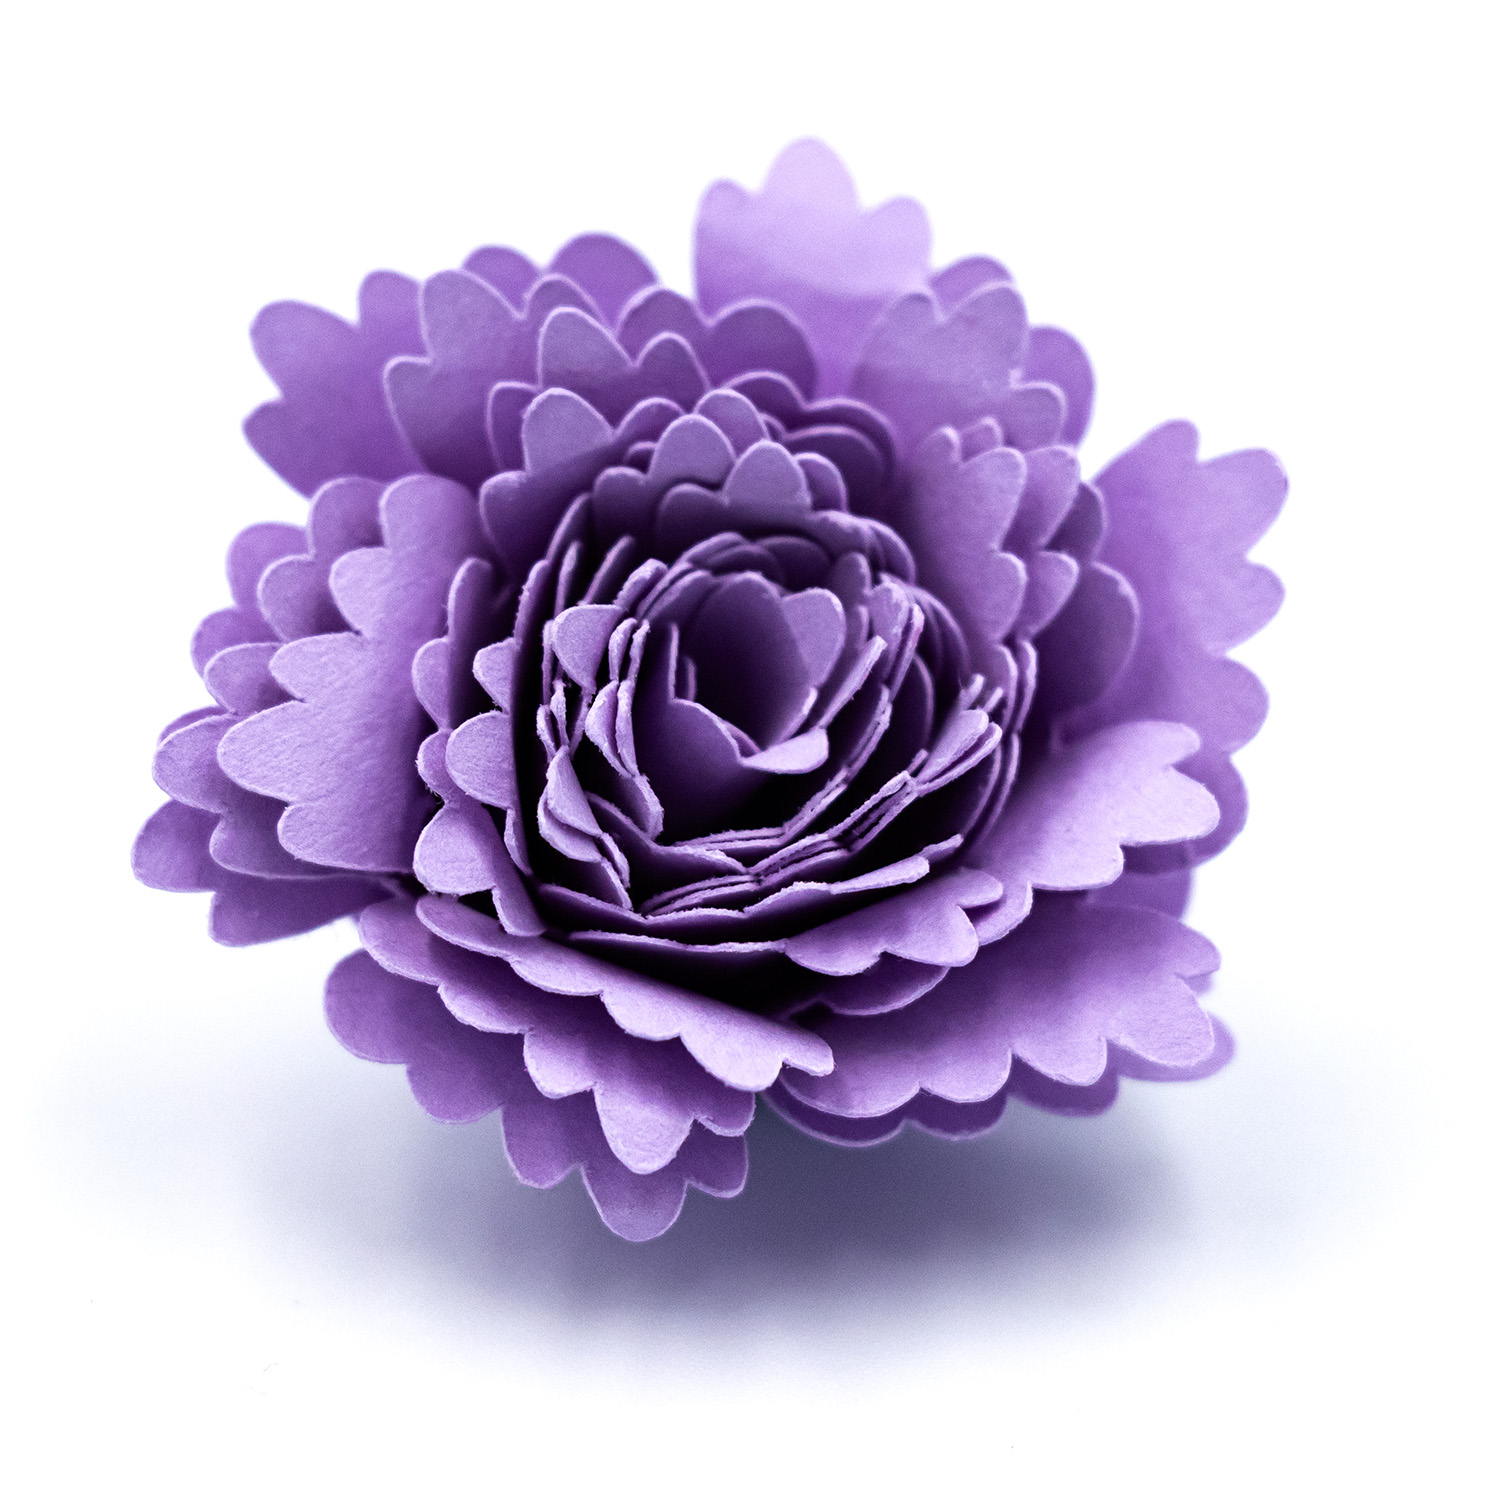
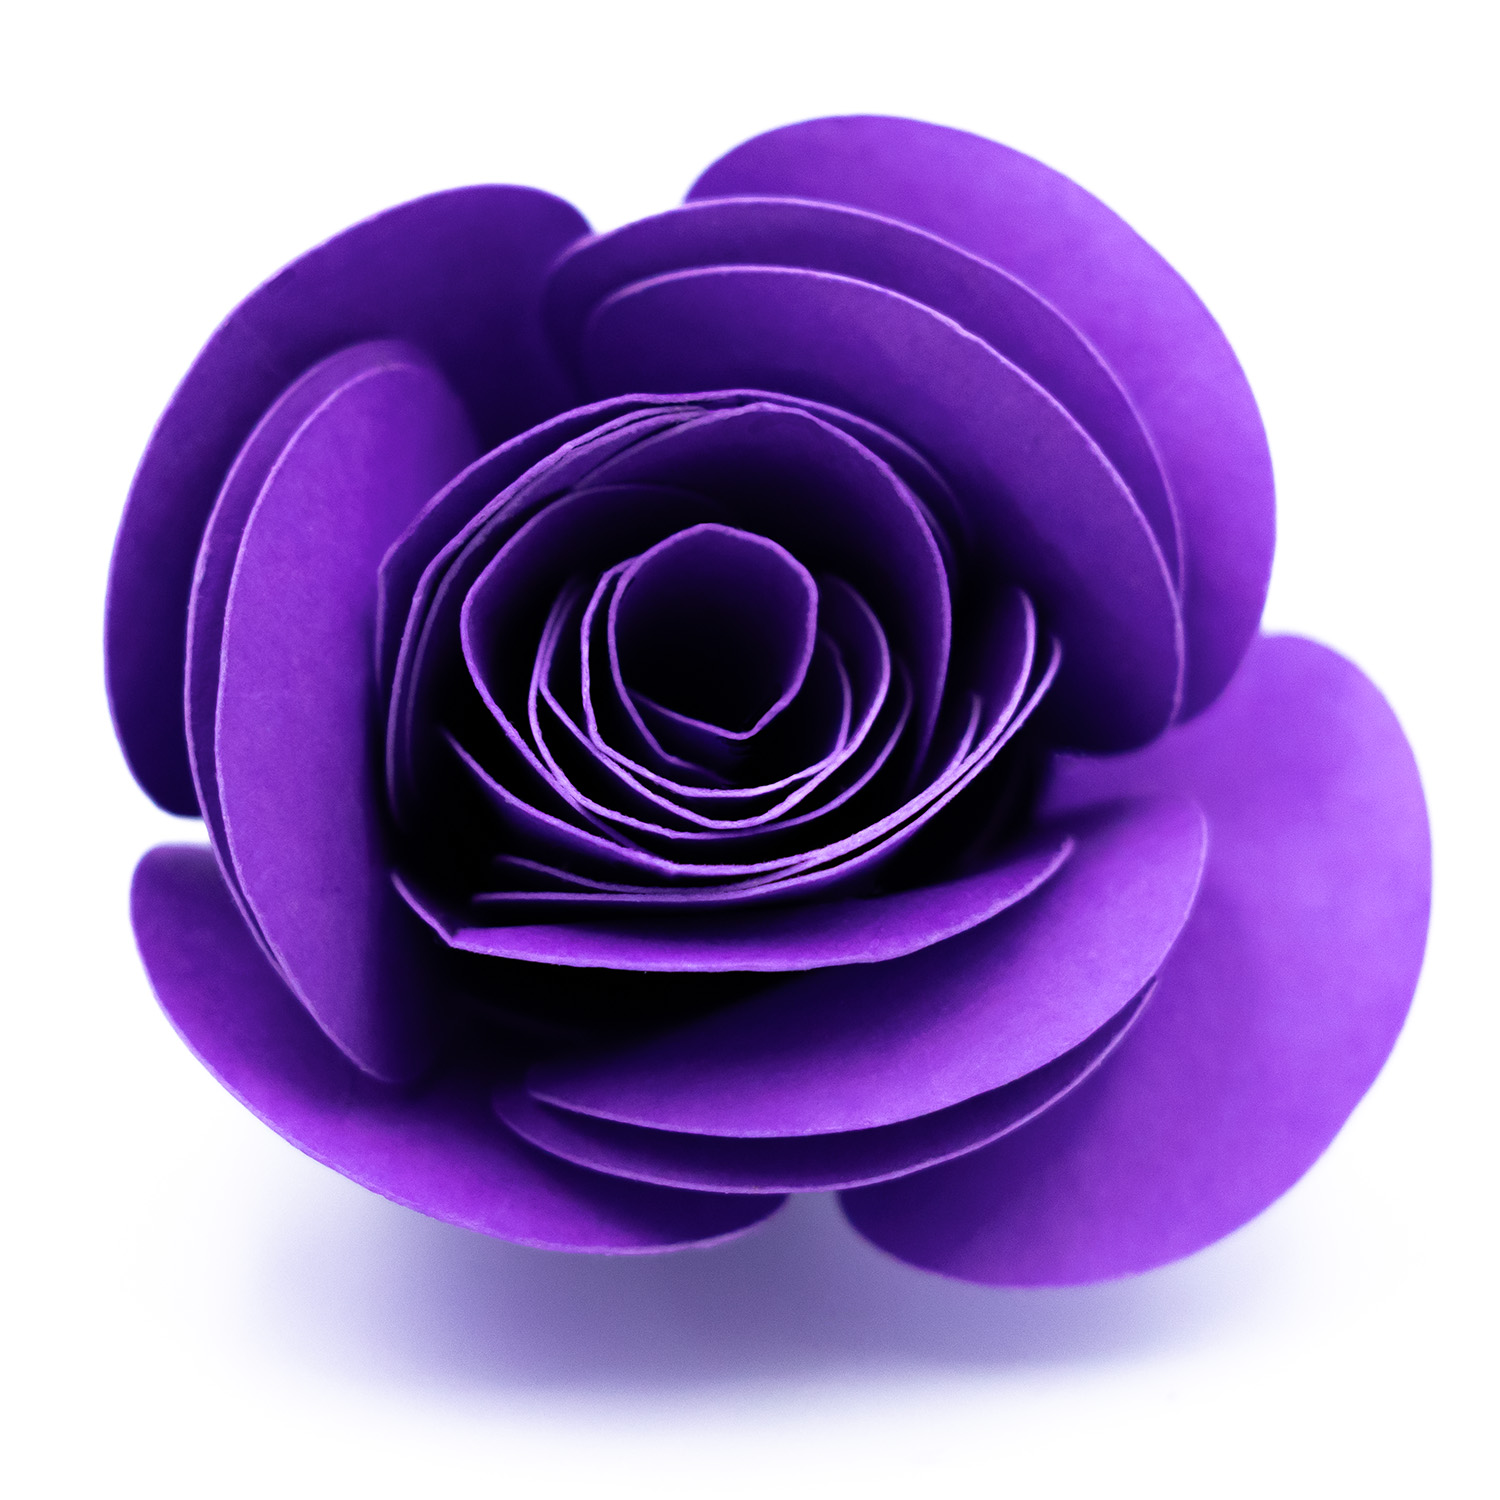
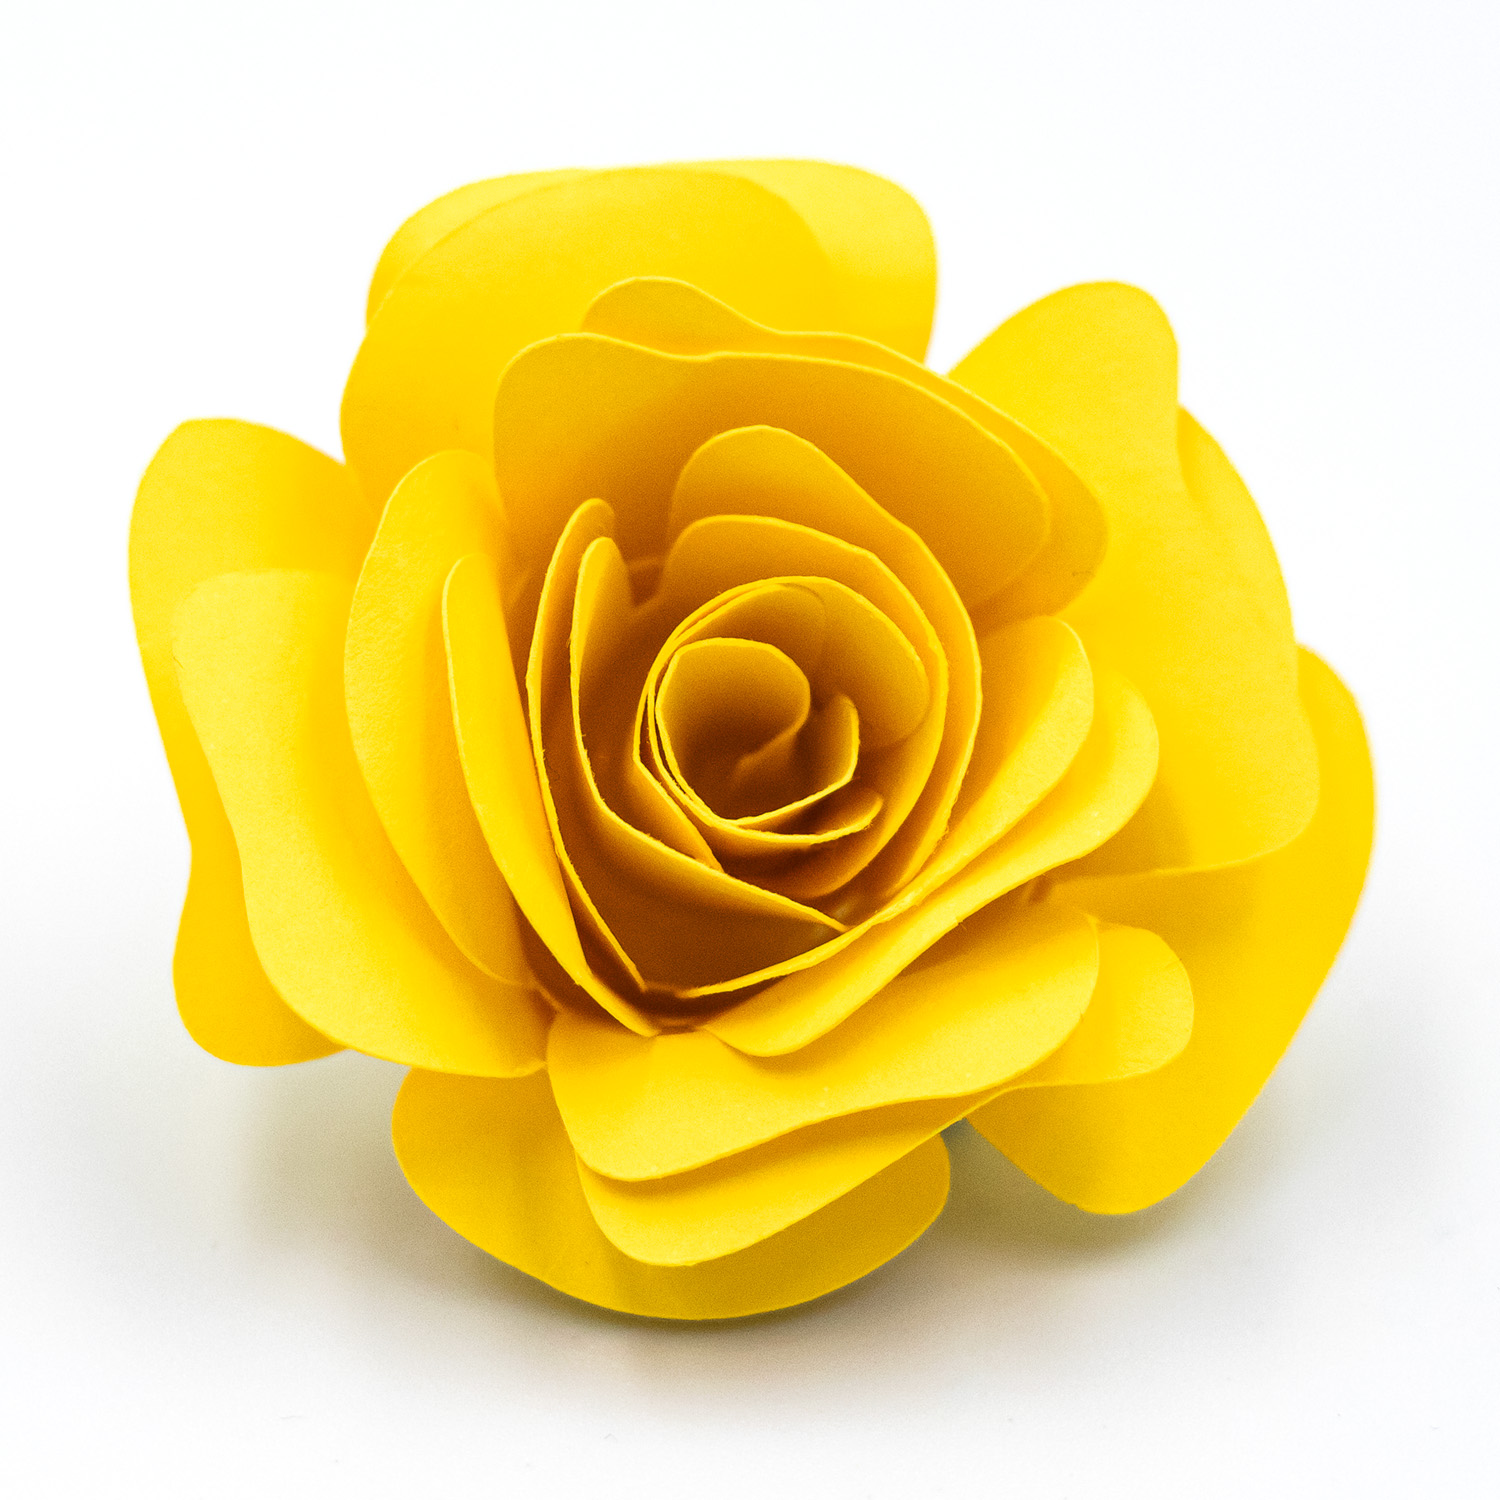
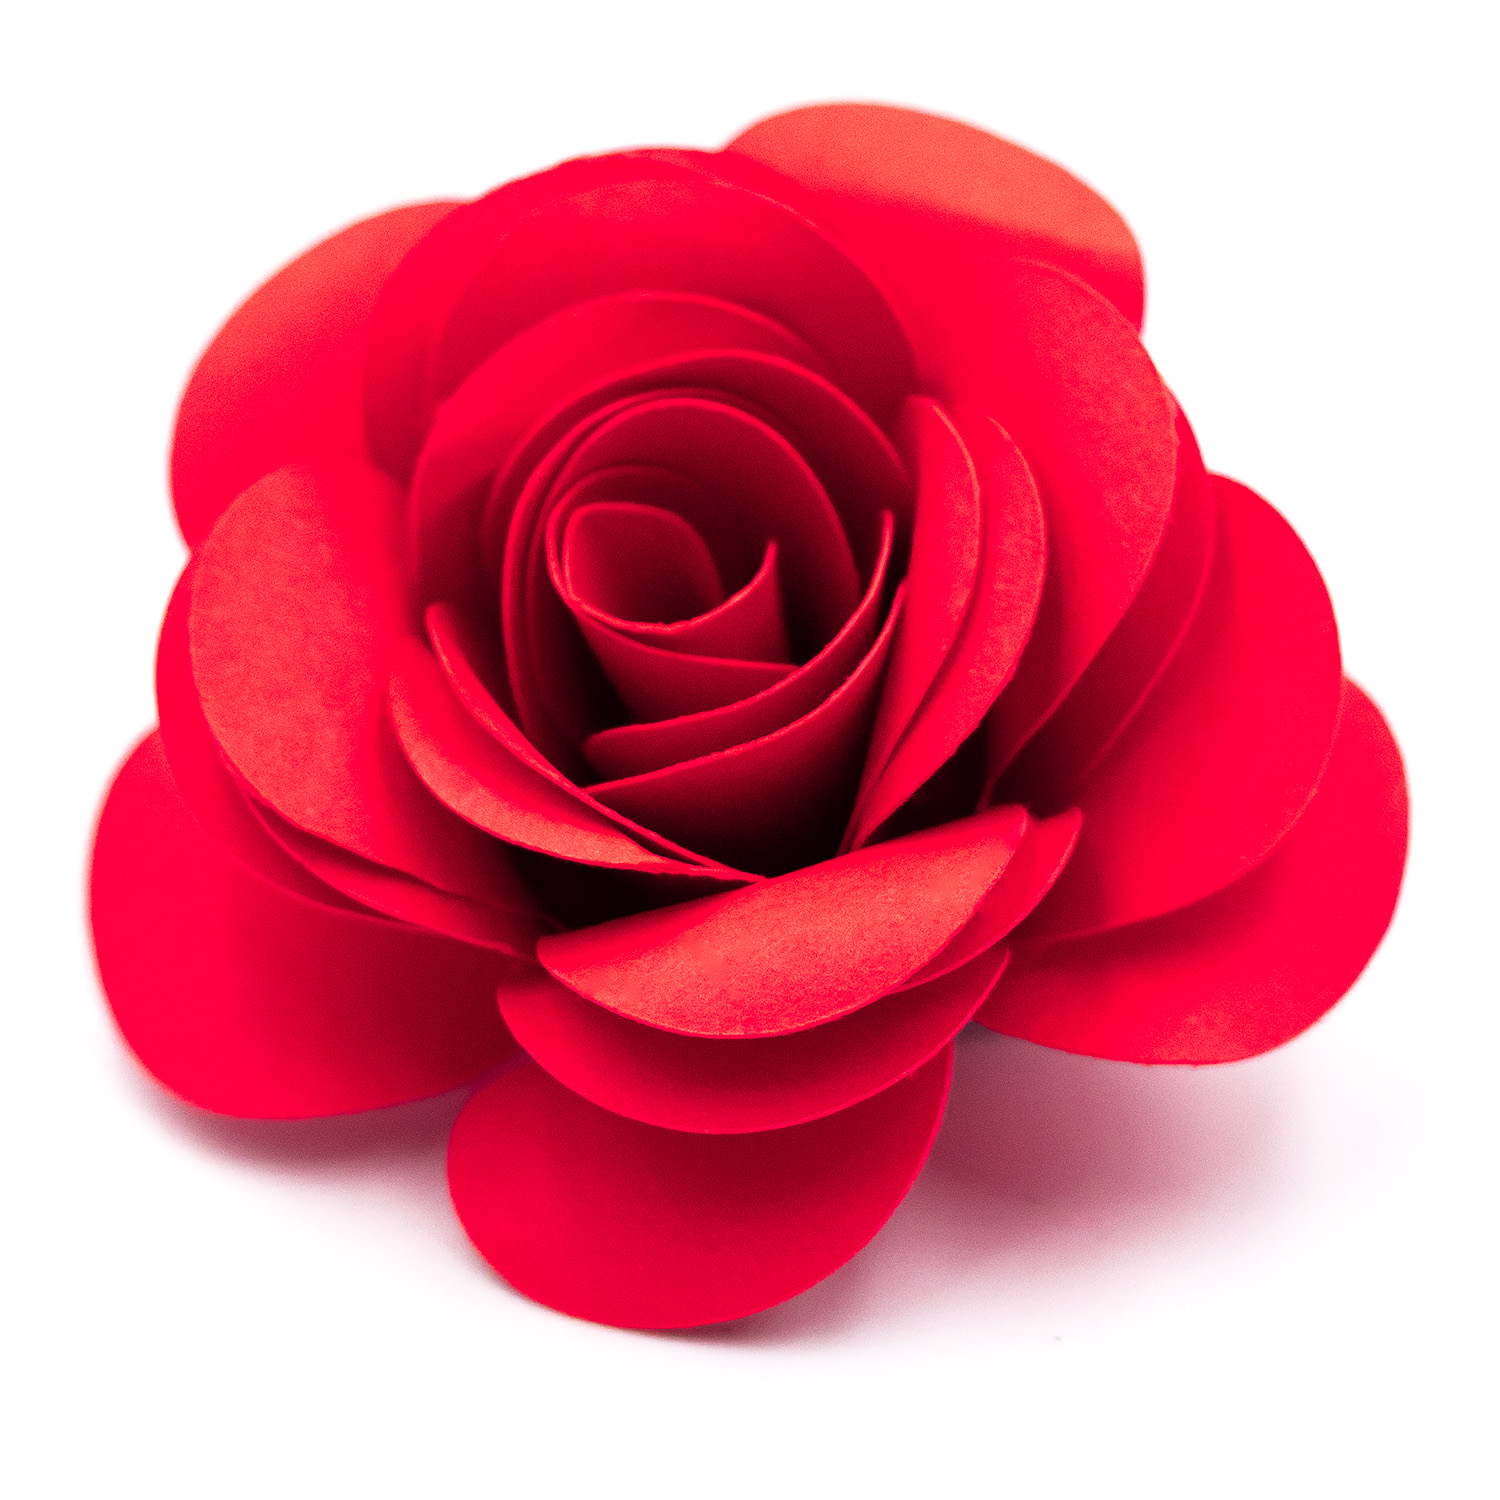
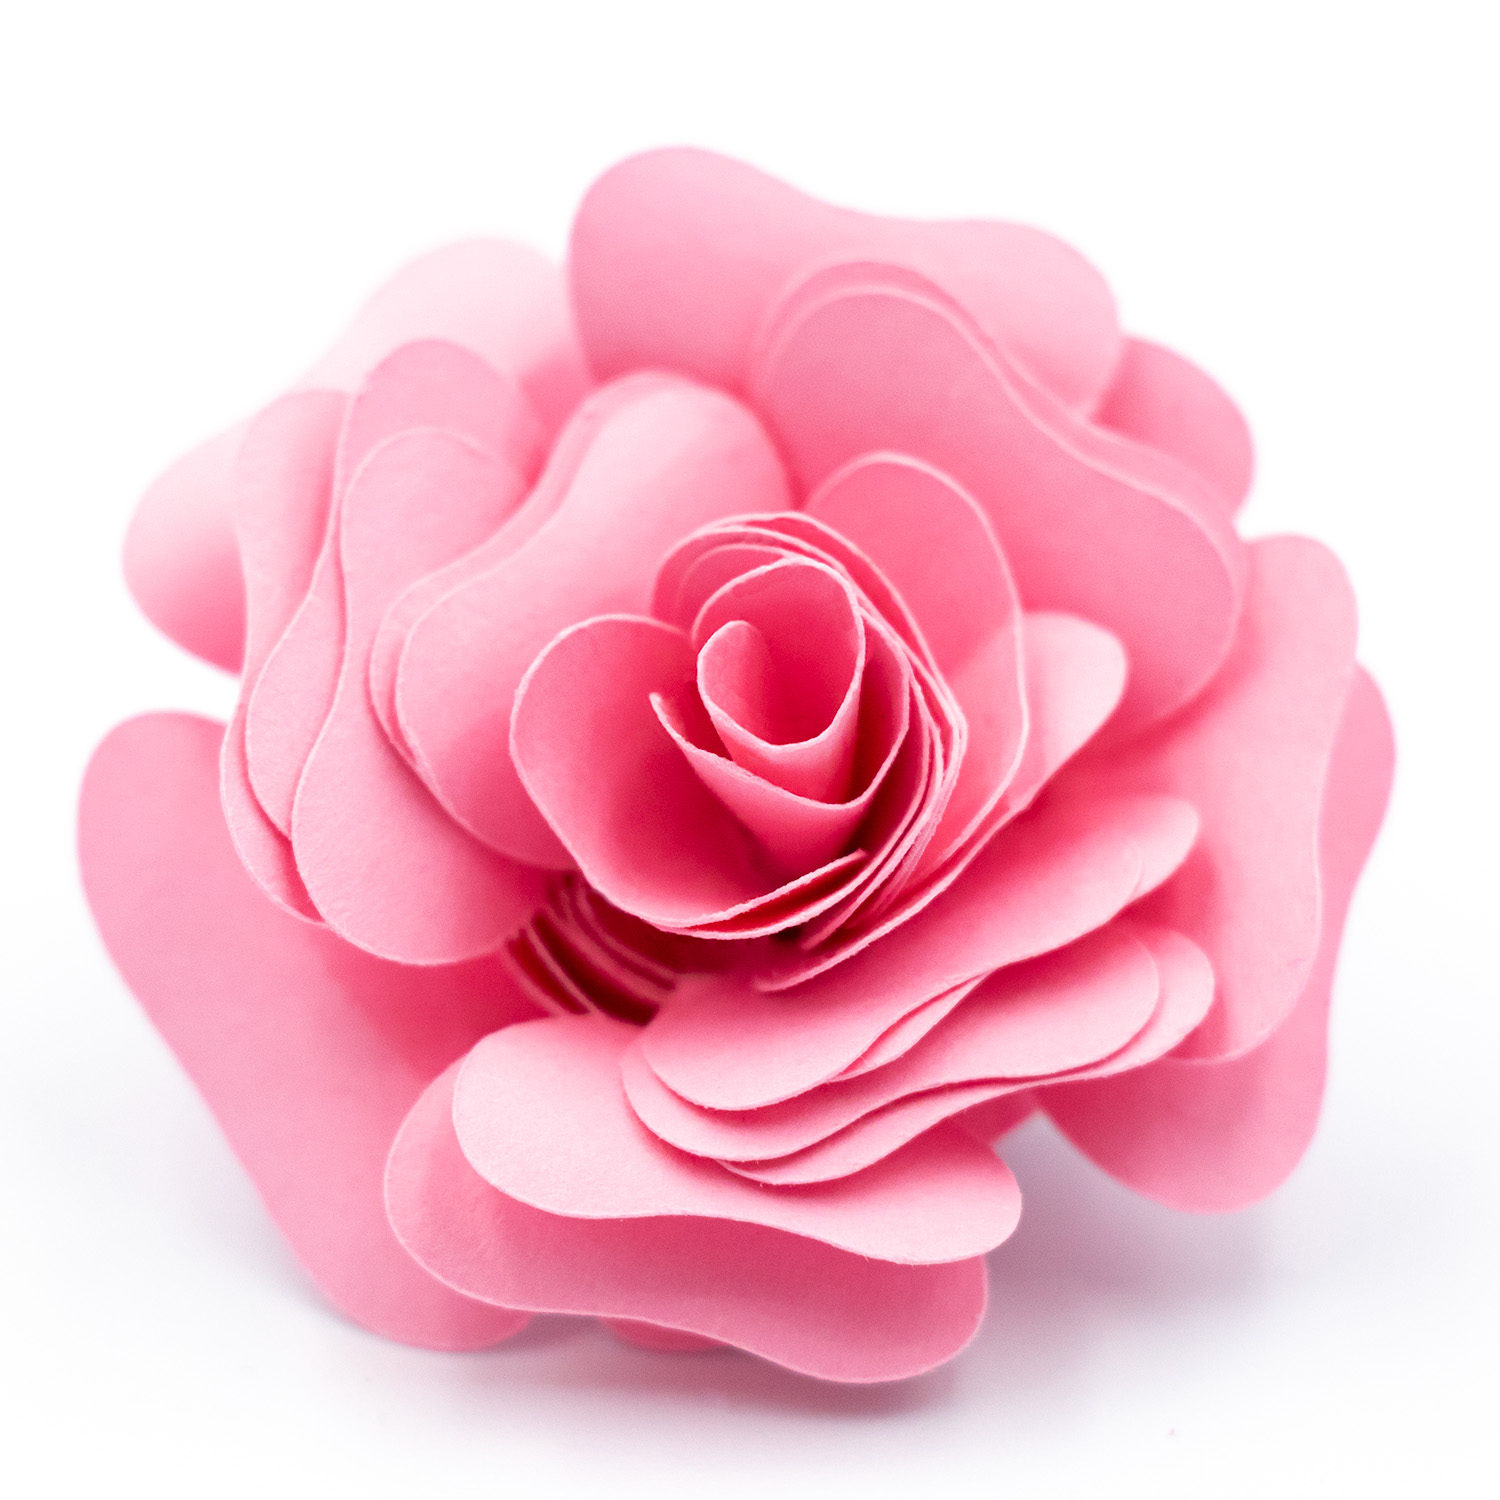
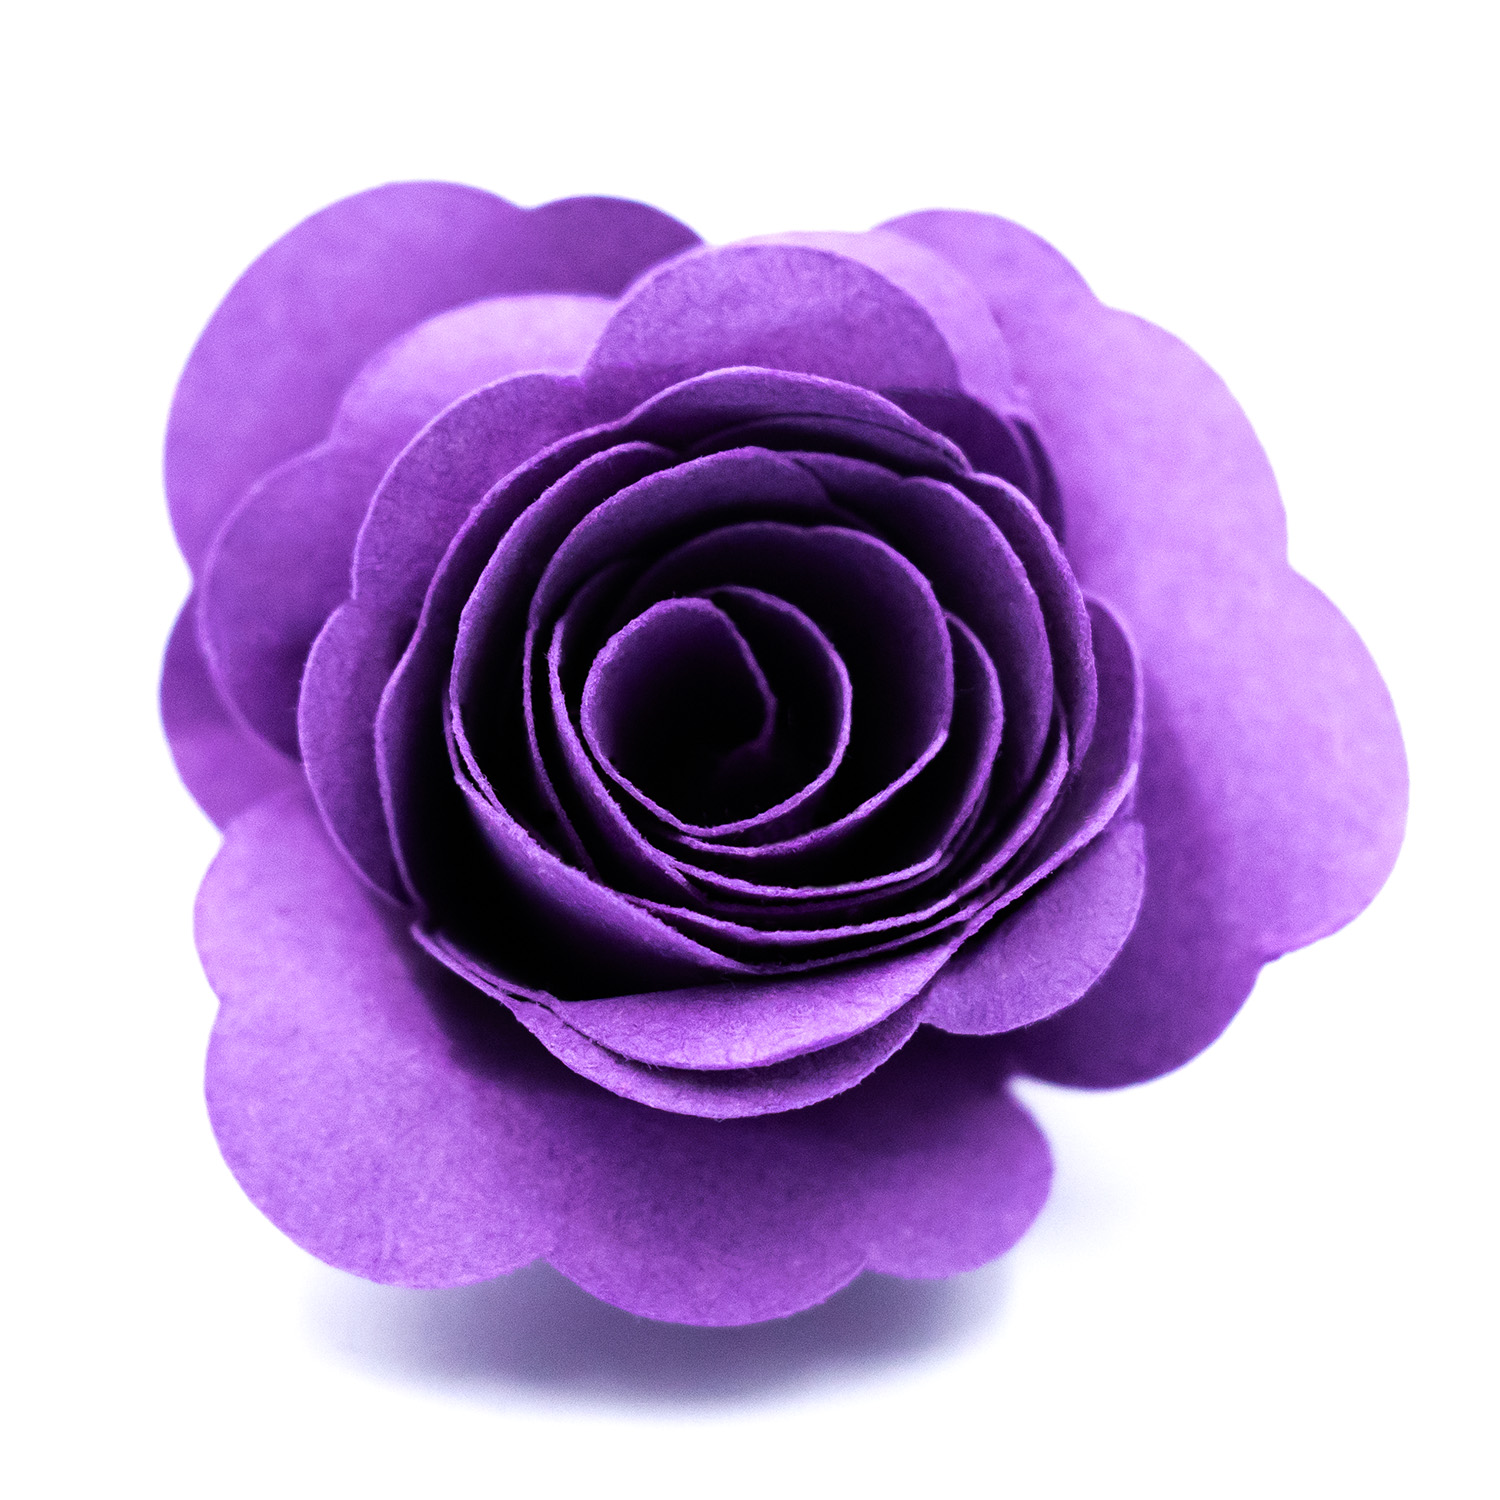
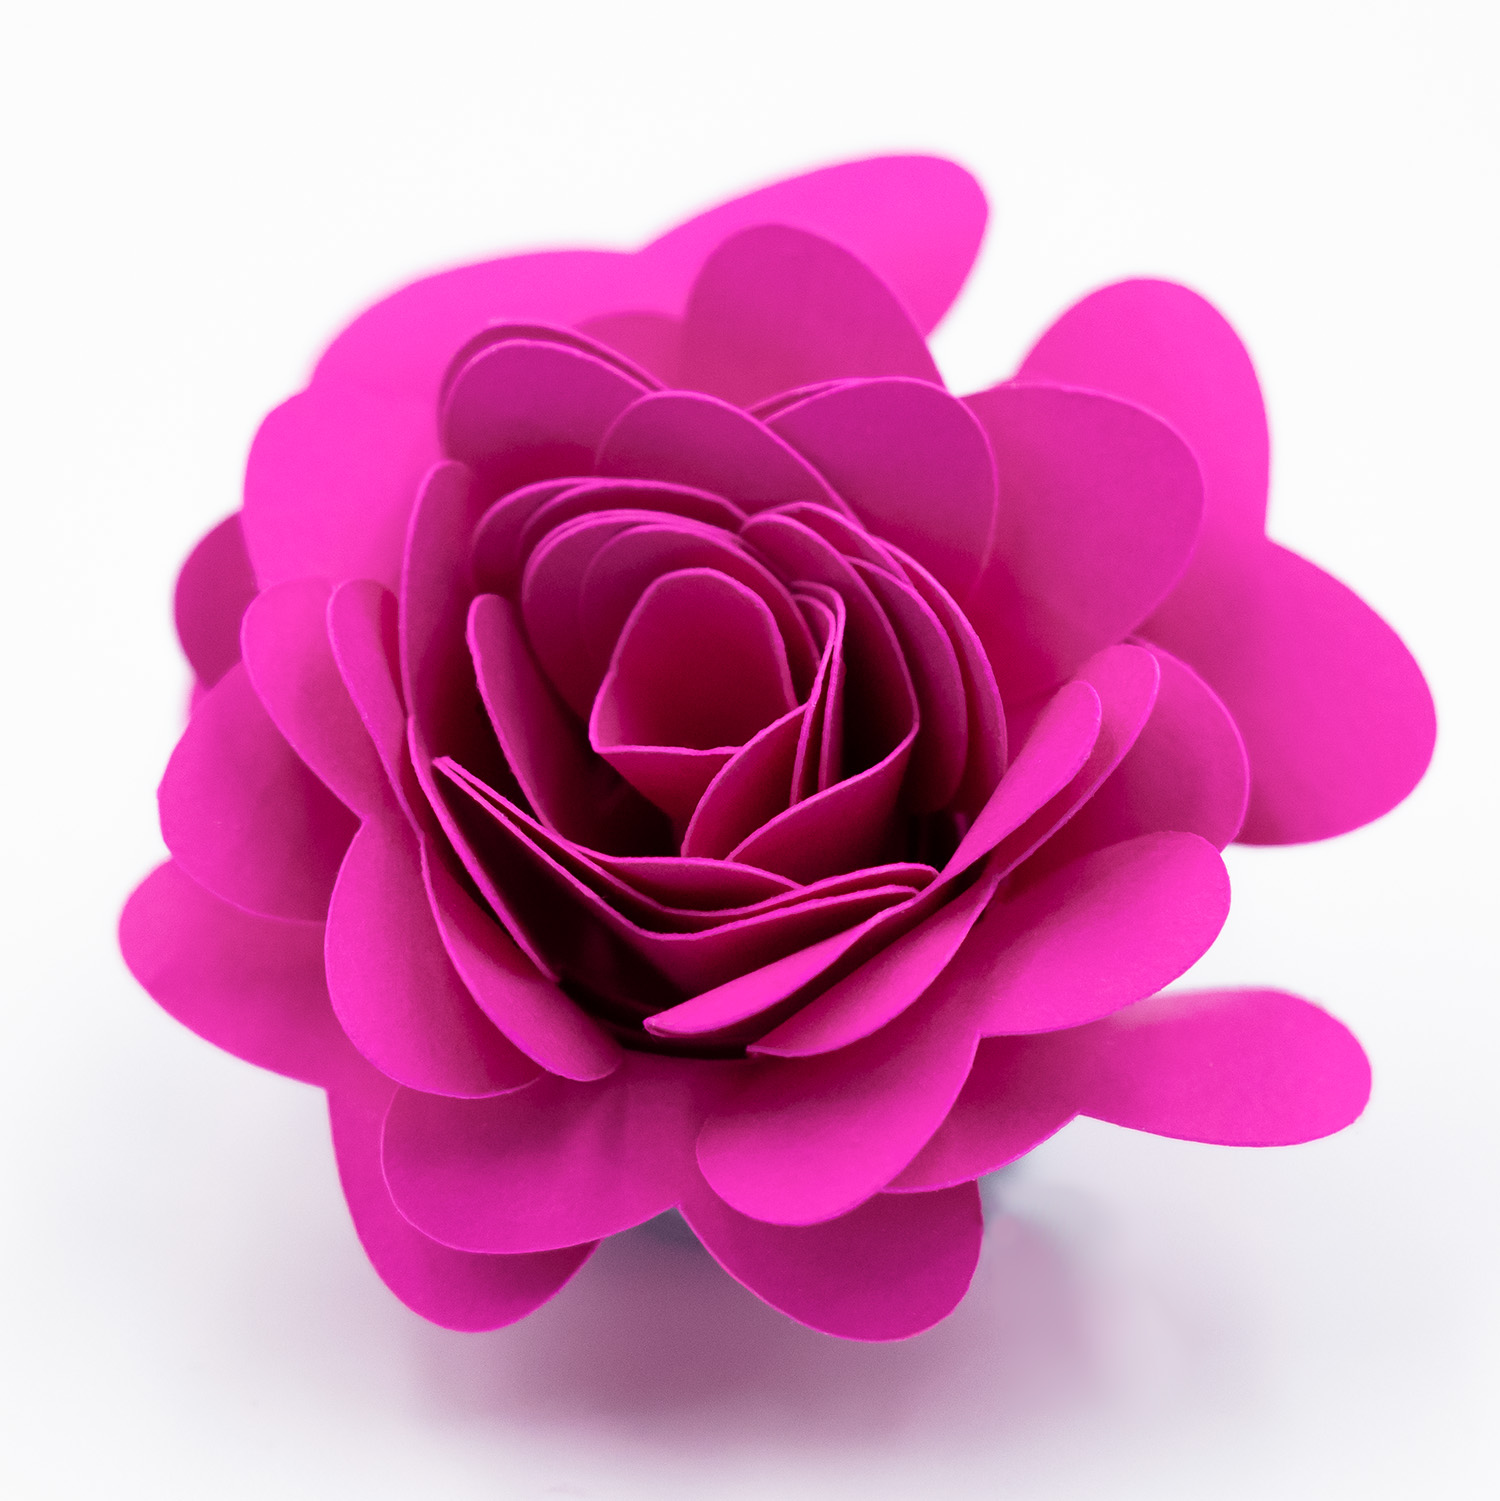
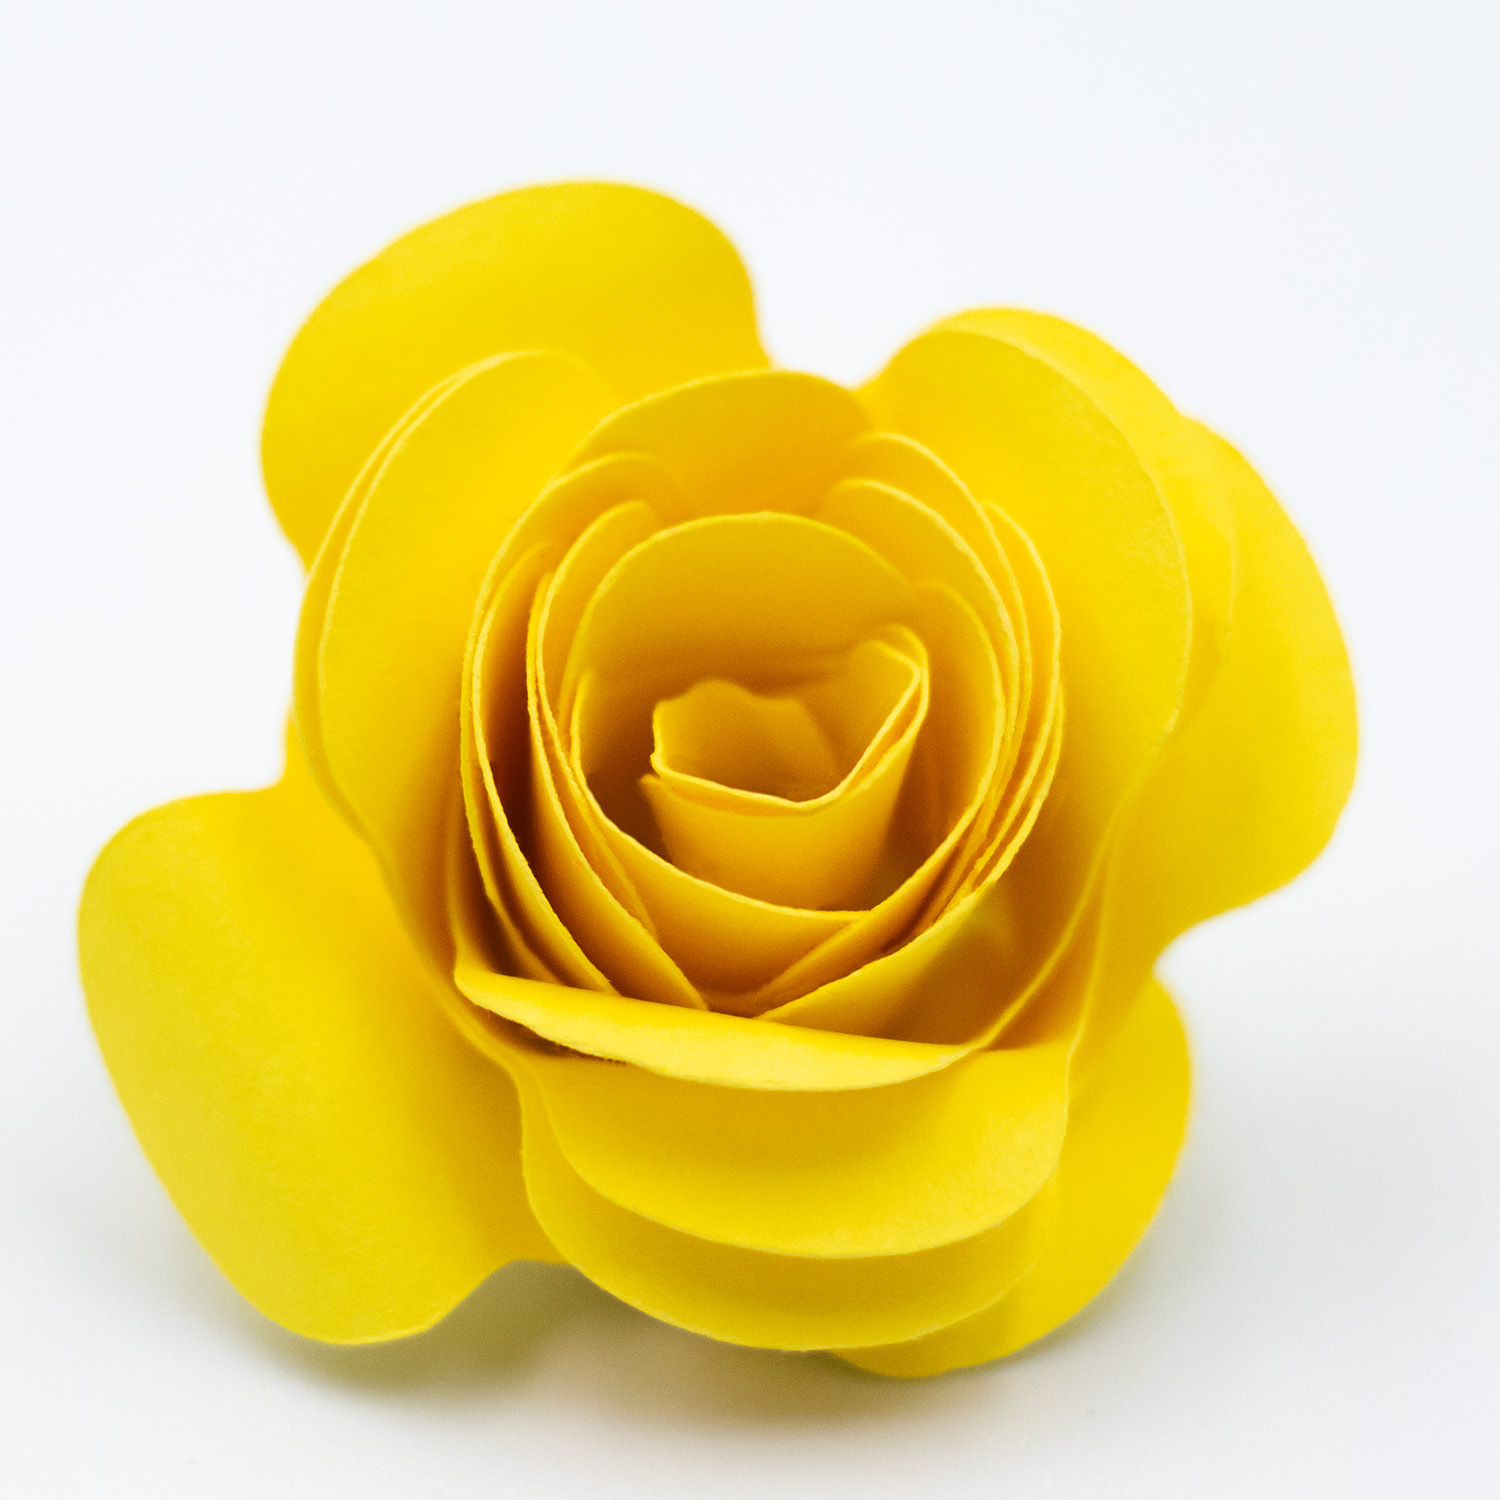
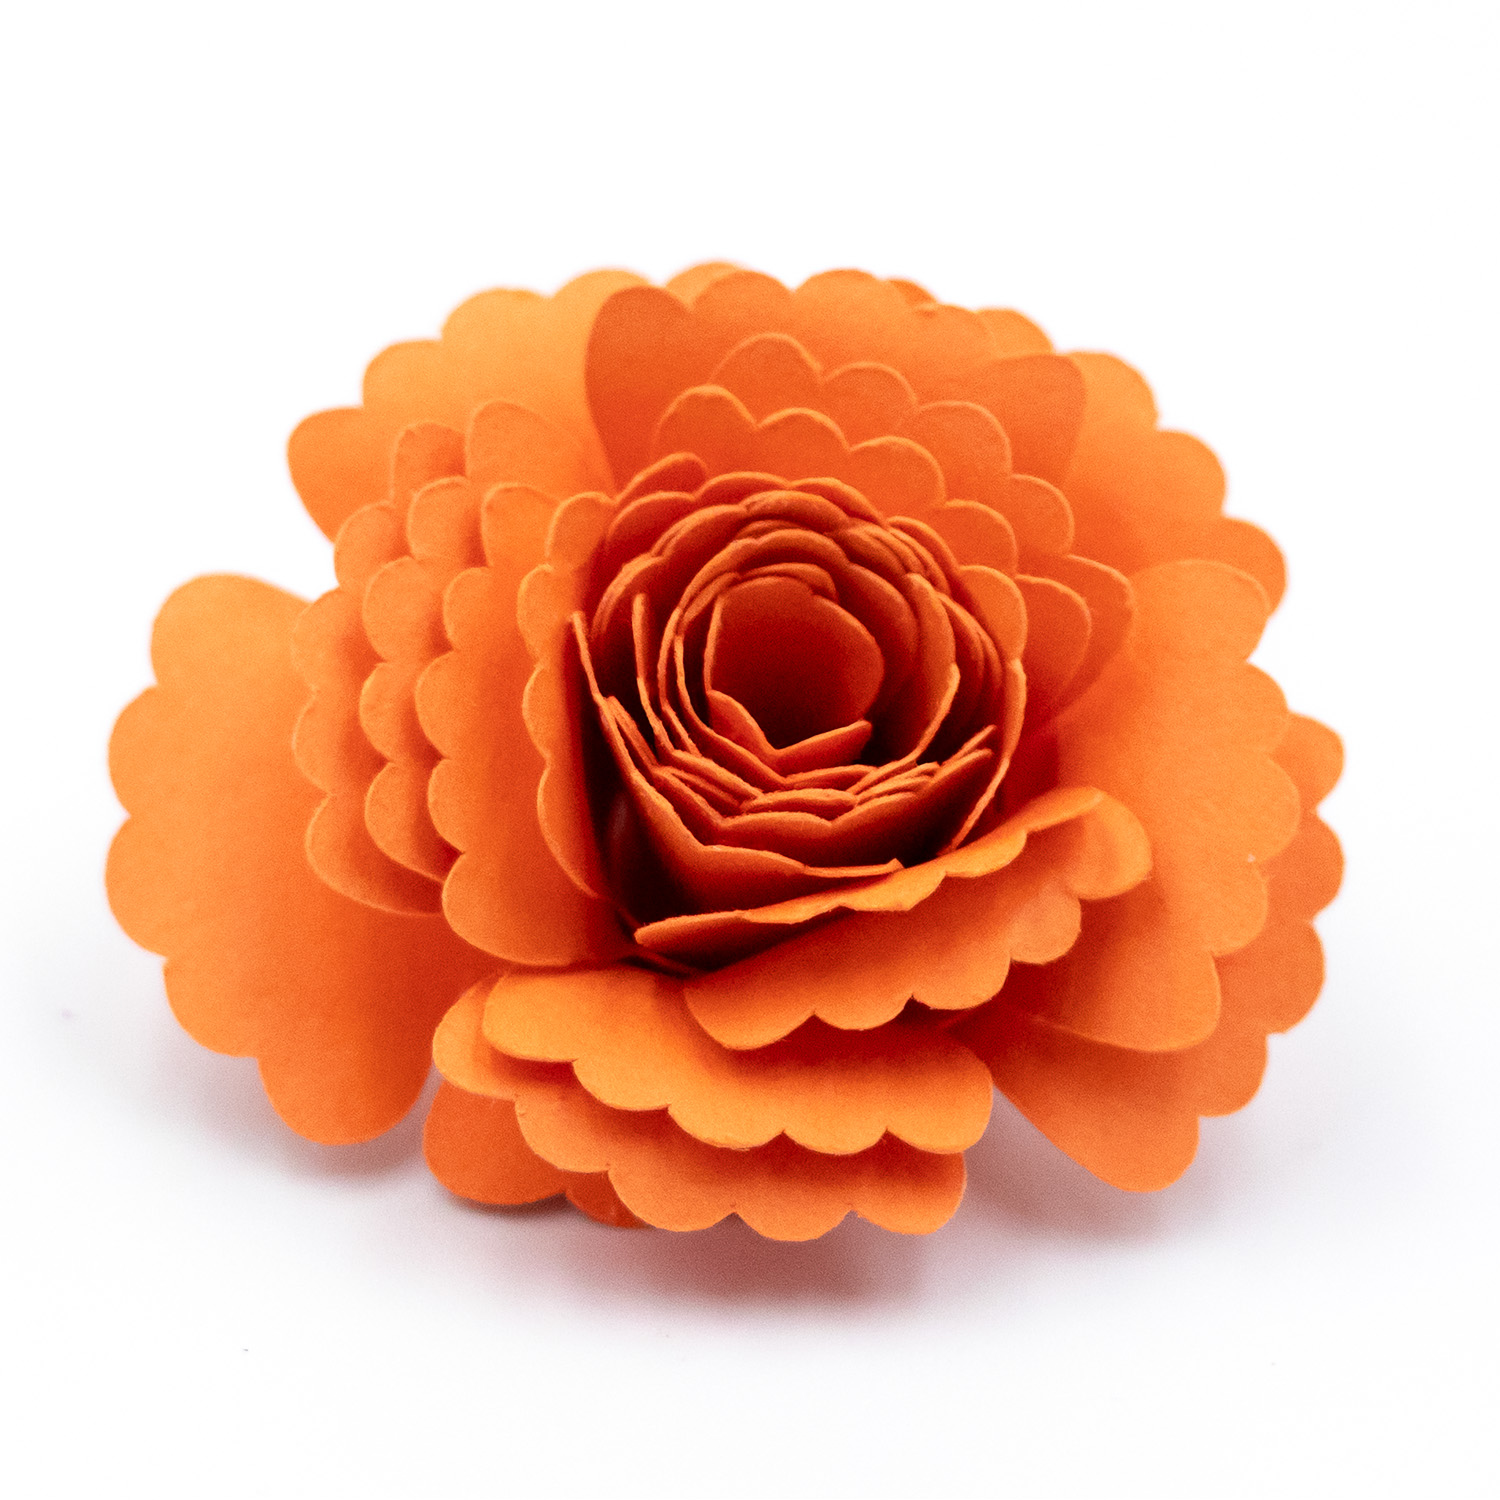
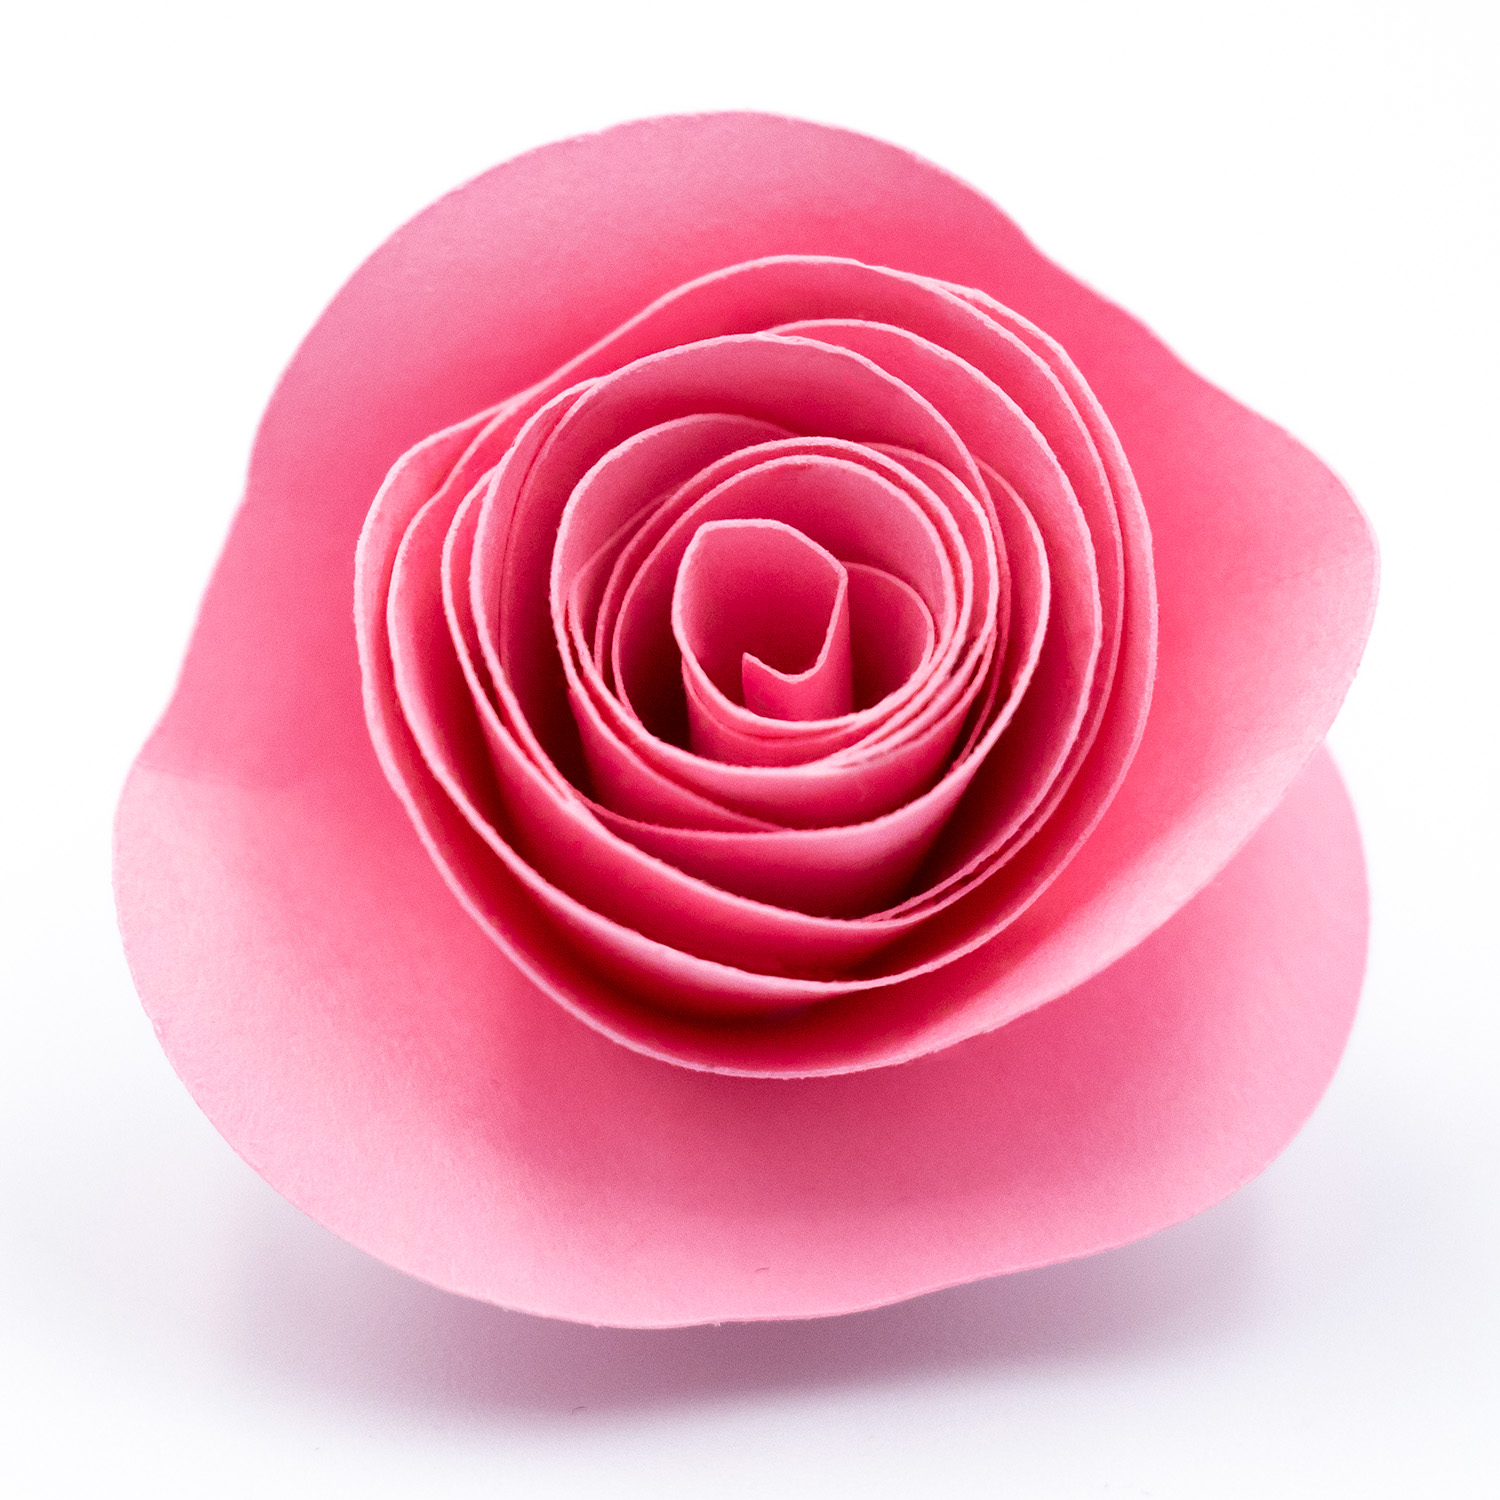
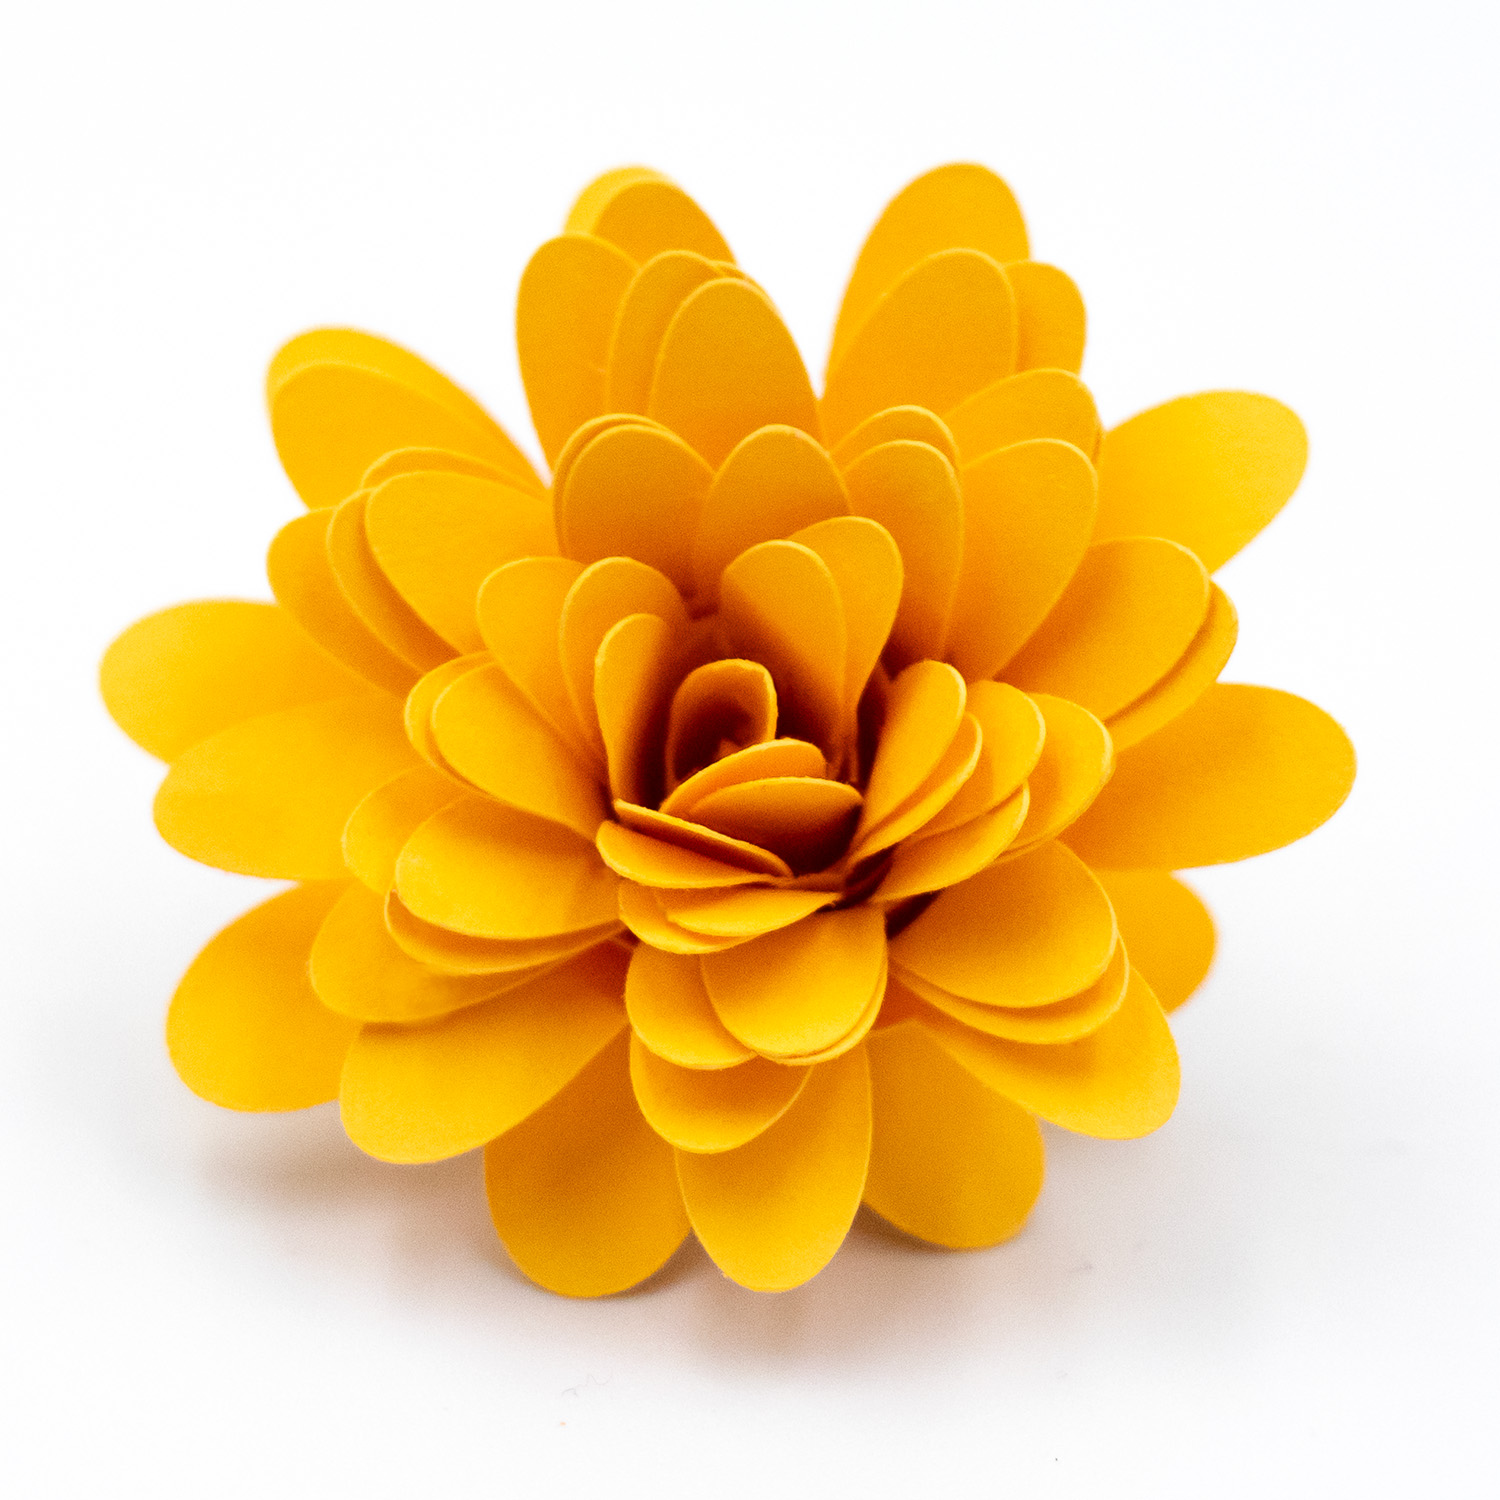
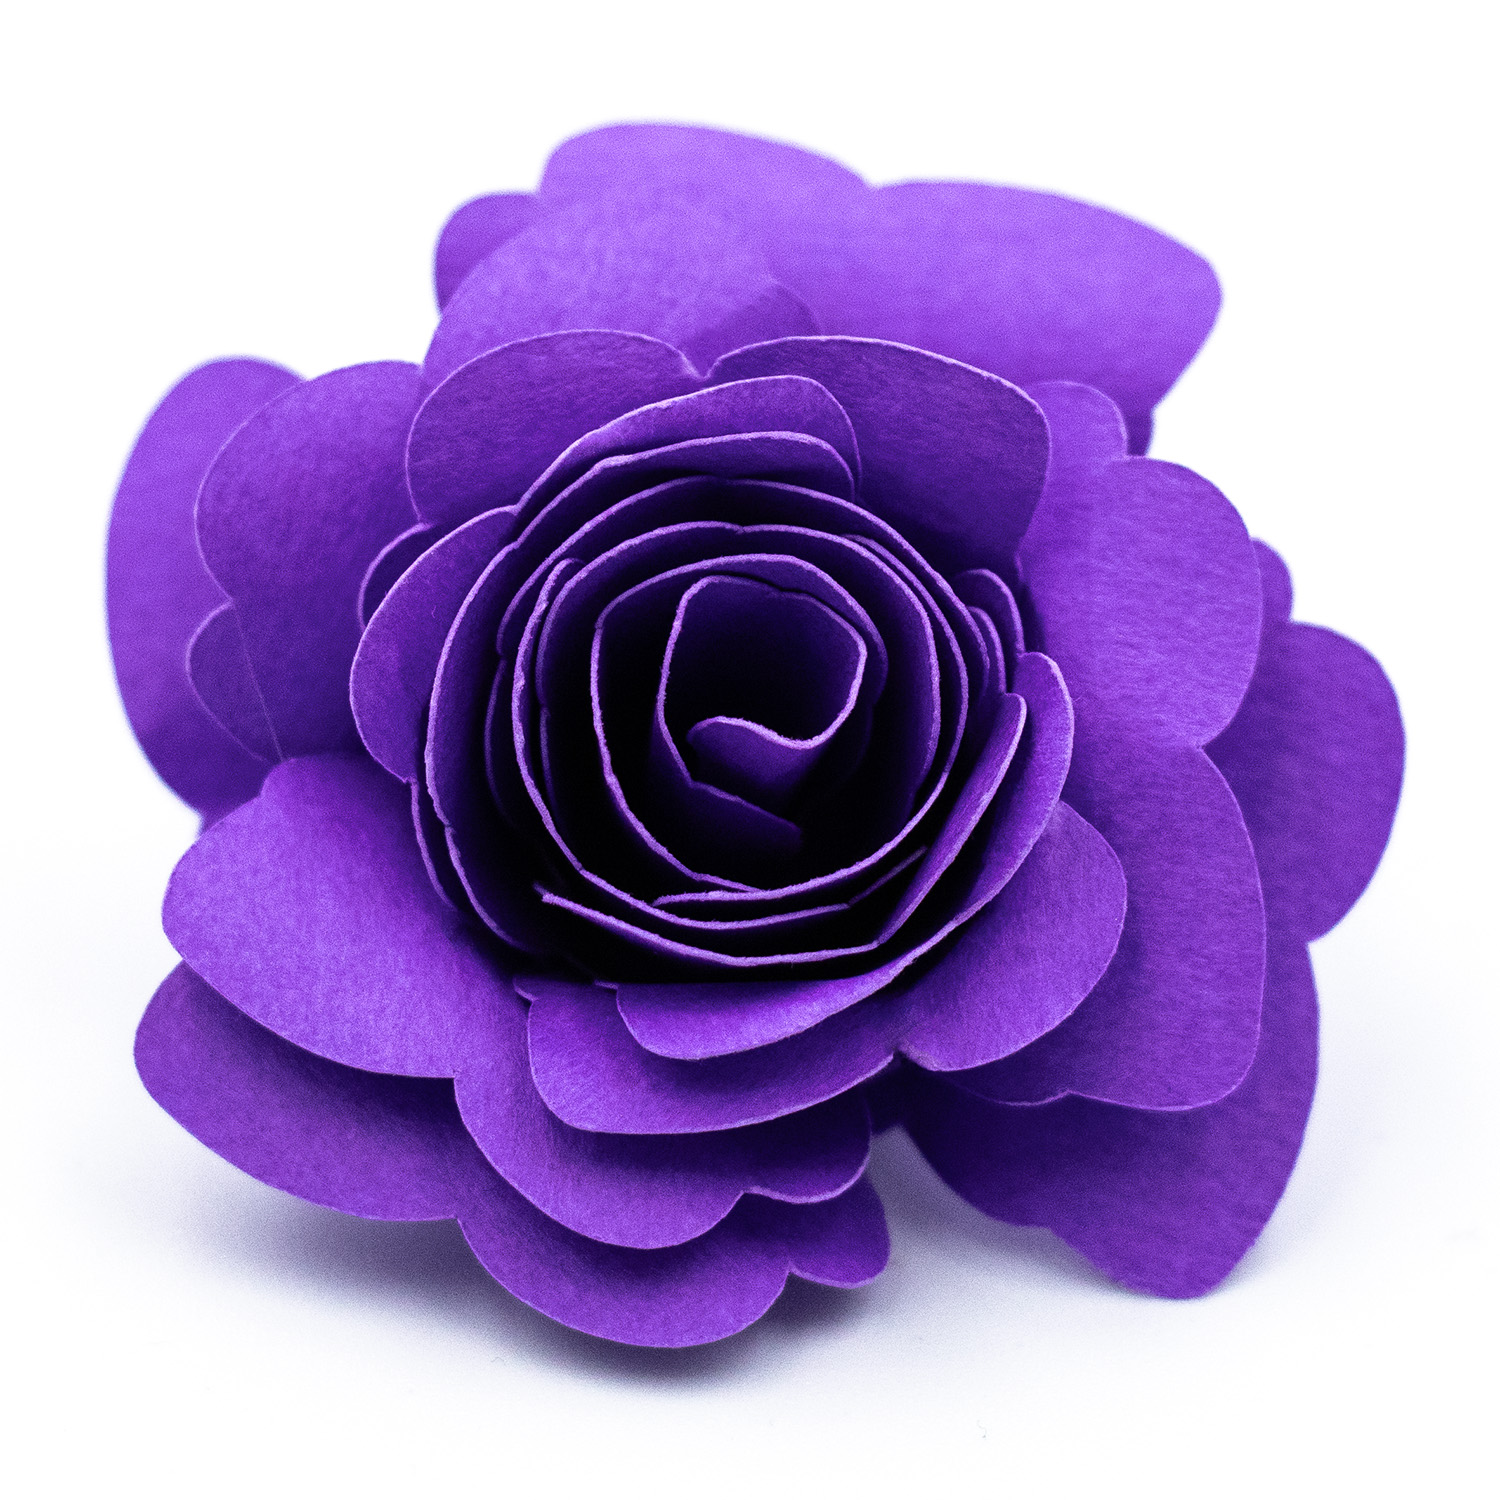
For this shadow box, I used four of my rolled flower designs. Mixing petal shapes is the key to getting that full, lush look rather than everything looking identical.
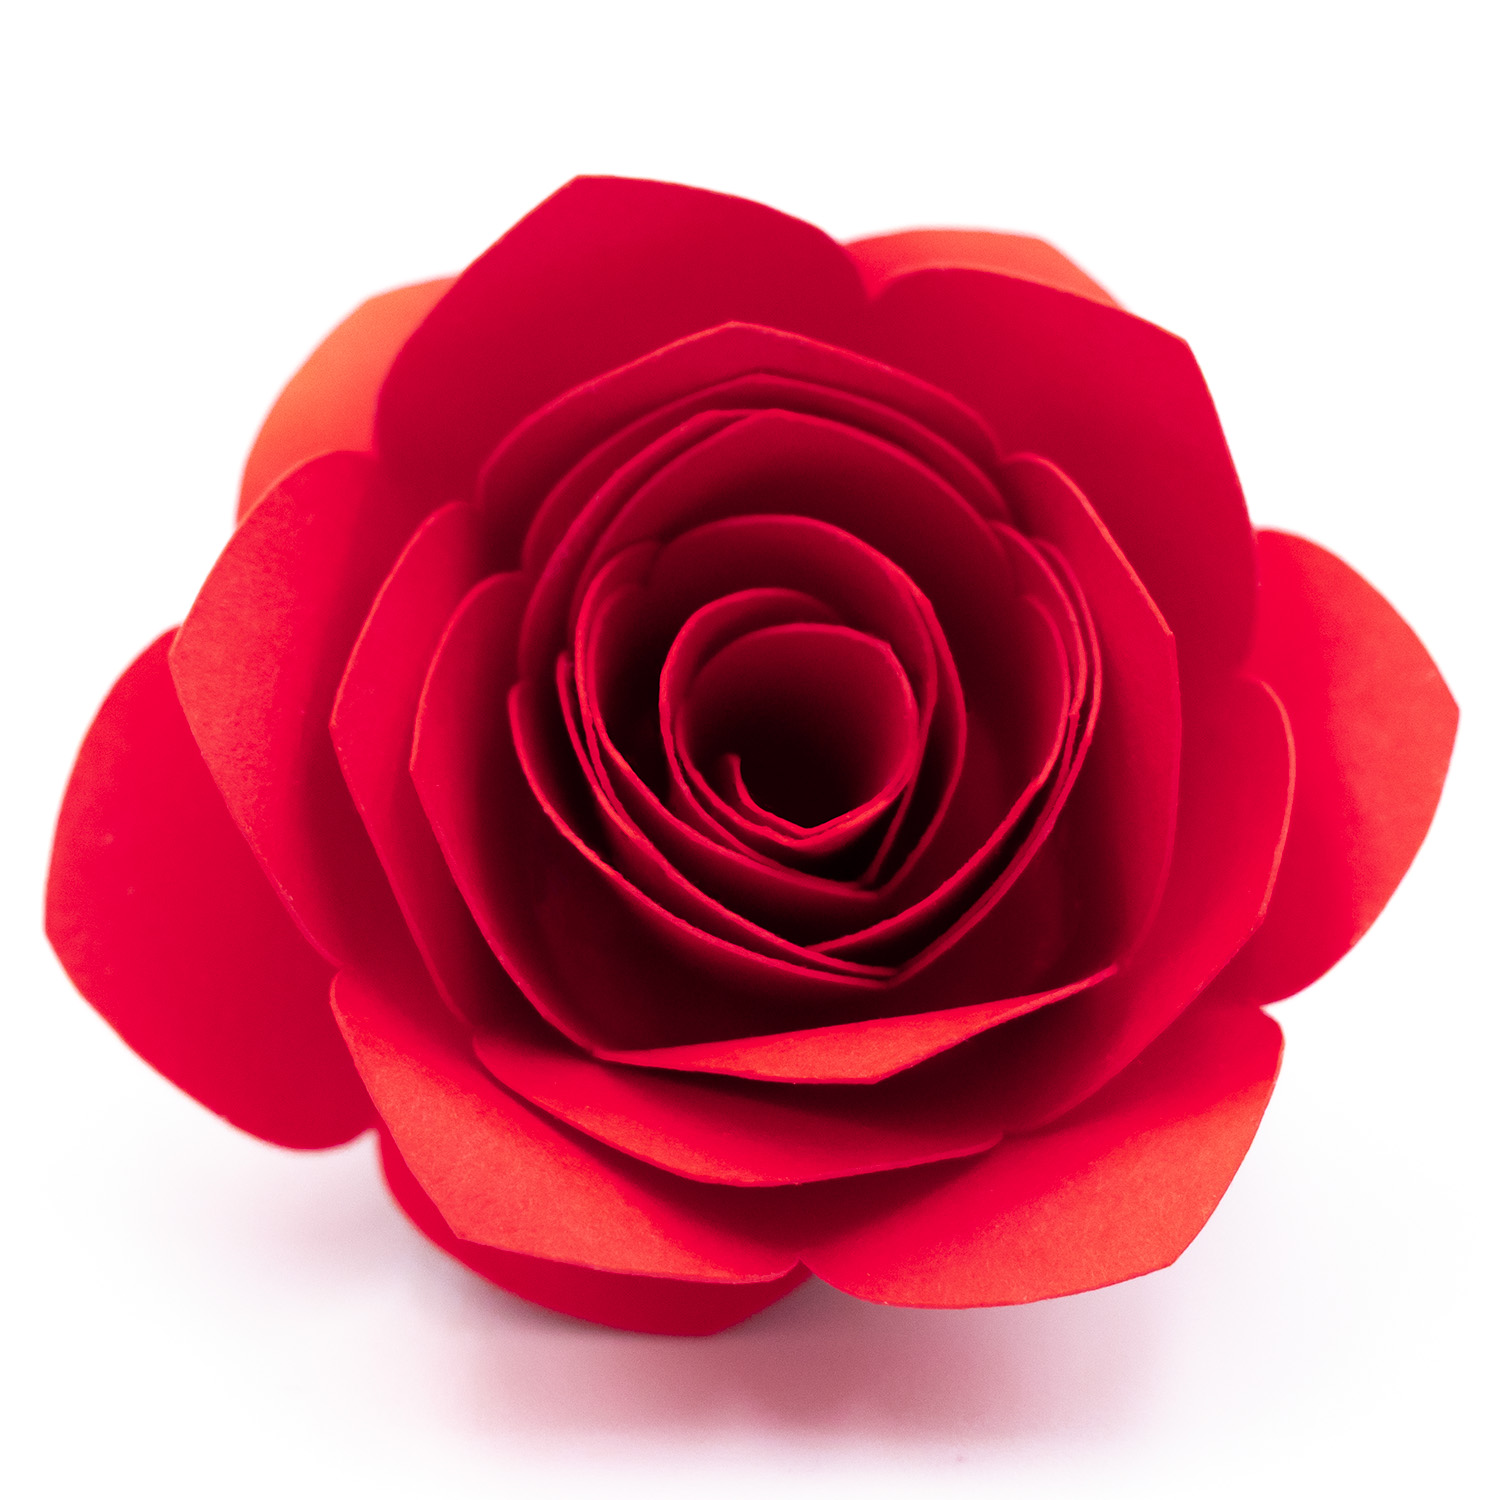
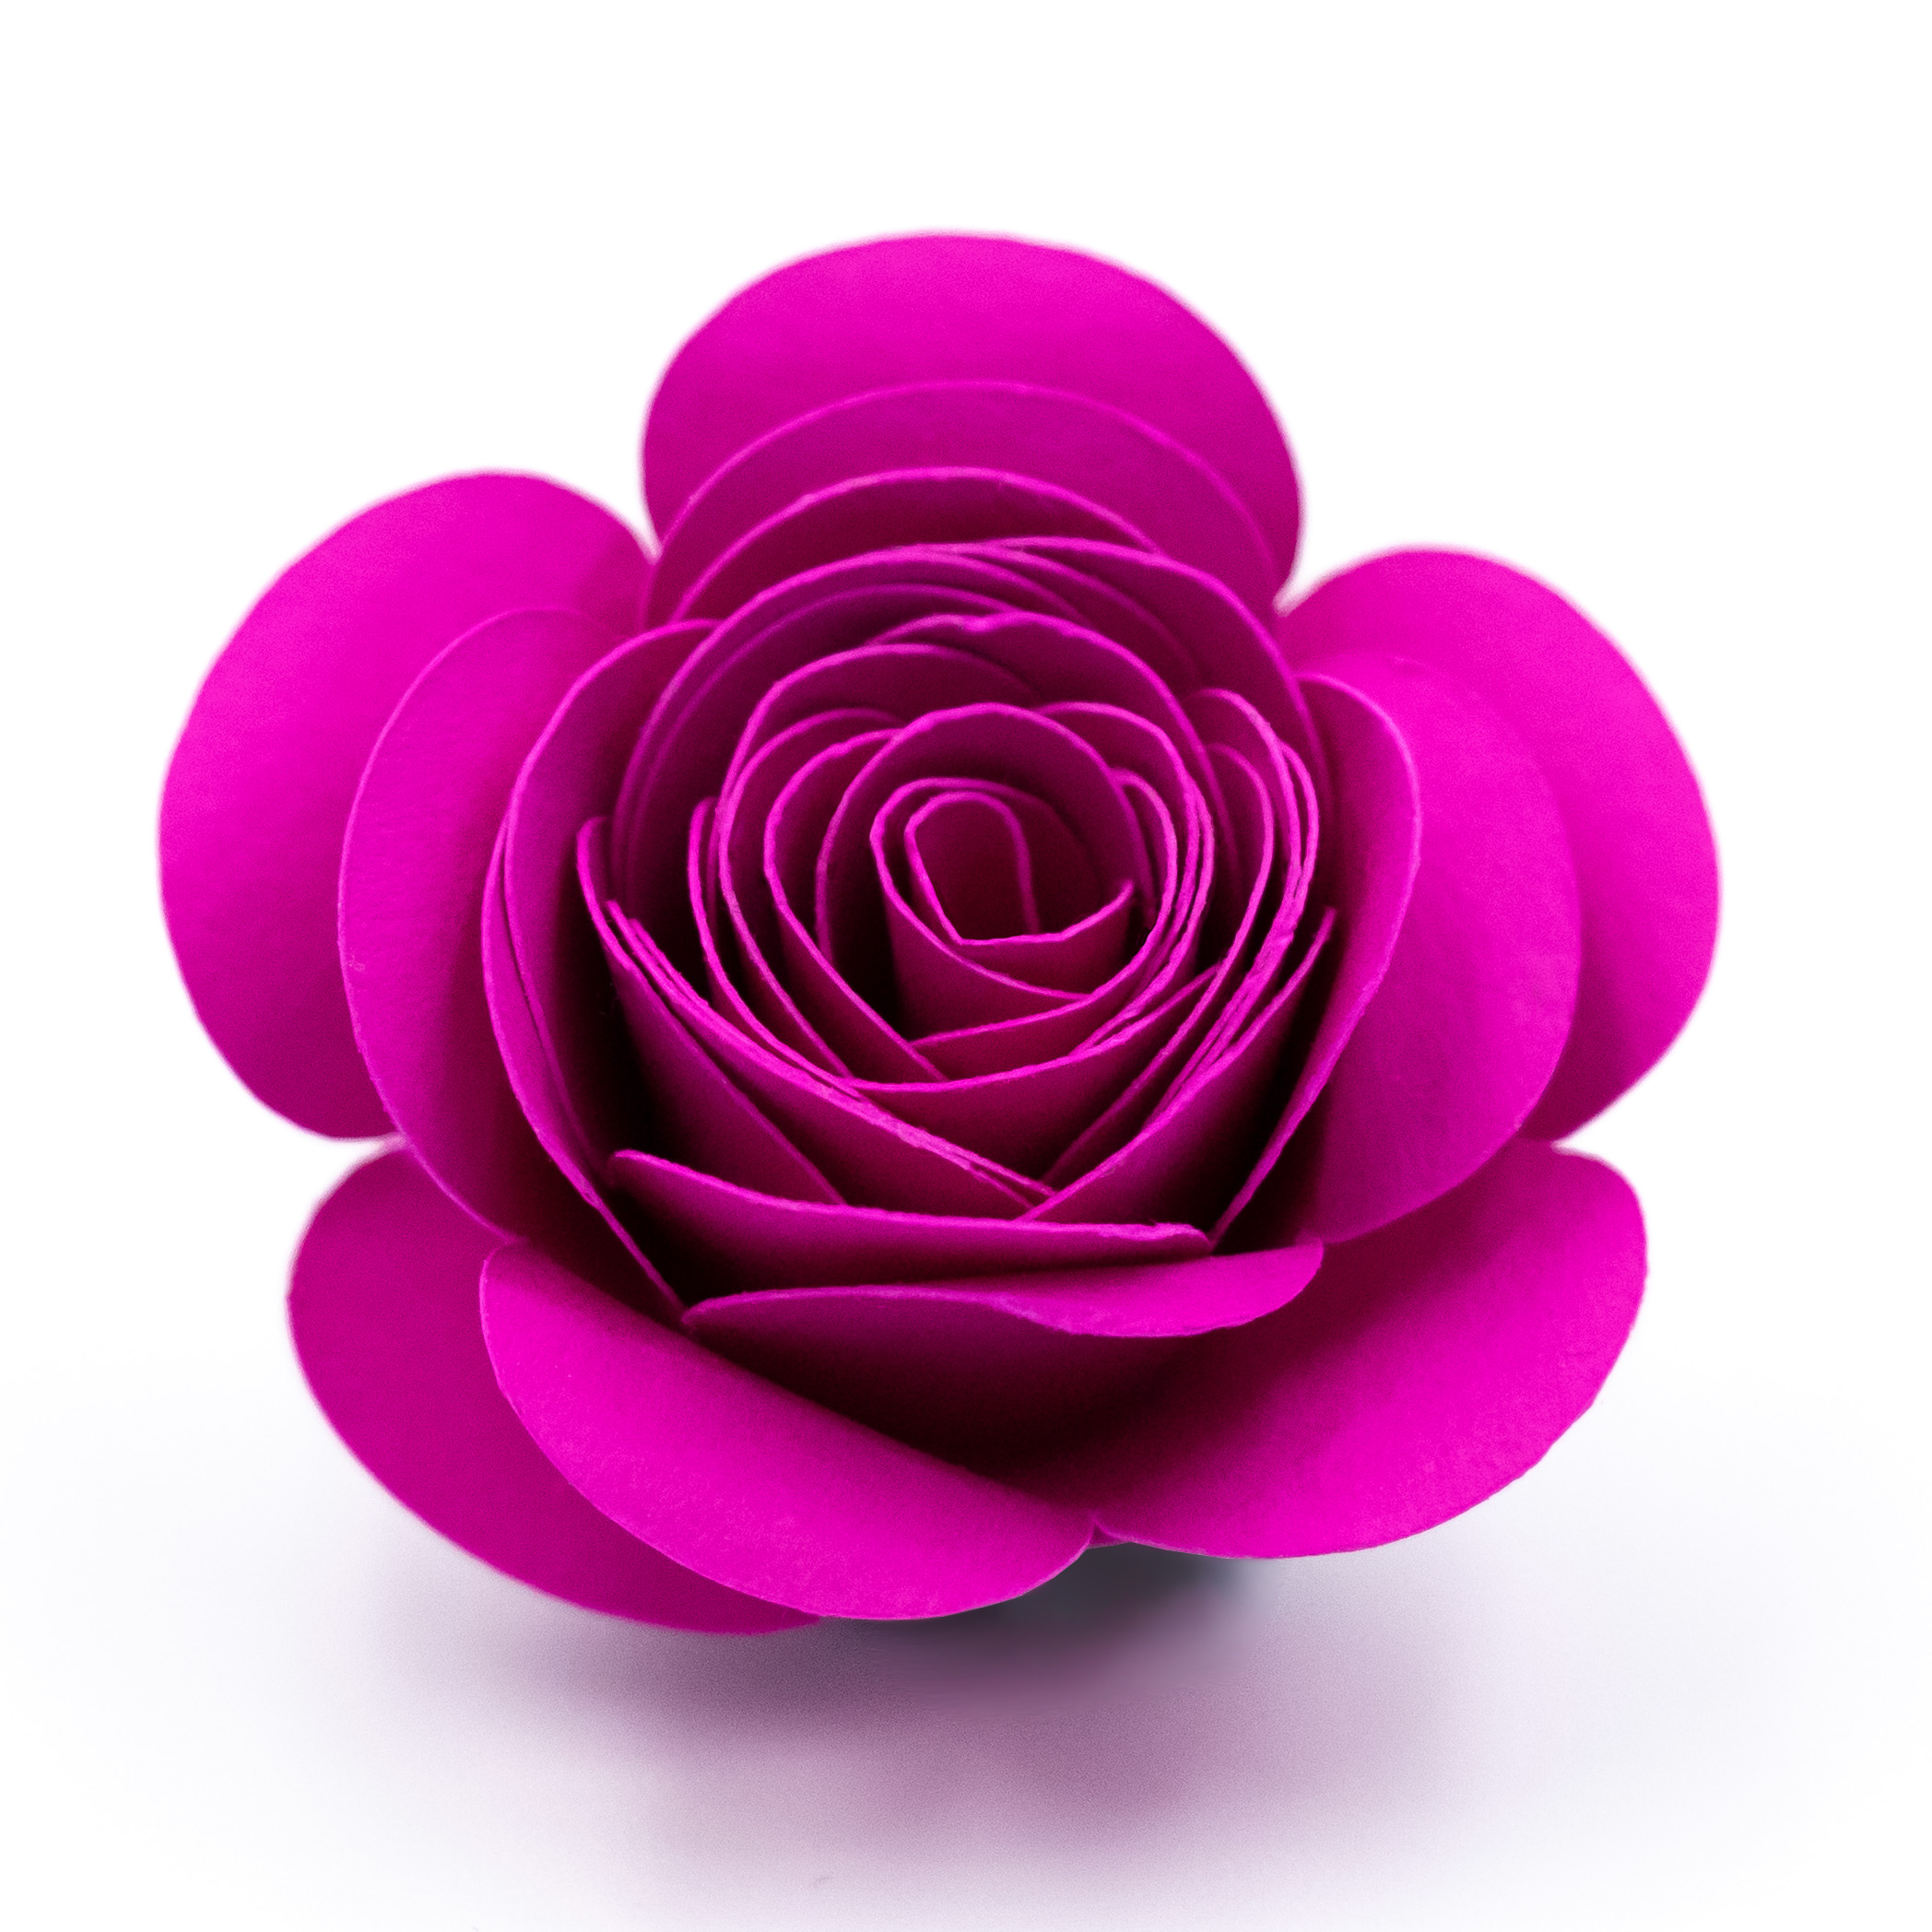
I cut flowers in three shades: deep red, mid red, and hot pink. The contrast between the deep burgundy and the bright pink keeps the eye moving across the finished piece.
Step-by-Step Instructions
Step 1: Plan Your Colour Palette
Before you cut anything, decide on your colours. For a cohesive look, choose two to three shades within the same colour family. For the shadow box shown, I used deep red, mid red/burgundy, and pink cardstock.
Cut a small test flower in each colour to check how they look together before committing to a full batch.
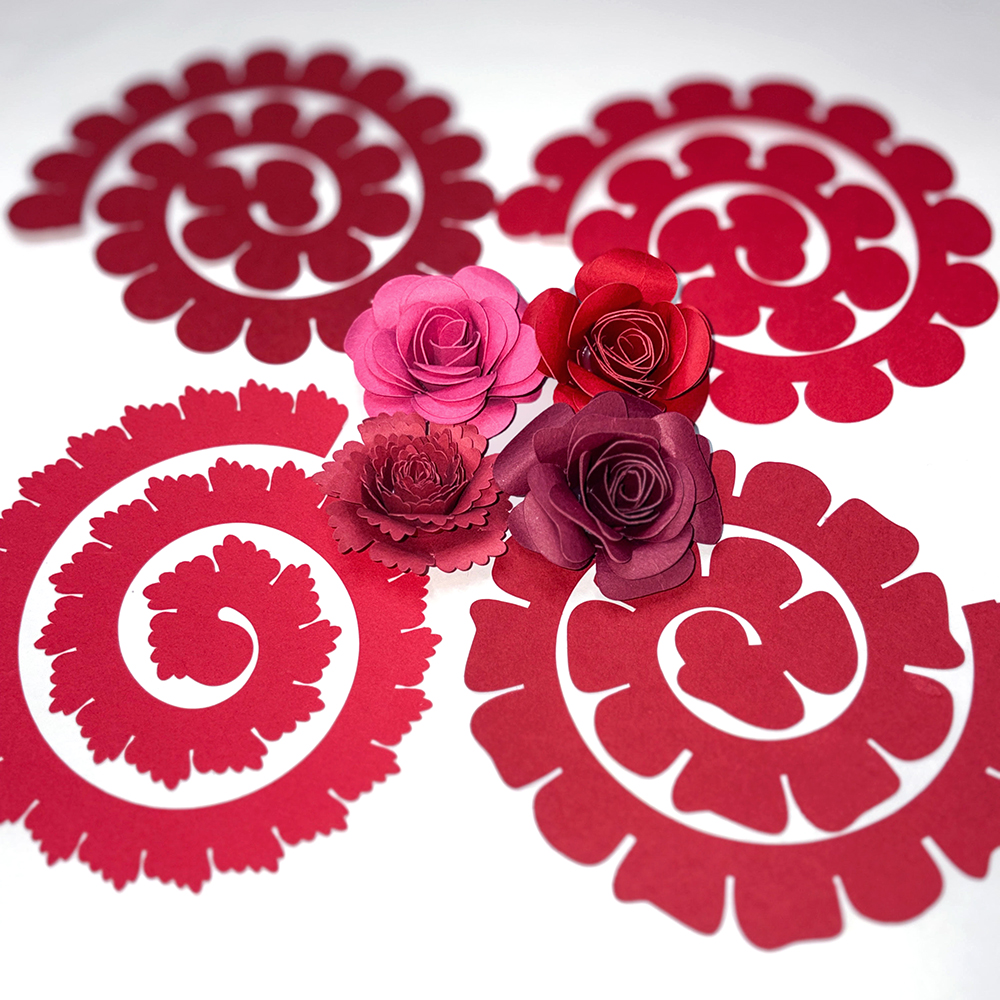
Step 2: Cut Your Flowers
Open your rolled flower SVG files in Silhouette Studio®. For a 30cm x 30cm shadow box, you will need a lot of flowers – the one shown used approximately 65 to 75 blooms in varying sizes. I cut approx 80 flowers for the shadow box. The number you require will in the end depend on how tightly rolled your flowers are and how tightly you pack them into the frame. This purely comes down to personal taste. Having a several spares comes in handy when it comes to gluing them down.
A few tips for this step:
Fit all four flowers on a letter sized page to save time. They will fit at purchased file size with some manoeuvring. Or fit however many you can on your chosen page size. Having them all on one page also ensures a good variety of shapes for each colour sheet.
Cut more than you think you need. It is easier to have extras than to stop mid-arrangement to cut more.
Roll at varying levels of tightness to ensure varying sizes to fill gaps.
Start rolling from the outer edge of the spiral using a quilling tool or tweezers.
Roll inward toward the centre, keeping the base edge as even as you can.
Let the roll relax slightly before gluing, so the petals open up naturally.
Apply hot glue to the base of the flower and adhere flat circle at end of spiral. Don’t be too concerned if flat circle isn’t spot on in centre, you won’t see it.
For a shadow box, I recommend rolling most flowers to a medium tightness. Very tight rolls look like buds; looser rolls look more like open blooms. A mix of both adds variety.
Step 4: Ink or Colour the Edges (Optional)
One of the easiest ways to add depth is to ink the edges of your flowers before rolling. Use an ink pad, soft pastel, chalk, or a slightly darker paint shade and lightly brush along the outer edges of the spiral.
You can also do this after rolling if you prefer a subtler effect.
Step 5: Prepare Your Sentiment
The sentiment for this project was cut from white adhesive vinyl and applied to the outside of the glass or acrylic panel. If you prefer the inside of the glass you will need to flip the design so it is backwards.
Design or select your sentiment SVG in Silhouette Studio®. Size it to fit comfortably within your shadow box frame.
Cut the sentiment from white vinyl.
Weed the excess vinyl carefully.
Apply transfer tape and transfer the sentiment to the outside face of the glass or acrylic panel.
Smooth out any bubbles and remove the transfer tape slowly.
If you feel confident enough to try it applying the sentiment to the inside of the glass gives a clean, embedded look once the flowers are in behind it.
Step 6: Arrange Your Flowers
This is the most satisfying step where the project comes together.
Remove the backing panel from your shadow box and set it flat on your work surface. Place a coloured piece of cardstock on the backing panel. This will serve as a pretty contrast to your flowers. I chose a deep pink shade for mine. You might find it easiest to temporarily tape the shadow box insert to the backing panel with the cardstock in between to help frame the flowers. Begin placing flowers without gluing, starting from the outer edges and working inward. Vary the sizes and colours as you go, and mix petal styles to avoid repetition.
A few arrangement tips:
Work from the outside edges toward the centre, or toward where your sentiment will be.
Aim to fill every gap, you want a lush, full look with minimal cardstock backing visible through the flowers.
Alternate deep and light shades rather than clustering similar colours together. Try to keep the colours somewhat random for a more natural look.
Stand the arrangement up occasionally to check how it looks from a viewing angle, since it will look different vertical than it does flat on the table.
Step 7: Glue the Flowers Down
Once you are happy with the arrangement, glue the flowers in place one at a time. Hot glue works best — it grabs quickly and holds well. You may find the arrangement shifts somewhat as you glue. It is handy to have spare flowers in case gaps appear.
Start by gluing the largest flowers first, then fill in smaller ones around them. If any gaps appear as you go, cut and roll a few extra small flowers to tuck in.
Step 8: Assemble the Shadow Box
Once all the flowers are glued and the glue has cooled completely:
Place the flower-covered backing panel back into the frame.
Place the glass or acrylic panel (with the vinyl sentiment applied) over the flowers.
Secure the frame backing as per your frame’s instructions.
The glass sits just above the flowers, so the sentiment appears to float in front of the blooms.
Tips
Frame depth matters. Standard shadow box frames have a depth of around 3-4 cm. If your flowers are particularly full or tall, check the frame depth before you start. Tighter-rolled flowers will fit more easily.
Hot glue dries fast. Work in small sections and have your spare flowers within arm’s reach before you start gluing.
Use a mix of petal styles. Using all the same petal shape makes the arrangement look repetitive. Mixing two to four styles creates a much richer result.
Paper weight counts. Too light and the flowers go floppy; too heavy and they are difficult to roll. 65-80 lb / 176-230 gsm cardstock is the sweet spot. Lighter cardstocks are easier to curl and don’t give unsightly folds as easily.
Cardstock from craft stores works well. You do not need specialty paper — standard double-sided cardstock in coordinating colours is ideal.
Shop the Rolled Flower Designs
[Suggested image: collage of all available rolled flower designs]
All rolled flower designs below are compatible with Silhouette Studio® and available from the Silhouette Design Store.
Have you made a rolled paper flower shadow box? I would love to see it. Share a photo in the comments or tag me on Instagram. I would love to share your masterpiece with my followers.
Don’t forget to follow Clikchic Designs in the Silhouette Design Store for easy to find updates on latest designs.
This post contains affiliate links. If you purchase through them, I may earn a small commission at no extra cost to you.