Creating a Blinkie in Photoshop CS-CS5
Anyone who joins the online digiscrapping communities will notice the popularity of blinking avatars and ‘blinkies’. This tutorial teaches you how to easily create your very own blinking avatars and blinkies in Photoshop CS-CS5.
There are a few more steps to create a blinkie in older versions of Photoshop CS than in Photoshop Elements but once you know how you will be creating dozens of blinking avatars and blinkies! The blinkie size I have used in this instance is 125×60 pixels, another common blinkie size is 150×50 pixels. The avatar size limit on most scrapping forums is 125x125pixels so this is a good size to create your avatar’s at.
Firstly you need to create your design, and this needs to be a layered image, as showing and hiding the layers enables you to create each frame of the blinkie.

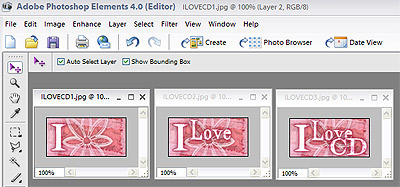
For the purpose of this tutorial I will be using the top three layers as ‘blinking’ layers for the blinkie. You can use any combination of layers you wish to create a frame for your blinkie. In this instance I will keep it simple and only ‘blink’ the top three layers.
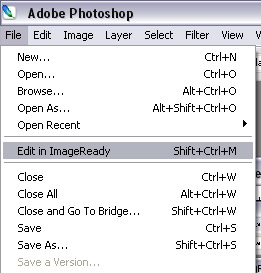
Once you have all your layers ready to go you then need to begin the animation process. To do this, go to the file menu and choose Edit in ImageReady.
Note: This step is unnecessary in Photoshop CS3+ as animations are now done within Photoshop itself. Simply click on the window menu and click on Animation to open the Animation window while still in Photoshop.
Image Ready will open up (this can sometimes take some time to load) with your image in it, and no longer in Photoshop. If you need to go back and fix something you can just choose Edit in Photoshop from the file menu of Image Ready. Be warned however if you do this you should do so before you begin the animation process as it can play havoc with your frames. If you need to do it after you have started adding new frames, first delete the extra frames and then do your editing in Photoshop before coming back to Image Ready.
Next you need to open the Animation window, in image ready or in Photoshop CS3+.
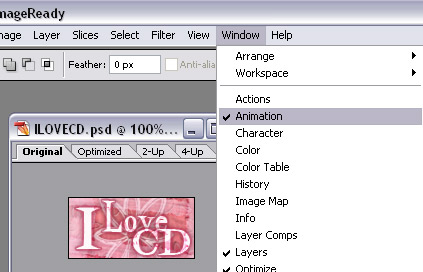
Go to the Window menu and ensure that the Animation option is checked. This will ensure you have the animation window open.
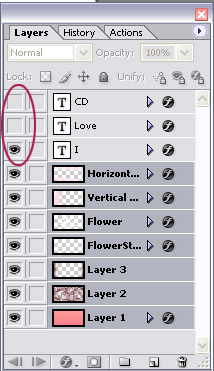
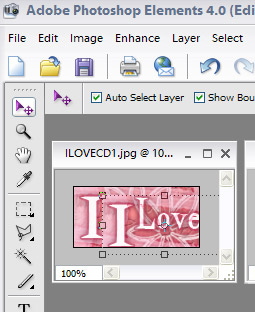
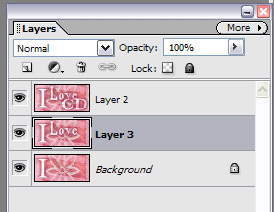
To create each frame we need to turn on the layers we want visible and off the layers we don’t. You can do this by clicking on the eye next to each layer. If there is no eye next to the layer, it means the layer’s visibility has been turned off. In the above sample we have turned off the ‘Love’ and ‘CD’ Layers which will be for the first frame of our blinkie. For this blinkie the first layer only has the ‘I’ layer visible.
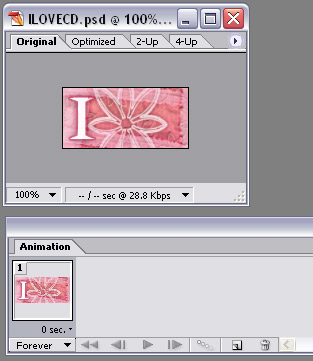
Here we have the Animation window visible. This is where we create each frame of the animation. Here we need to ensure it is set to forever. This allows the blinkie to continue blinking. If it is set to once, it will only go through the frames once and then stop.
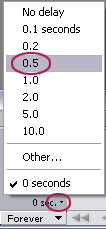
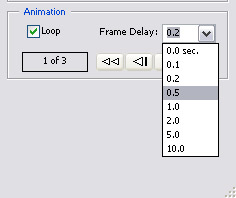
The frame delay is the length of time in seconds the frame will appear. You can set different time values for each frame if you wish. For instance if something takes a little longer to read you can make it a longer frame delay. If it is just an outside border which flickers, you can set it to a short delay so that it blinks quickly. For the purpose of this tutorial we will set all the frame delay’s at 0.5 seconds.
Once the first frame is set, following new frames are defaulted at the same value, but can be changed if you wish.
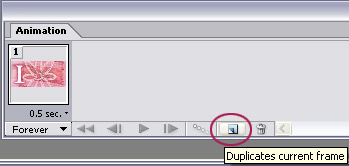
We already had the first frame ready to go, and just had to adjust the frame delay. Now we are ready to create the second frame. First we need to click on the New Frame Icon circled above.
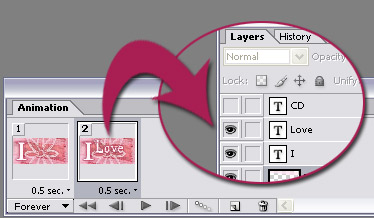
Next we need to make the layers visible that we want to appear in the second frame of the blinkie. Above shows the second layer we want visible.
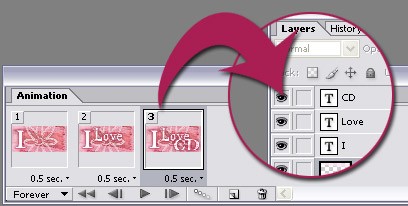
Here is the third frame we wish to have for the blinkie, showing the layers which are visible for this frame. We have now finished creating the frames for the blinkie and it is now ready to be saved into gif format.
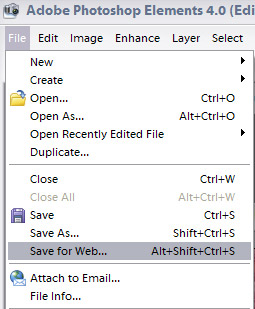
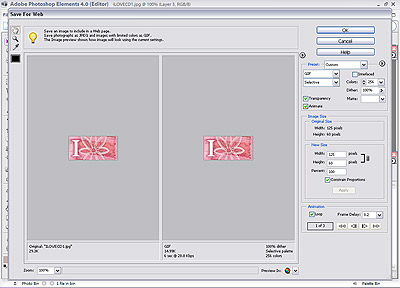
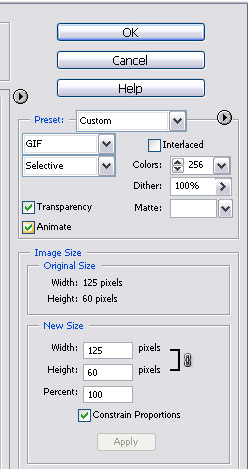
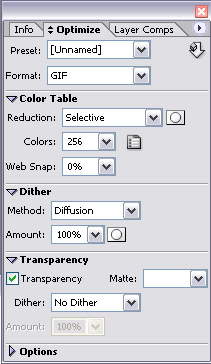
Note: In CS3+ this step is now done through Save For Web & Devices (file menu). The settings are on the right hand side of the window. If you wish to view the quality settings, click on the two up tab. This allows you to view the Original file on the left, and your adjusted settings on the right. You can use the play button at the bottom right of the window to view your animation before saving. Once you are happy with your settings click on save and save to your computer.
Photoshop CS3+ Save For Web & Devices
Back to prior photoshop versions…
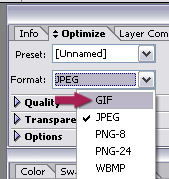
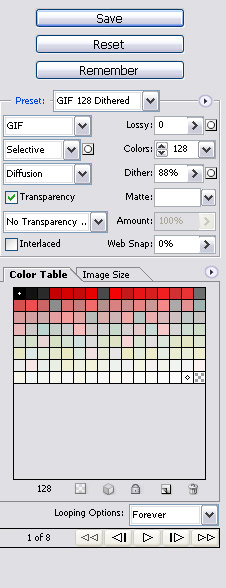
Next we need to make sure that gif is selected in the optimize palette. If you need to compress the image a little further and reduce the file size you can try adjusting the number of colours, however this can reduce the viewing quality of the image. If file size is not an issue you will not need to adjust any of the other settings.
For the purpose of this tutorial I have left all the settings at their defaults.
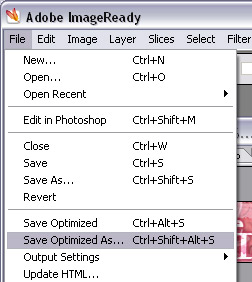
Now it is time to save our image! Go to the file menu and choose Save Optimized As. Choose an easy to find spot on your hard drive to save your blinkie and you are done!
This article is © Clikchic Designs (clikchic) 2006 All Rights Reserved Not to be reproduced in any way without written permission