Thank you to EVERYONE who voted on my designs in the Dell Make It Yours Competition. I am sooo excited to announce that thanks to your votes, all three of my designs made it to the top 25 most voted designs in the competition which meant all three were eligible for judging.
Not only did ‘Not Your Ordinary Coaster’ have the most votes, but it was judged as the most creative entry in the top 25. This means that I won the main prize and the person with the second most votes would have won the voting prize. There was also a runner up prize. I have not heard who won the other two prizes as yet, but I will be sure to post it once I find out.
What did I win? I am so totally excited that I have won such a cool prize!!!
I won a Dell Studio Laptop with my winning Design on it! How cool does it look, especially in the arms of this hunk! I also won a cash prize, some of which I will be using to upgrade my desktop to a new DELL!
There have been some comments as to why some designs were removed from the competition gallery, several of which were on the first couple of pages. It is my understanding that there were voting restrictions and some entries were disqualified due to vote rigging. I was assured by Dell over the phone that not only was my design legitimately the one with the most votes, but voted the most creative independantly of the votes by judging panel who did not know how many votes each entry had.
The judging panel chose my design because it ‘was a great reflection of today’s offices environments’. (I am paraphrasing because I forgot the exact words) The design is VERY me, because I am ALWAYS spilling my coffee and have ruined a number of keyboards doing so! LOL Never on my Dell laptop tho!
For those of you who have wondered or were speculating… I created the design using my own hand created brushes. Those coffee stains were hand created by me. The texture of the background was created by me in photoshop with the help of my own collection of hand made photoshop brushes, blend modes and the creative process. It is a shame some people saw fit to insult my design and Dell’s handling of the competition. From my perspective they have been entirely professional throughout even disqualifying entries that received votes in an unfair manner.
All of my votes were made by friends and family and members of the digital scrapbooking community. I did a lot of promoting of the competition and all of my votes were genuine.
Thanks again to everyone who voted to me. Despite the negative comments I have managed to receive, I have also had a lot of support and that and such a fantastic prize has made this a fantastic experience!
Most of all, I need to thank Dell, for holding the competition and for your generous prizes!
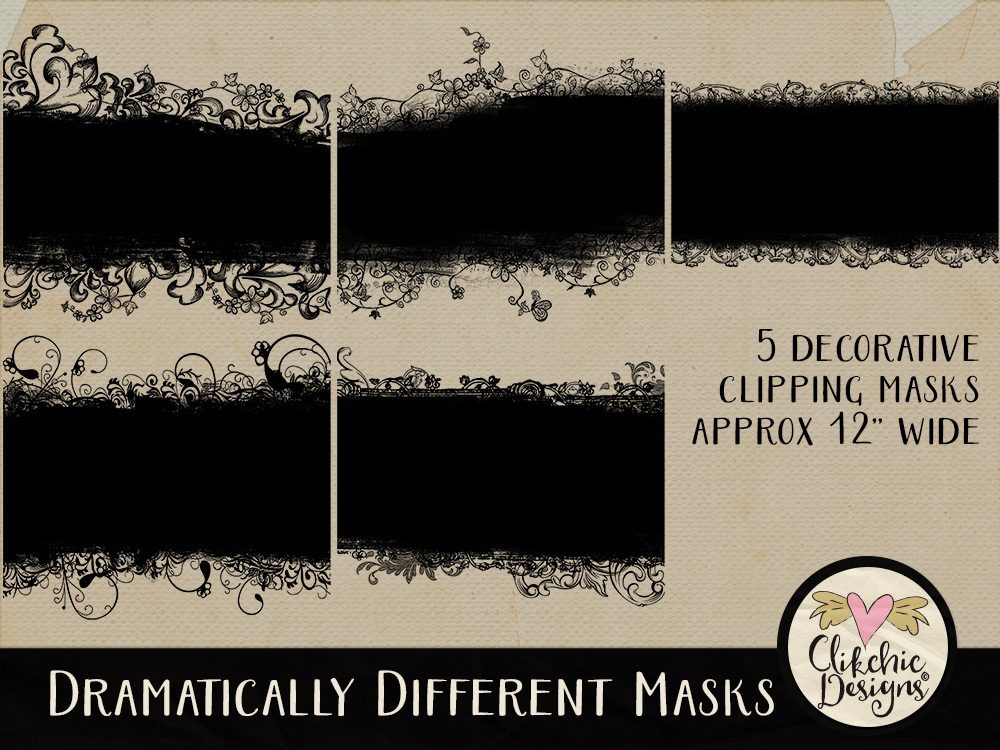
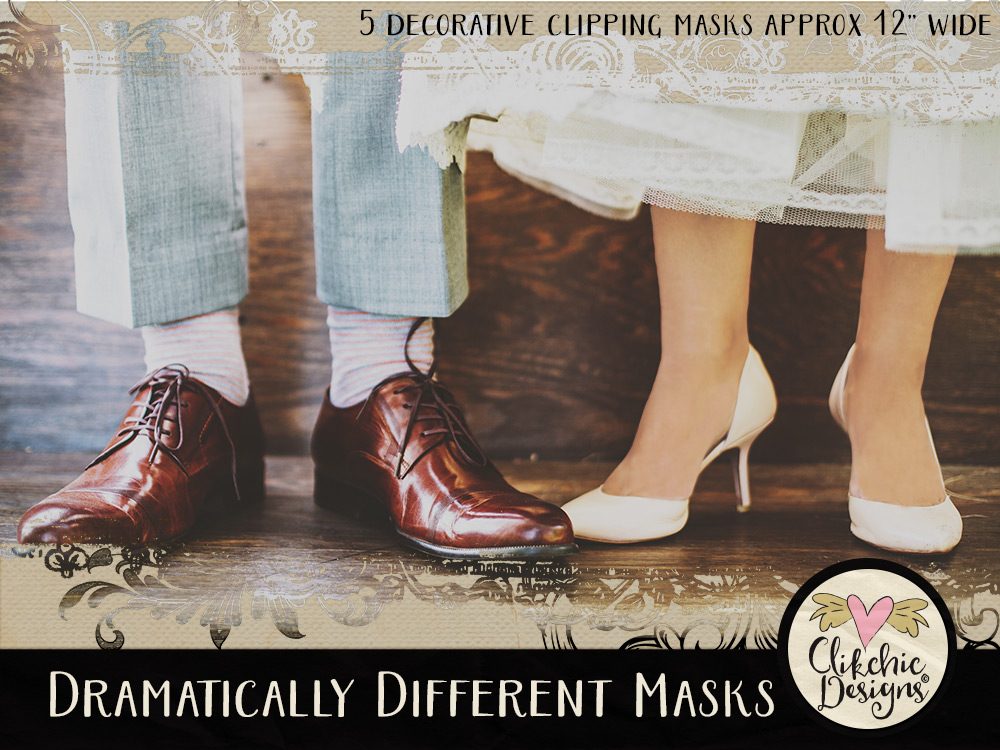
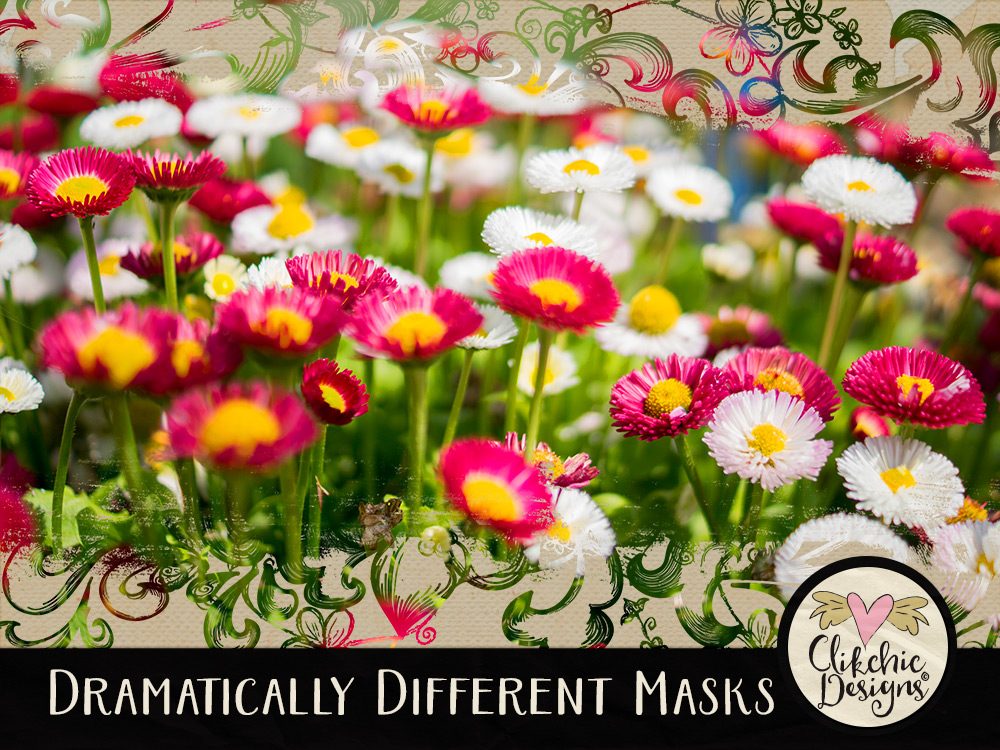
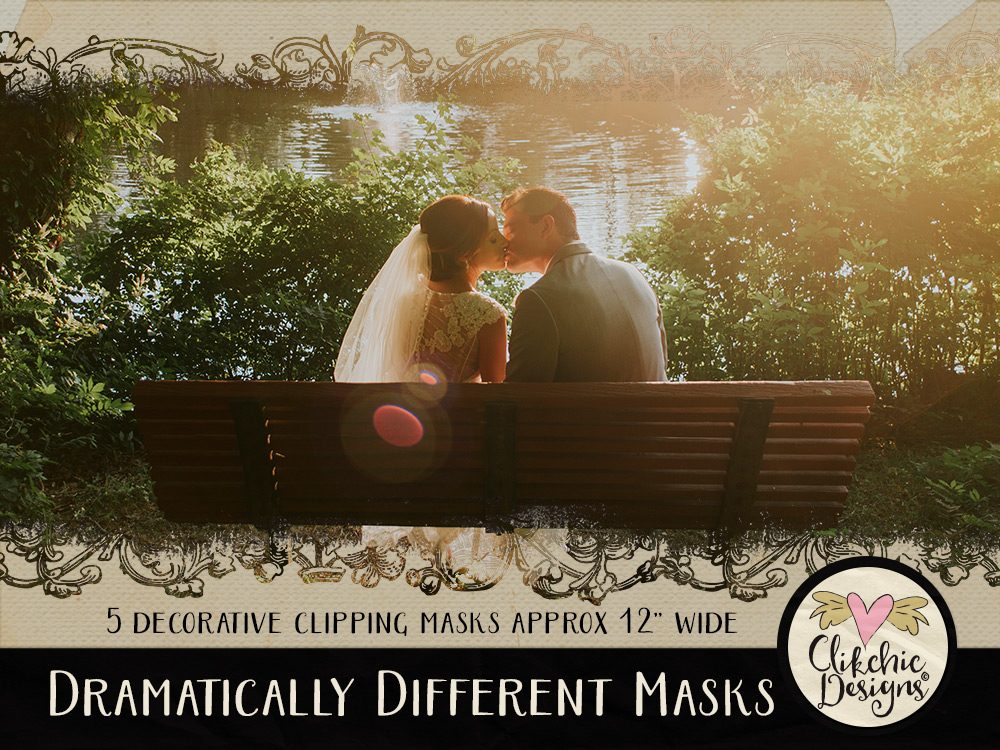
These large versatile Dramatically Different Clipping Masks (12″ wide) are a fabulous and easy way to give your photos stylish look. Simply use them as a clipping mask to clip them to your photo. The masks are a quick and easy way to add some art to your layouts and are ideal for a wide variety of photos from landscape to portrait.
The Dramatically Different Clipping Masks are available on Etsy
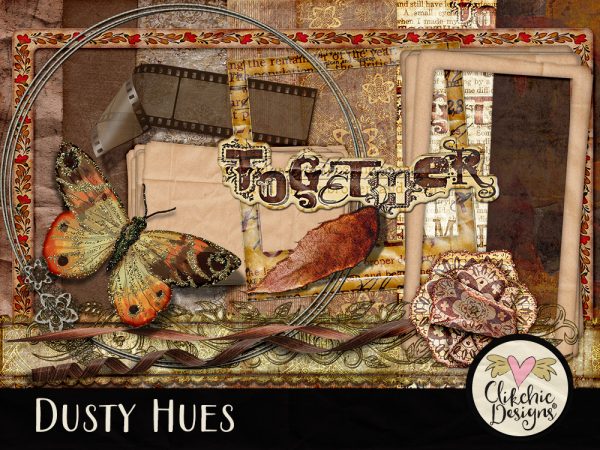
I did this layout of our Australian Dust Storms in September. I used the kits I made inspired by the colours we saw! Created with the Dusty Hues Digital Scrapbook Kit available in my Etsy store. I also used my Painted Photo Masks also available in my Etsy store, Design Bundles and Creative Market store, to give the photo a painted look.
Journaling: In September of this year we had some really extreme dust storms. The storms made the news worldwide and caused many breathing issues, not to mention the clean up! We tucked ourselves inside as much as we could to avoid the dust, but I couldn’t resist going out to take photos of the amazing effect of the dust on our view.
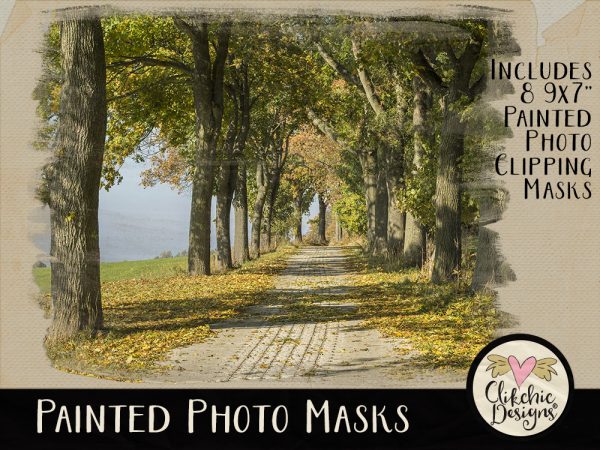
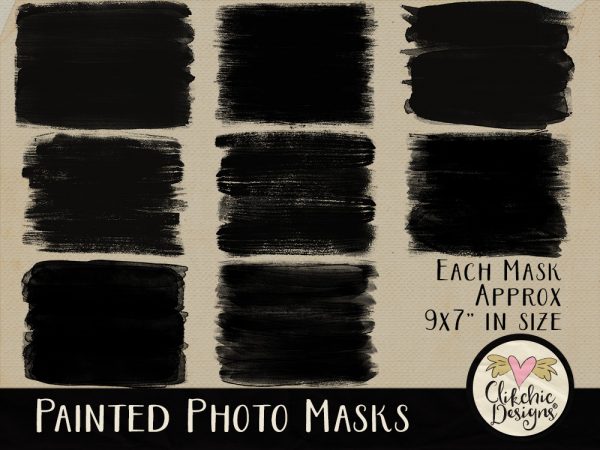
These Painted Photo Clipping Masks are a great way to give your photo’s and papers the brushed on appearance and work beautifully for collage and Art Journal projects. These masks also work great for your digital creations and photography ventures.
Instructions for using clipping masks in Photoshop or Photoshop Elements are included in the zip file. Software programs that can currently use these templates include – Photoshop 6 or higher, Photoshop Elements 2 or higher, Paint Shop Pro 7 or higher. Painted Photo Clipping Masks are available in my Etsy store, Clikchic Designs Store & Creative Market Store.
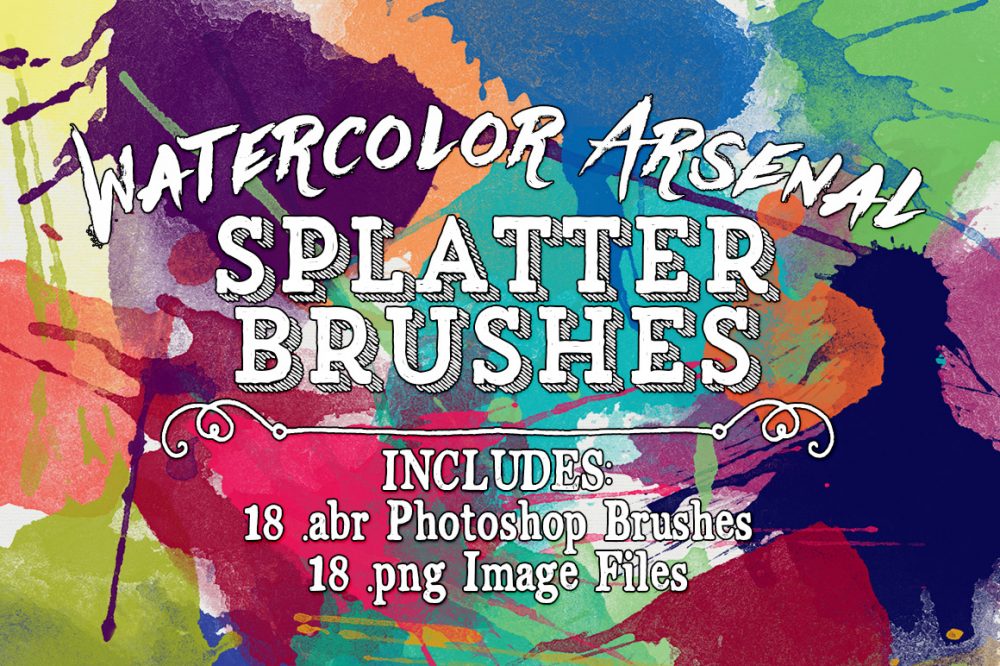
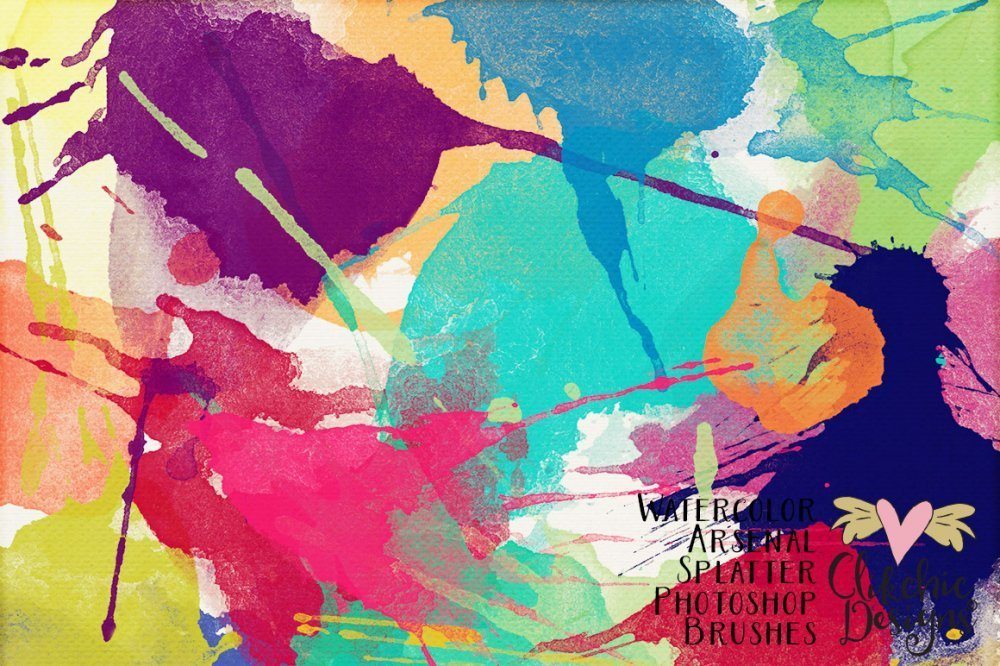
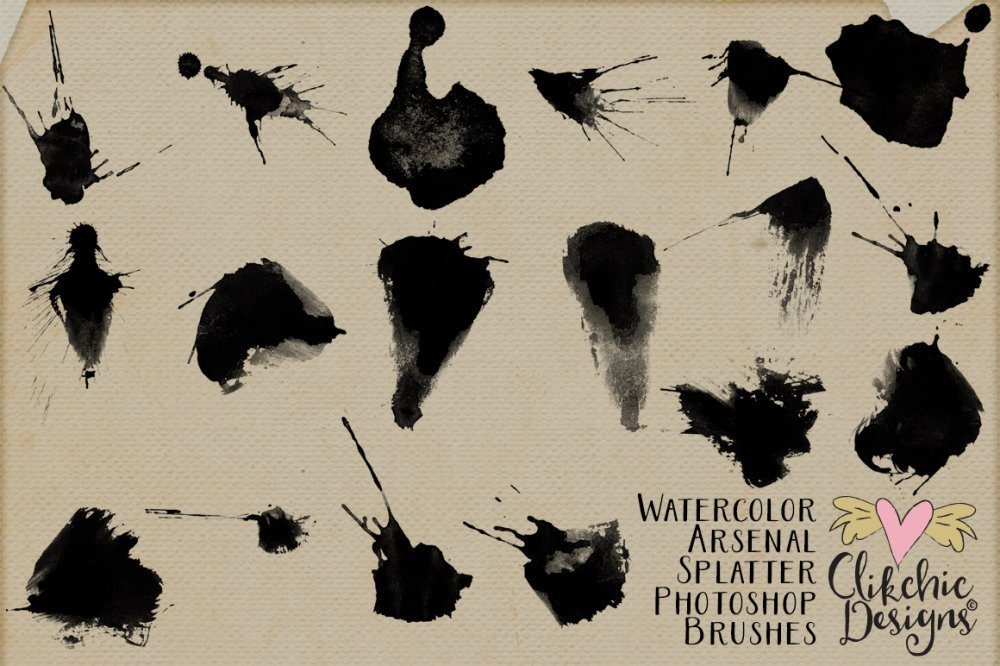
These Watercolor Arsenal Splatter Photoshop Brushes are perfect for adding a touch of whimsy and artistry to your digital scrapbook layouts or graphic design projects, whether it be childish paint splatters or arty brush splatters, the options are endless. The brush set includes both the original .png image files and Photoshop Brushes (.abr). Experiment with a variety of color and blend modes to maximize the versatility of this set. Note: You might also like to check out the rest of the Watercolor Arsenal Brushes and Overlays available to add to your collection!
The Watercolor Arsenal Splatter Brushes are available the following stores.
To download the pdf version of this tutorial click here. In this tutorial we will learn how to load brushes into Photoshop as well as some of the basics in regards to using them and making them work for your layouts. This tutorial is suitable for Photoshop CS+ . First we need to load our set of brushes. Photoshop comes with several sets or you may have purchased a set. For the purpose of this tutorial I will be using grungy Photoshop brushes. First copy your .abr file into your C:/Program Files/Adobe/Adobe Photoshop CS/Presets/Brushes folder before loading your brushes.
Brushes saved to this folder will load each time you start Photoshop. (If you do not wish to have them load every time you start Photoshop, you can save them to a different folder and load them as you need them.) Please note that your drive letter may vary from this and your Photoshop folder may have a slightly different name depending on the version of Photoshop you use.
We now need to ensure our brushes tool is selected by clicking on the brush/pencil tool and holding your mouse button down to get the pop out menu. Click on the first item, Brush tool to select brushes.
Now click on the brushes tab at the top right of your screen.
If you are unable to view this tab, you can show it by going to the Windows menu and clicking on brushes. You should then be able to drag it to the box containing the other tabs so that it appears each time you open Photoshop. We then need to load your brushes. To do so click on the small arrow next to the word brushes on the brushes tab and a menu will appear.
Select Load Brushes from the list of options.
Brushes for Photoshop come in .abr files. So in your download, look for the .abr file you copied to your presets folder. Browse for your brushes file in your Adobe/Photoshop CS/Presets/Brushes folder. Once you have found the file click on it to select it and click on the Load button. This will load your brushes into the Photoshop brushes collection. You should now be able to view your loaded brushes in the brush selection menu.
Tip:- In the above preview I have my brushes set to show as large thumbnails. There are several viewing options. To choose your favourite, click on the arrow on your brushes tab again and select your viewing option from the menu that appears. You may prefer small thumbnails or one of the other options, try them and see!
The next step is to choose a brush to use. For the purposes of this tutorial I am going to put white inked edges around the edges of a photo. Brushes are very versatile and have a HUGE number of uses, from painting, grunging or decorating papers, to inking edges on photos and papers or even editing photos. You can use brushes with your eraser tool and dodging and burning tools to name a few. Then you have the option of experimenting with blend modes to enhance the effect of your brushwork. Once you start to experiment with brushes, they become very addictive! I have several inked edge brushes to choose from, and in the sample below I have used a few of them, but you can just use one and change the rotation of the brush to suit each side of the image. I have also used some other grunge brushes to achieve the effect I am after. Now to choose the brush!
To choose a brush, find the brush you wish to use and click on it. This selects your brush choice. You can then change the size of the brush to suit your purpose using the Master Diameter. Alternatively you may wish to use the menu that appears when you click on the dropdown arrow next to your chosen brush at the top left of your options toolbar.
Tip:- Create a new layer before beginning your brushwork so that it can be easily erased if need be by deleting everything on the layer or the layer itself.
I am editing a 400x575 pixel photo in this tutorial, and will need to adjust my brush sizes accordingly. You can reduce or increase the size of your brushes to suit your needs using the Master Diameter setting. As you can see below, I have selected white from my colour palette and have begun my brushwork on a new layer by clicking on the areas of my canvas that I wish the brushwork to appear, much like ‘stamping’ the image on the screen. In the sample below you can see the outline of the brush as an indicator of how it will appear on the canvas.
Your brush will not always be angled in the position you wish to use it, to rotate your brush to suit the angle you require, click on the Brush Tip Shape option to the left of the Brushes palette. Here you will find further options for editing your brush. To change the rotation of the brush, you can click on and drag the arrow to an angle that suits, or enter the angle into the Angle box. You can also edit the diameter of your box in this area.
You may notice the other options down the left side of your palette. There is great scope for experimentation here, however these will not be covered in this basic tutorial. Below is the finished product, with several different brushes applied. (some inked edges & a crayon line brush).
If you want to take it one step further, you can experiment with blend modes and additional brush work to create different effects. Below are the blend modes I have used for my Ink Edges layer and also a second layer of grunge brushwork I have done on the image following.
Below is the end result of the above blend modes (Exclusion – Layer 1 & Soft Light – Layer 2) and an extra layer of additional brushwork.
Or for a more defined border, I have changed the blend mode on the inked edges layer to Difference.
The techniques you have learned in this tutorial can be applied to your favourite background papers or photos and even when designing blinkies. The possibilities are endless! You can add layer layer styles, vary the opacity and apply further effects as well to add further enhancements to your work.
Our darling boy is a bit of an enigma, he can be oooh sooo sweet and charming, but can also be SO cranky and moody! Created with an old Page Kit which is no longer available. I put one of the backgrounds over the other in overlay mode to create a different background. I used my Inked Edges Photoshop Brushes to create a bit of a border around the photo. I used my Urban Grunge and Faux Lomo actions (no longer available) on his photo. I love how it came out!
Our darling girl. She really does rock! Created with my Urban Princess Page Kit . The photo effects were created with the Dreamy Photo and Urban Grunge actions from my Foto Action Pack Vol 1 The frame was from my Doodle Me Crazy Frames


Subscribe To Our Newsletter
Subscribe to receive the latest news and updates from Clikchic Designs. Get a FREEBIE just for subscribing!
You have Successfully Subscribed!