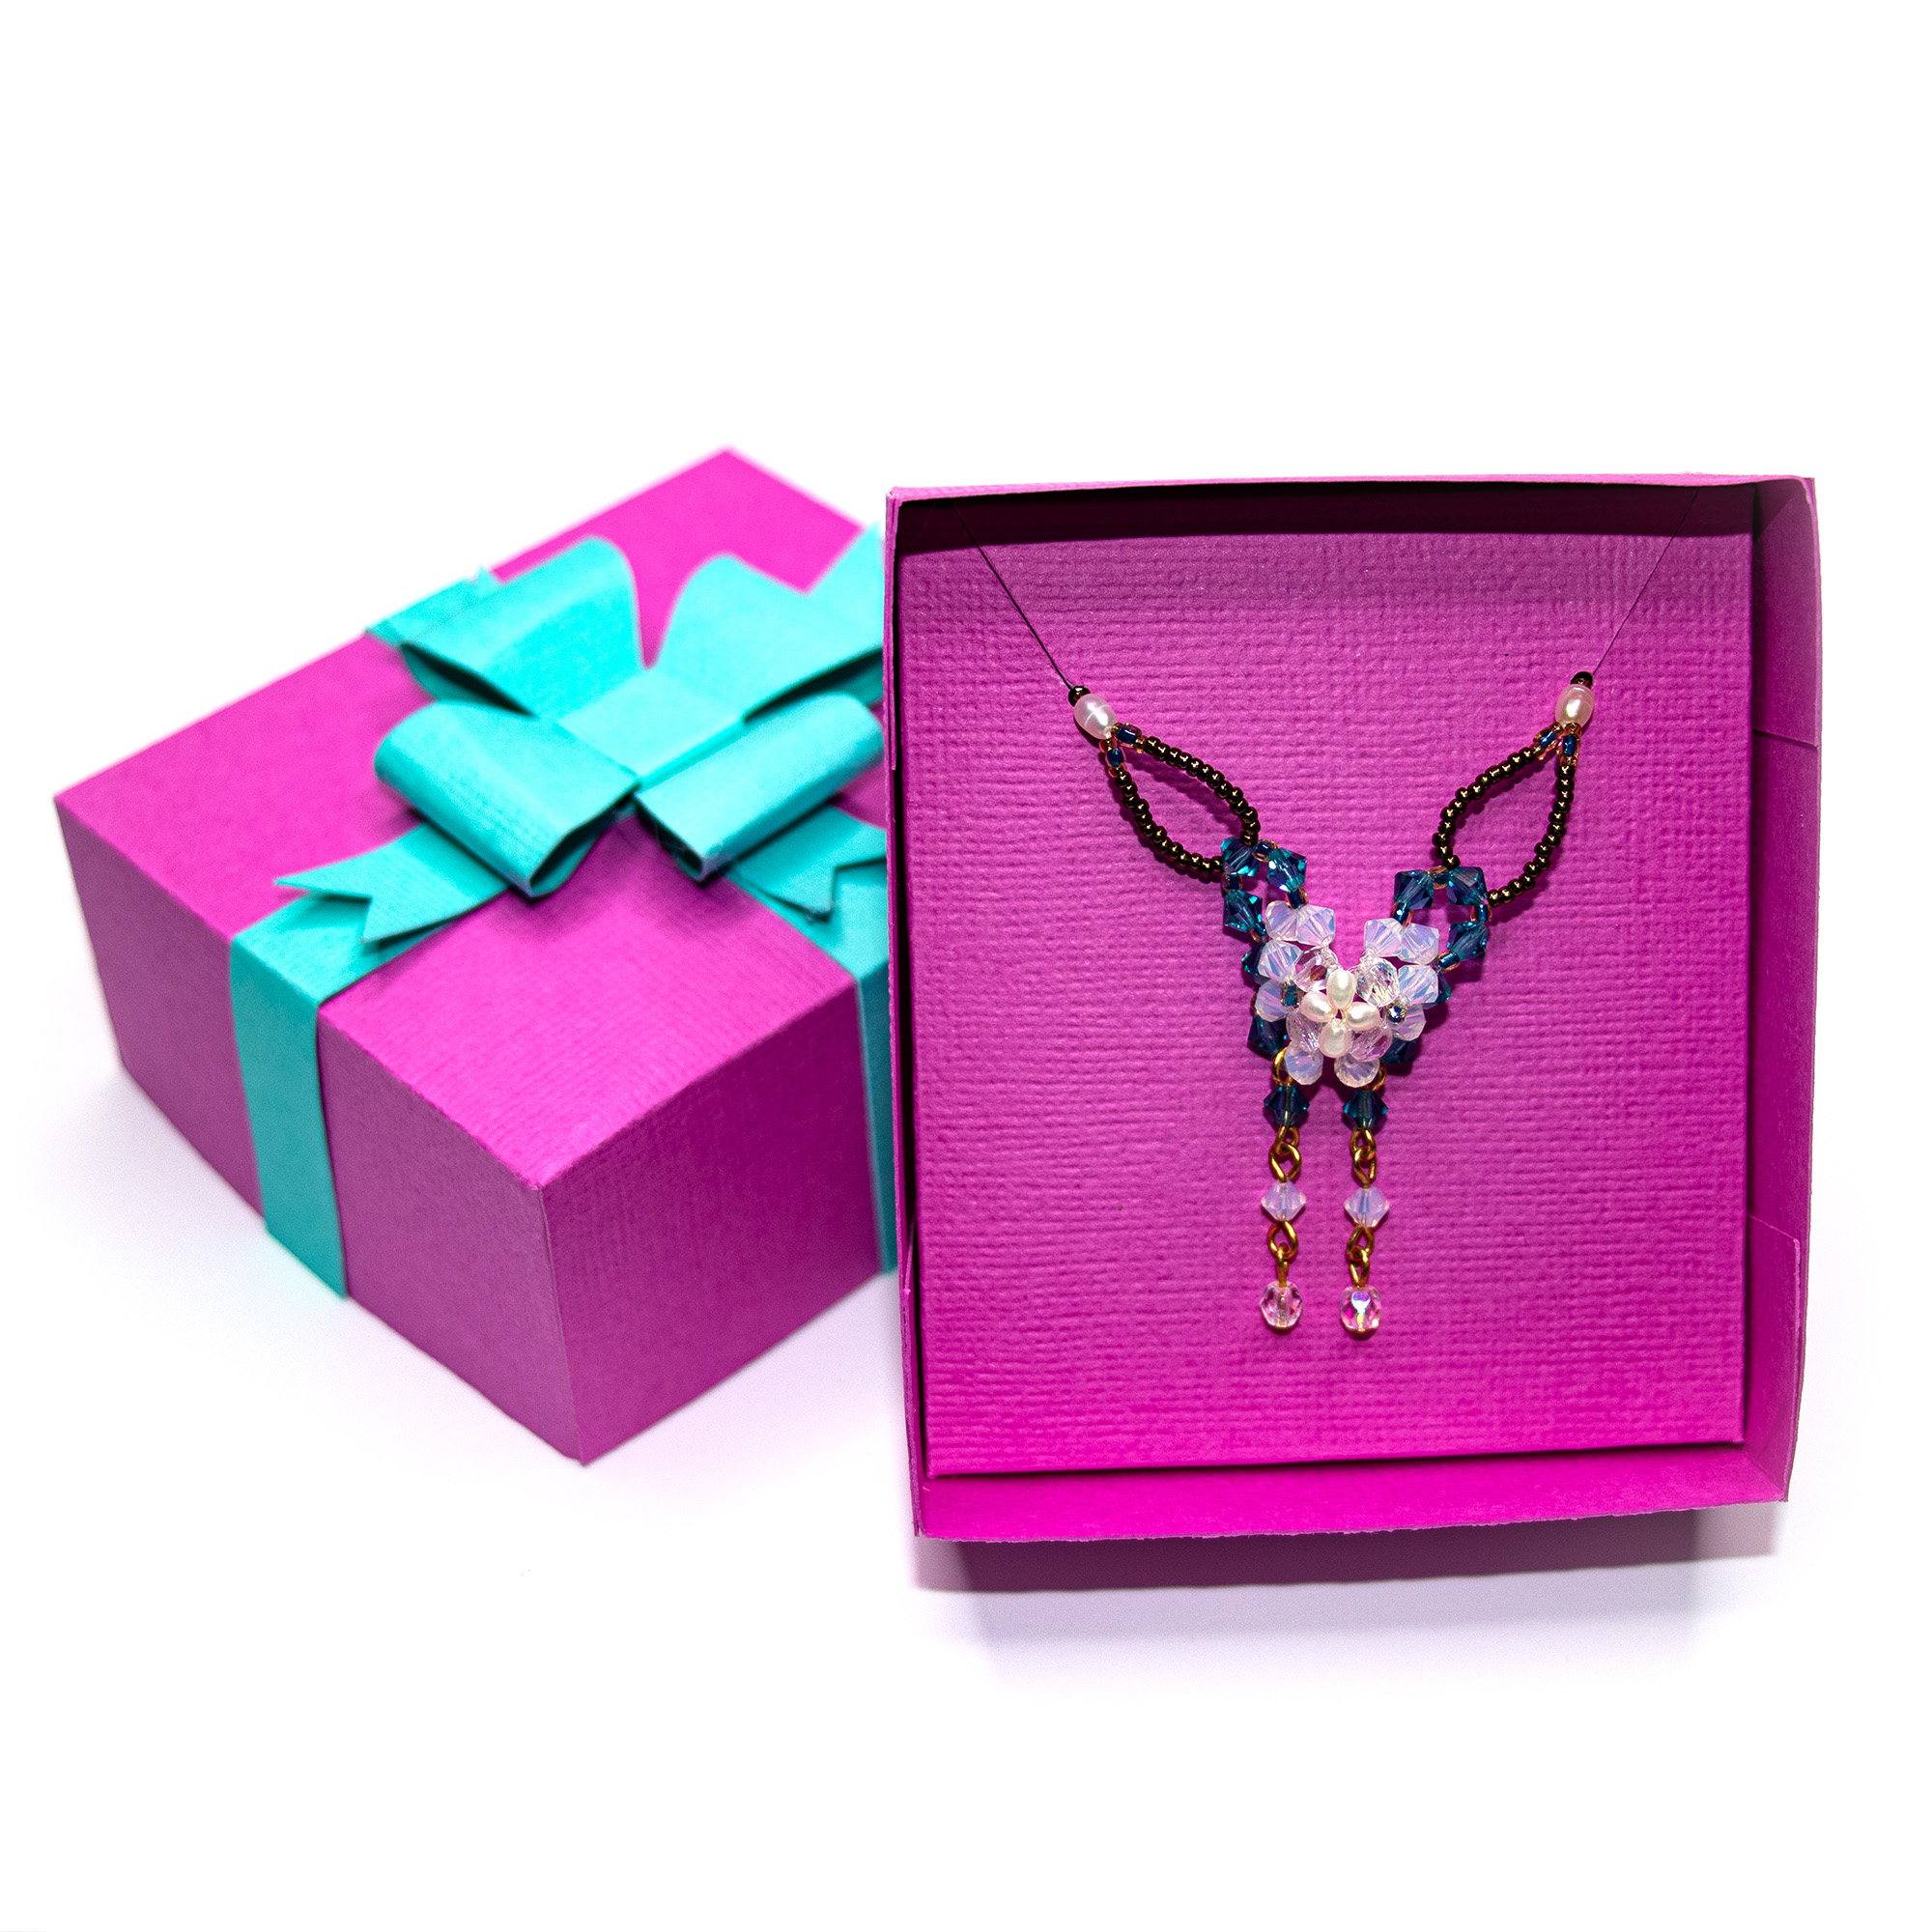
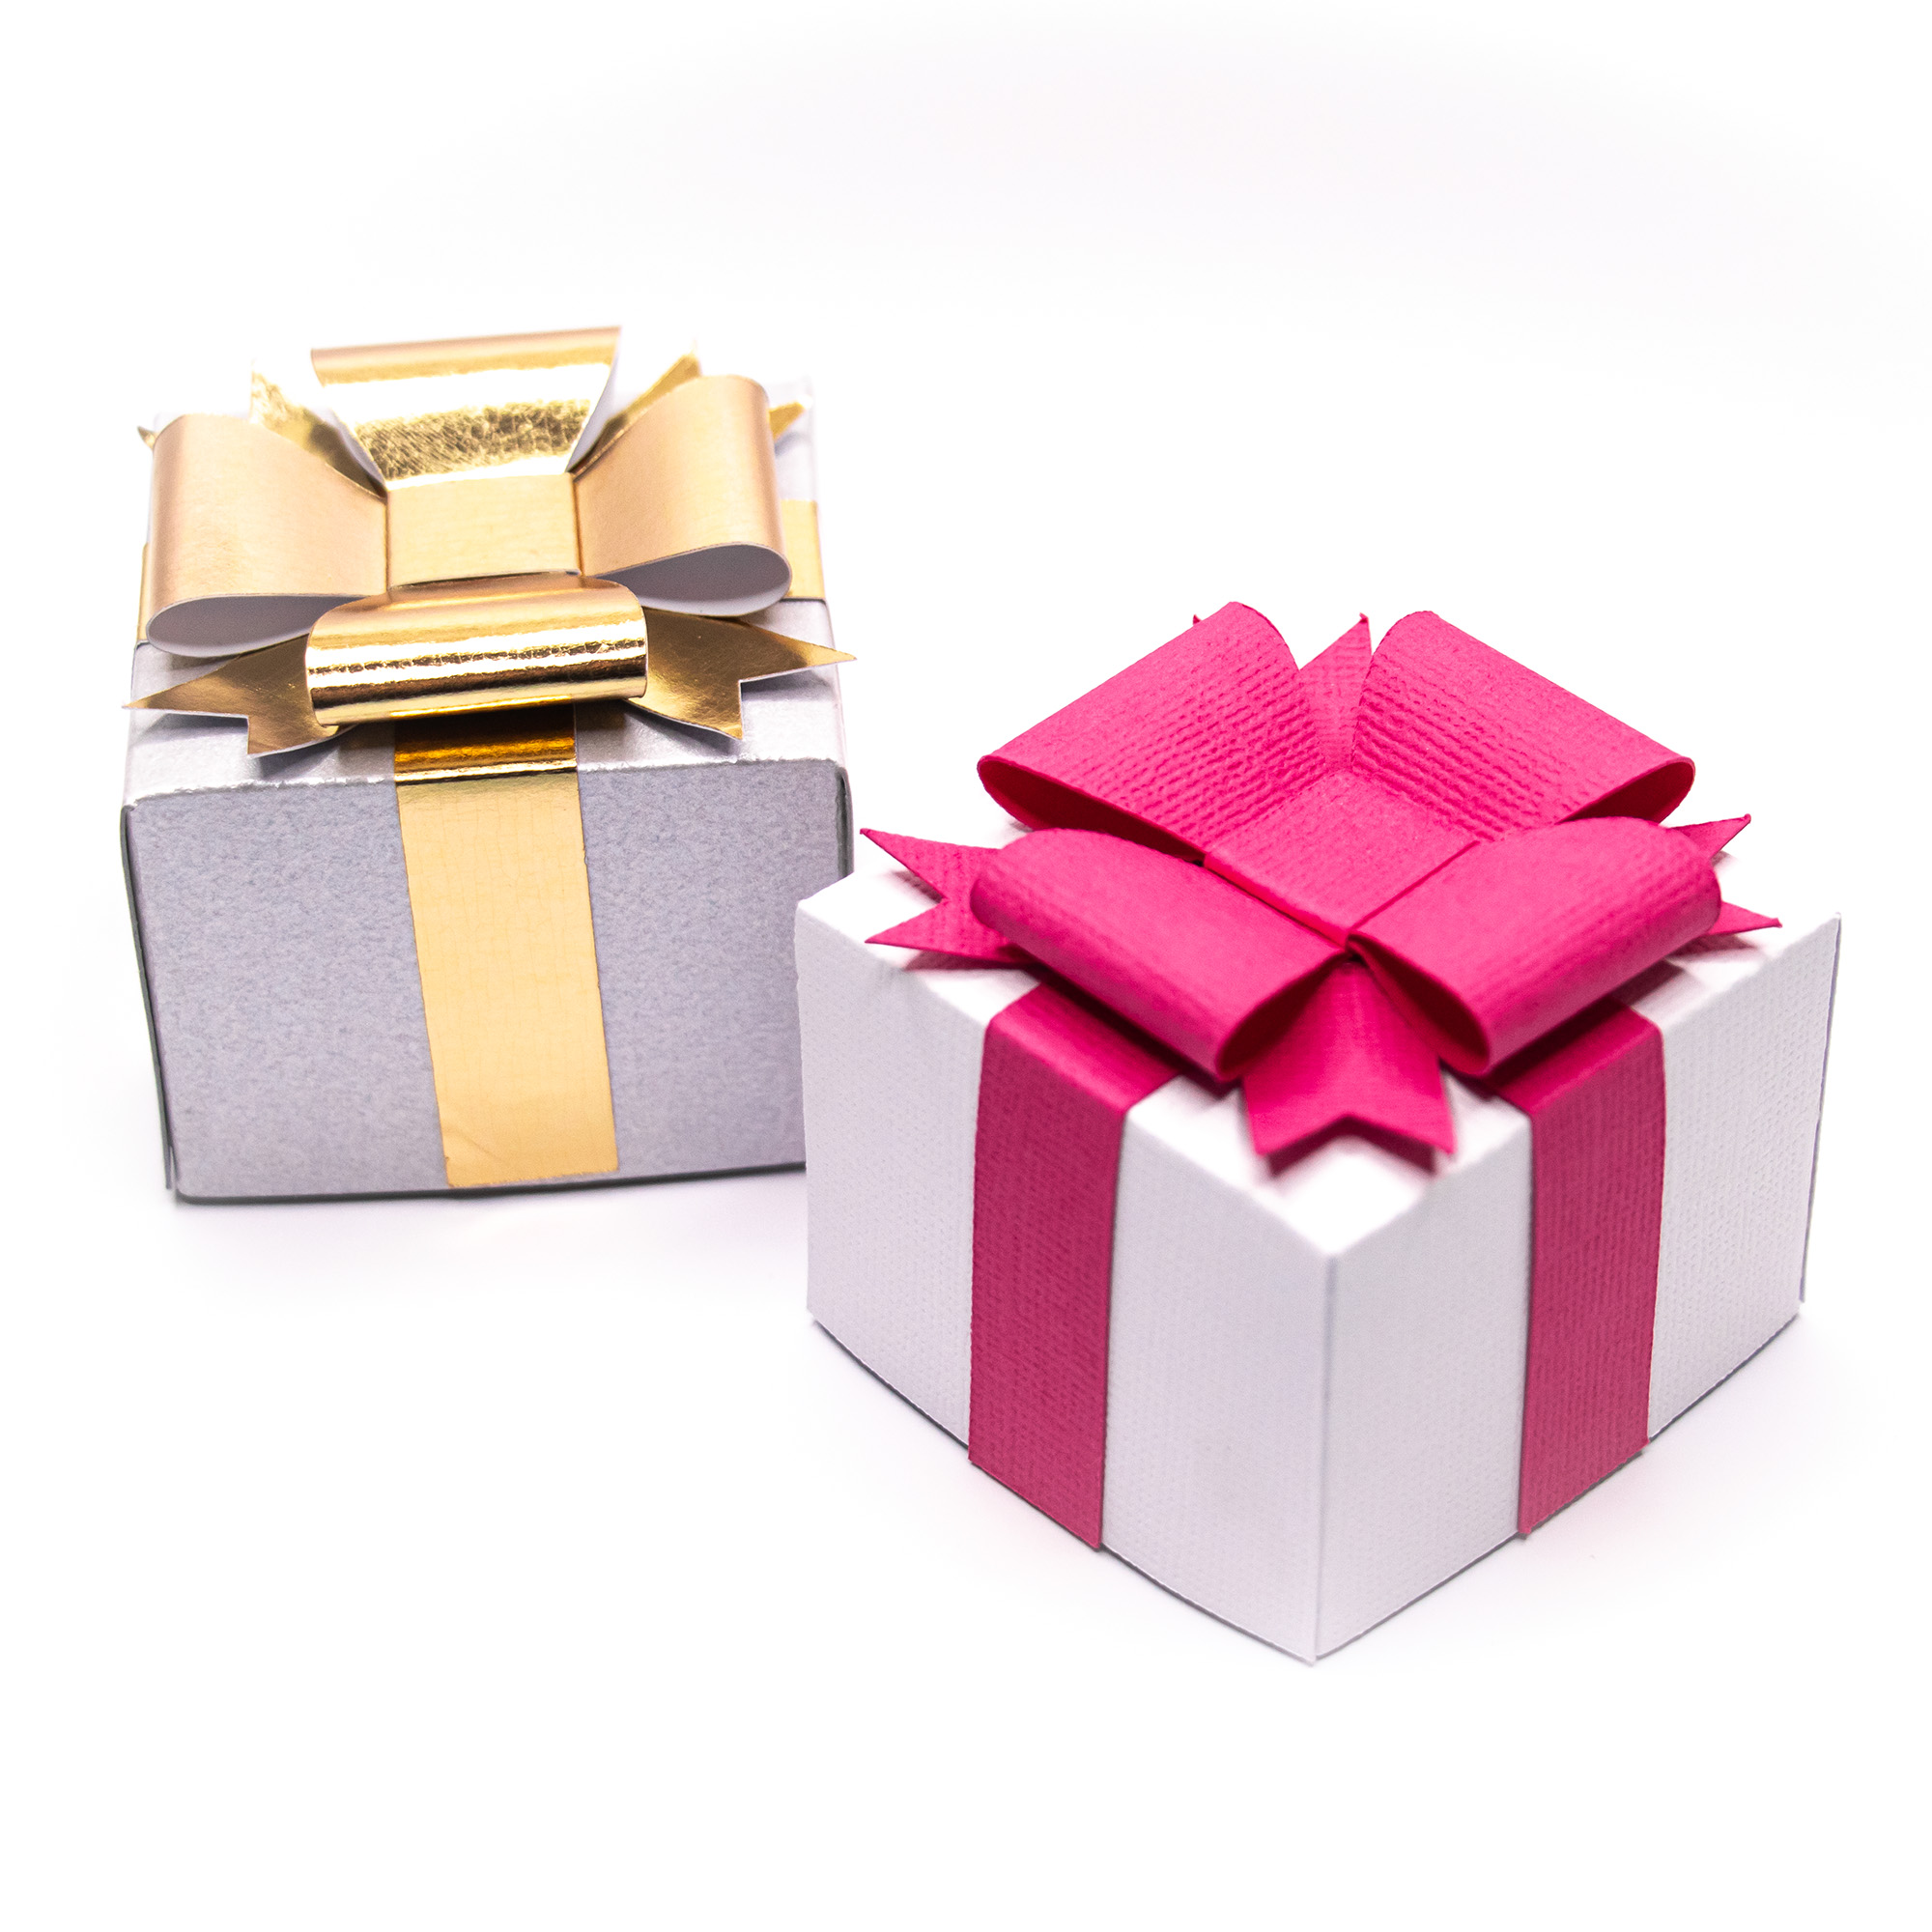
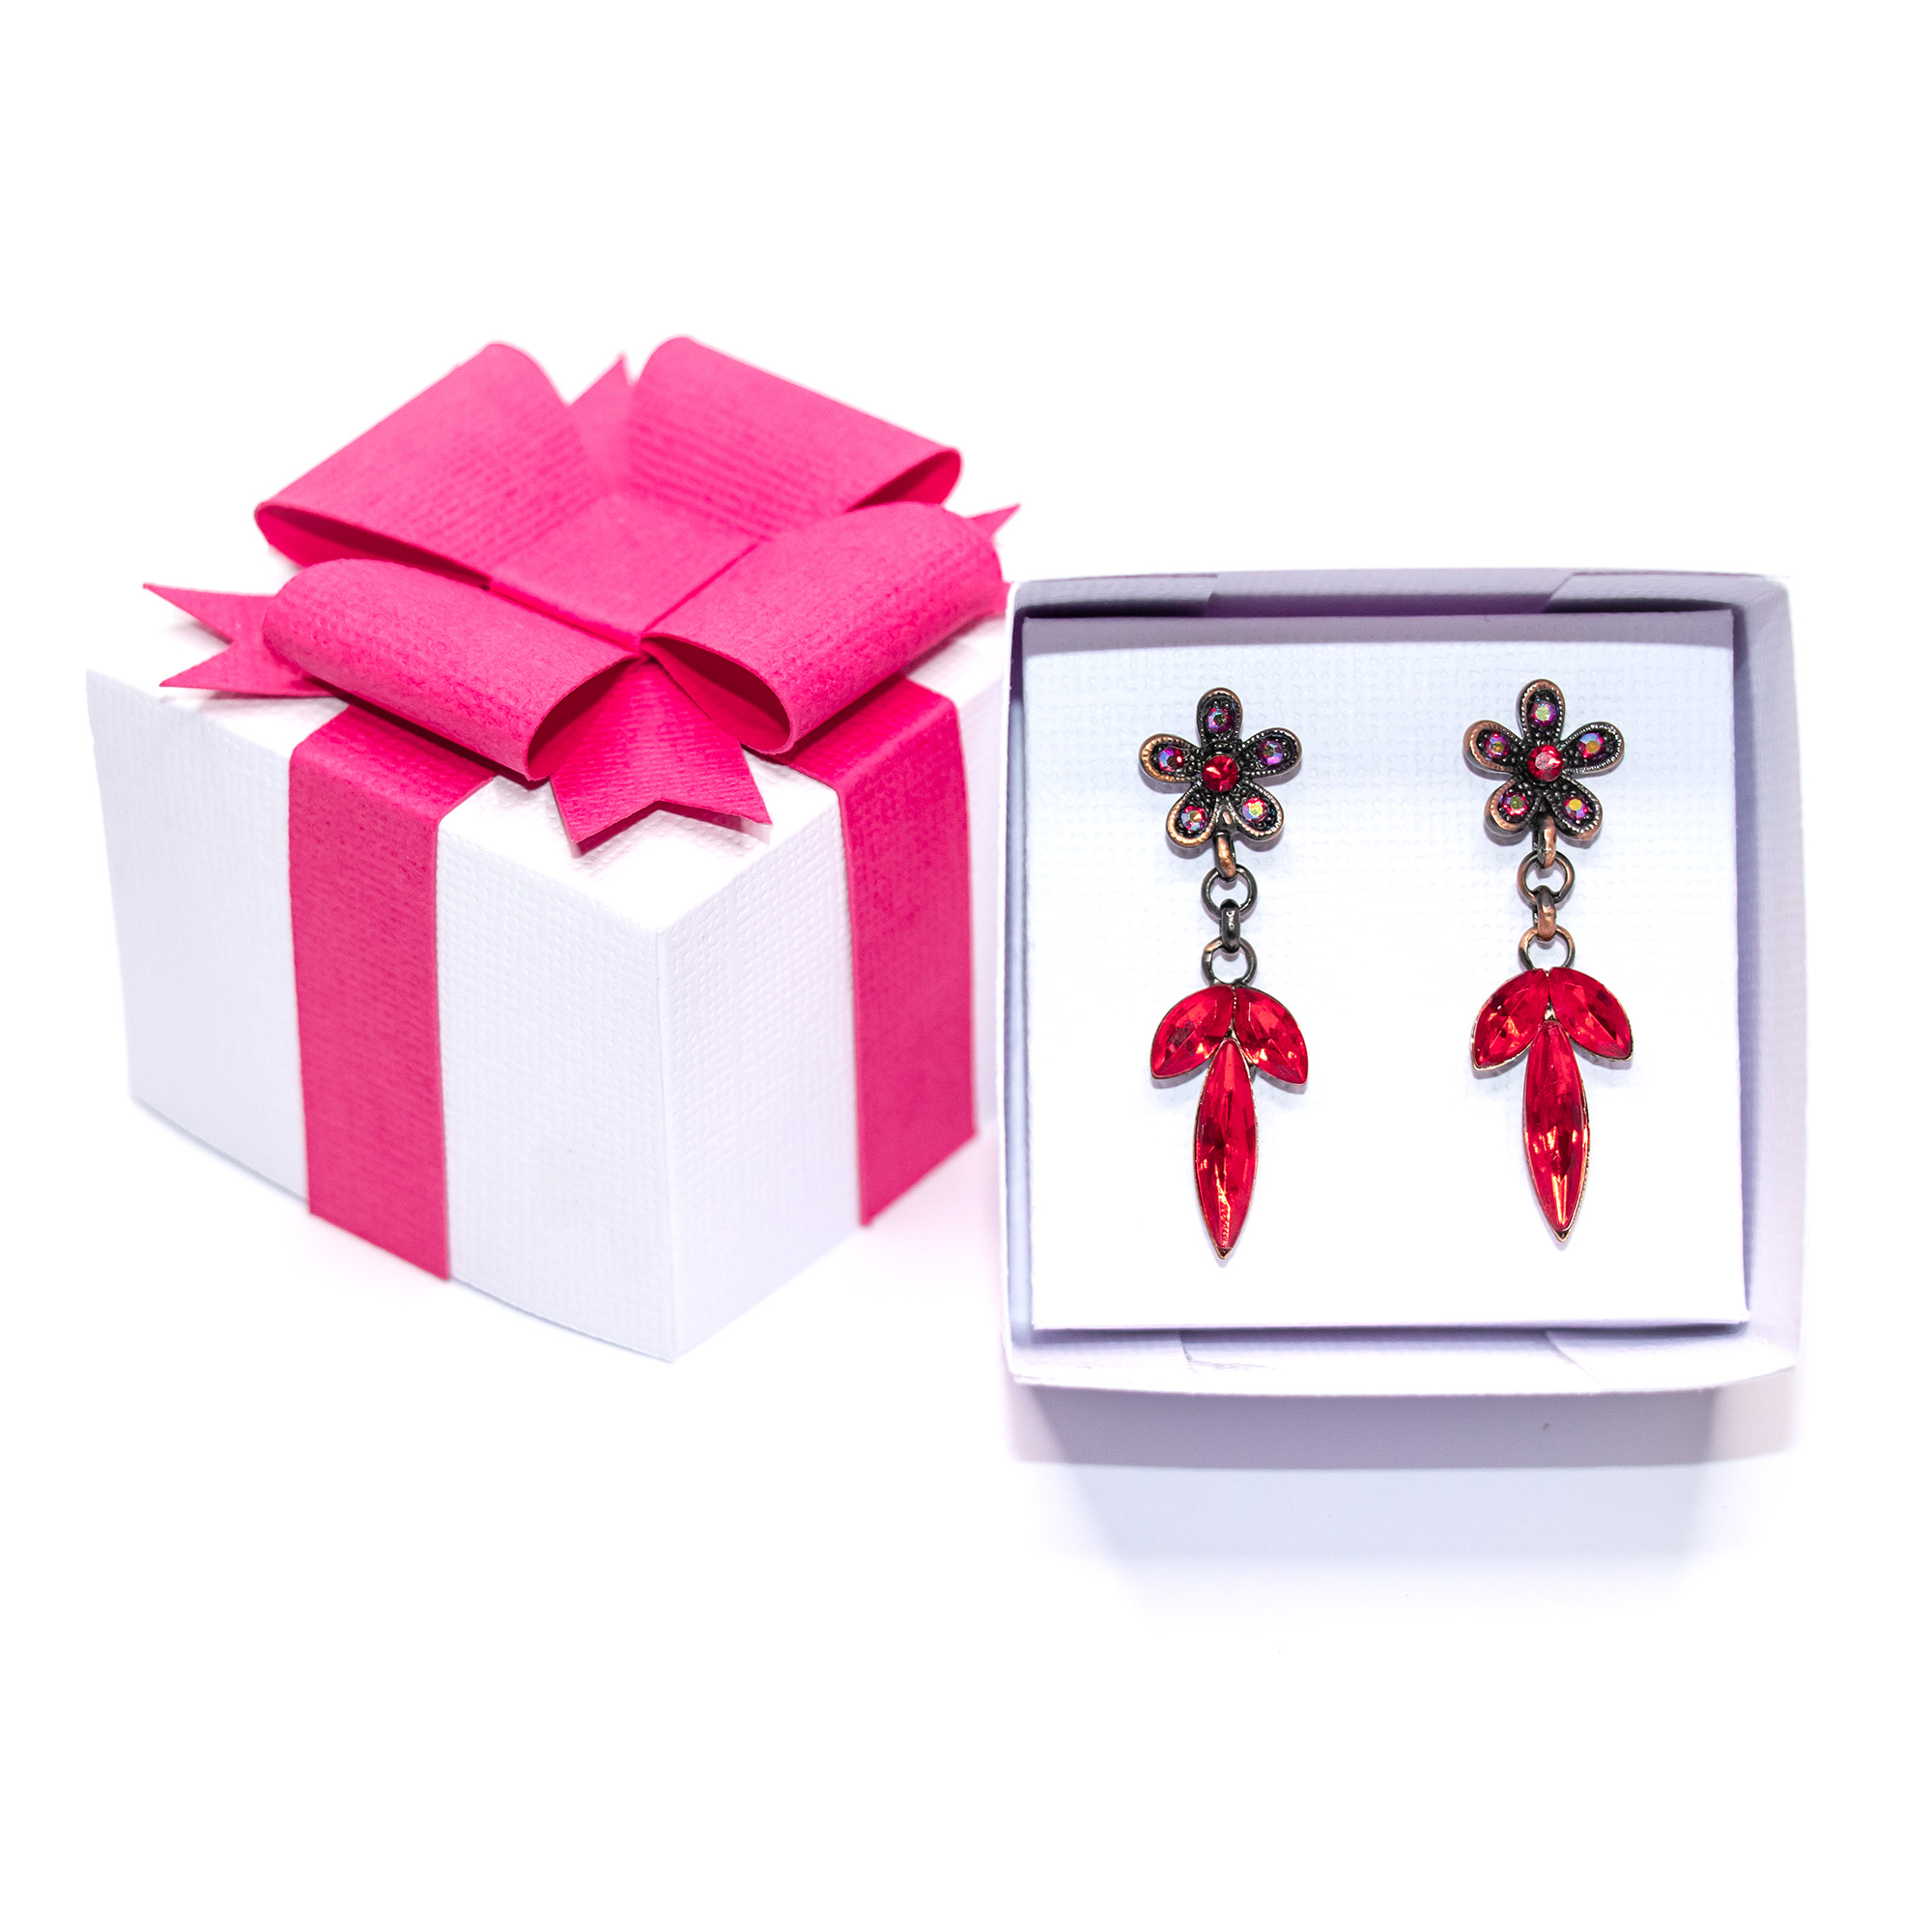
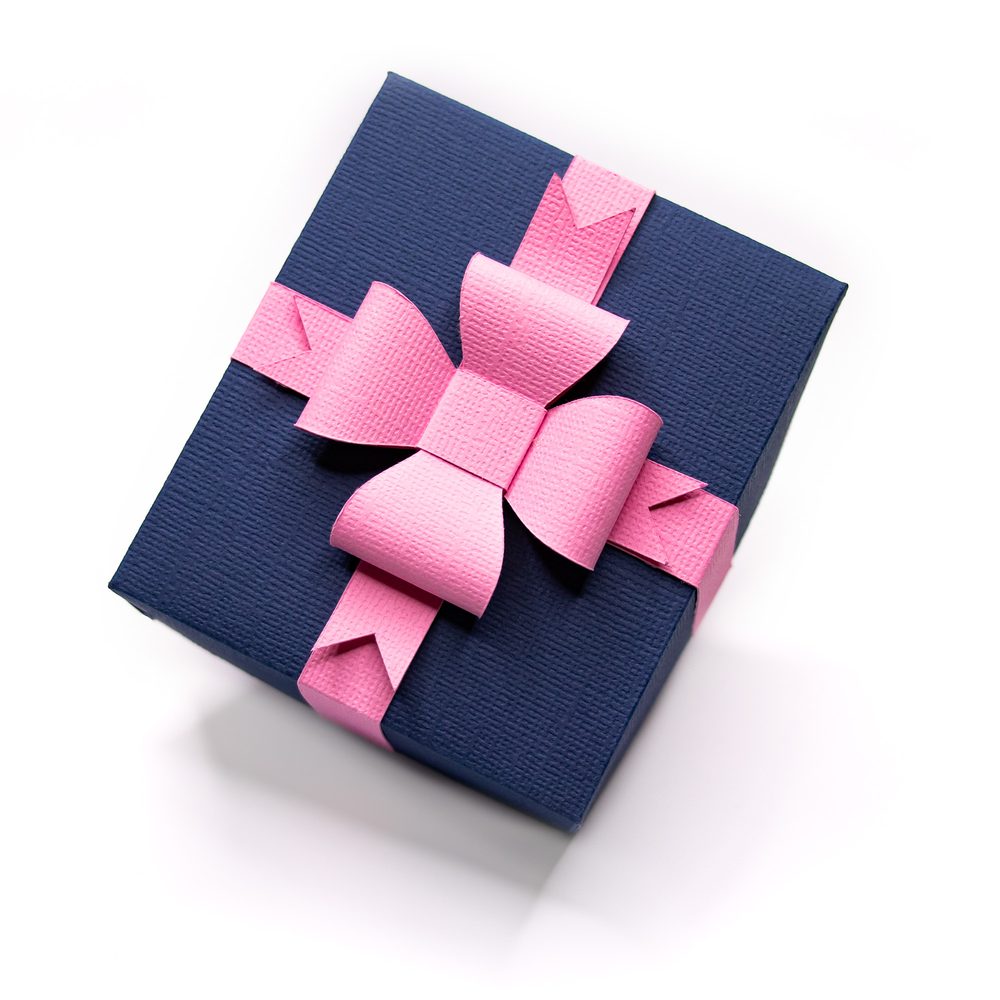
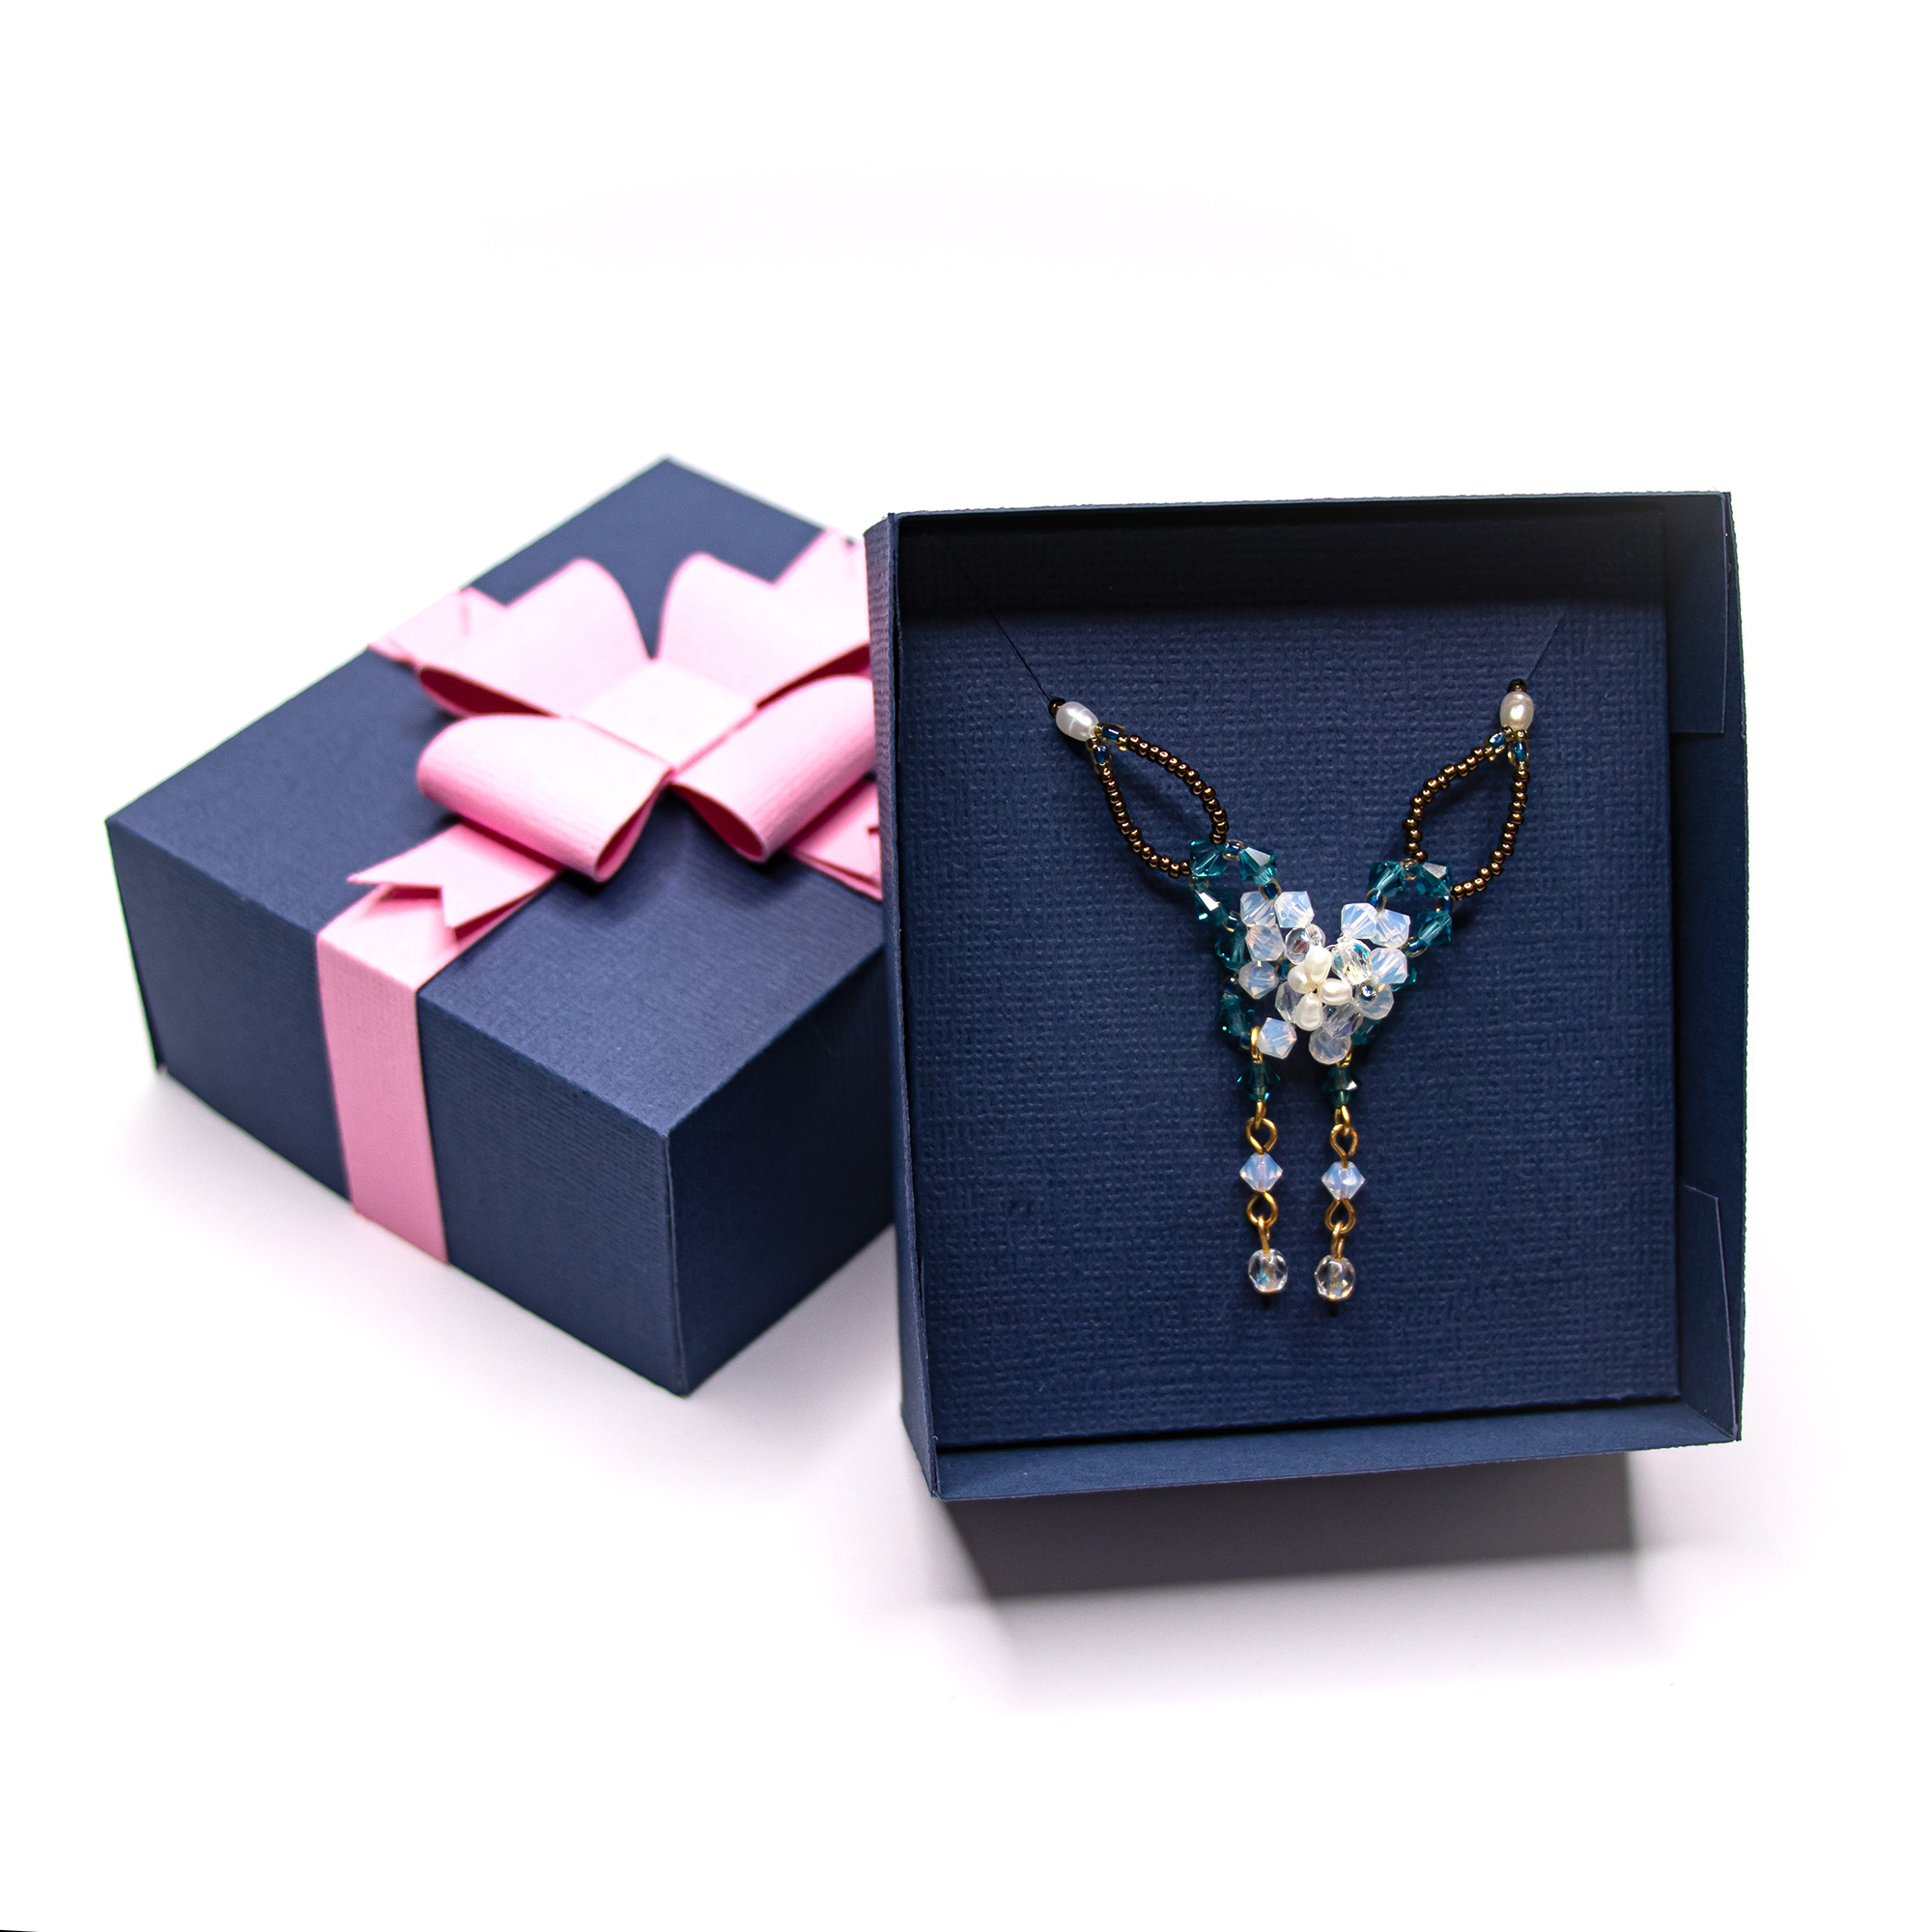
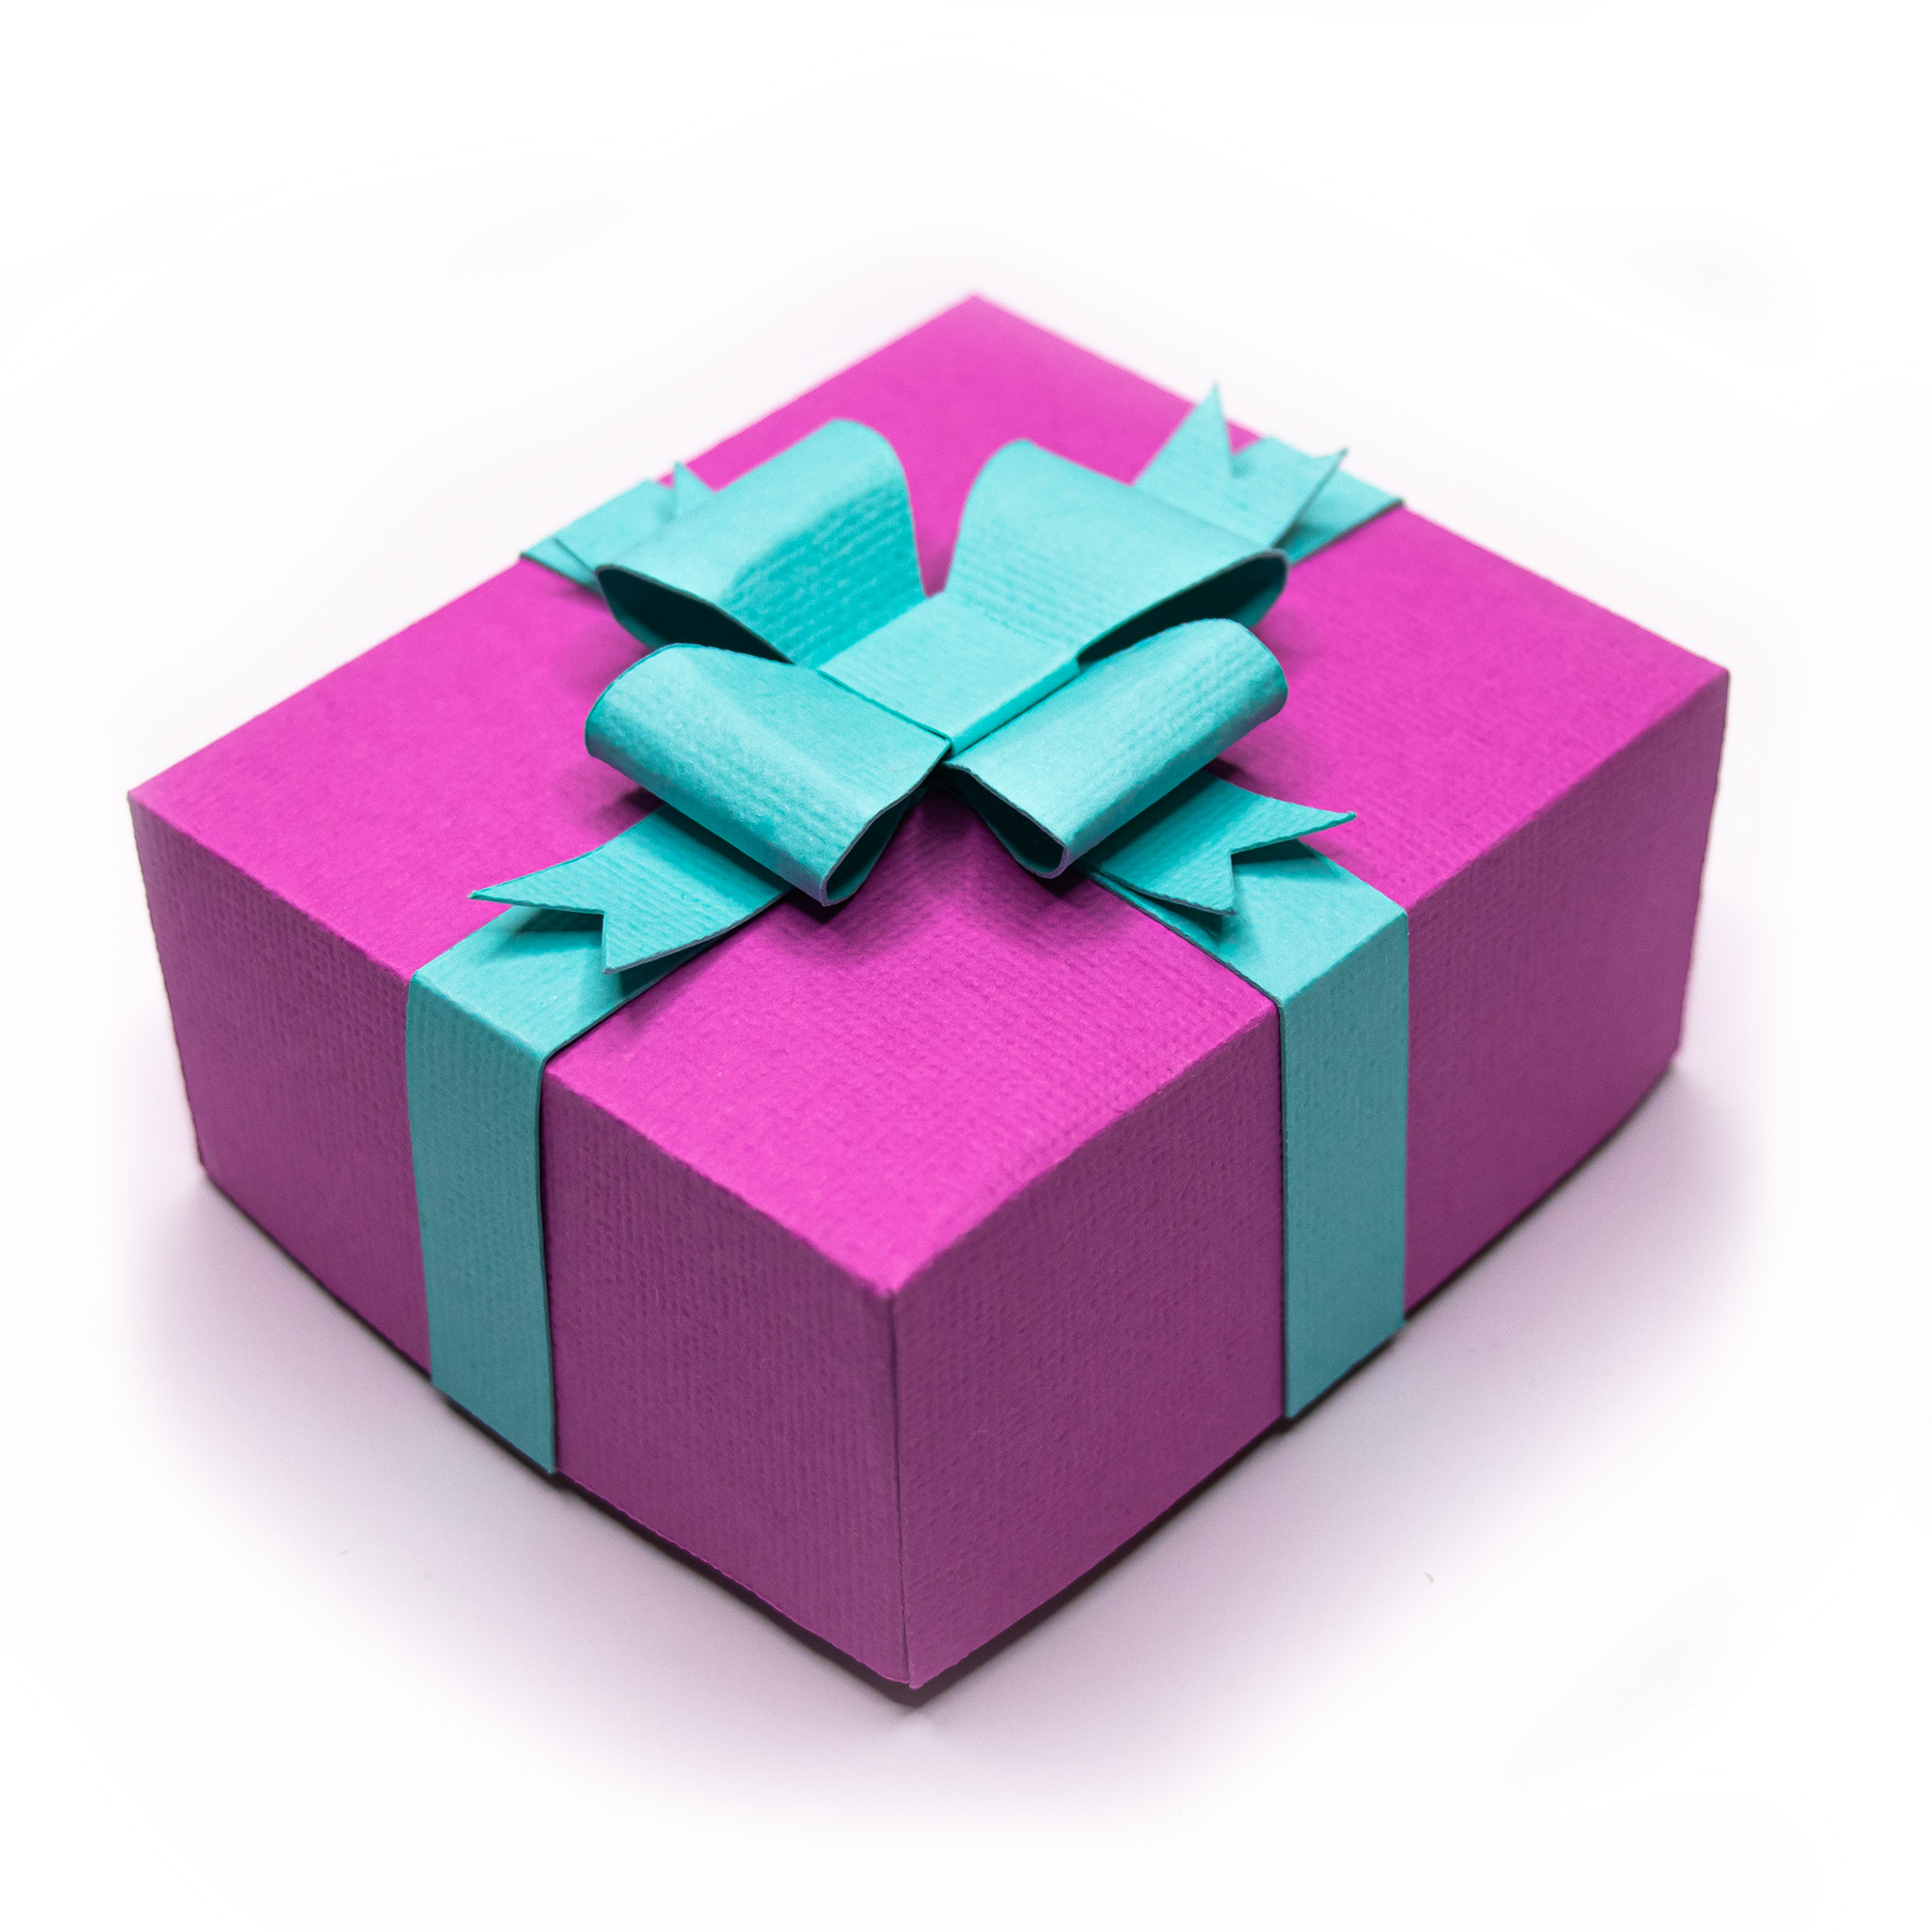
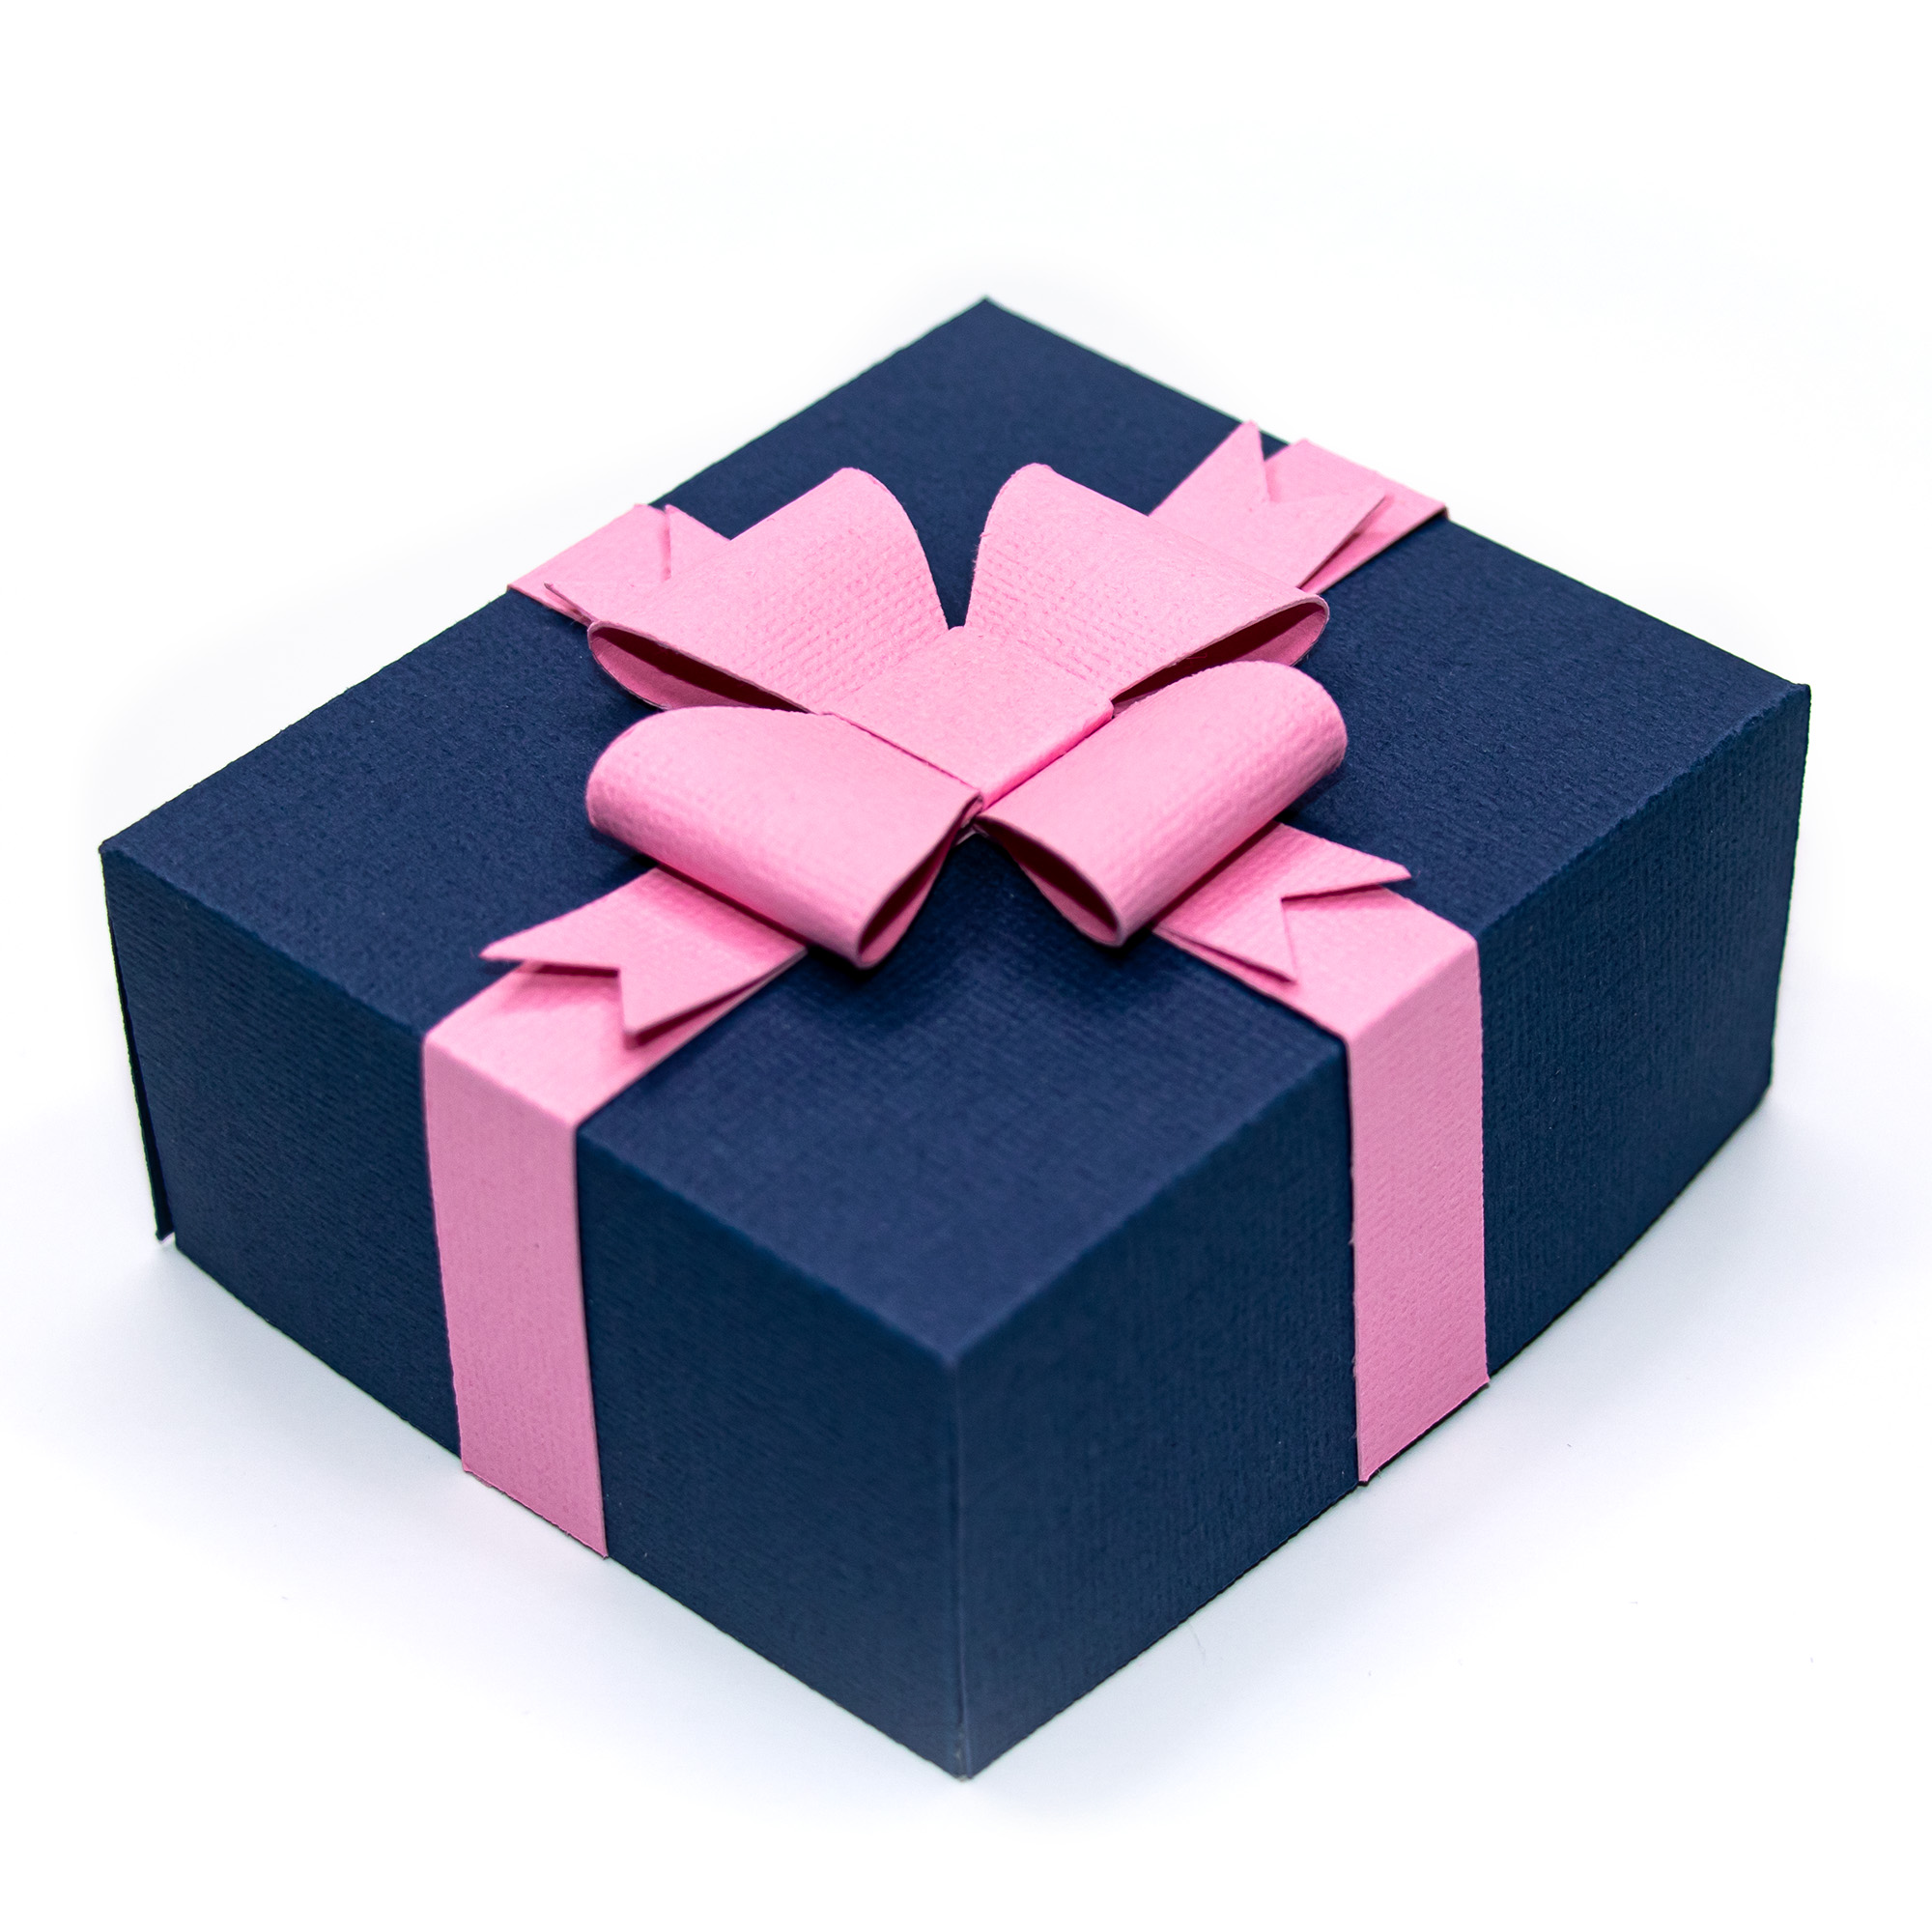
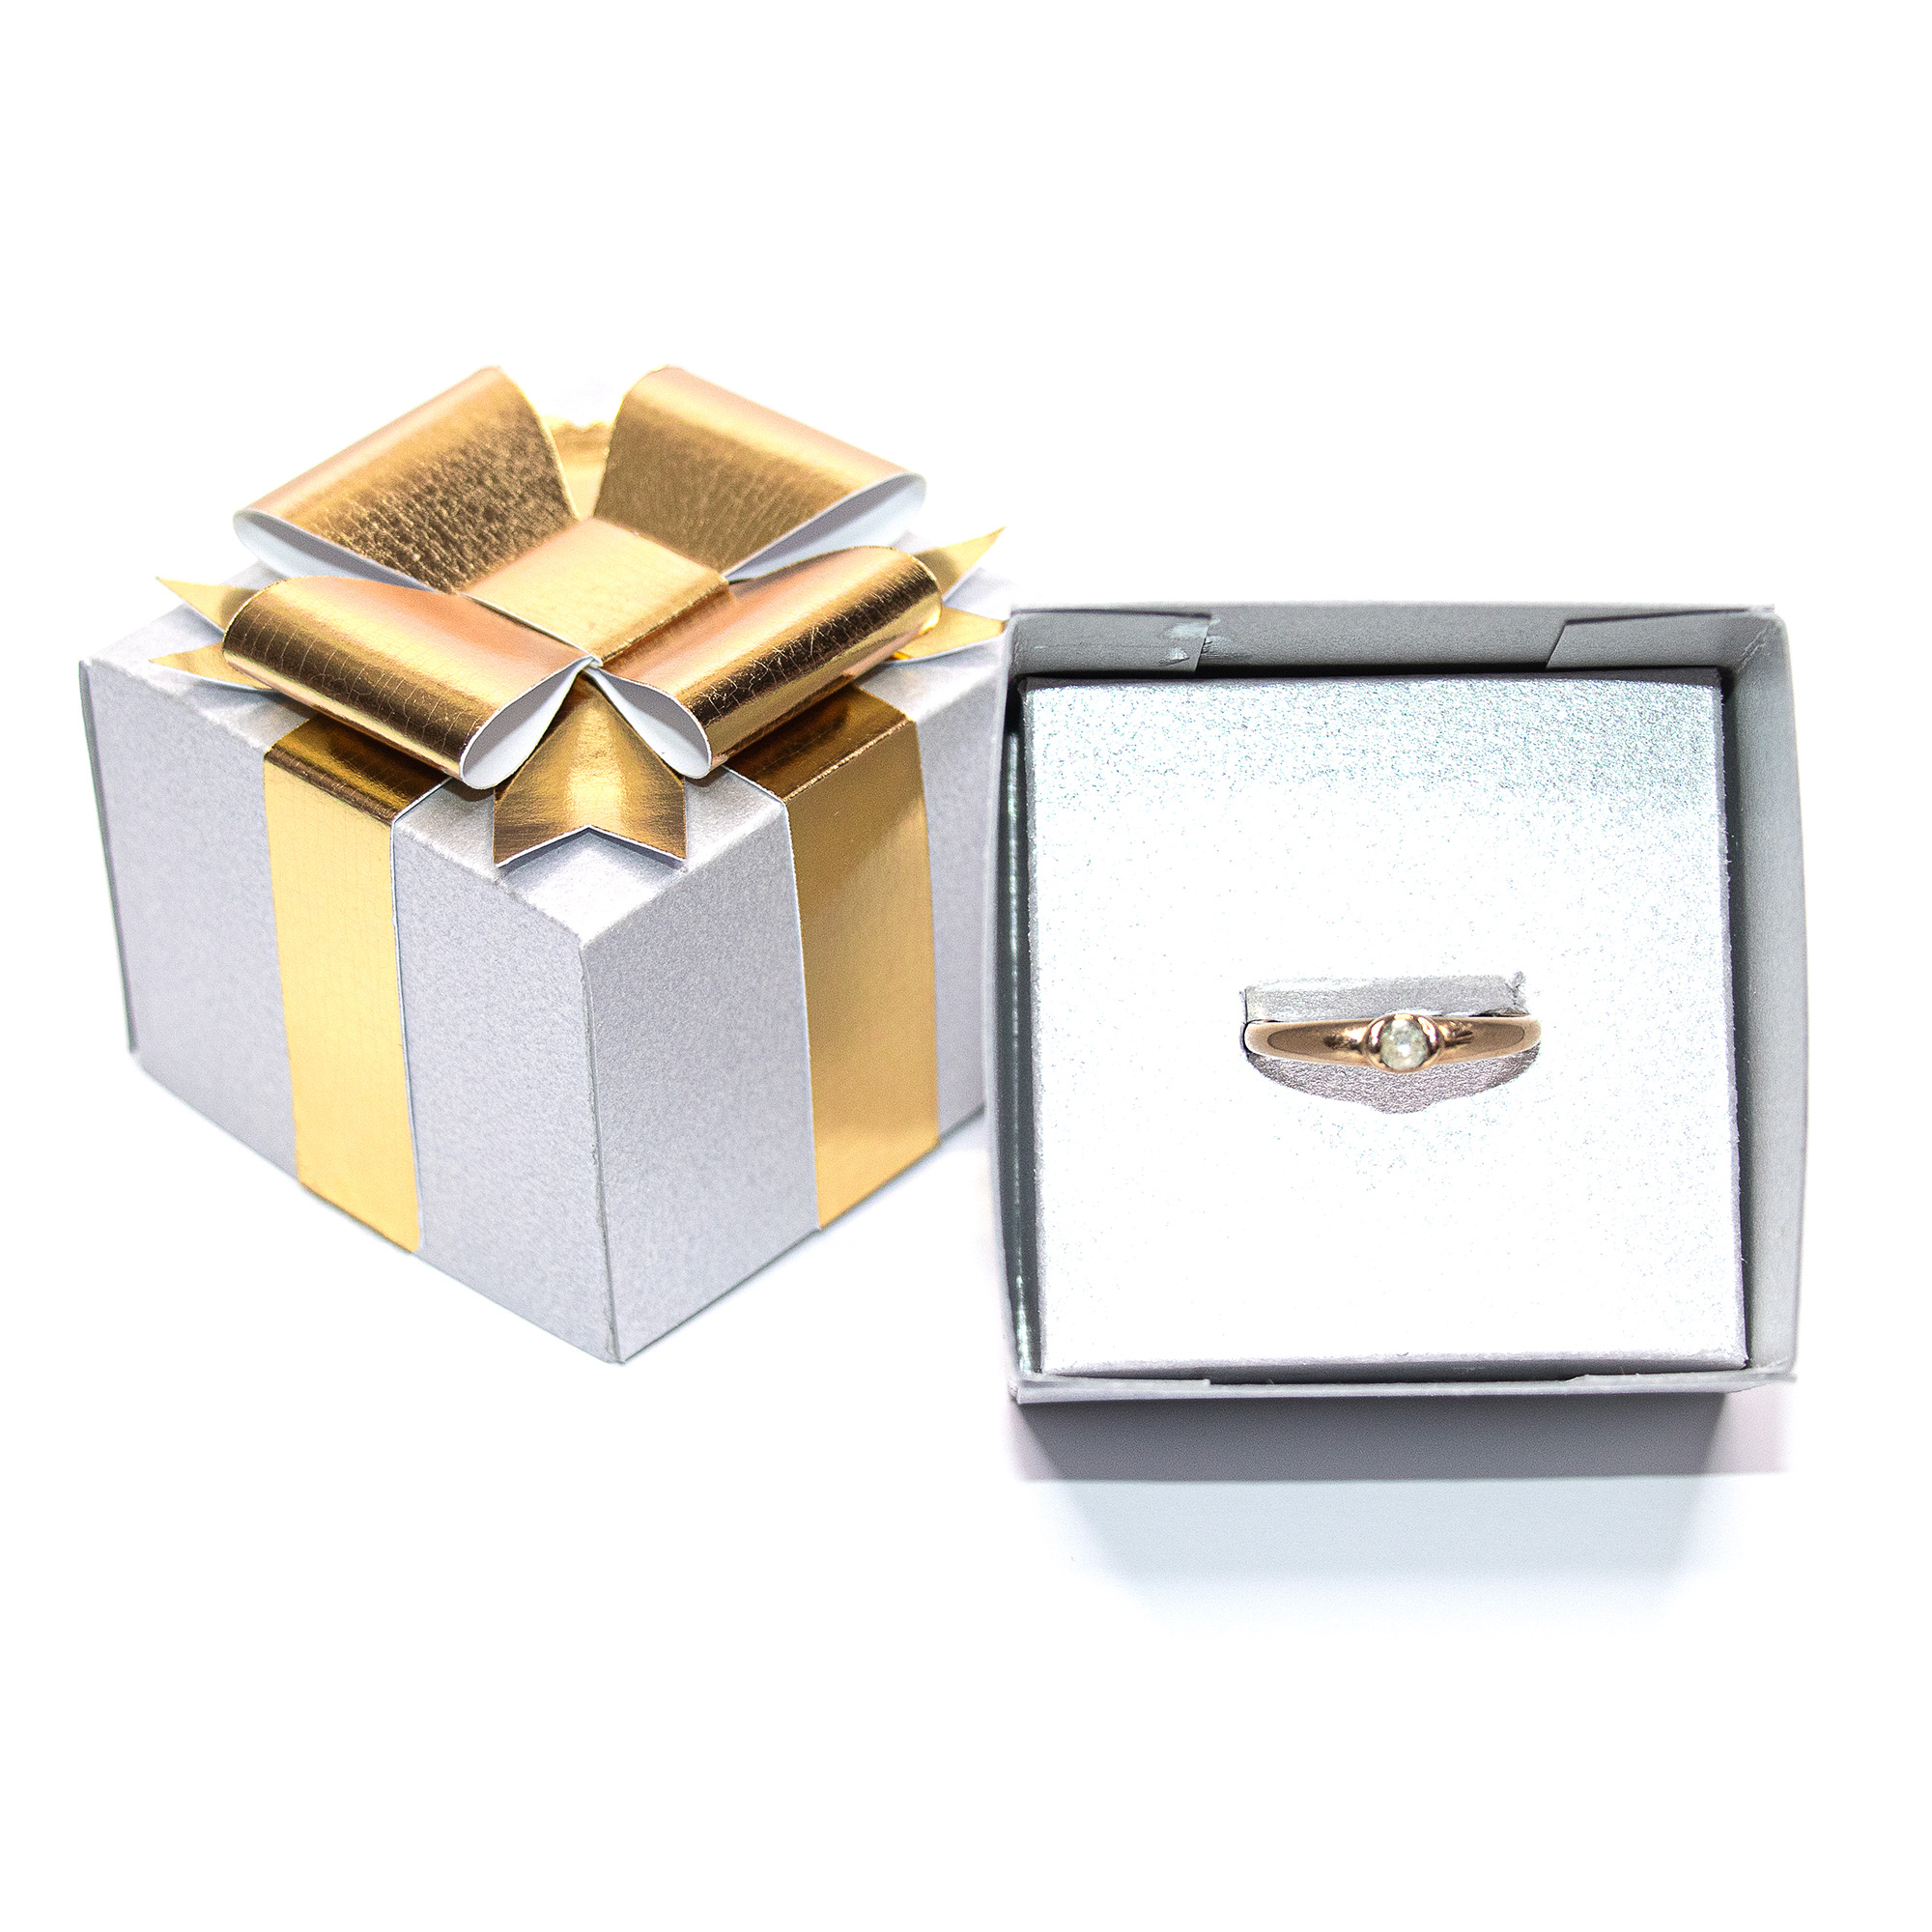
A beautiful piece of jewelry deserves more than a plastic bag or a flimsy box. These 3D gift boxes give it a beautiful presentation. Each one has a lid and base, a ribbon band and a handmade paper bow, plus a matching insert that shows the jewelry off the moment
the lid is lifted.There are two designs. One is made for necklaces. The other is for earrings or a ring, and it comes with three inserts so you can choose the right one for the gift. Cut them from any color or patterned cardstock to match the occasion, the outfit or your brand.
Why you will want to make these
Made for the jewelry: the insert holds the piece in place and displays it neatly, so it looks memorable as soon as the box is opened.
The earring and ring design comes with three inserts: on for stud earrings, hanging earrings or a ring, all from the same file.
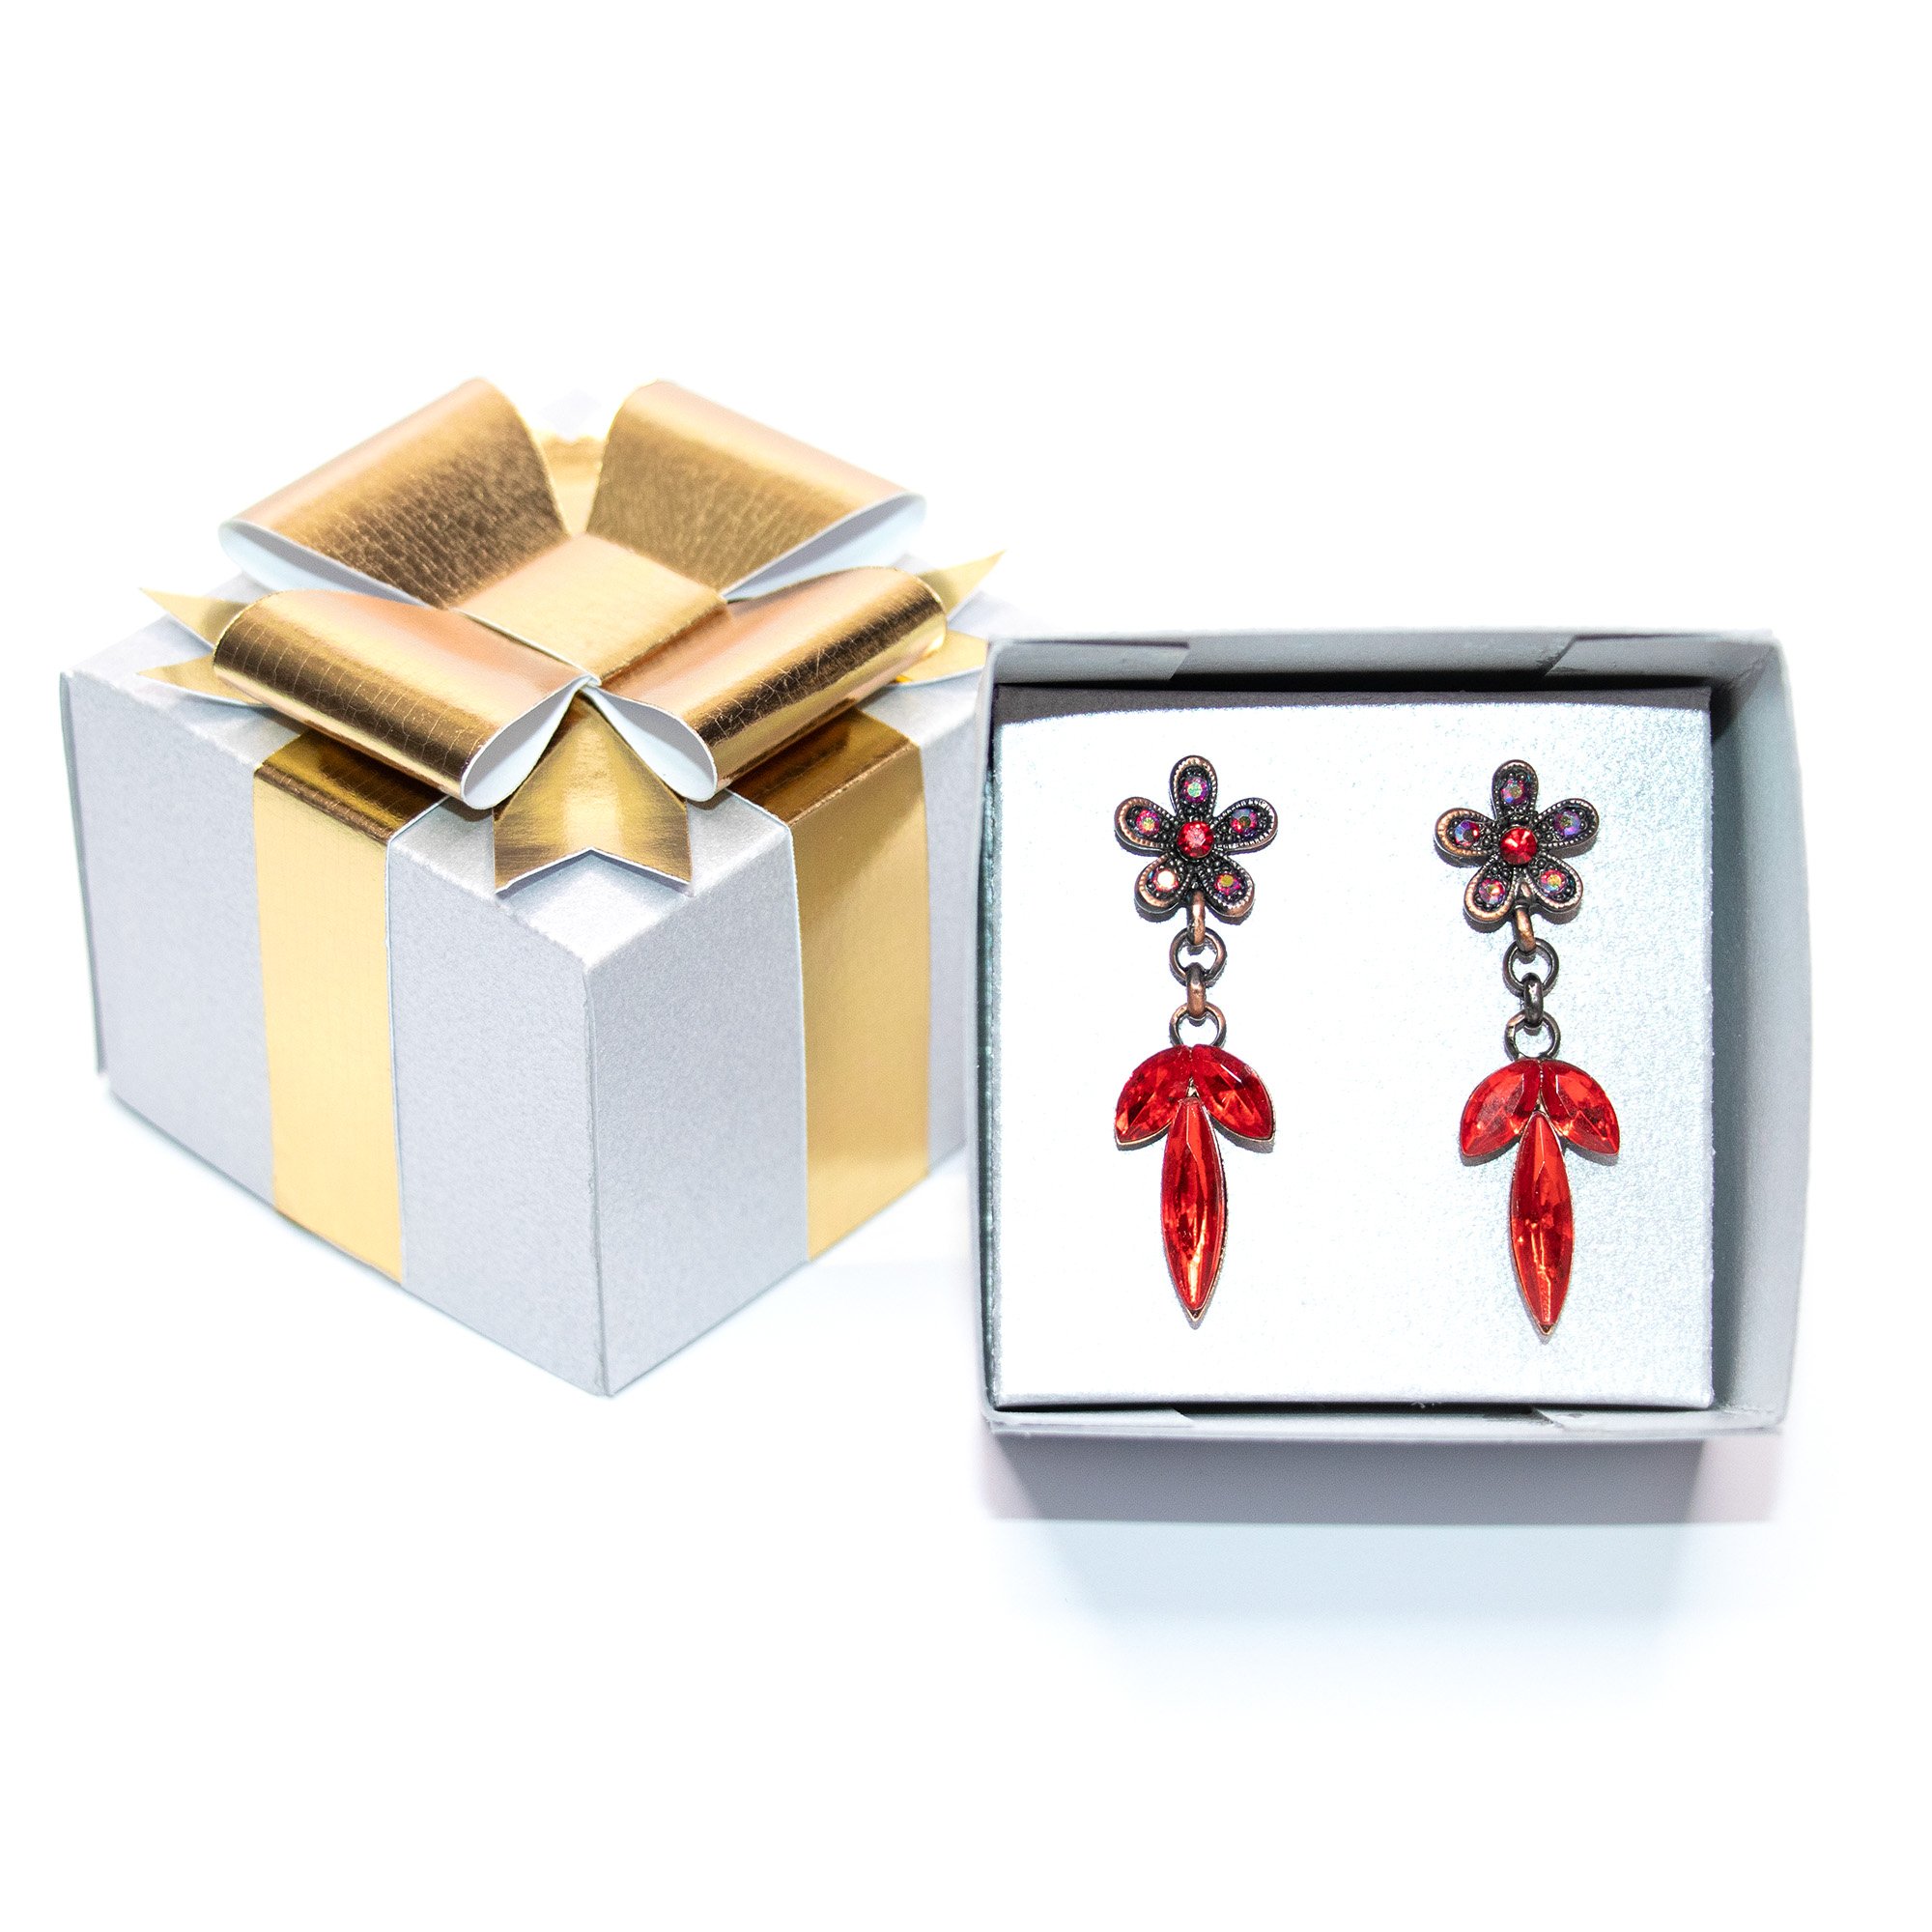
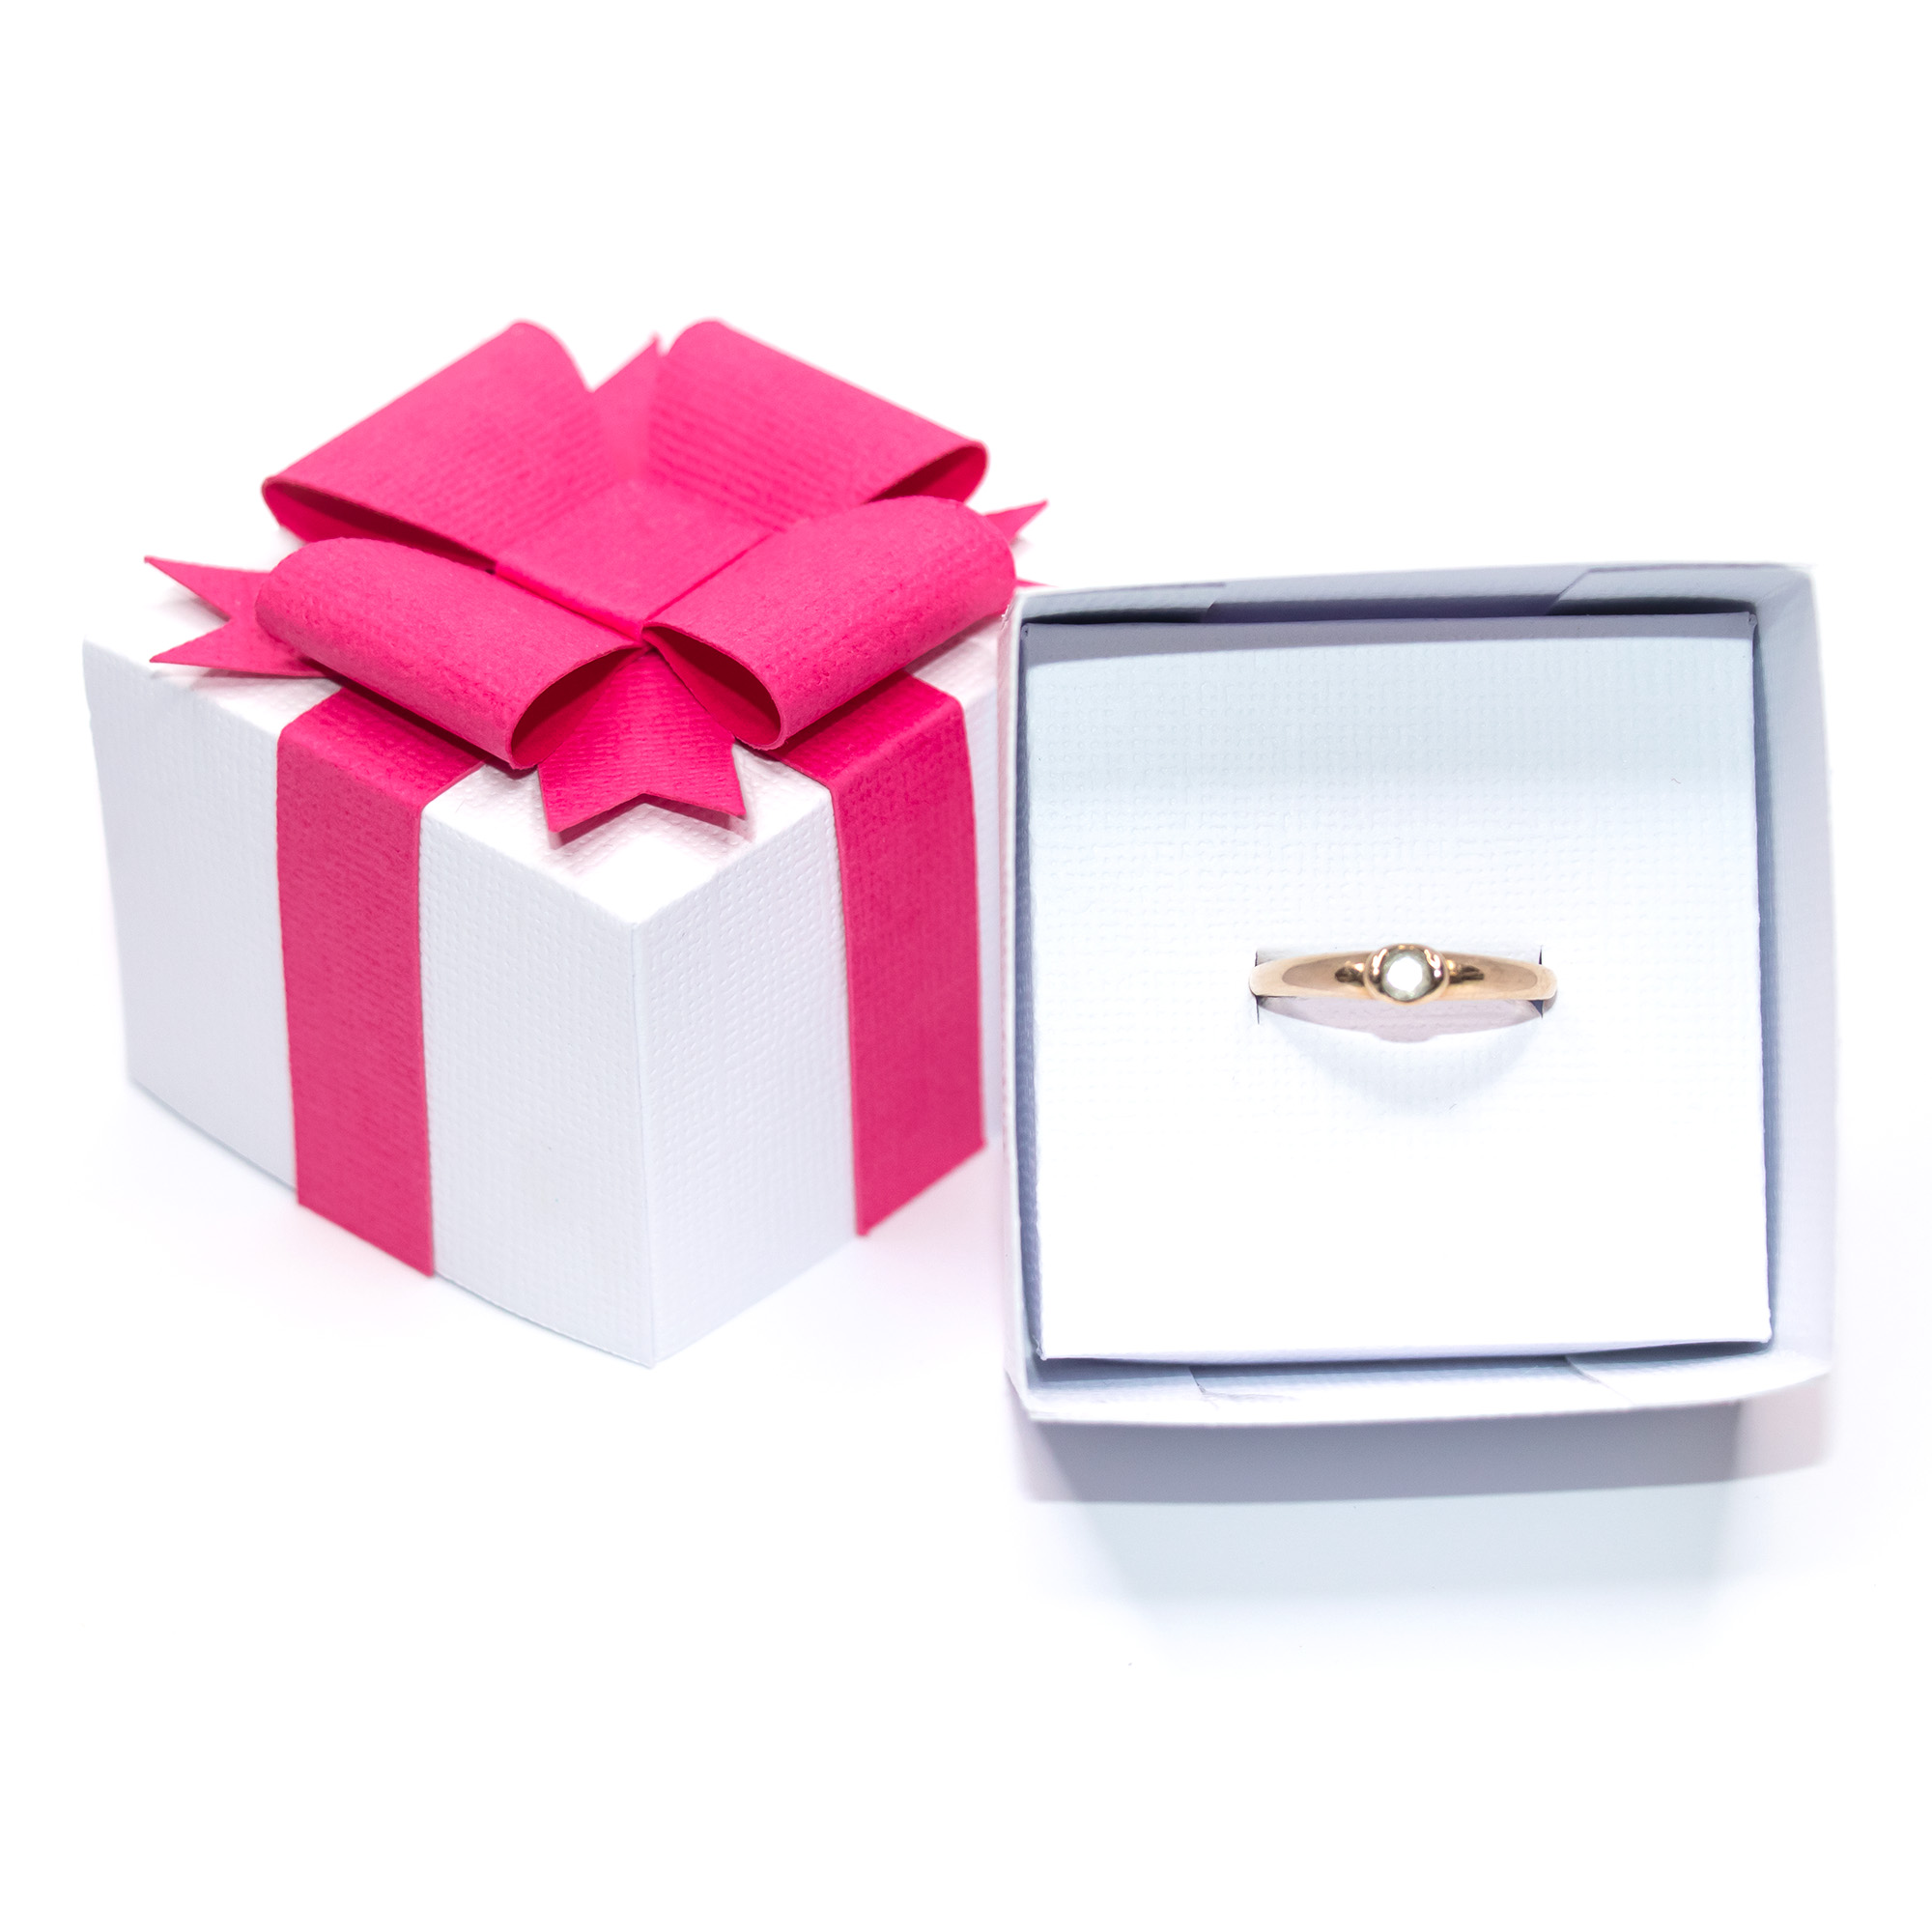
Any color you like: pick your cardstock and make the box and bow to suit the gift and recipient. The photos show magenta and teal, navy and pink, white and hot pink, and silver and metallic gold. Use as inspiration or come up with your own color combinations.
Great for gifts and for selling: birthdays, C hristmas, anniversaries and bridesmaid gifts are easy, and a batch in your brand colors makes handmade jewelry look professionally packaged.
Simple to put together: all you need is cardstock, craft glue and your cutting machine.
[IMAGE: open white box with the red crystal earrings, and open white box with the gold ring]
The two boxes go together almost the same way, so this tutorial covers both. The only real differences are the inserts, and each one has its own section below. Prefer to watch? The assembly videos are at the bottom of this post.
At a glance
Finished size, necklace box: 7.9 x 9.2 x 3.9 cm (3.1 x 3.6 x 1.5 in), or 4.9 cm (1.9 in) high including the ribbon
Finished size, earring and ring box: 5.4 x 5.4 x 3.9 cm (2.1 x 2.1 x 1.5 in), or 4.5 cm (1.8 in) high including the ribbon
Cutting machine: Silhouette Portrait, Cameo or Curio. (Or buy the SVG for other cutting machines) Every piece is smaller than letter size, so all three machines can cut the designs. The Cameo and Curio make it easier, because you can cut from 12 x 12 inch sheets. If you only have a Portrait, it works well too
Cardstock: medium to heavy weight gives the best result. The photos use heavy textured cardstock
Also needed: craft glue. Tape is optional for the necklace insert
What is in the files
Both designs open in Silhouette Studio® with the pieces already laid out and the fold lines marked.
In both boxes:
Box top (lid) and box bottom (tray)
Ribbon cross: the long cross shape that wraps around the box
Tail cross: the smaller cross with forked ends
Two bow loops: the long strips with shaped ends
Bow center: the small rectangle
Necklace box: one insert with cut lines and placement holes for the necklace.
Earring and ring box: a ring insert with a slot for the ring, an optional ring stabilizer, and two earring inserts with holes for the earring posts. The insert with the holes in the middle is for stud earrings, and the insert with the holes nearer the top is for hanging earrings. Placement can be altered if needed for your earring style.
Step 1: Cut the pieces
Cut the box top, box bottom, the insert you want and the ribbon pieces from your chosen cardstock. If you are using two colors, cut the box and insert in one, and the ribbon pieces in the other. For the earring and ring box, you only need to cut the insert that suits the gift.
Step 2: Assemble the box bottom
Fold along all the scored lines.
Add glue to the tabs.
Fix the tabs to the inside of the box sides, keeping the corners at right angles and the edges flush. Hold each join for a few seconds until the glue grips.
Step 3: Assemble the box top
Repeat the same steps for the box top.
Step 4: Assemble the insert
All the inserts fold and glue the same way as the box, with two tabs glued on two sides. Follow the section for the insert you are using, then place it into the box bottom.
Necklace insert
The cut lines on the insert let you gently slide the necklace into the placement holes. Take your time and it will not tear.
Optional: tape the cut lines. Put a small piece of tape over the cut lines on the side/back of the insert. This protects the paper from tearing and keeps the necklace in place when you pull the insert out of the box. It is not essential. Once the insert is in the box base it sits securely, and the box protects the necklace insert.
Earring inserts
Use the insert with the holes in the middle for stud earrings, or the insert with the holes nearer the top for hanging earrings, so the earrings hang freely. Push the posts through the holes from the front.
Ring insert
Slide the ring into the slot. For extra support, add the optional ring stabilizer.
Optional ring stabilizer: this small piece stops the ring from moving from side to side in the slot.
Glue the stabilizer to the underside of the ring slot, with one tab on each side of the ring score lines.
The stabilizer forms a V underneath the slot, which holds the ring in place.
Step 5: Join the ribbon pieces
Lay the ribbon cross flat and fold on the score lines and glue the sides to the sides of the box. Glue the tail cross on top, centered and flush, so the forked ends sit over the ribbon. For the ring/earring box, it looks super cute to have them angled on the diagonal rather than flush with the larger crossed ribbon. But do whatever you think looks the cutest.
Step 6: Make the first bow loop
Take one of the shaped bow strips and bring its ends together.
Glue the shaped ends to the underside of the ribbon center.
Glue the center of the bow to the center of the ribbon cross.
See the video how to here for my Gift Card Box to see how to make the loops. It is really easy to do. Note that the glue tabs are placed slightly differently for this Gift Box. There will be more videos to come!
Step 7: Make the second bow loop
Repeat with the second shaped strip.
Glue the small bow center piece over the middle to hold the top bow loop together.
Fix the second loop facing the opposite direction to the first, so the bow sits evenly.
Step 8: Attach the ribbon to the lid
Fold the sides of the ribbon cross along the score lines.
Glue the finished ribbon and bow to the center of the box top, pressing it flush against the lid.
Step 9: Finish
Place the box top onto the box bottom. Your jewelry is ready to give.
Tips for a neat result
Use medium to heavy cardstock for crisp folds and a firm fit.
Use a small amount of craft glue and hold each join until it grips.
Textured cardstock gives the box a fabric look.
Choose an insert color that contrasts with the jewelry so it stands out.
Metallic cardstock makes a striking bow, as in the silver and gold version.
Selling jewelry? Cut a batch in your brand colors.
Not sure which earring or ring insert you need? Cut all three and keep the spares for next time.
The same ribbon and bow design comes in a gift card size, with a holder that fits a standard credit card sized gift card. It is a great way to make a gift card feel more like a real present and less like a last minute gift. Many tweens and teens prefer gift cards, but why not make it extra special with a custom box? Get the 3D Gift Card Box with Ribbon and Bow, and follow the gift card box assembly tutorial.
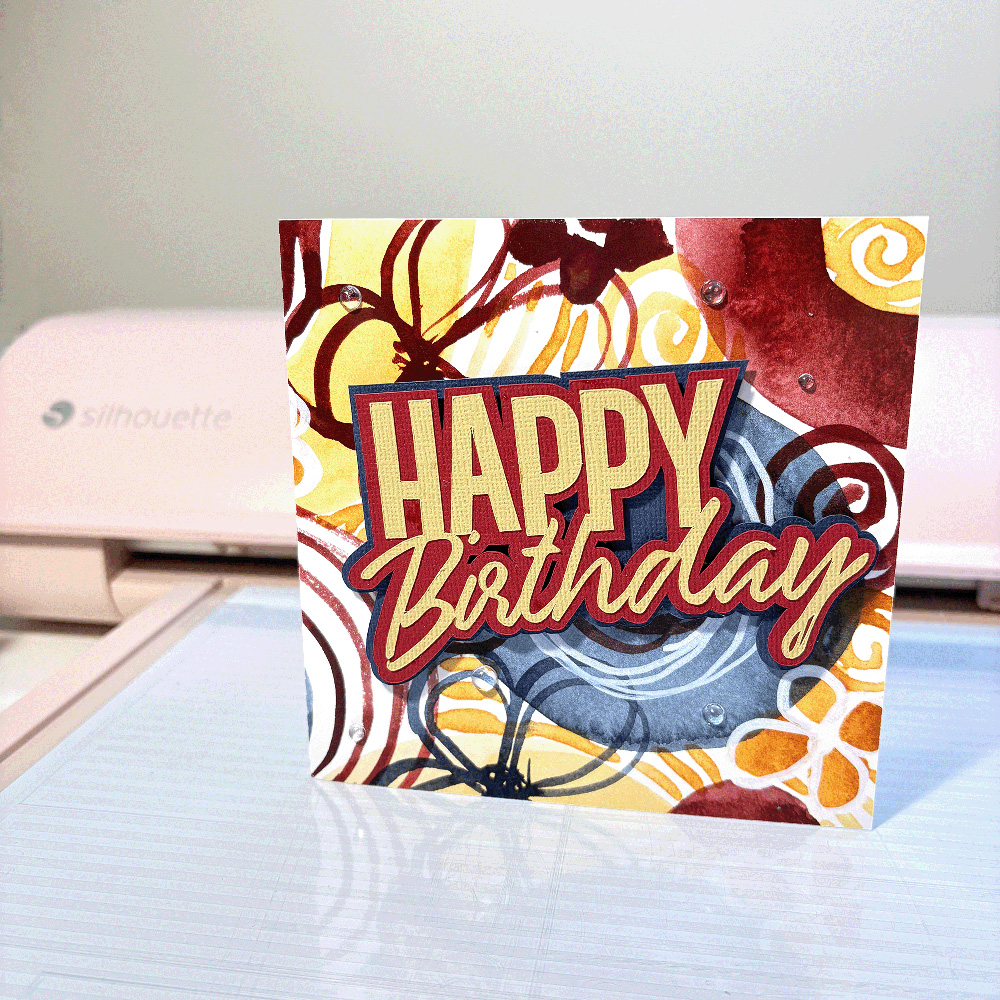
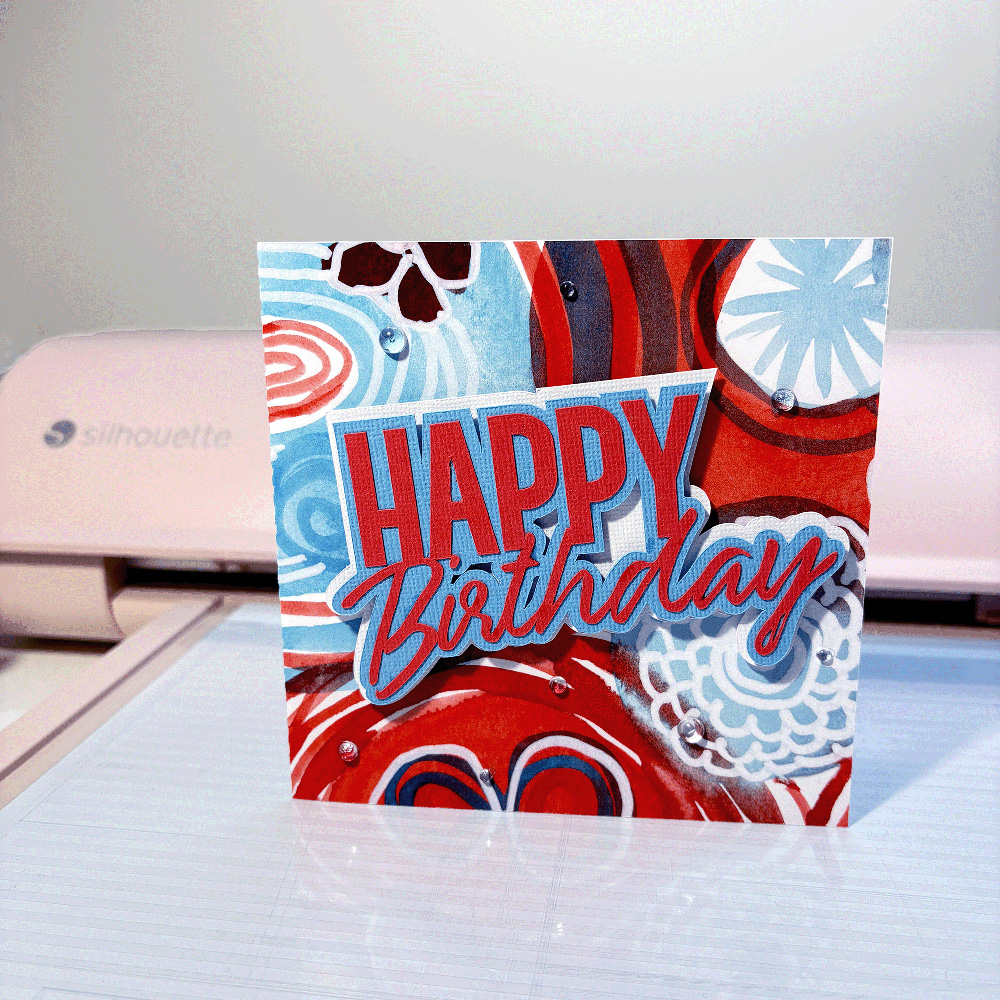
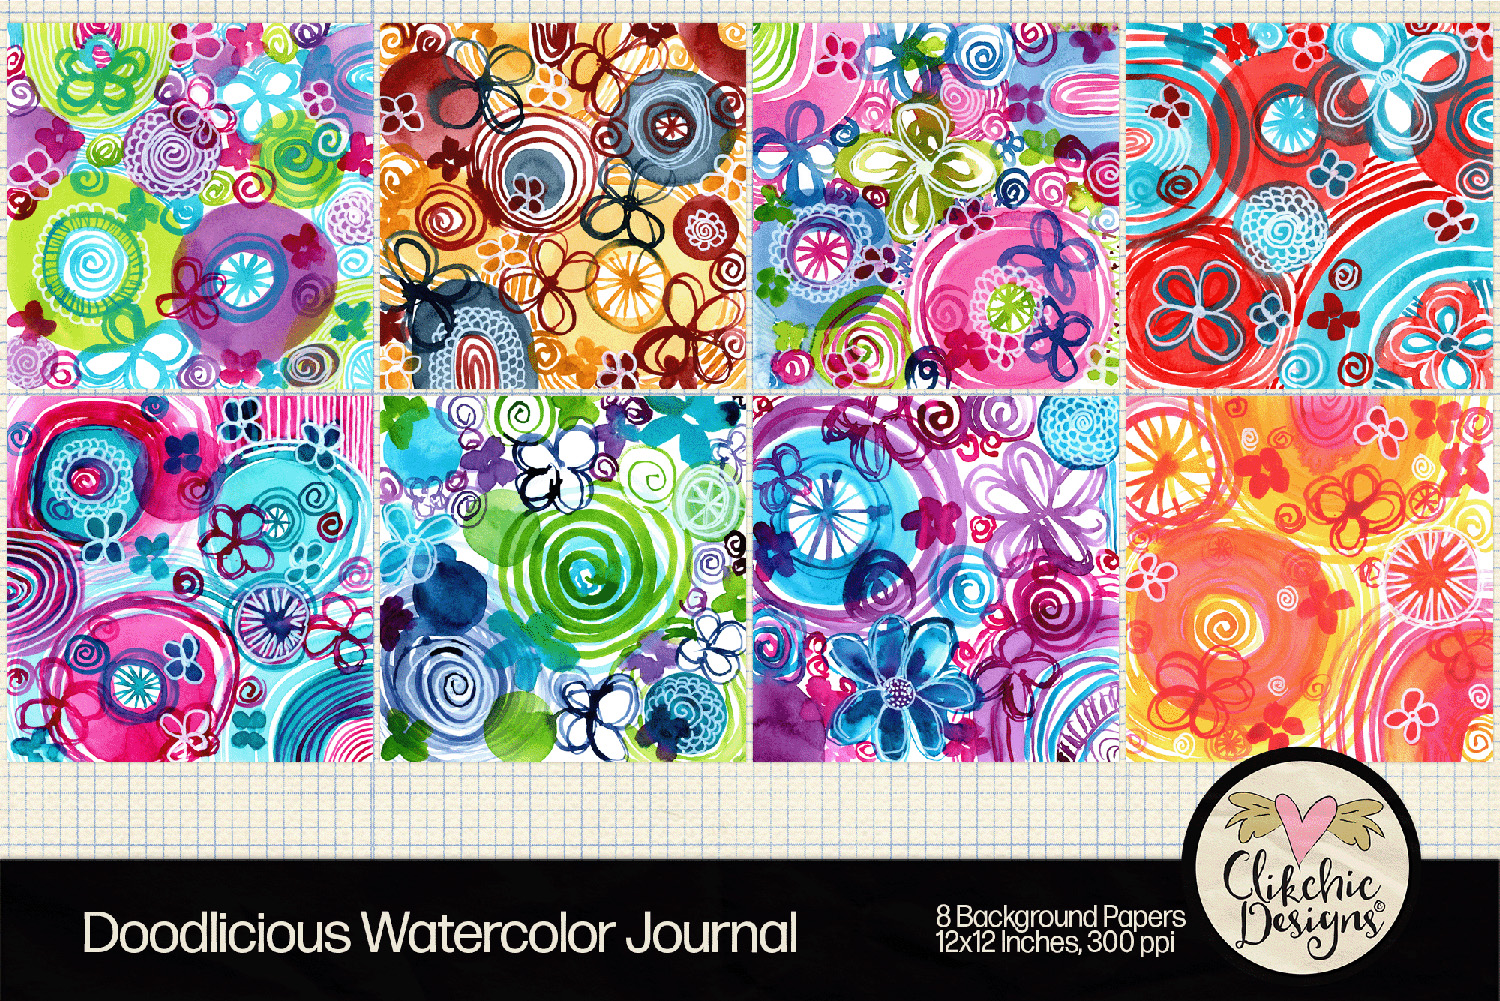
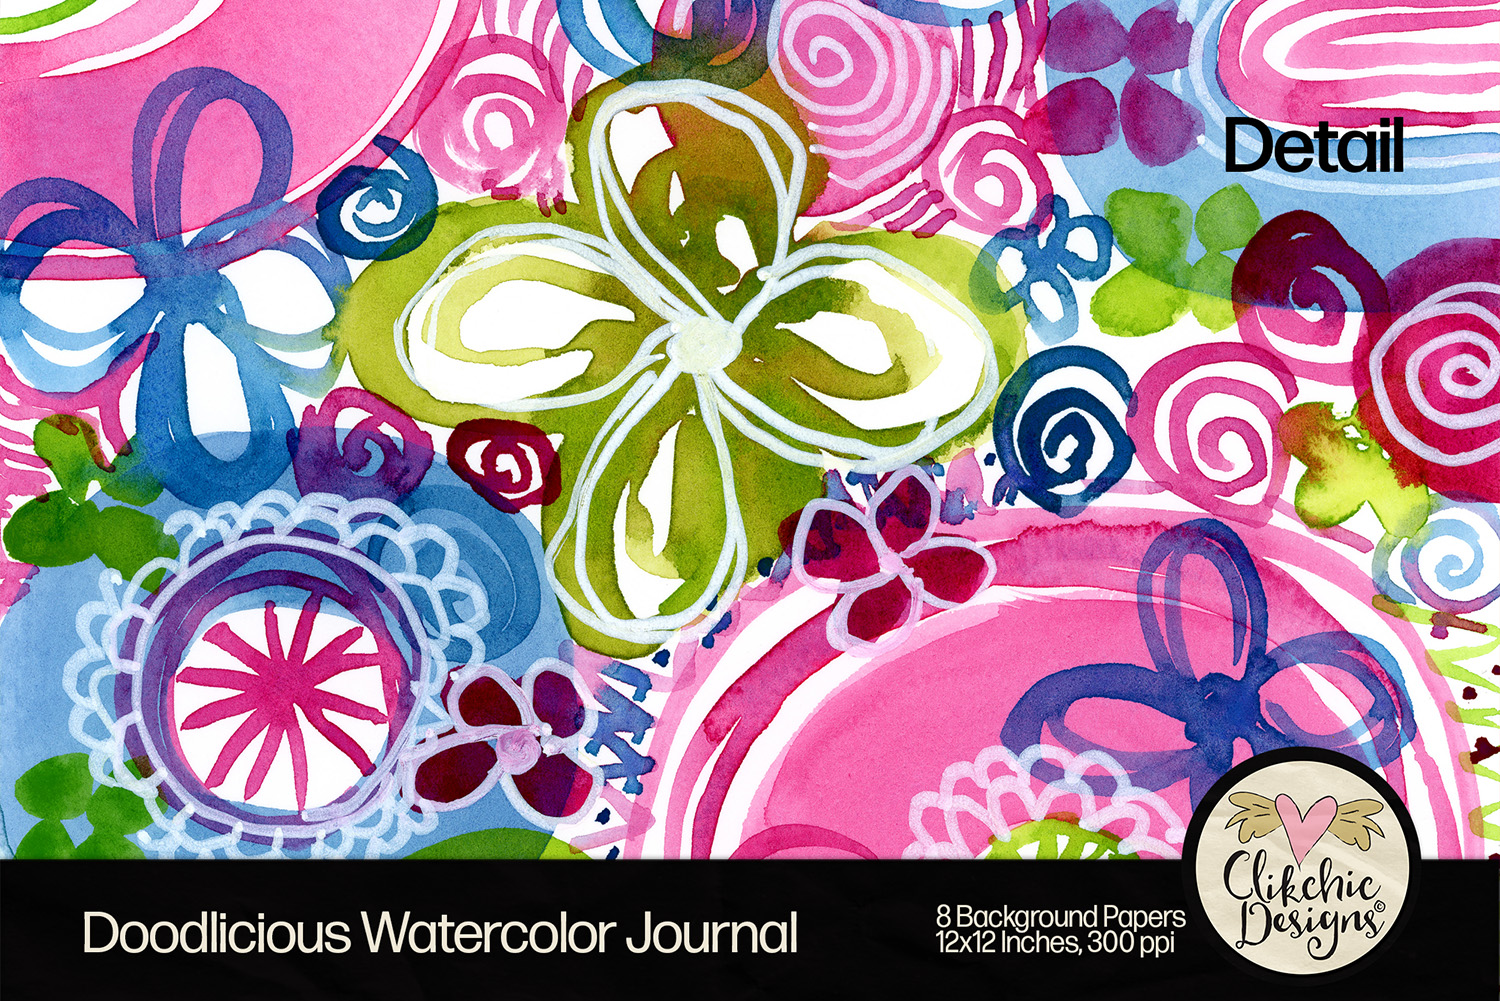
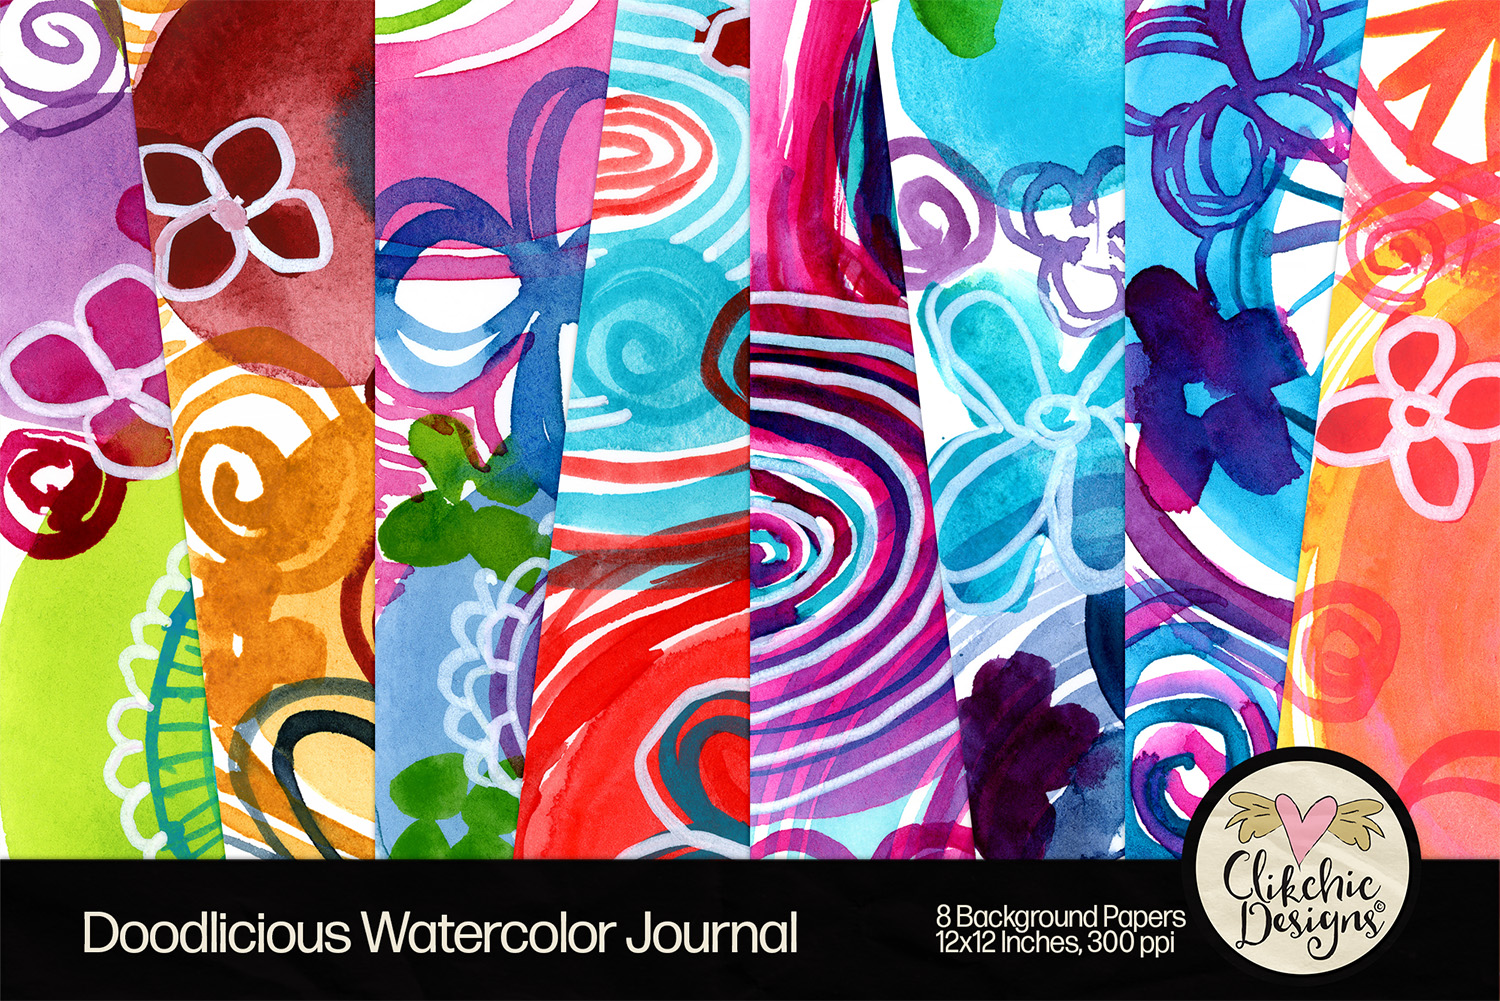
These new Doodlicious Journal printable backgrounds are hand-painted watercolour designs packed with swirling spirals, doodle flowers and bold overlapping circles in eight vivid colourways. In Silhouette Studio®, you can use them as standalone printed backgrounds or fill your favourite cuttable shapes with them using the clipping mask tool to create custom print and cut projects. You can also simply print from any suitable software to use for any crafting project. To show you what they can do, here are two birthday cards made using the backgrounds paired with a brand new Happy Birthday sentiment.
Ochre and Indigo Doodlicious Birthday Card
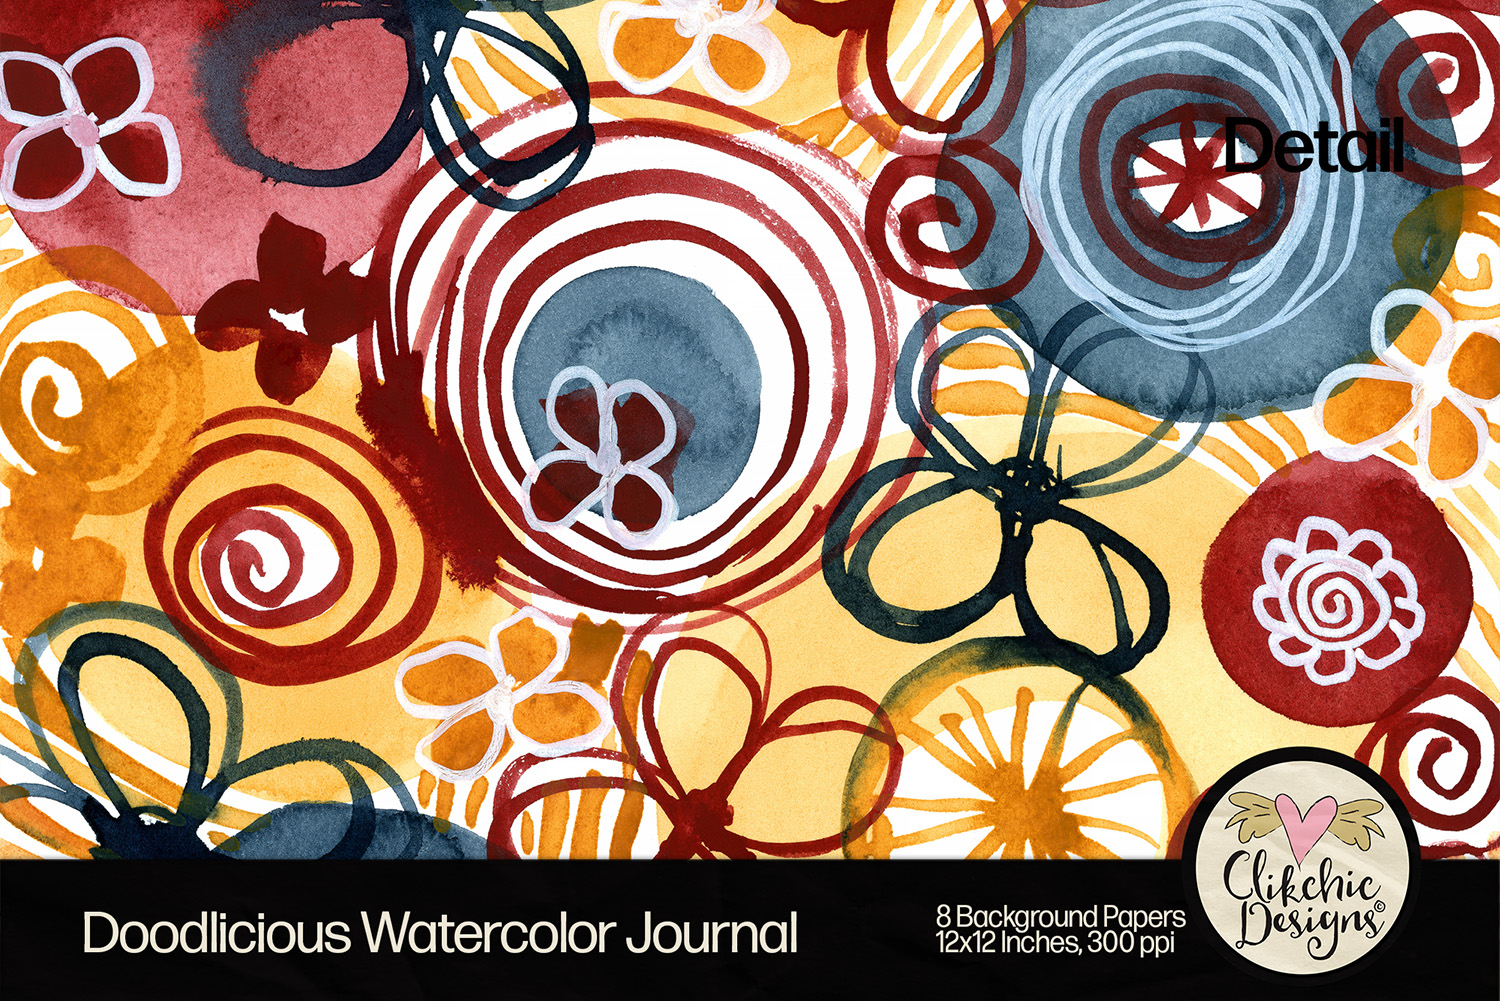
The warm ochre, rust and indigo tones of this Doodlicious background give the card a rich, earthy feel. The new layered Happy Birthday sentiment picks up the warm tones of the background, making it a natural fit for the design.
The bold contrast of red and turquoise in this Doodlicious background gives the card a lot of energy. The Happy Birthday sentiment layers beautifully over the busy background, keeping the focal point clear while letting the pattern do the work behind it.
All eight backgrounds are available individually in the Silhouette Design Store. Each one is a printable pattern that can be used as a background on its own or as a clipping mask fill in Silhouette Studio®. Prefer to grab all eight at once? The complete Doodlicious Journal Backgrounds set is available on Etsy and Creative Market.
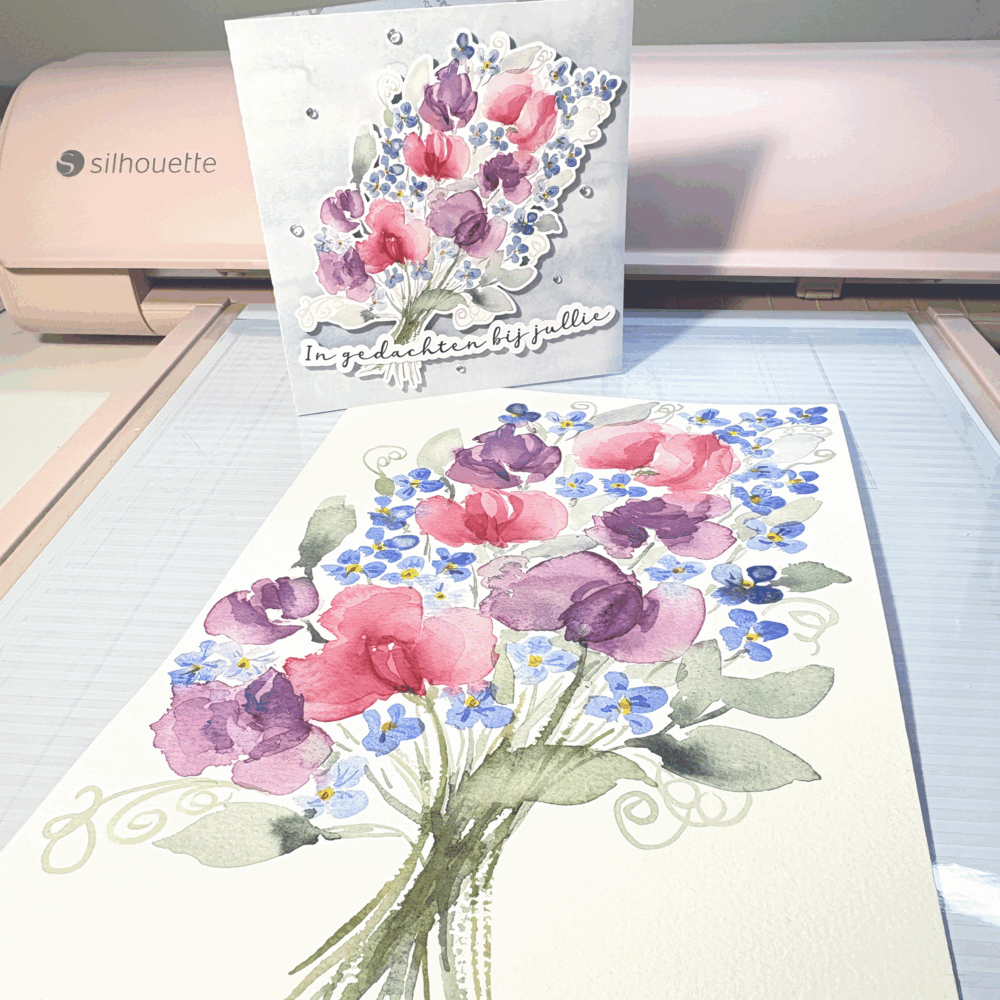
The Sweet Pea Forget Me Not Watercolor Floral Bouquet pairs soft pink and purple sweet peas with delicate blue forget me nots, painted by hand and set up as a print and cut file for Silhouette Studio®. It was originally designed with sympathy cards in mind. Sweet peas traditionally represent a fond goodbye, and forget me nots symbolise lasting remembrance, so the floral bouquet meaning sits comfortably on a “Thinking of You” or “In Sympathy” card.
The muted colour palette is the reason it doesn’t stop there. The same file works just as well for a birthday card, a scrapbook layout, or a gift tag, without ever looking out of place.
On a Sympathy Card
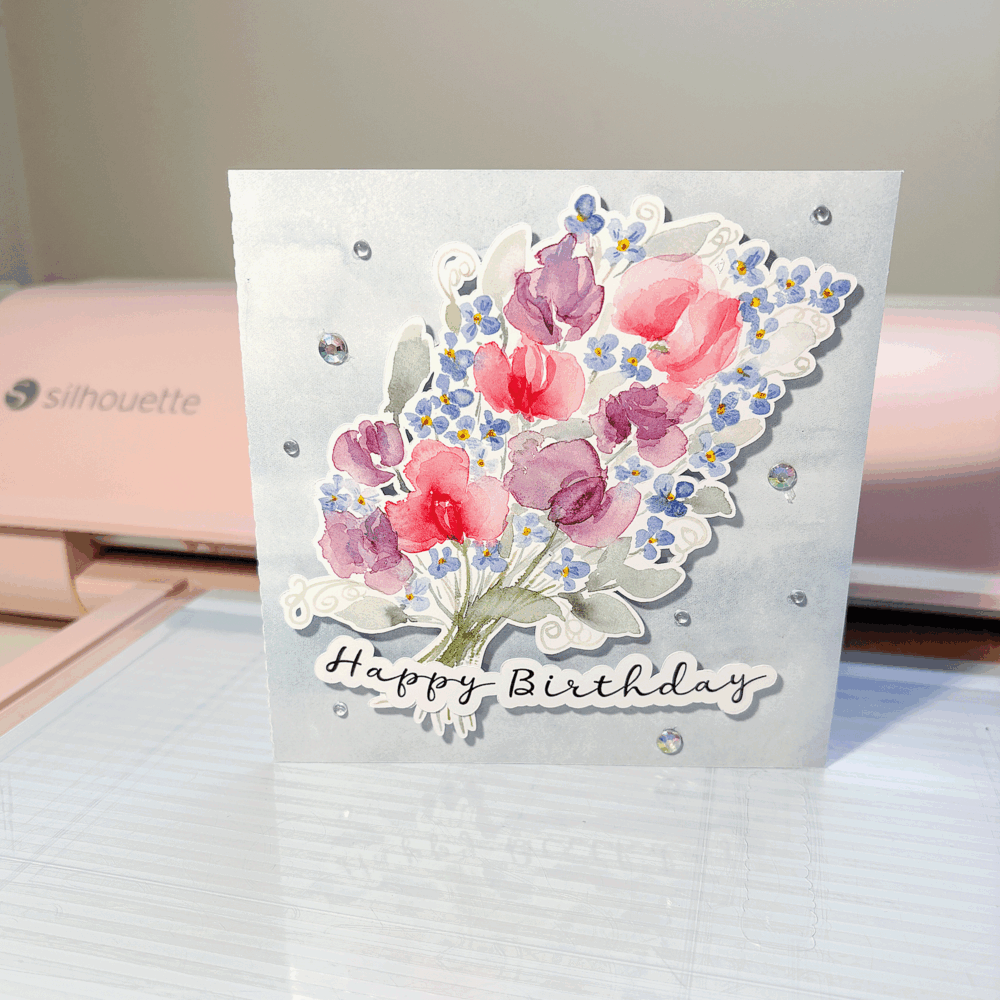
For the cards shown here, I paired the bouquet with the Crystal Sea Blue Watercolor Background and a few clear and iridescent gems. The soft grey blue tone keeps the focus on the florals and suits the tone of a sympathy or thinking of you card.
Also shown is the original hand painted watercolor artwork, scanned and edited into a print and cut file for Silhouette Studio®.
Beyond Sympathy
A “Happy Birthday” sentiment and a couple of extra rhinestones turn the same bouquet into a birthday card. Cut it larger and it becomes a page anchor for a scrapbook layout, or cut it smaller for a gift tag. It also suits thank you and anniversary cards, particularly in a rose gold or blush colour scheme.
Getting Started in Silhouette Studio®
Open the print and cut file in Silhouette Studio®
Print the design onto white or cream cardstock using your home printer
Load the printed sheet onto your cutting mat and register the print and cut marks
Send to cut and let your machine do the rest
Layer onto your card base or page with foam tape for extra dimension
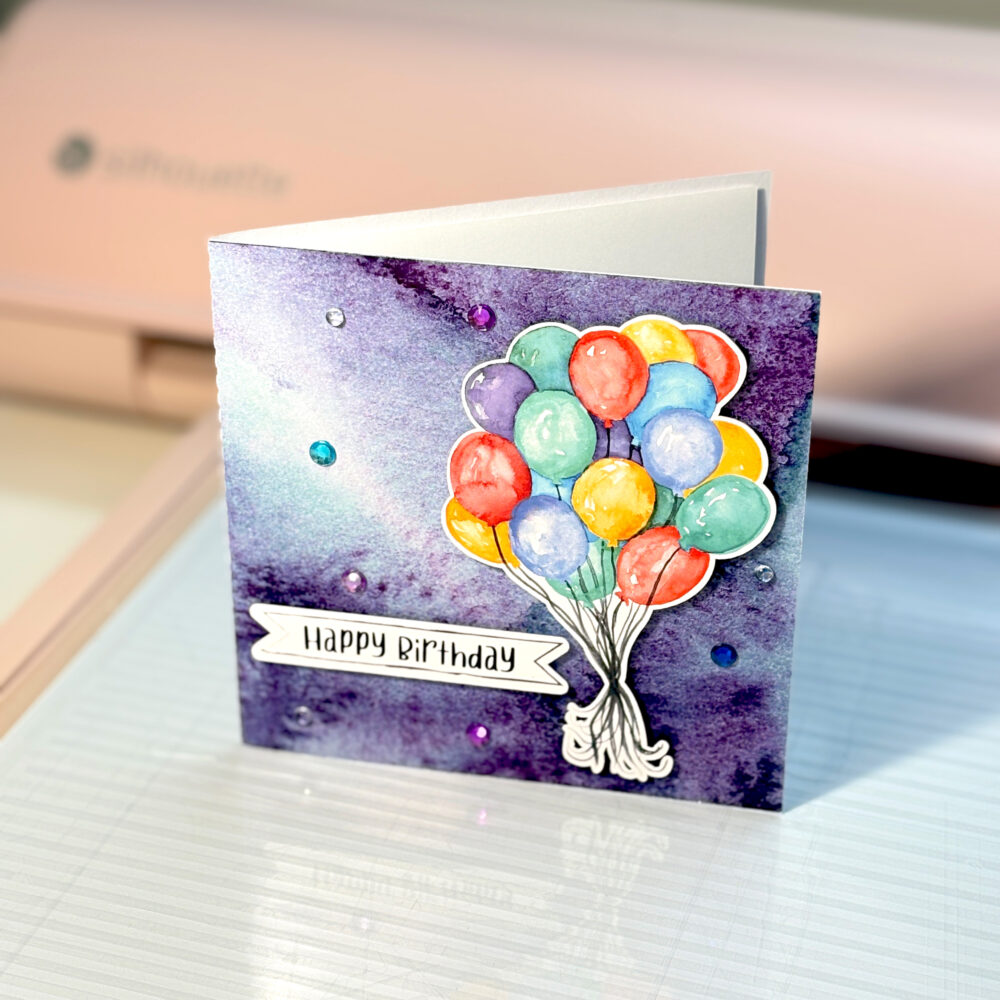
A bunch of balloons is one of those birthday card elements that works for almost anyone. These three hand-painted watercolor balloon bunch print and cut designs give you a versatile, large-scale focal point that suits a wide range of backgrounds and card styles. The sample cards below show all three palette options across seven different backgrounds, and the range of looks you can achieve from a single design might surprise you.
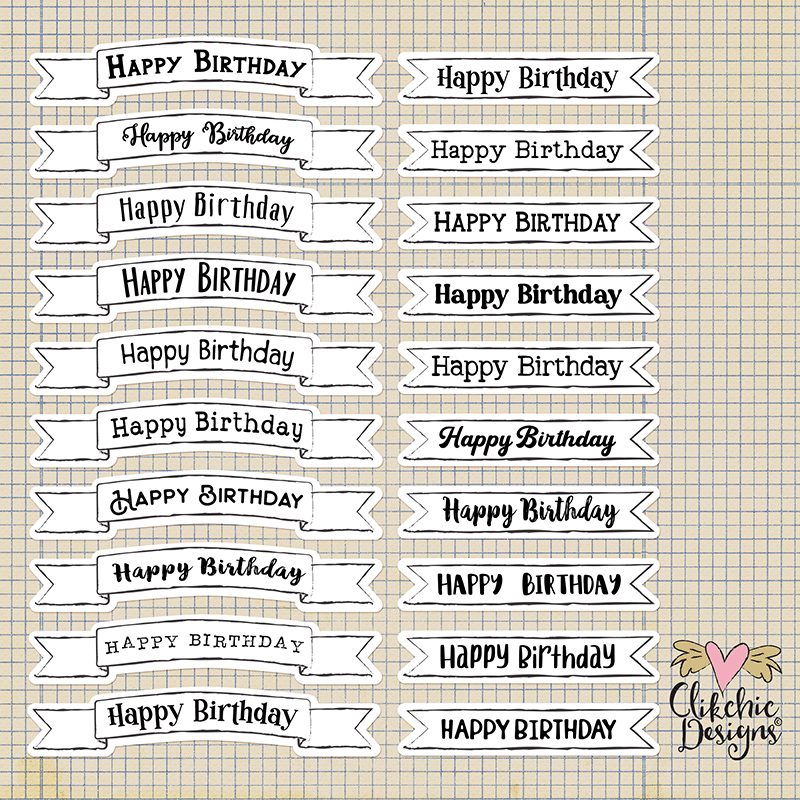
All the printable backgrounds used on the cards in this post are my own designs, also available in the Silhouette Design Store. The Happy Birthday banners are from the Doodled Happy Birthday Banners Sentiments, which coordinates with all three balloon designs. Keep reading to see each palette design in action and find the full supplies list for every card.
About the Designs
Three color palette options are available: bright tones, cool tones, and warm tones. Each is a large hand-painted watercolor bunch of balloons tied together with hand-drawn black string. Designed at a large size so you can use them at full size for a bold card focal point, or scale them down in Silhouette Studio® for smaller cards, tags, and layered projects.
The Cards
Bright Tones Colorful Balloons Bunch
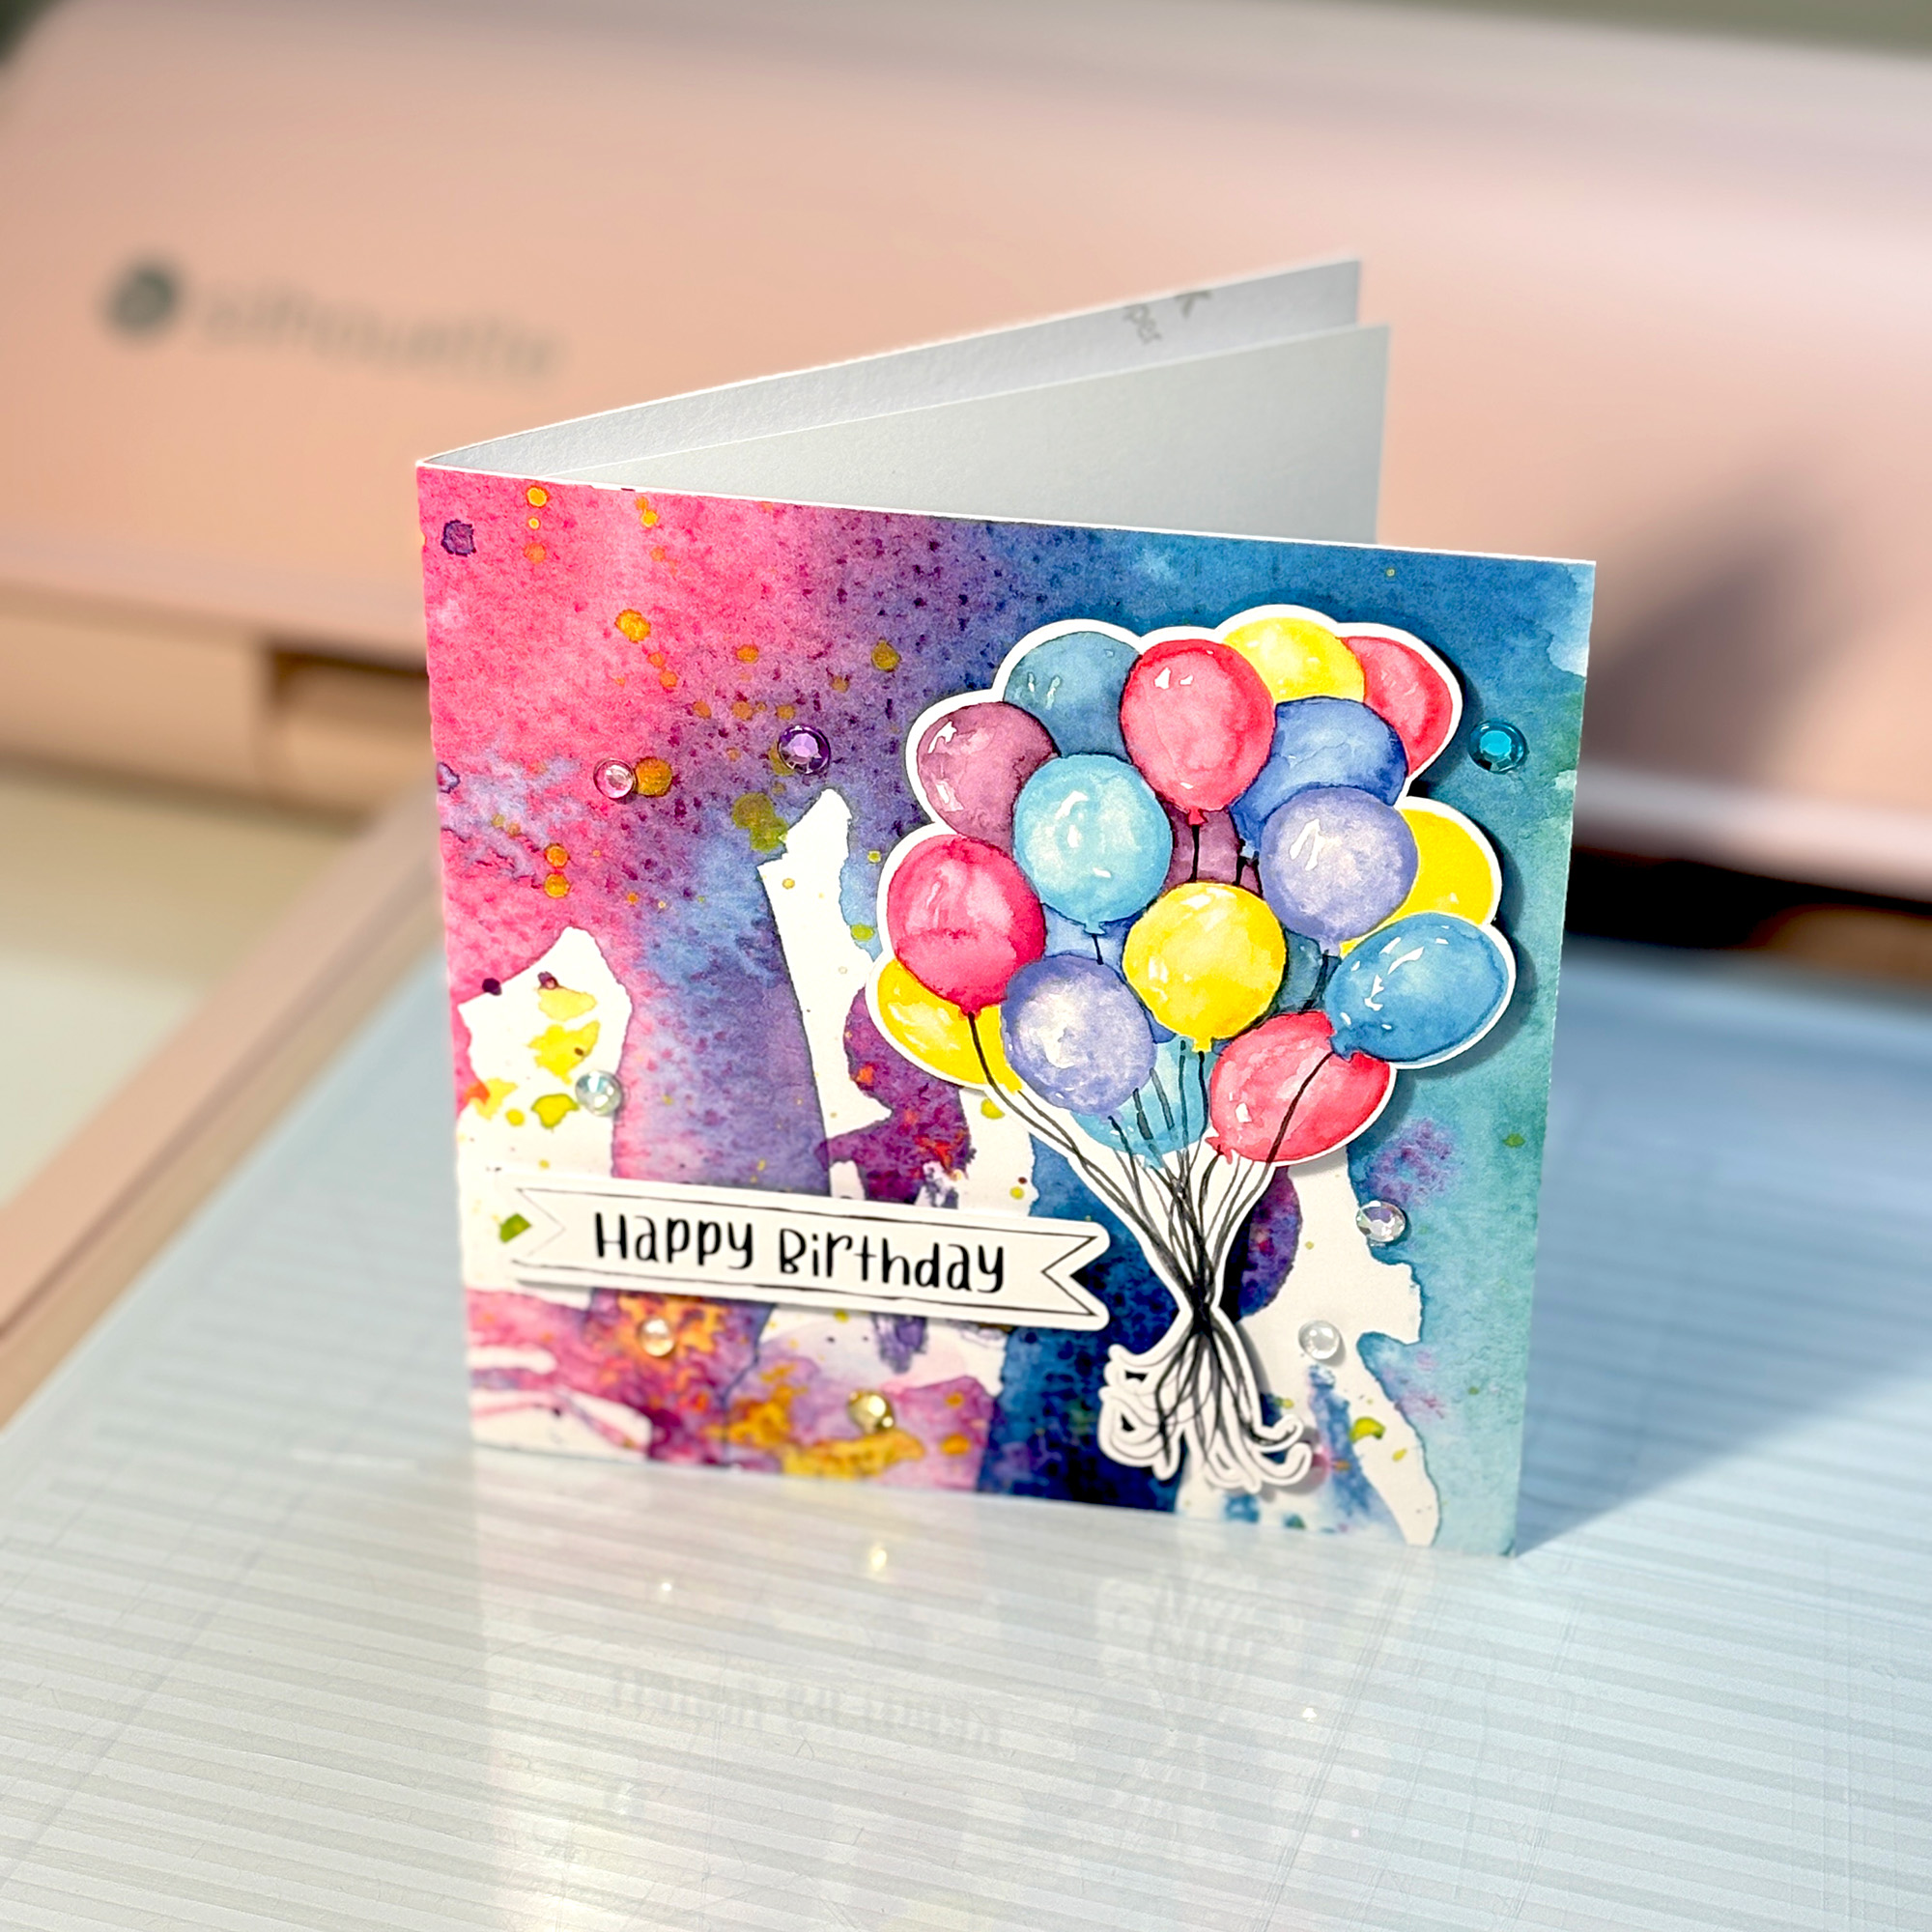
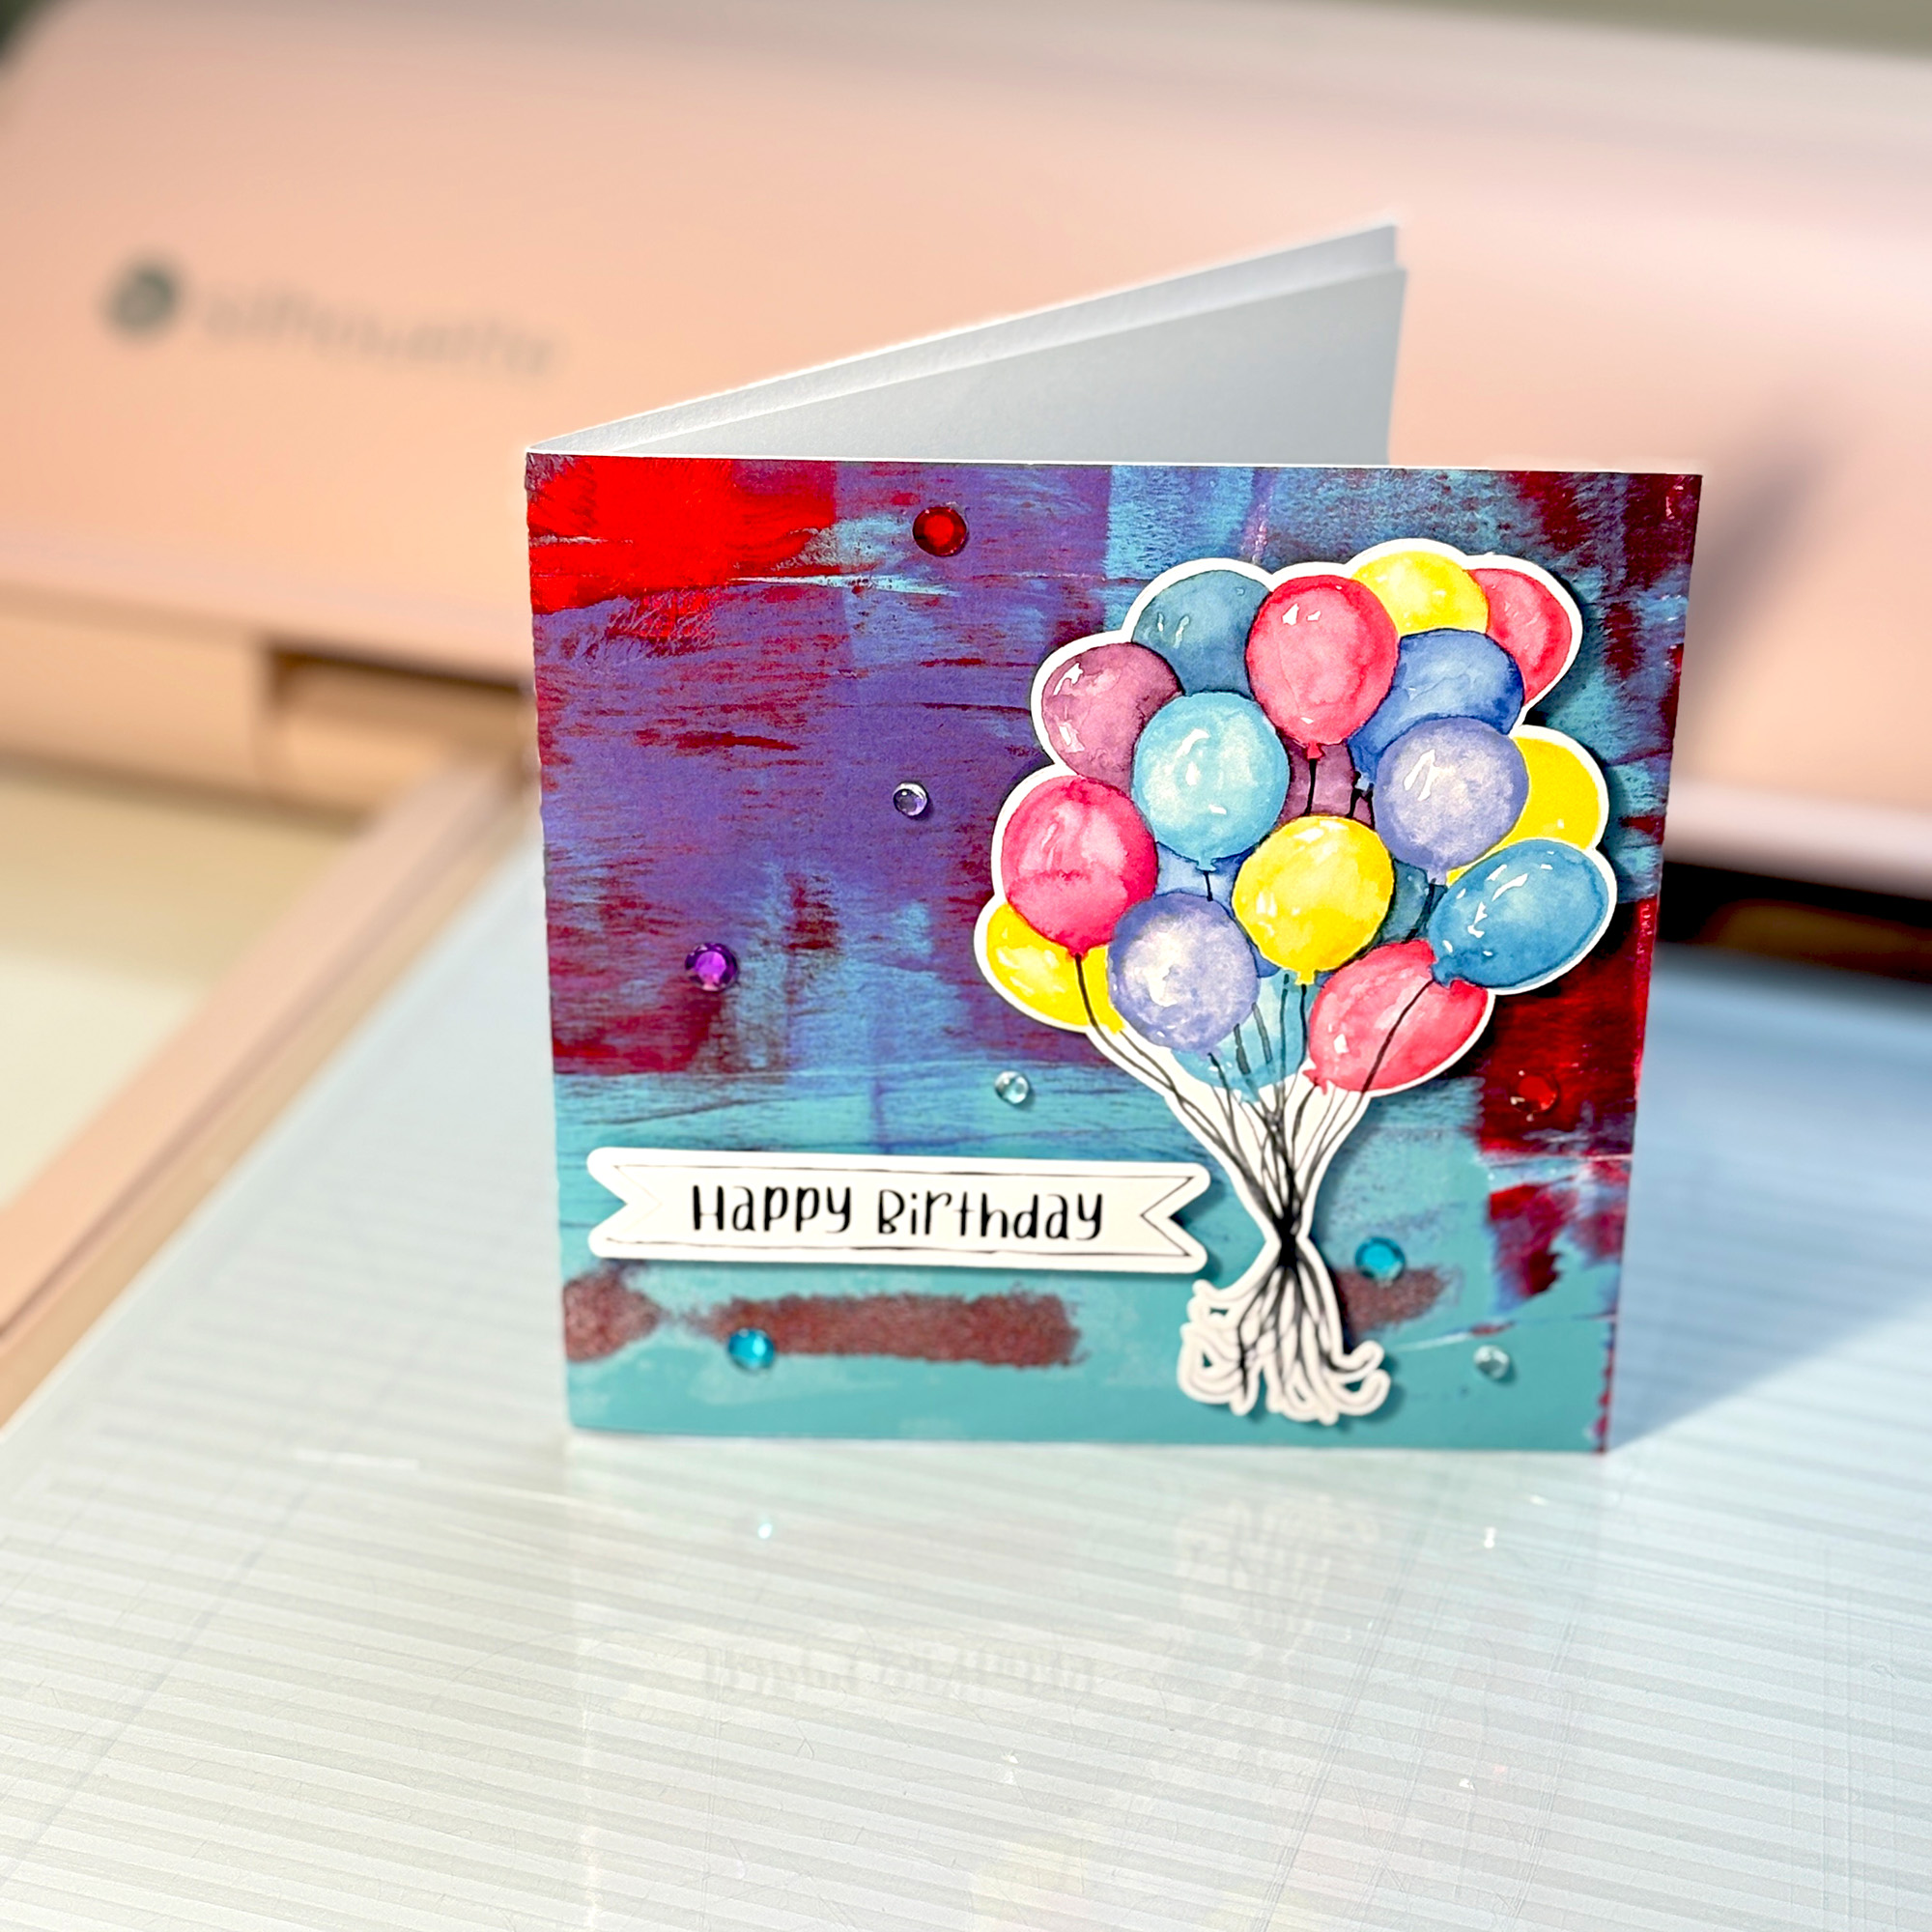
The bright tones palette features pink, yellow, teal, blue and purple balloons. It is the most vibrant of the three sets and suits backgrounds with strong colour and movement. The two cards below show how differently it reads depending on what sits behind it.
The first card pairs the bright tones balloon bunch with a soft mixed-media background in pink, purple, blue and gold. The background uses a clipping mask for a decorative shaped edge. The layered watercolour tones behind the balloons give this card a loose, painterly feel, and the scattered mixed-colour rhinestones keep the finish light and festive.
The second card uses a bold brushstroke background in dark purple, red and teal. The deeper tones make the bright balloon colours pop more than they do against the softer background, and the contrast gives the card a more dramatic feel while still reading as celebratory.
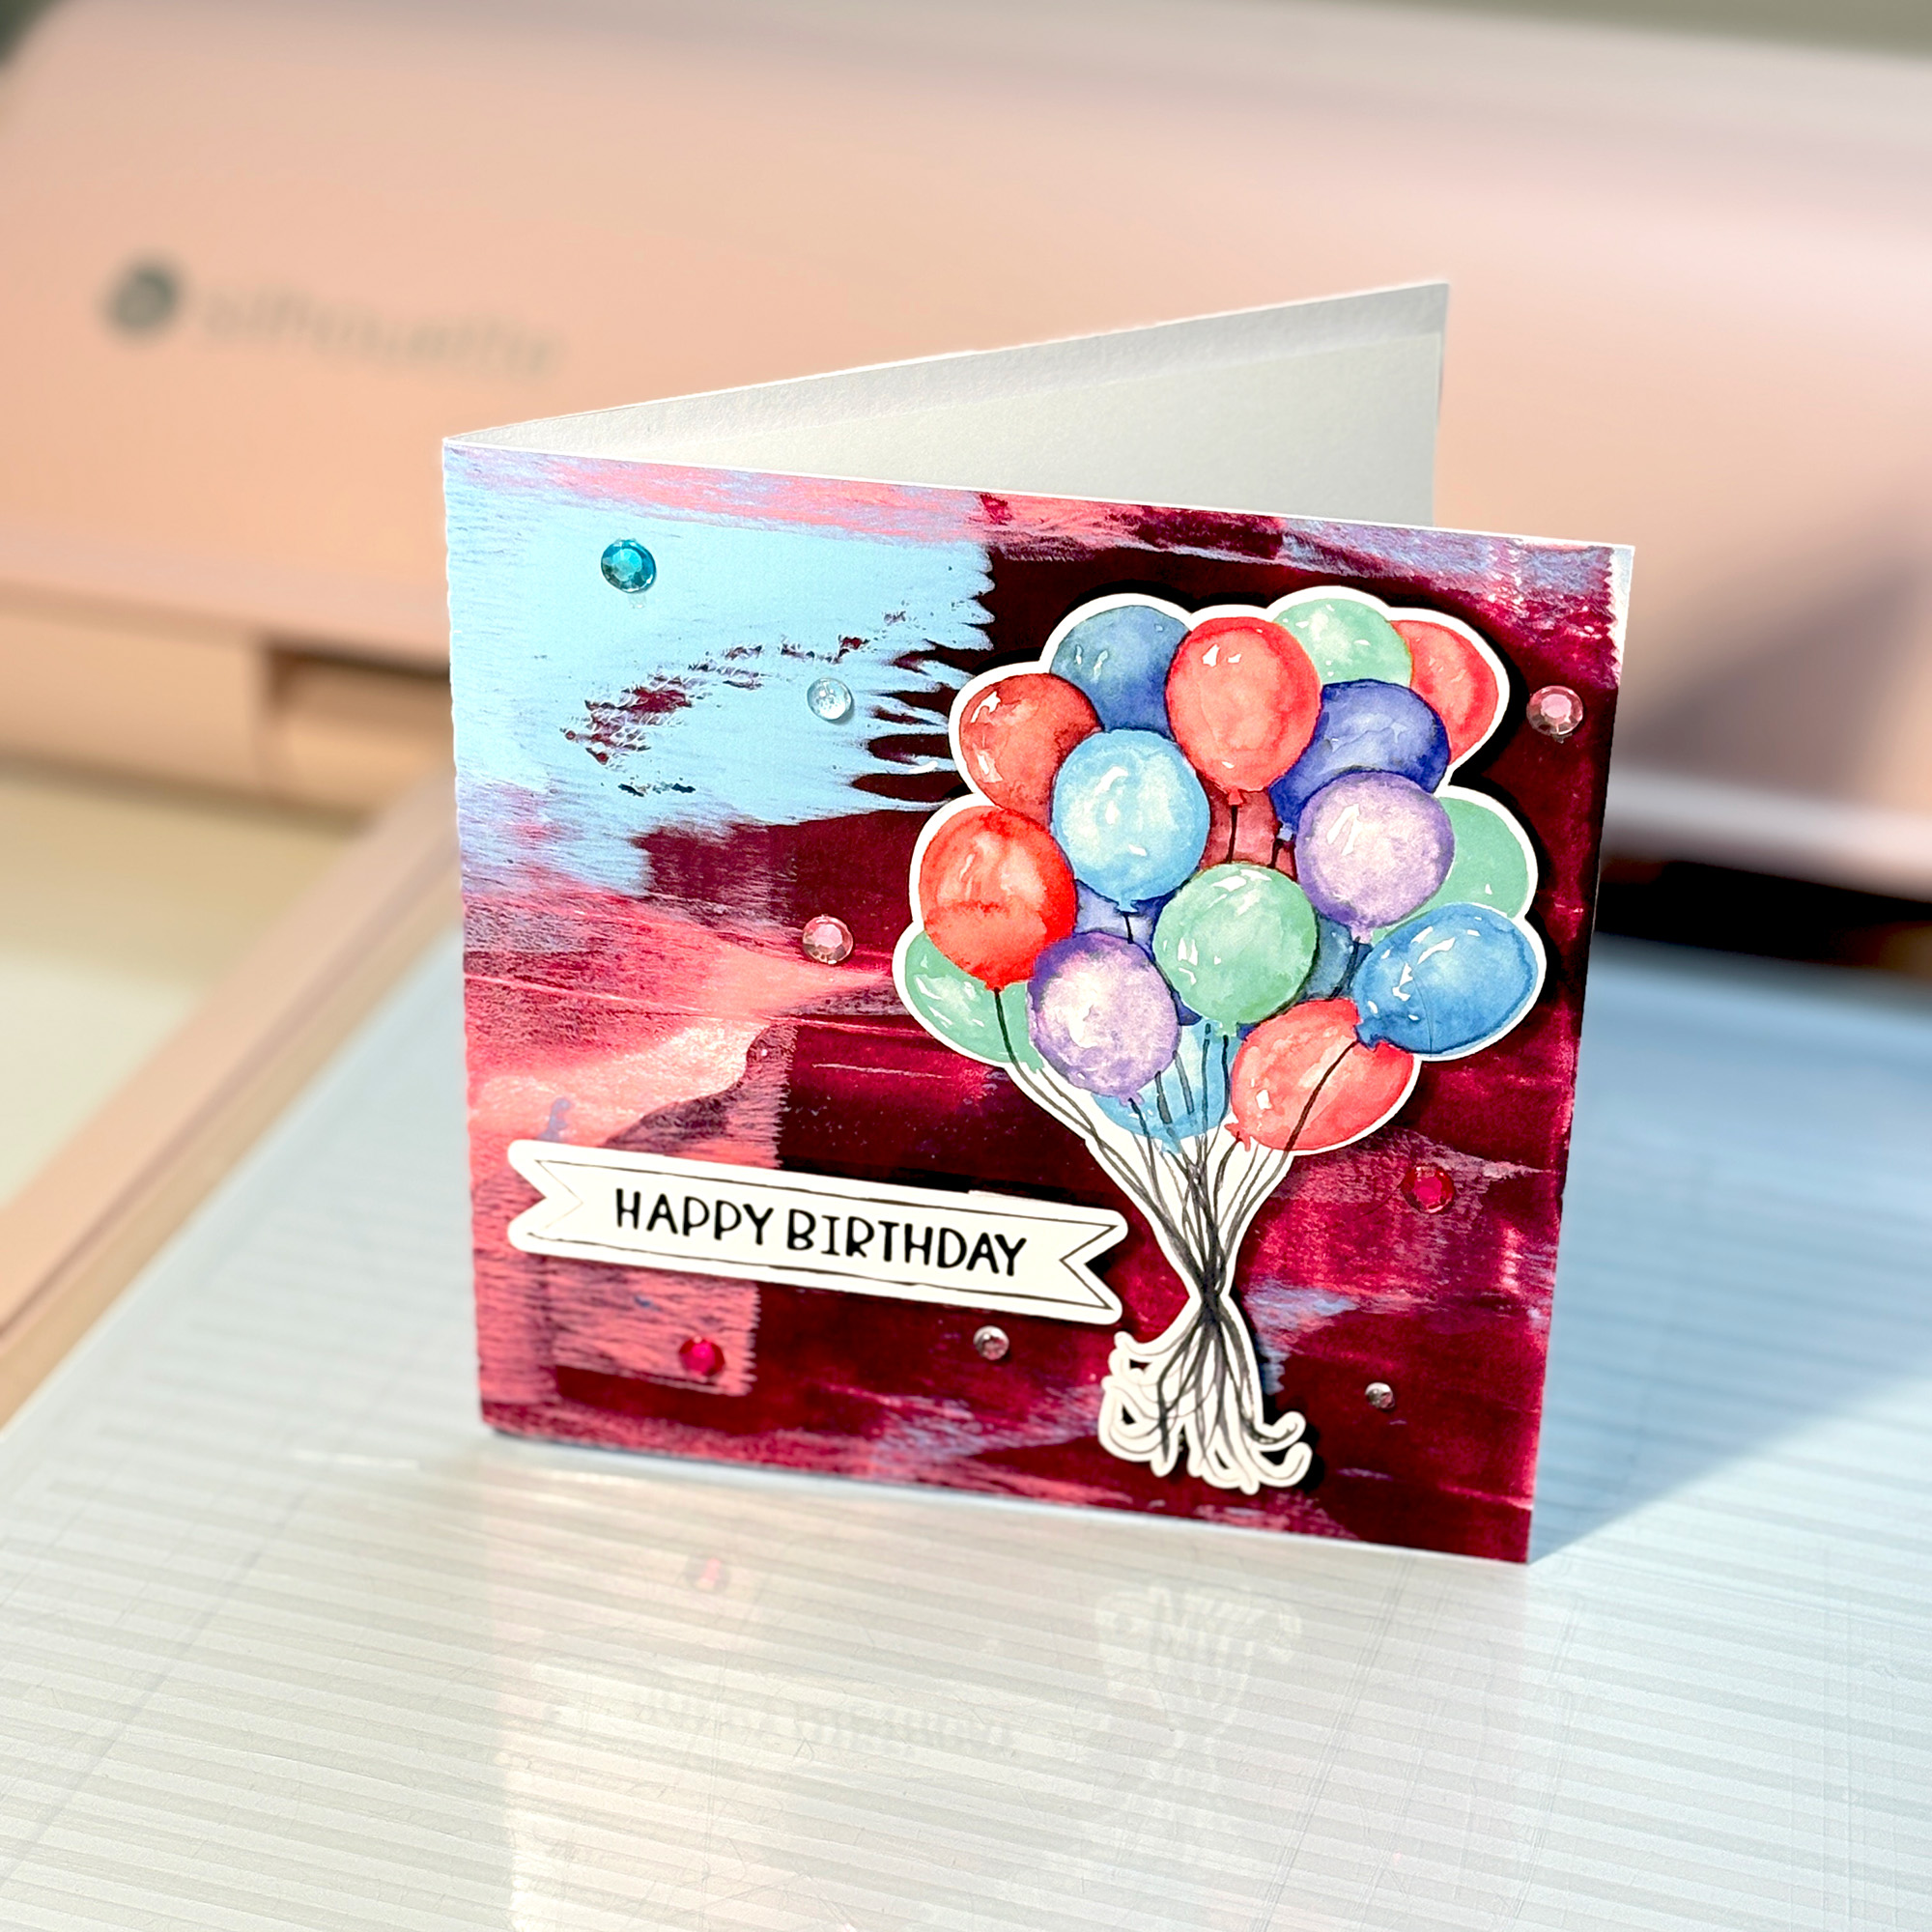
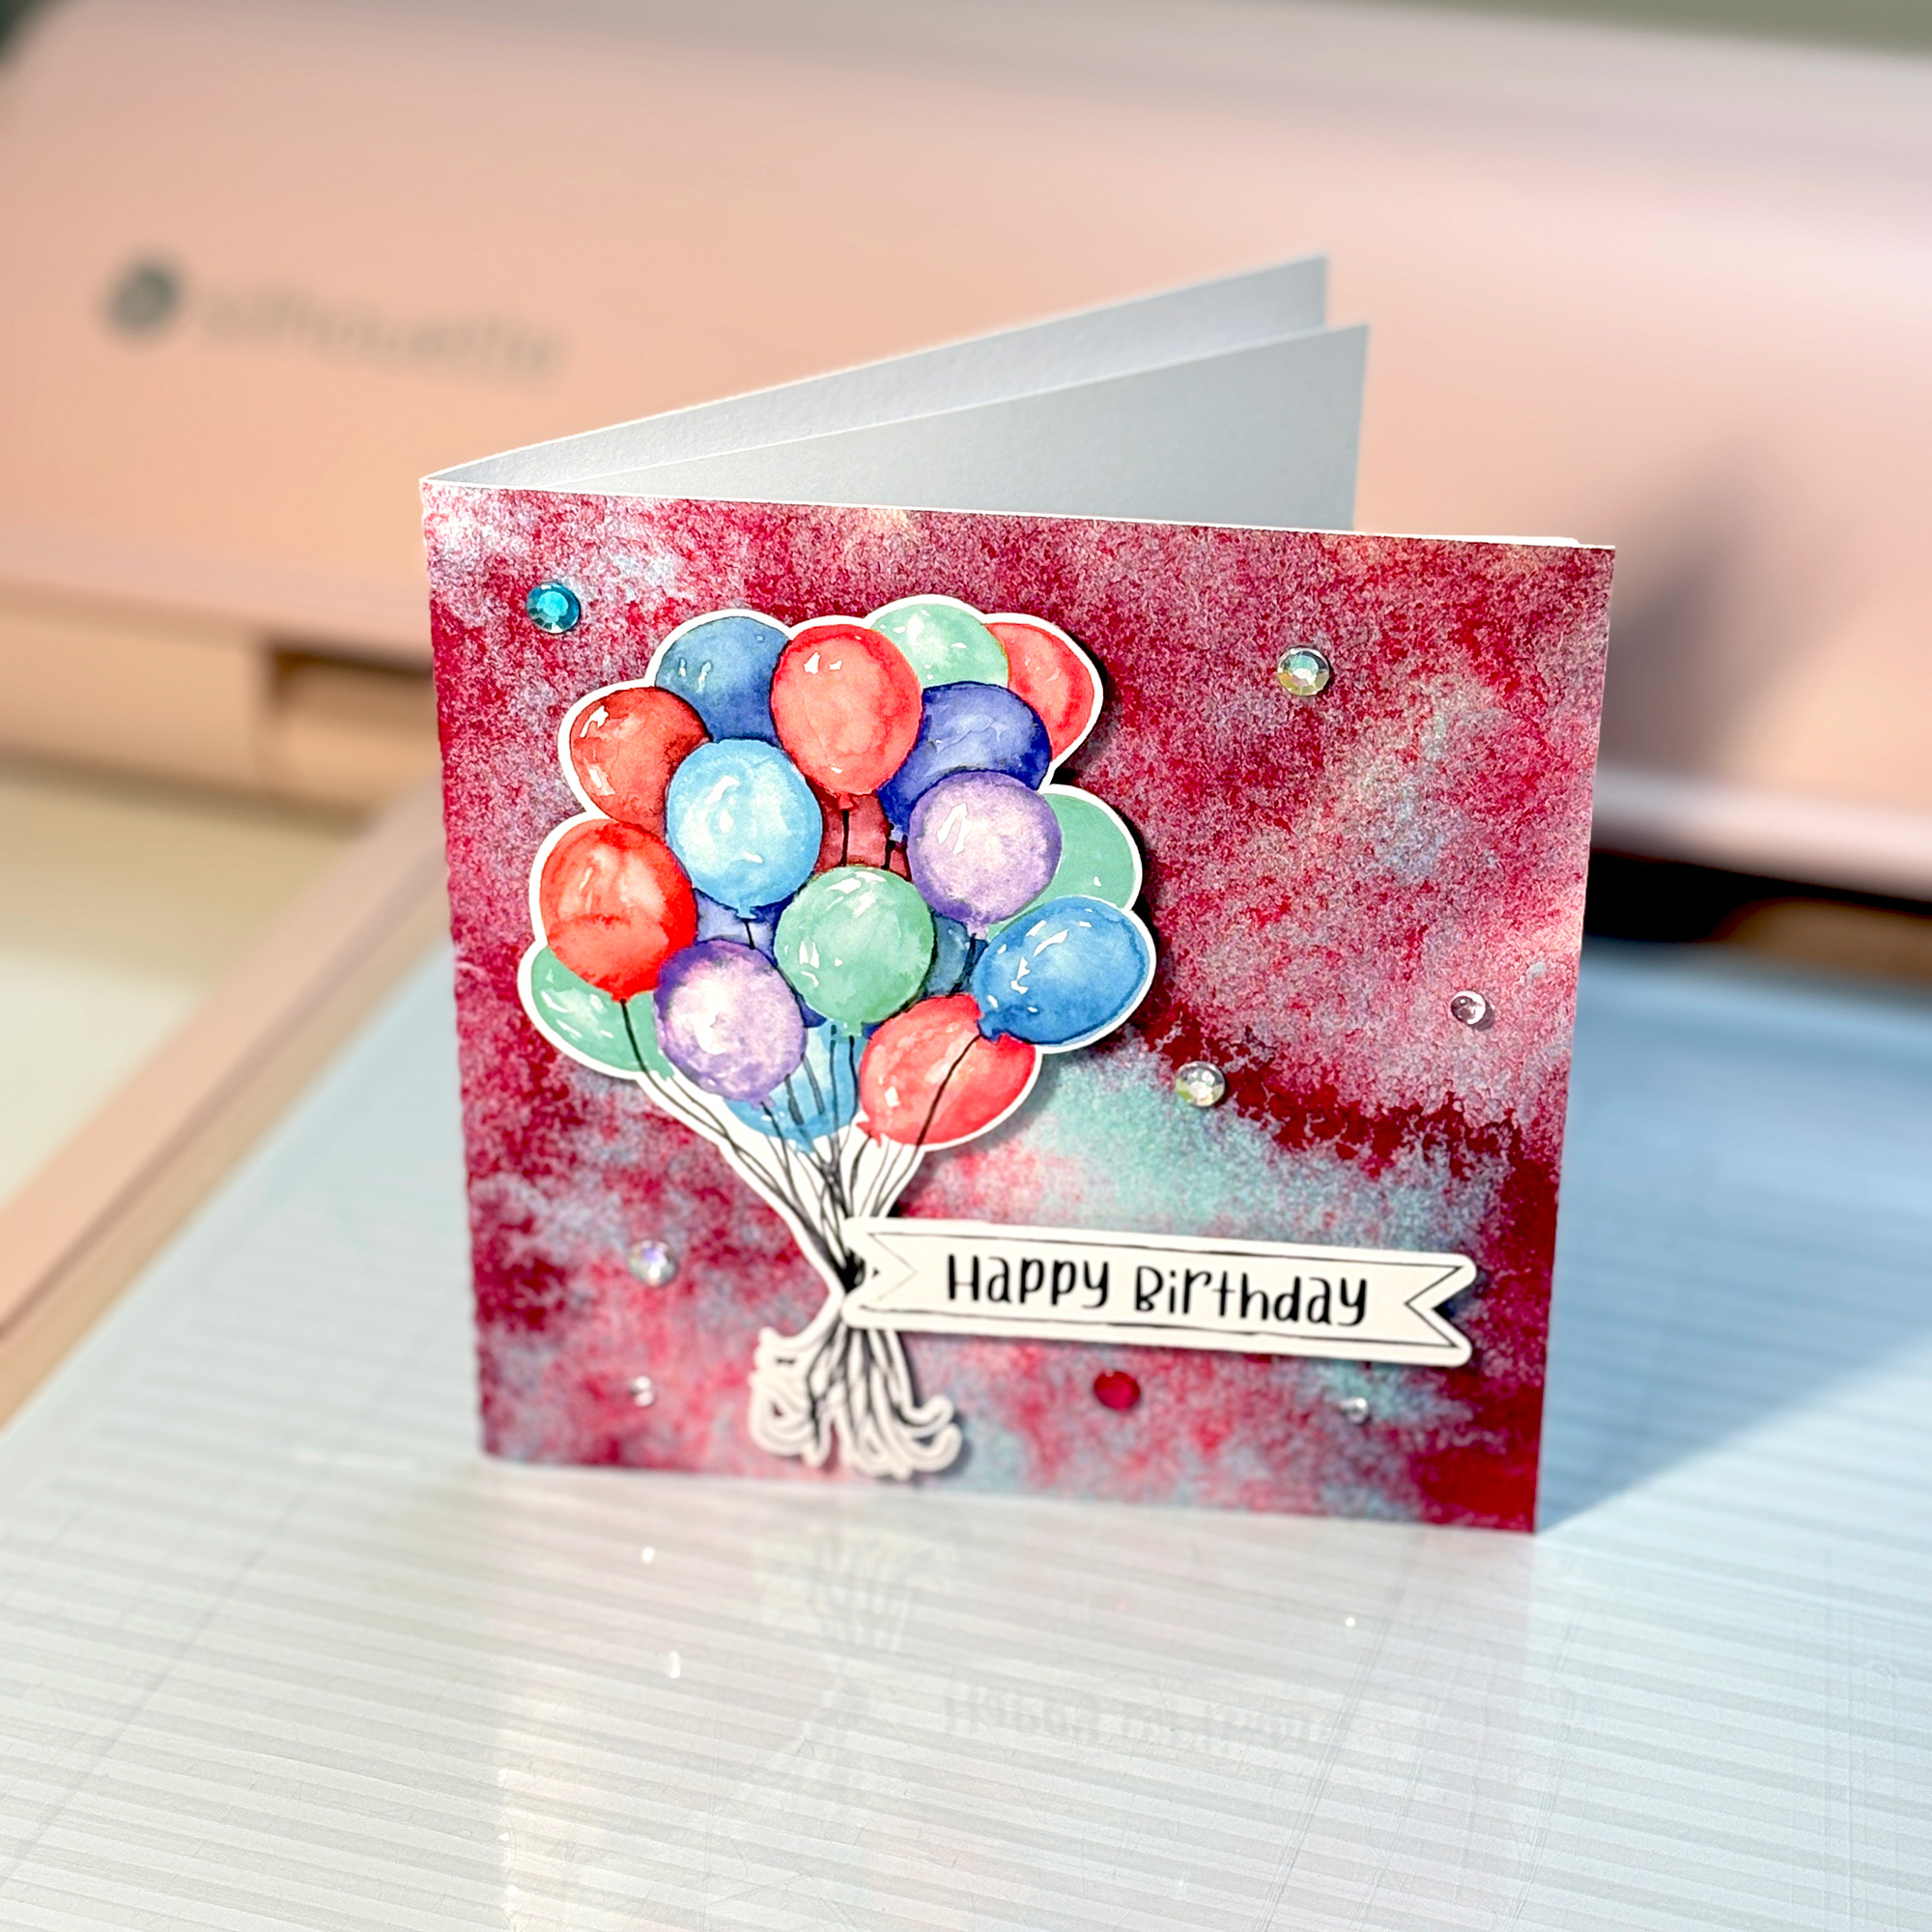
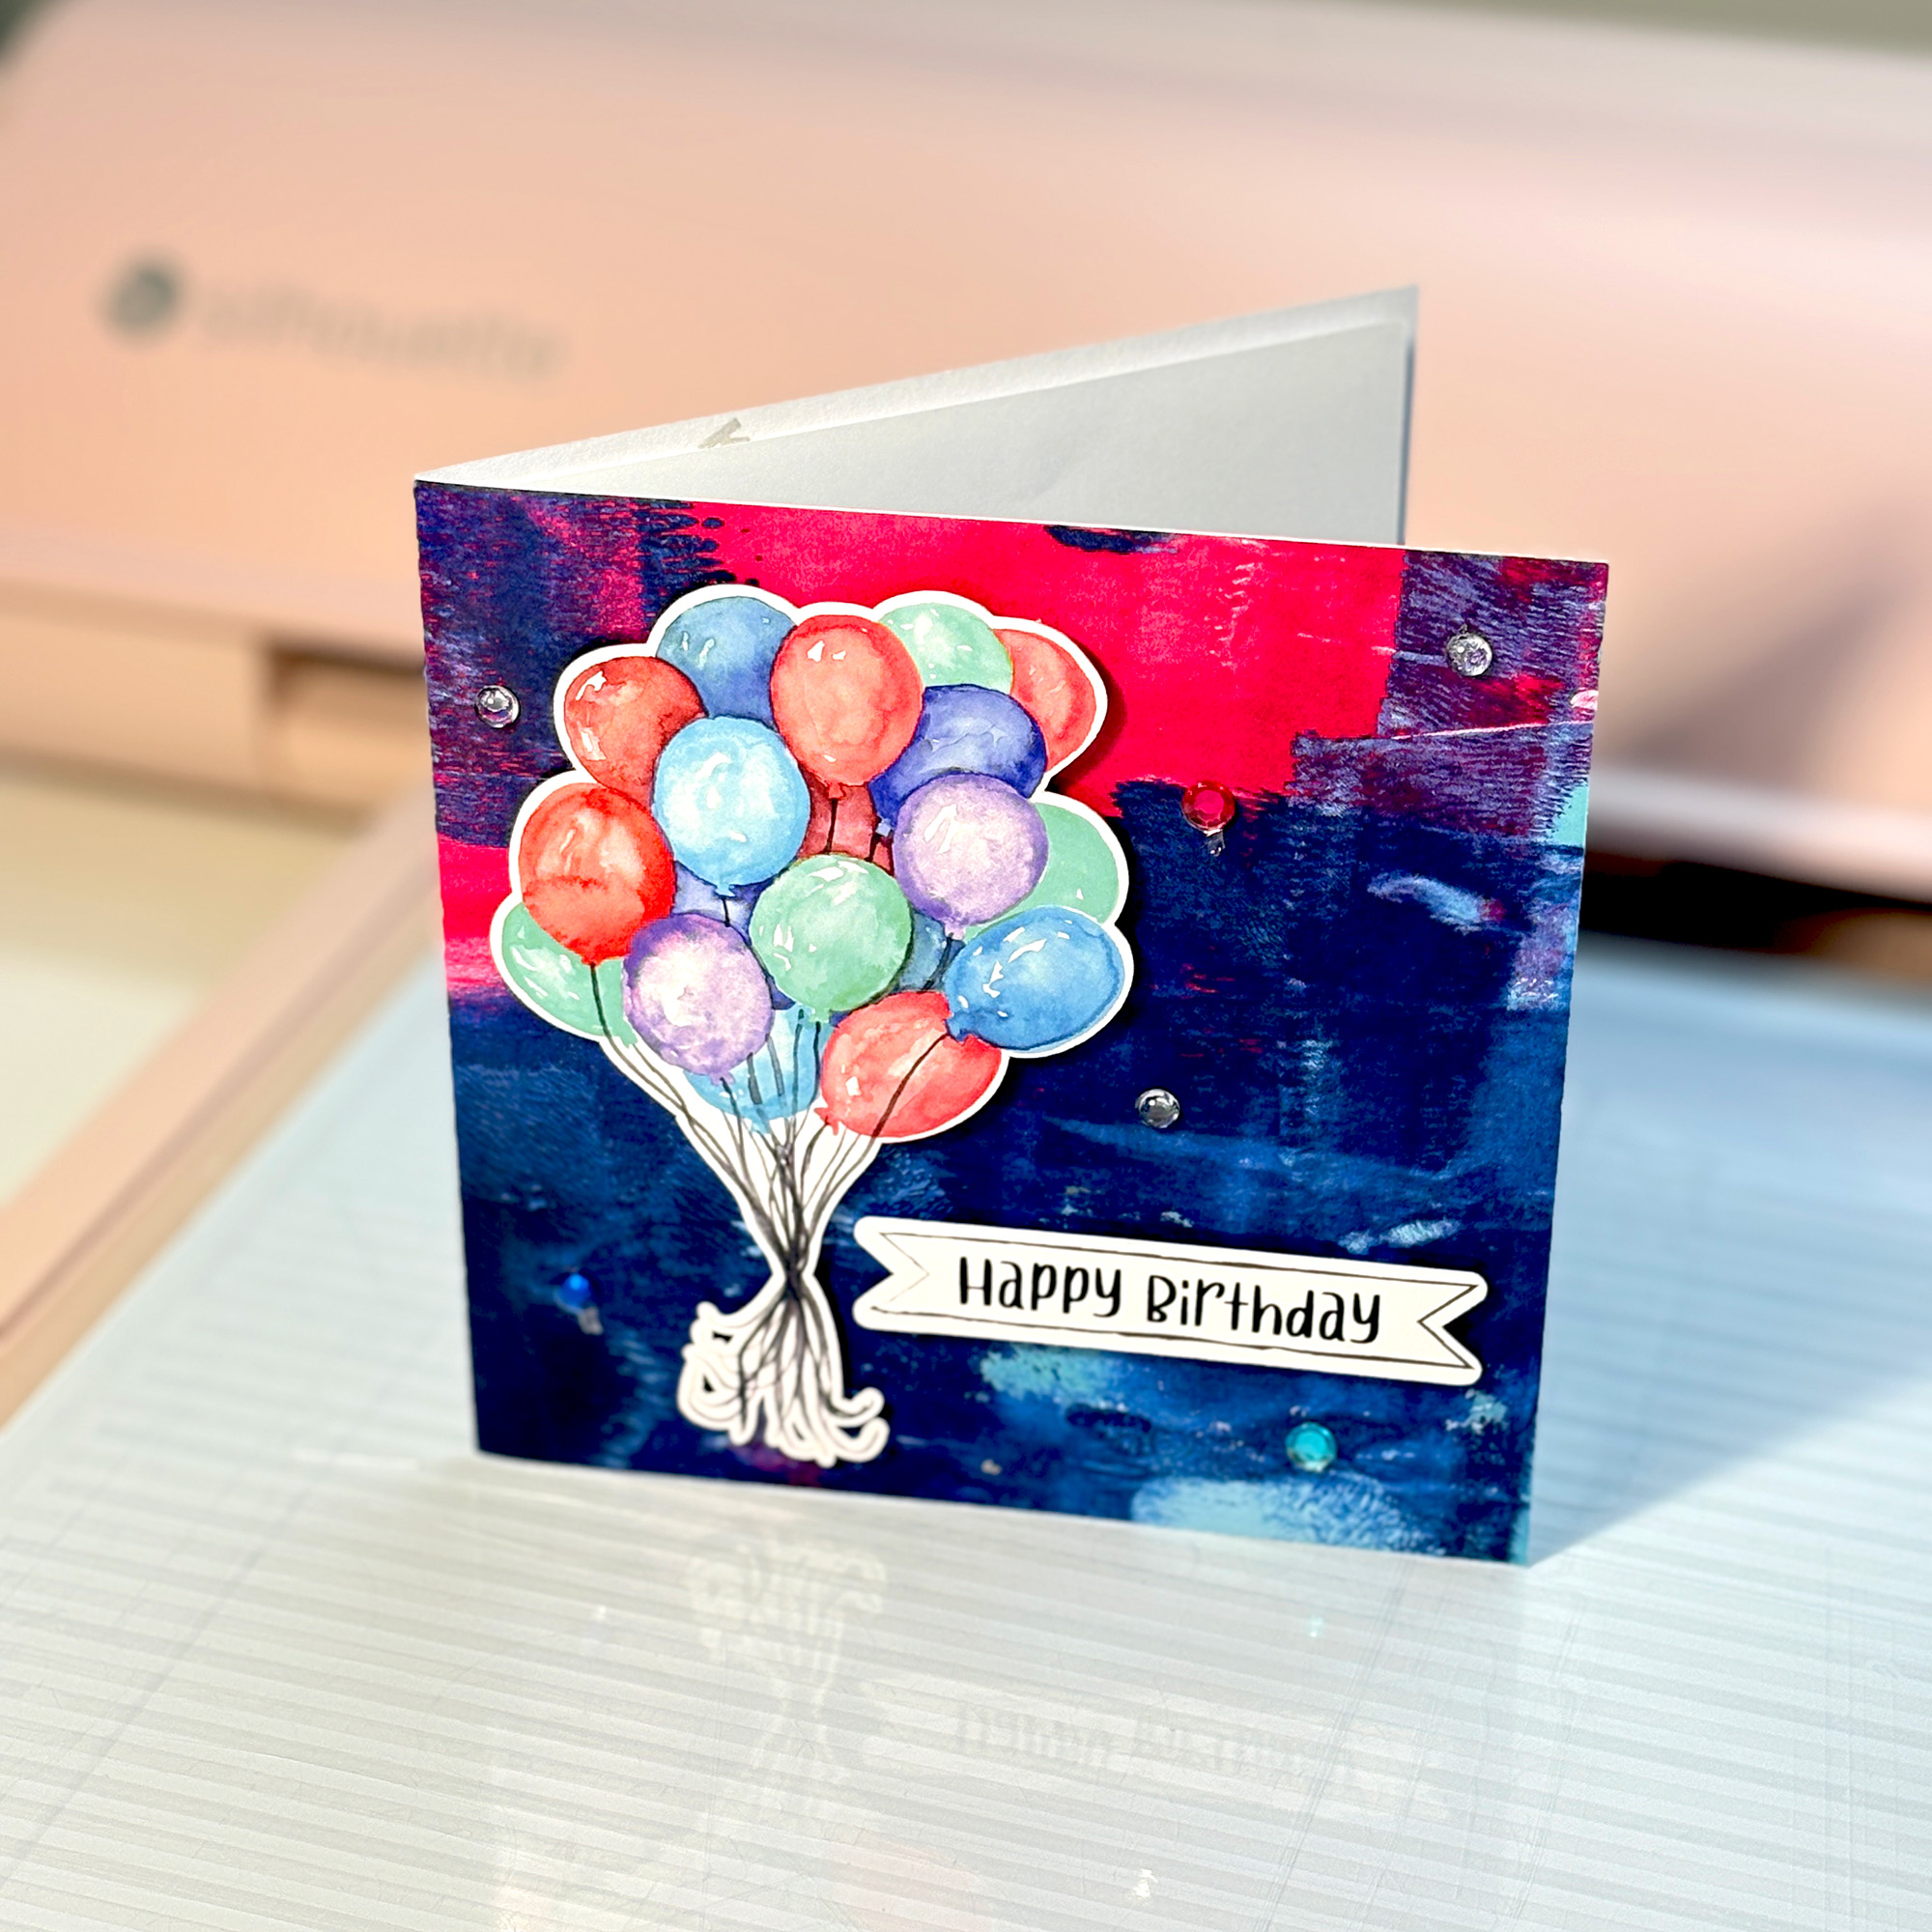
The cool tones palette features red, green, blue and purple balloons. It is a more balanced, classic combination that suits a wider range of background styles. The three cards below show it across three very different backgrounds.
The first cool tones card uses a burgundy and light blue painted background. The contrast between the warm burgundy and cool blue in the background echoes the balloon palette nicely, and the result feels bold without being busy. Red and pink rhinestones scattered across the lower half tie the warm tones together.
The second cool tones card pairs the balloon bunch with a red and turquoise granulated watercolour background. The granulated texture adds depth and interest to the background without competing with the balloons, and the teal in the background picks up the green tones in the design beautifully.
The third cool tones card uses a navy and pink painted background in bold brushstroke style. The deep navy gives the card real presence and the balloons sit against it with excellent contrast. Clear rhinestones keep the embellishment minimal so the design speaks for itself.
The warm tones palette features red, orange, green, teal, blue and purple balloons. It has the most colours of the three sets and the broadest tonal range, which makes it particularly versatile across different background styles. The two cards below show it on two different deep purple backgrounds with quite different textures.
The warm tones card uses a deep purple watercolour wash background. The rich purple brings out the red and orange in the balloon bunch and gives the card a luxurious, considered feel. Scattered rhinestones in mixed colours finish it without adding clutter.
All the printable backgrounds used on the sample cards in this post are my own designs, available in the Silhouette Design Store. Each is a print and cut design you can use to fill a standard card front shape in Silhouette Studio. I sometimes use a clipping mask in Silhouette Studio® to apply a decorative shaped edge to the background for an extra layer of detail.
Birthday cards have a way of feeling same-same when you reach for the same elements every time. These hand-painted watercolor birthday cake print and cut designs give you something a little more unexpected to work with, and right now they are on sale in the Silhouette Design Store. Four designs, two icing colours, two topper options, and a range of card looks that show just how much the background does the heavy lifting.
All the printable backgrounds on the sample cards in this post are my own designs, also available in the Silhouette Design Store. The Happy Birthday banners are from the Doodled Happy Birthday Banners Sentiments set, which coordinates with all four cake designs. Keep reading to see each one in action, and find the full supplies list for every card shown.
About the Designs
The collection comes in four flavours: chocolate ganache or bright pink strawberry icing, each topped with either nine whimsical patterned rainbow candles or a glossy red cherry. Four combinations that suit different card moods and colour palettes. Within each icing colour, one version is topped with nine whimsical patterned candles in rainbow colours, and one is finished simply with a glossy red cherry. That gives you four quite different looks from the same basic cake shape, which makes them easy to mix and match across projects.
All four are sized large so you can use them at full size for a bold scrapbooking focal point or scale them down in Silhouette Studio® for smaller cards, tags, and layered projects.
The Cards
Birthday Cake with Chocolate Ganache and Candles
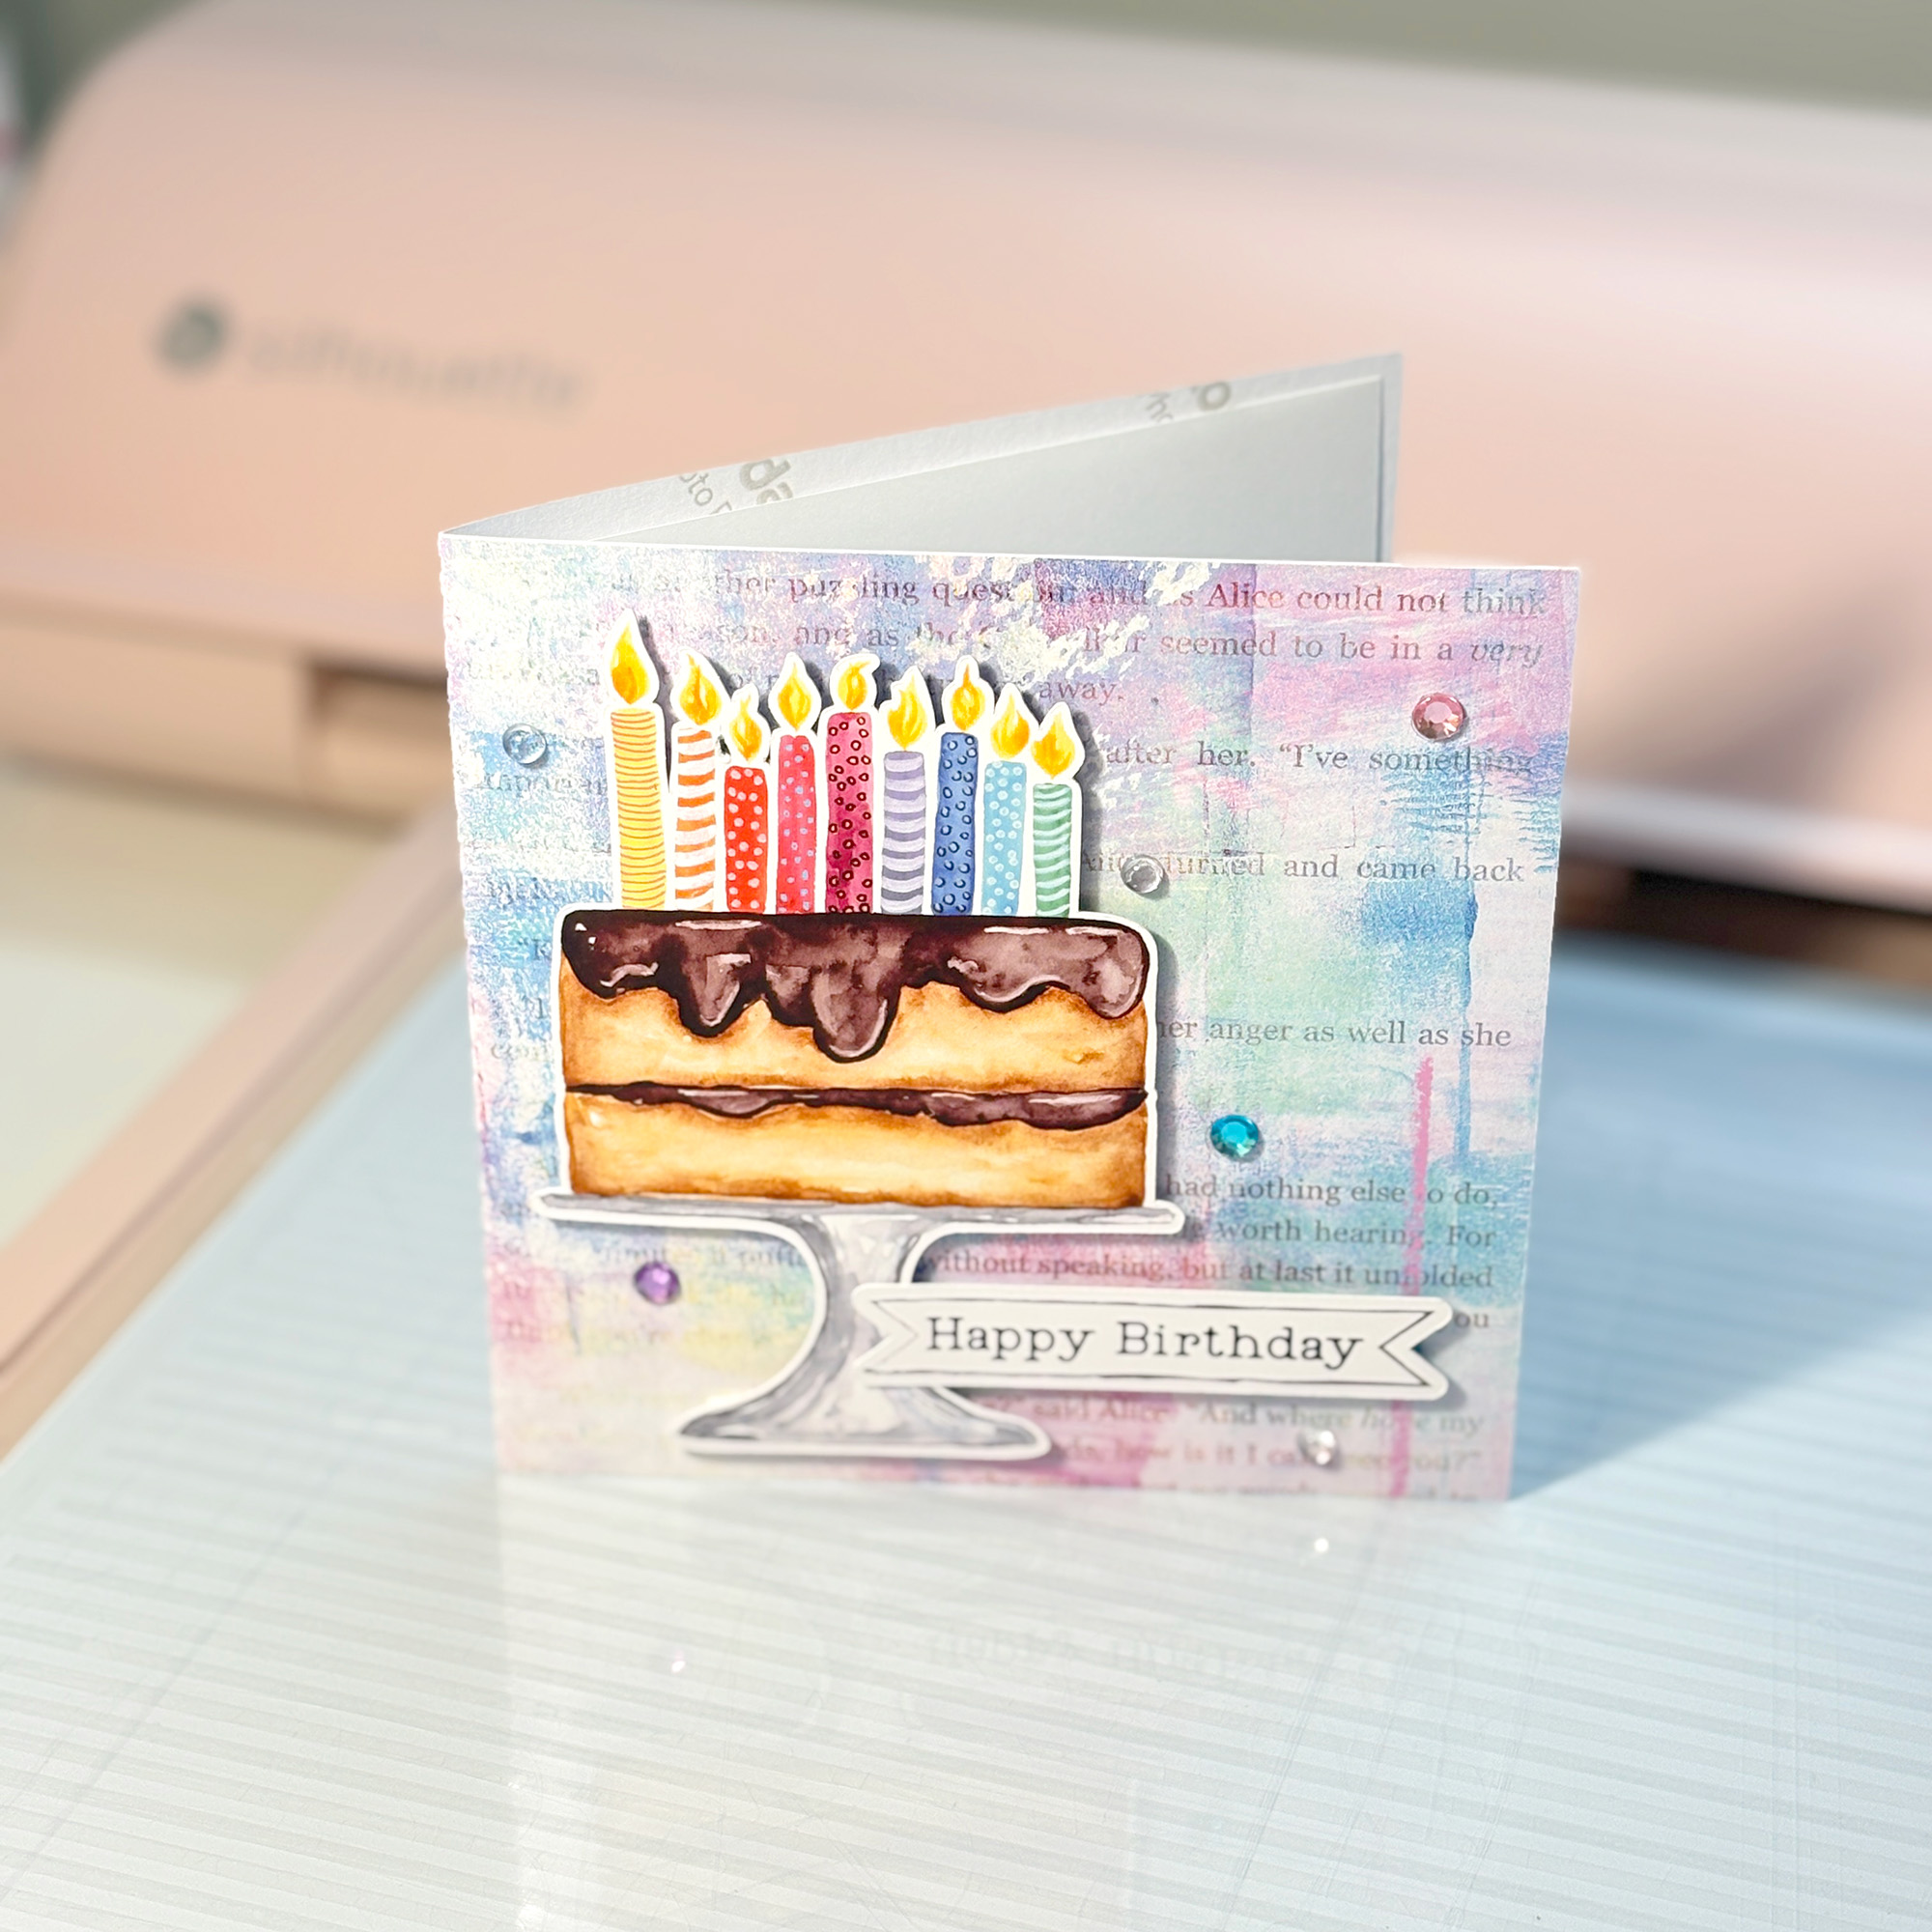
The chocolate ganache cake with candles sits beautifully against a pastel mixed-media background with Alice in Wonderland text layered through it. The cool blue, purple and pink tones in the background let the warm ganache and rainbow candles take centre stage without competition. Scattered rhinestones in mixed colours finish the card without overworking it.
The candles on this cake design are the same style as the Whimsical Patterned Birthday Candles, which are available separately if you want to use them as standalone elements on other projects.
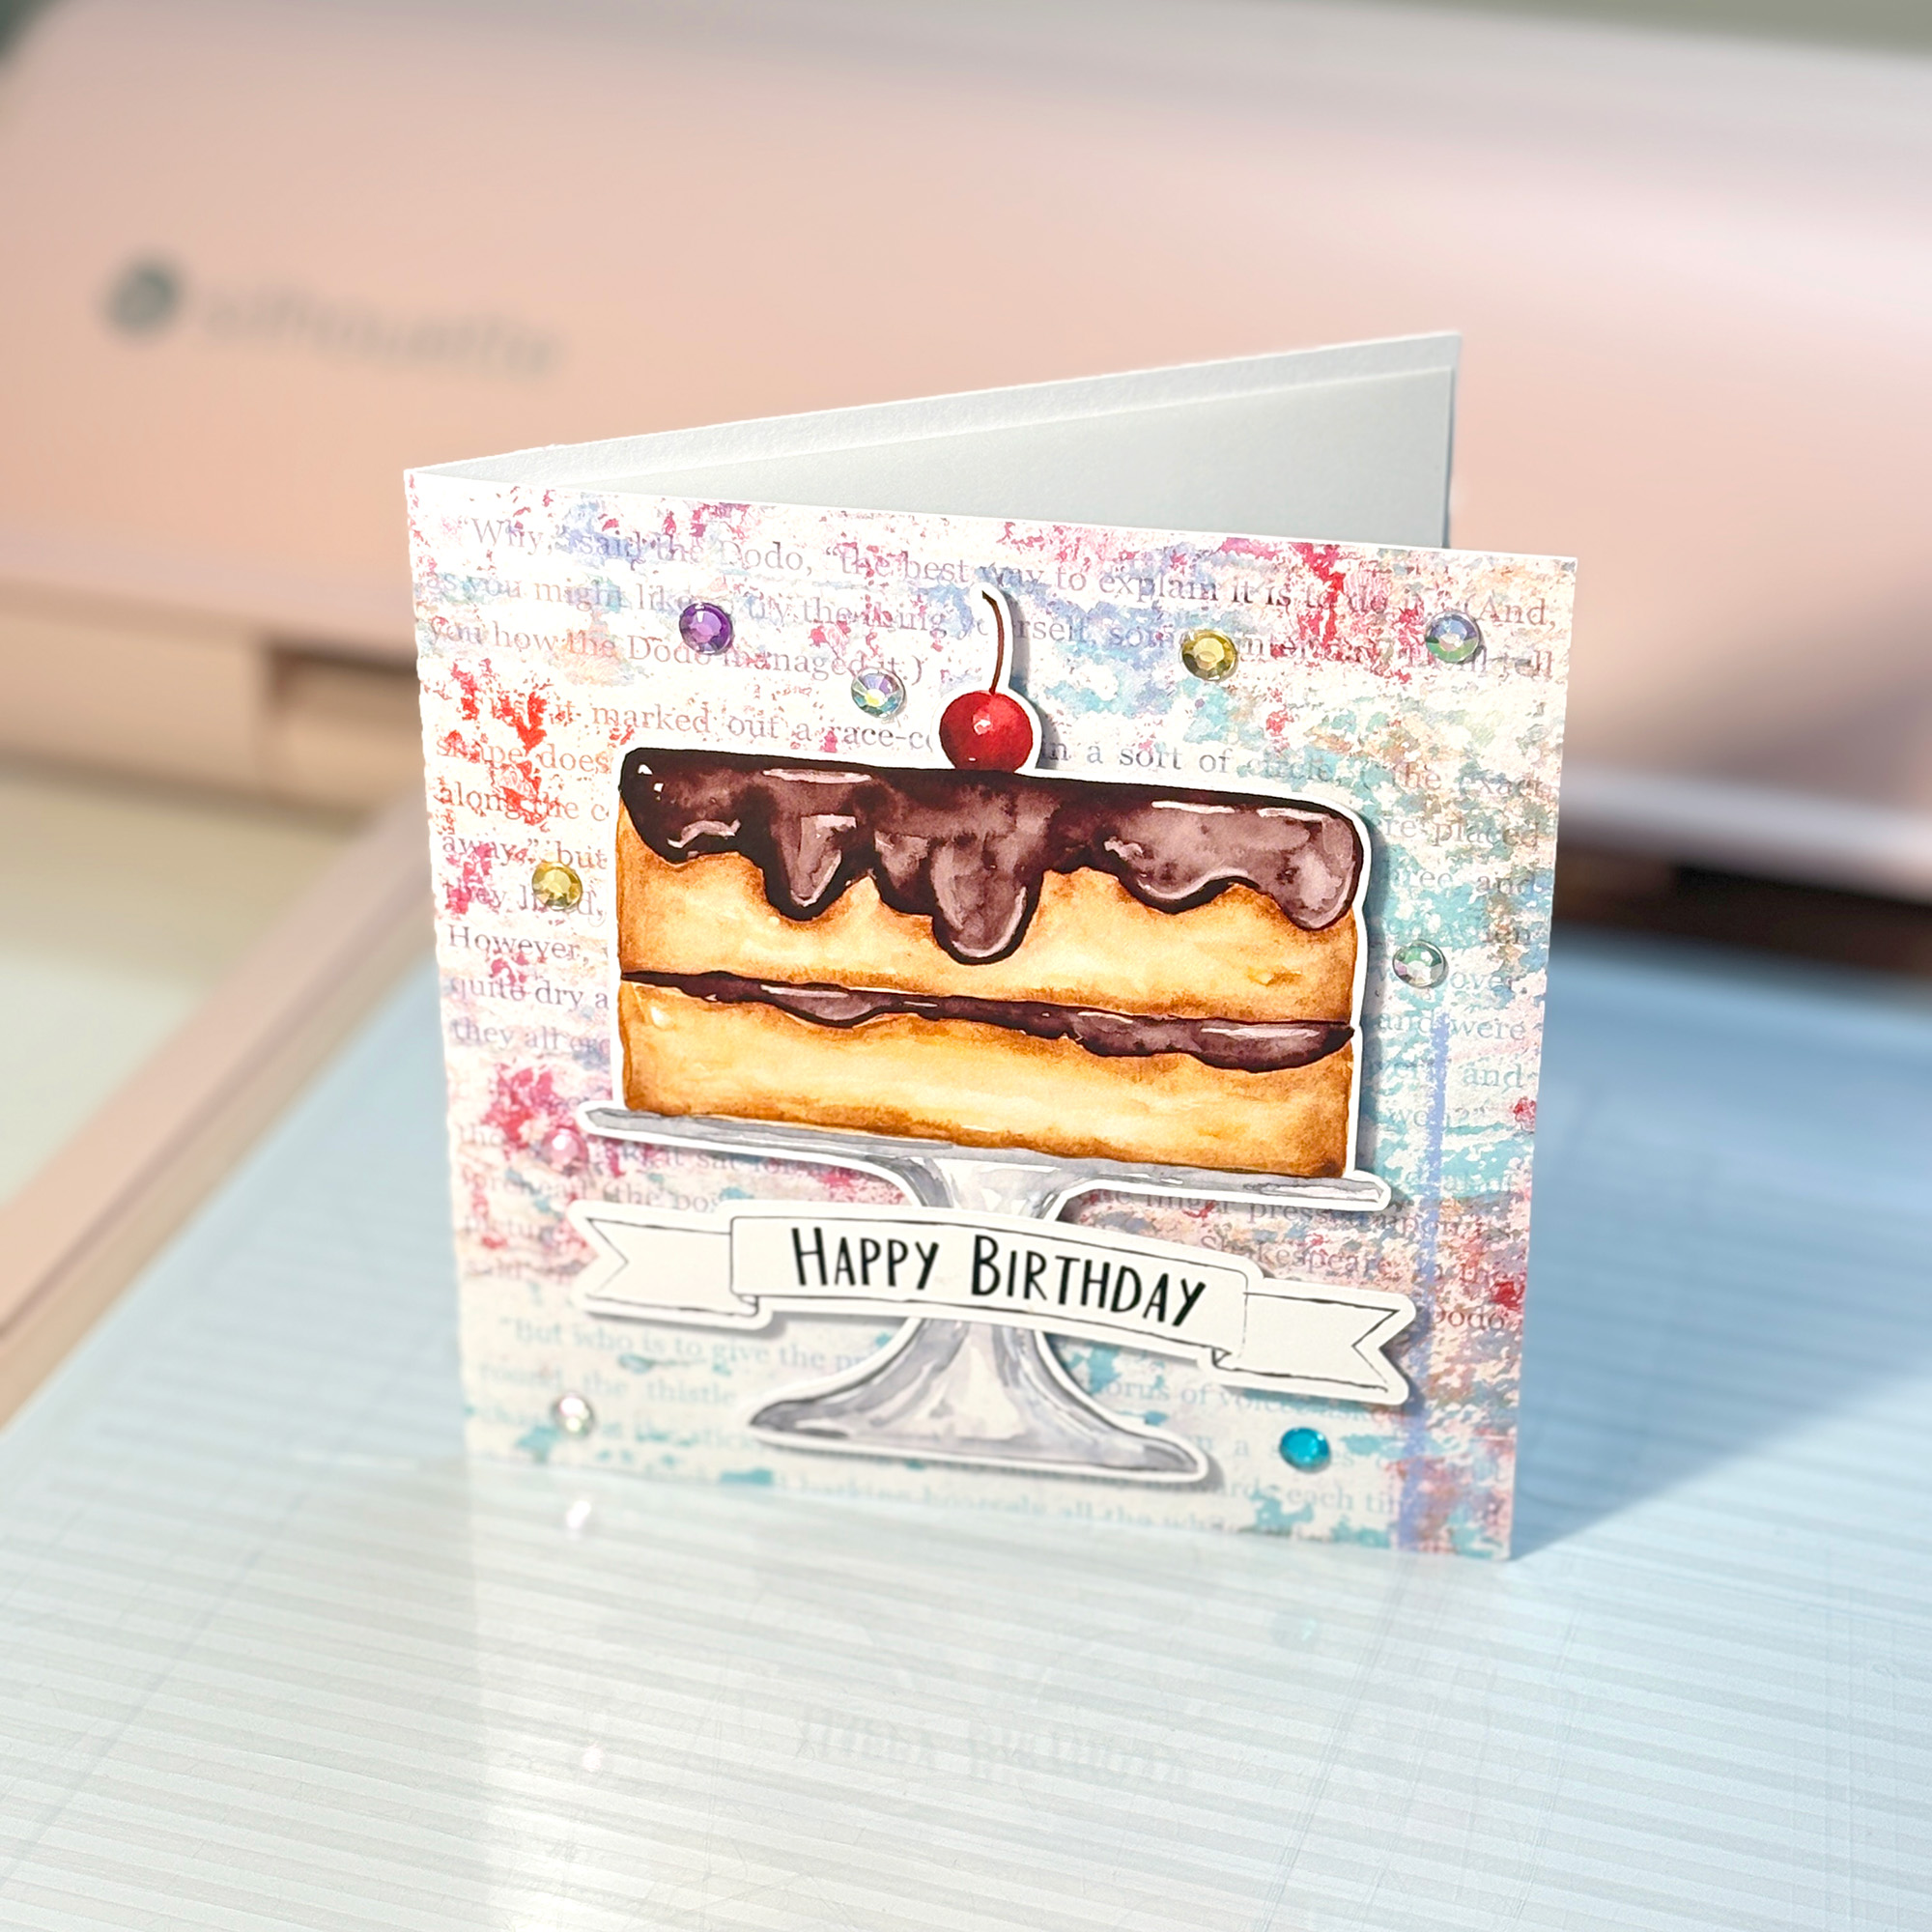
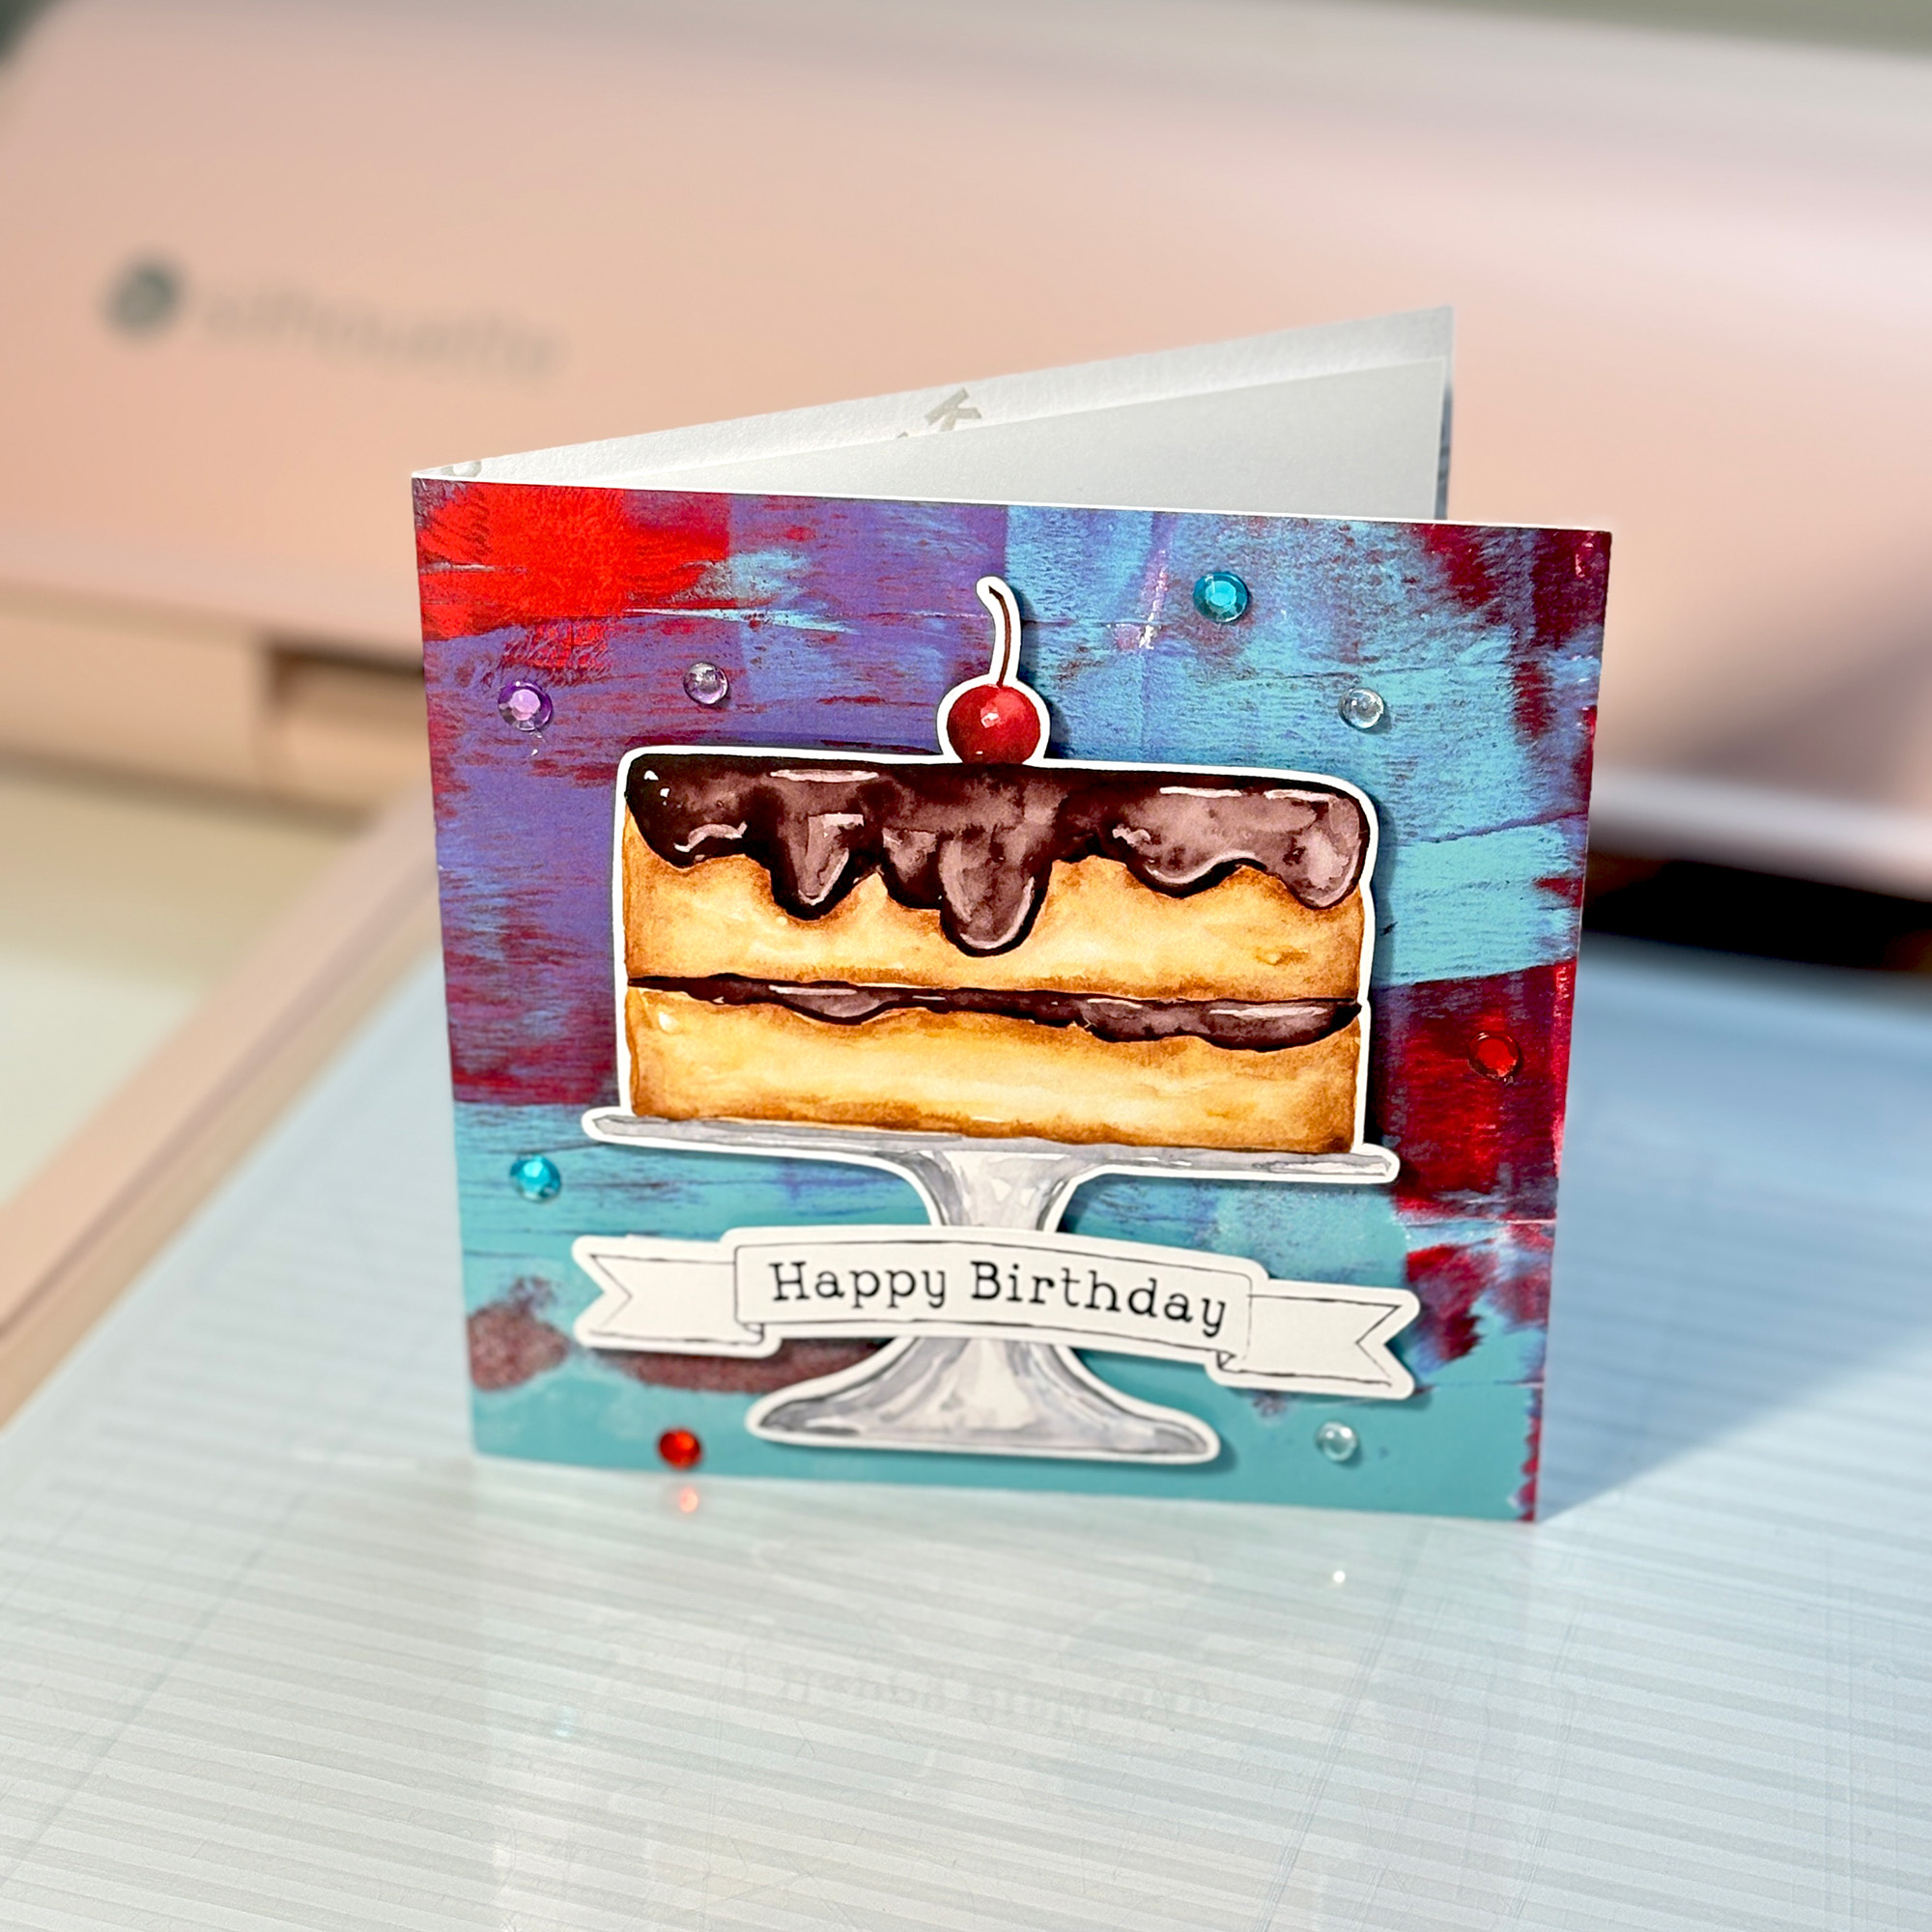
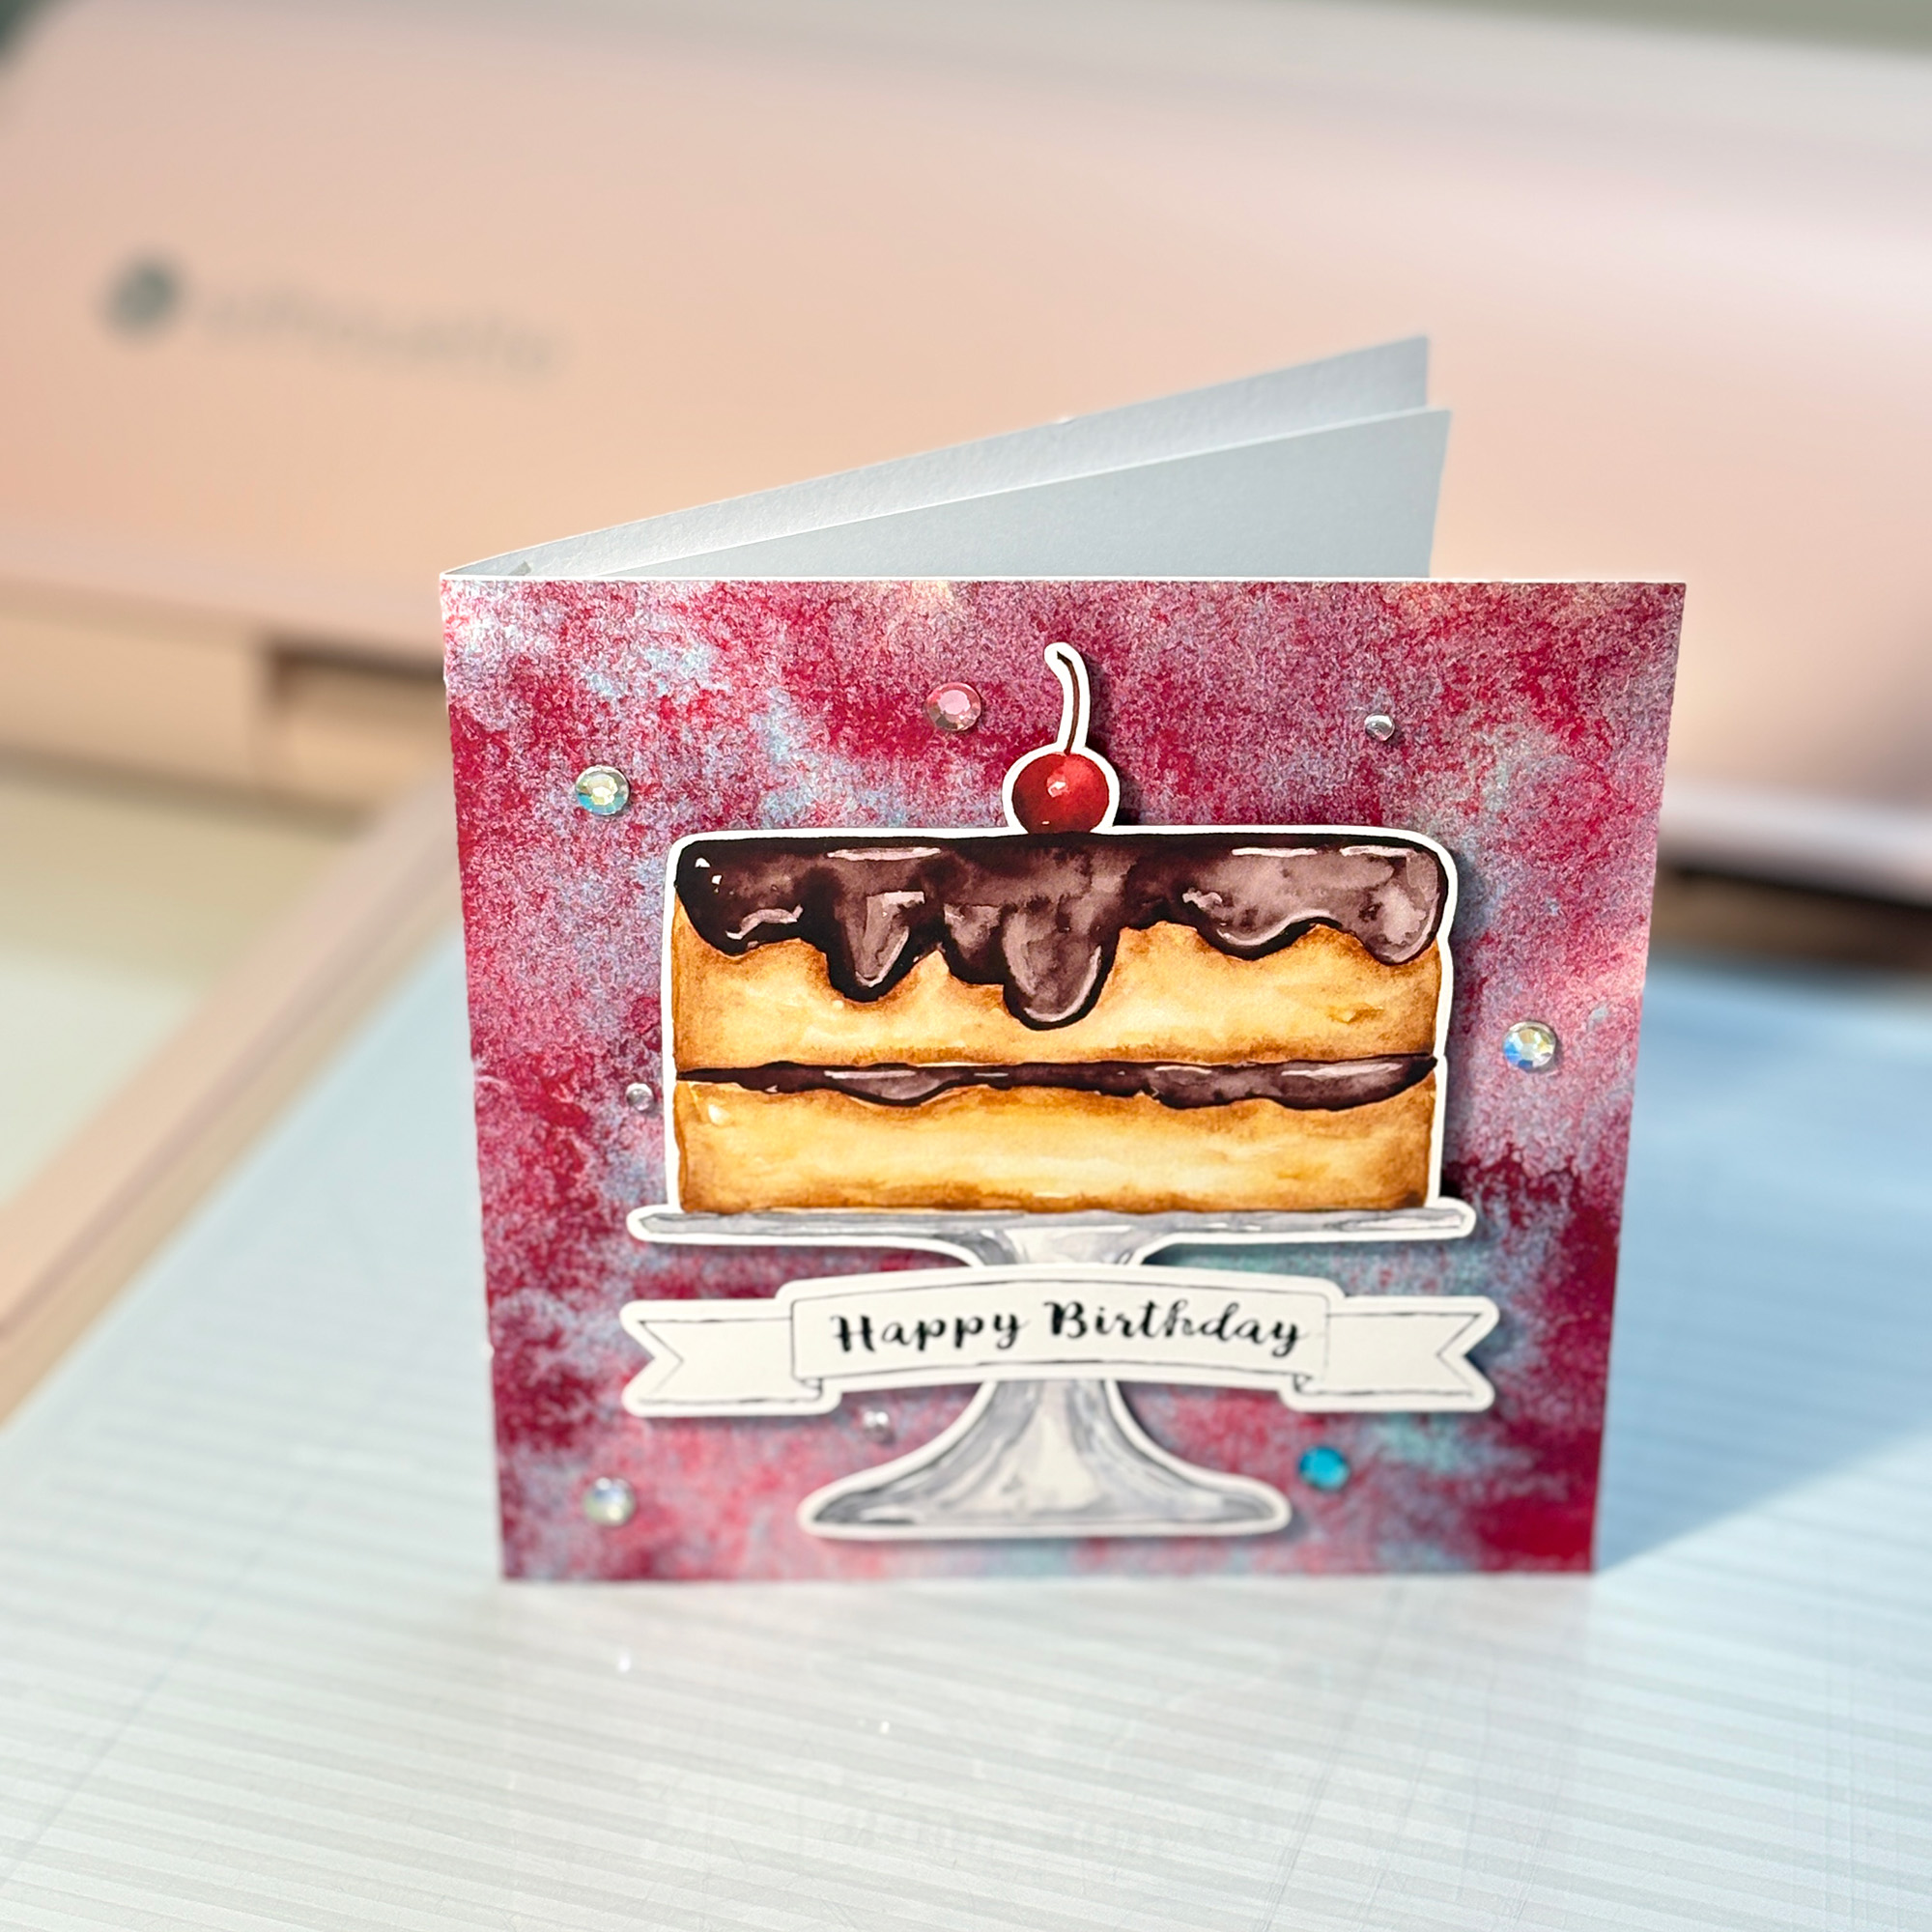
The cherry version of the chocolate ganache cake shows how much range a single design can have across different backgrounds. The first card pairs it with a bold painted background in deep red, turquoise and purple, giving the card a rich, high-contrast look. The second combines an Alice Lavender Pink Pastel Background with a colourful splattered background in pinks, teals and muted tones, keeping things playful and detailed without being busy. The Third uses a soft speckled pink, red and turquoise mixed-media texture that brings a warmer, more delicate feel.
All three use a Doodled Happy Birthday Banner from the same set, which shows how versatile the banner design is across very different card styles.
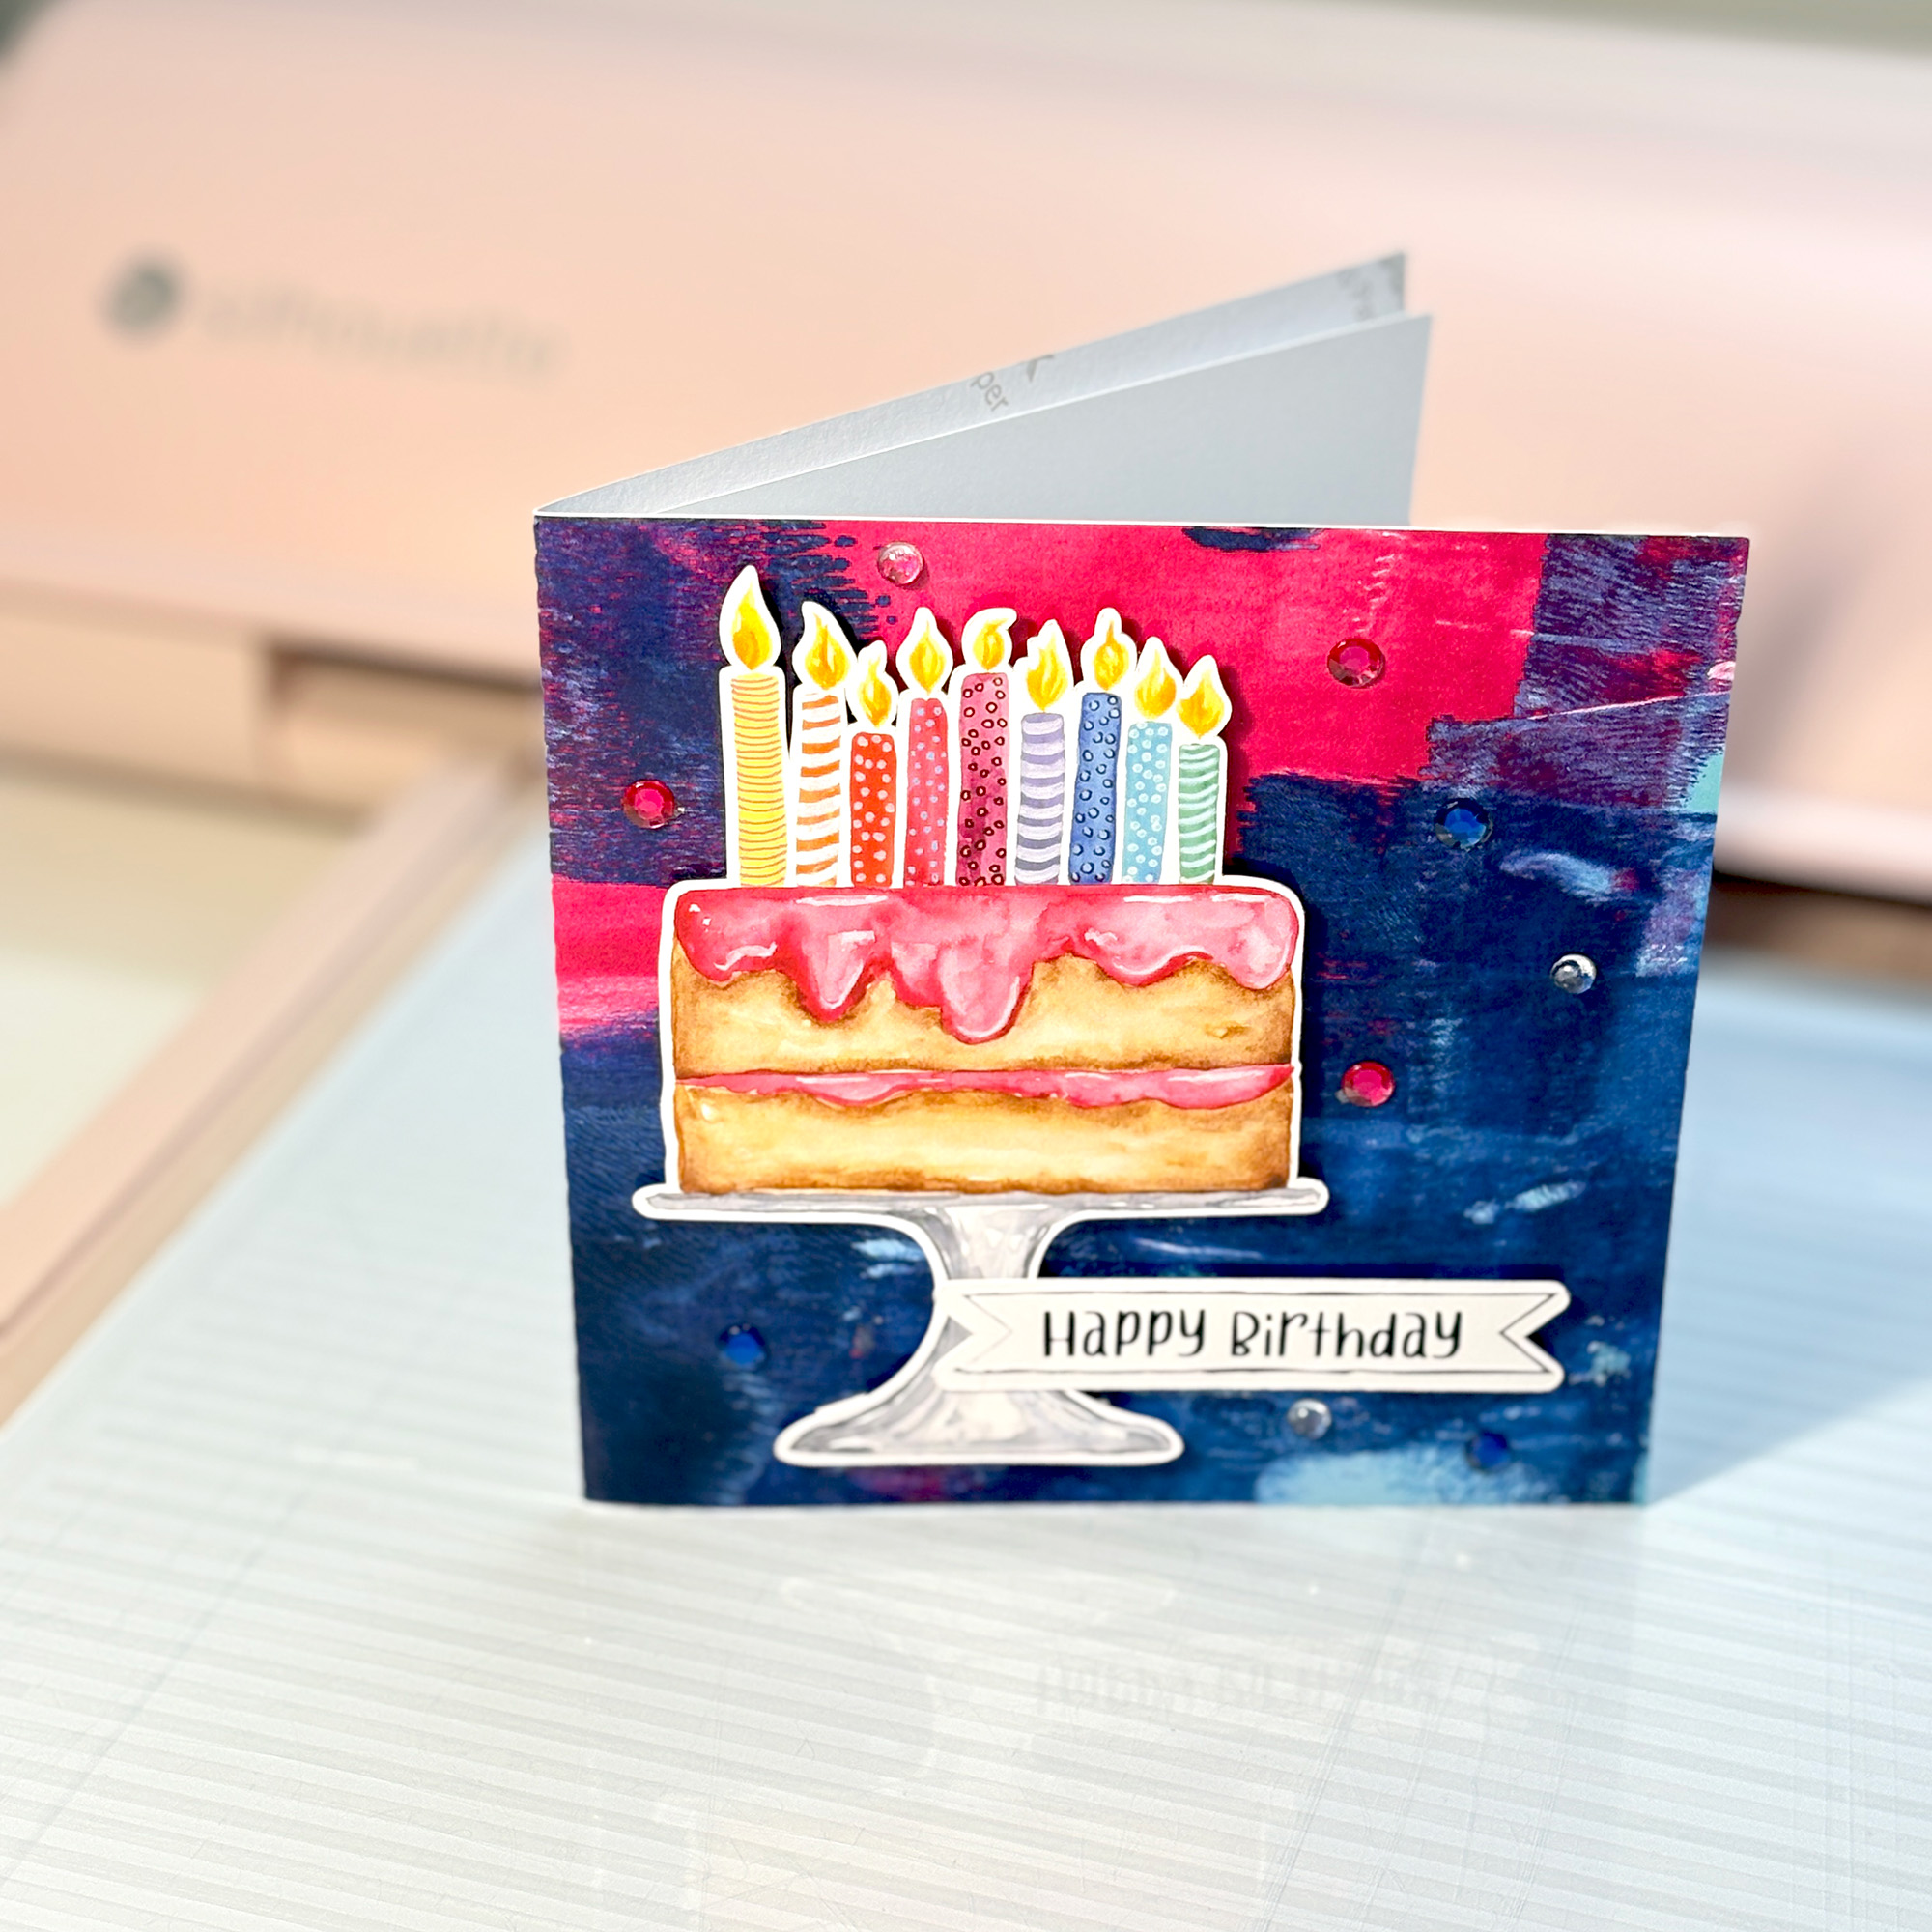
The pink icing cake with candles is shown here on a bold dark background in deep navy and magenta. The combination is striking and the bright pink icing reads really well against the darker tones. Two cards using the same design and the same background show how small changes in layout and embellishment placement give you slightly different results each time.
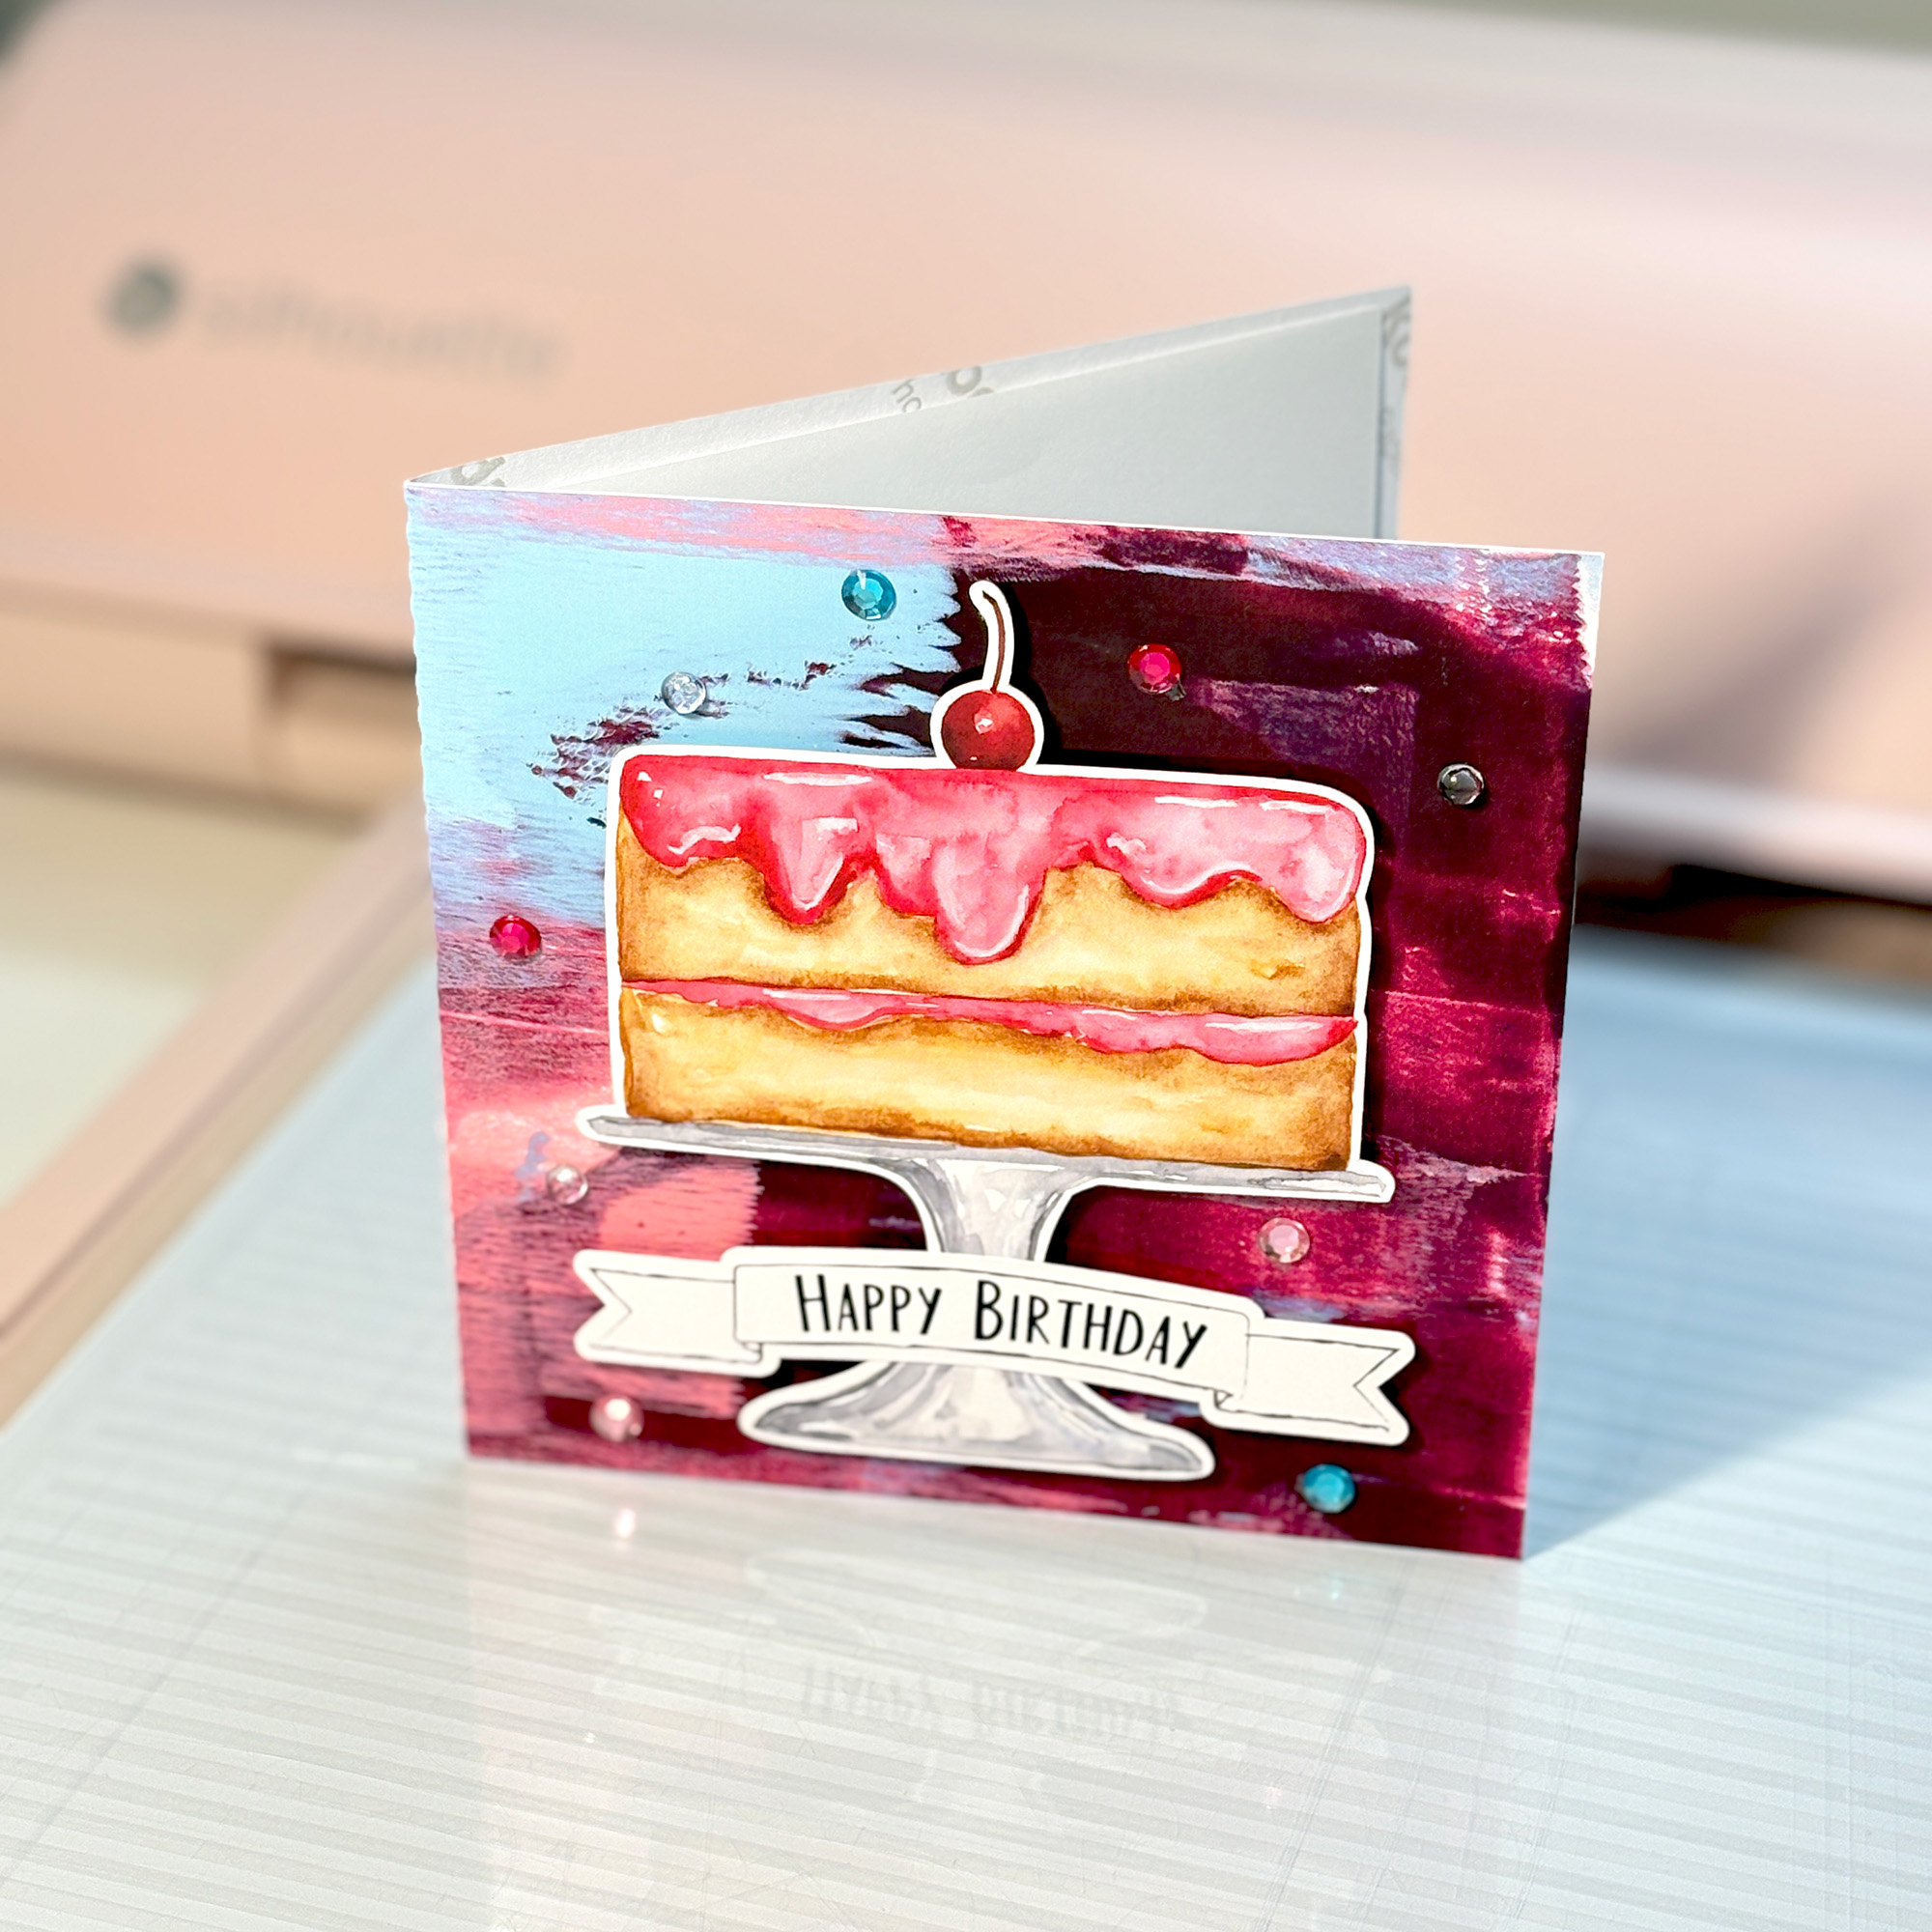
The pink icing cherry cake is shown here on a painted background in deep plum, burgundy and teal. The berry tones in the background pick up the pink icing beautifully, and the red cherry provides just enough contrast at the top to anchor the design. A mix of pink, red and clear rhinestones scattered across the card keeps it feeling festive without overdoing it.
All the printable backgrounds used on the sample cards in this post are my own designs and are available in the Silhouette Design Store. Each is a print and cut design sized to fill a standard card front and works as a complete backdrop straight off the mat.
The Happy Birthday banners on every card in this post come from one set that includes several banner styles. It is designed to sit comfortably alongside print and cut focal elements and scale to suit different card sizes in Silhouette Studio®.
All four birthday cake designs are currently on sale in the Silhouette Design Store. If you have been thinking about adding birthday cake elements to your print and cut collection, now is a good time to grab them.
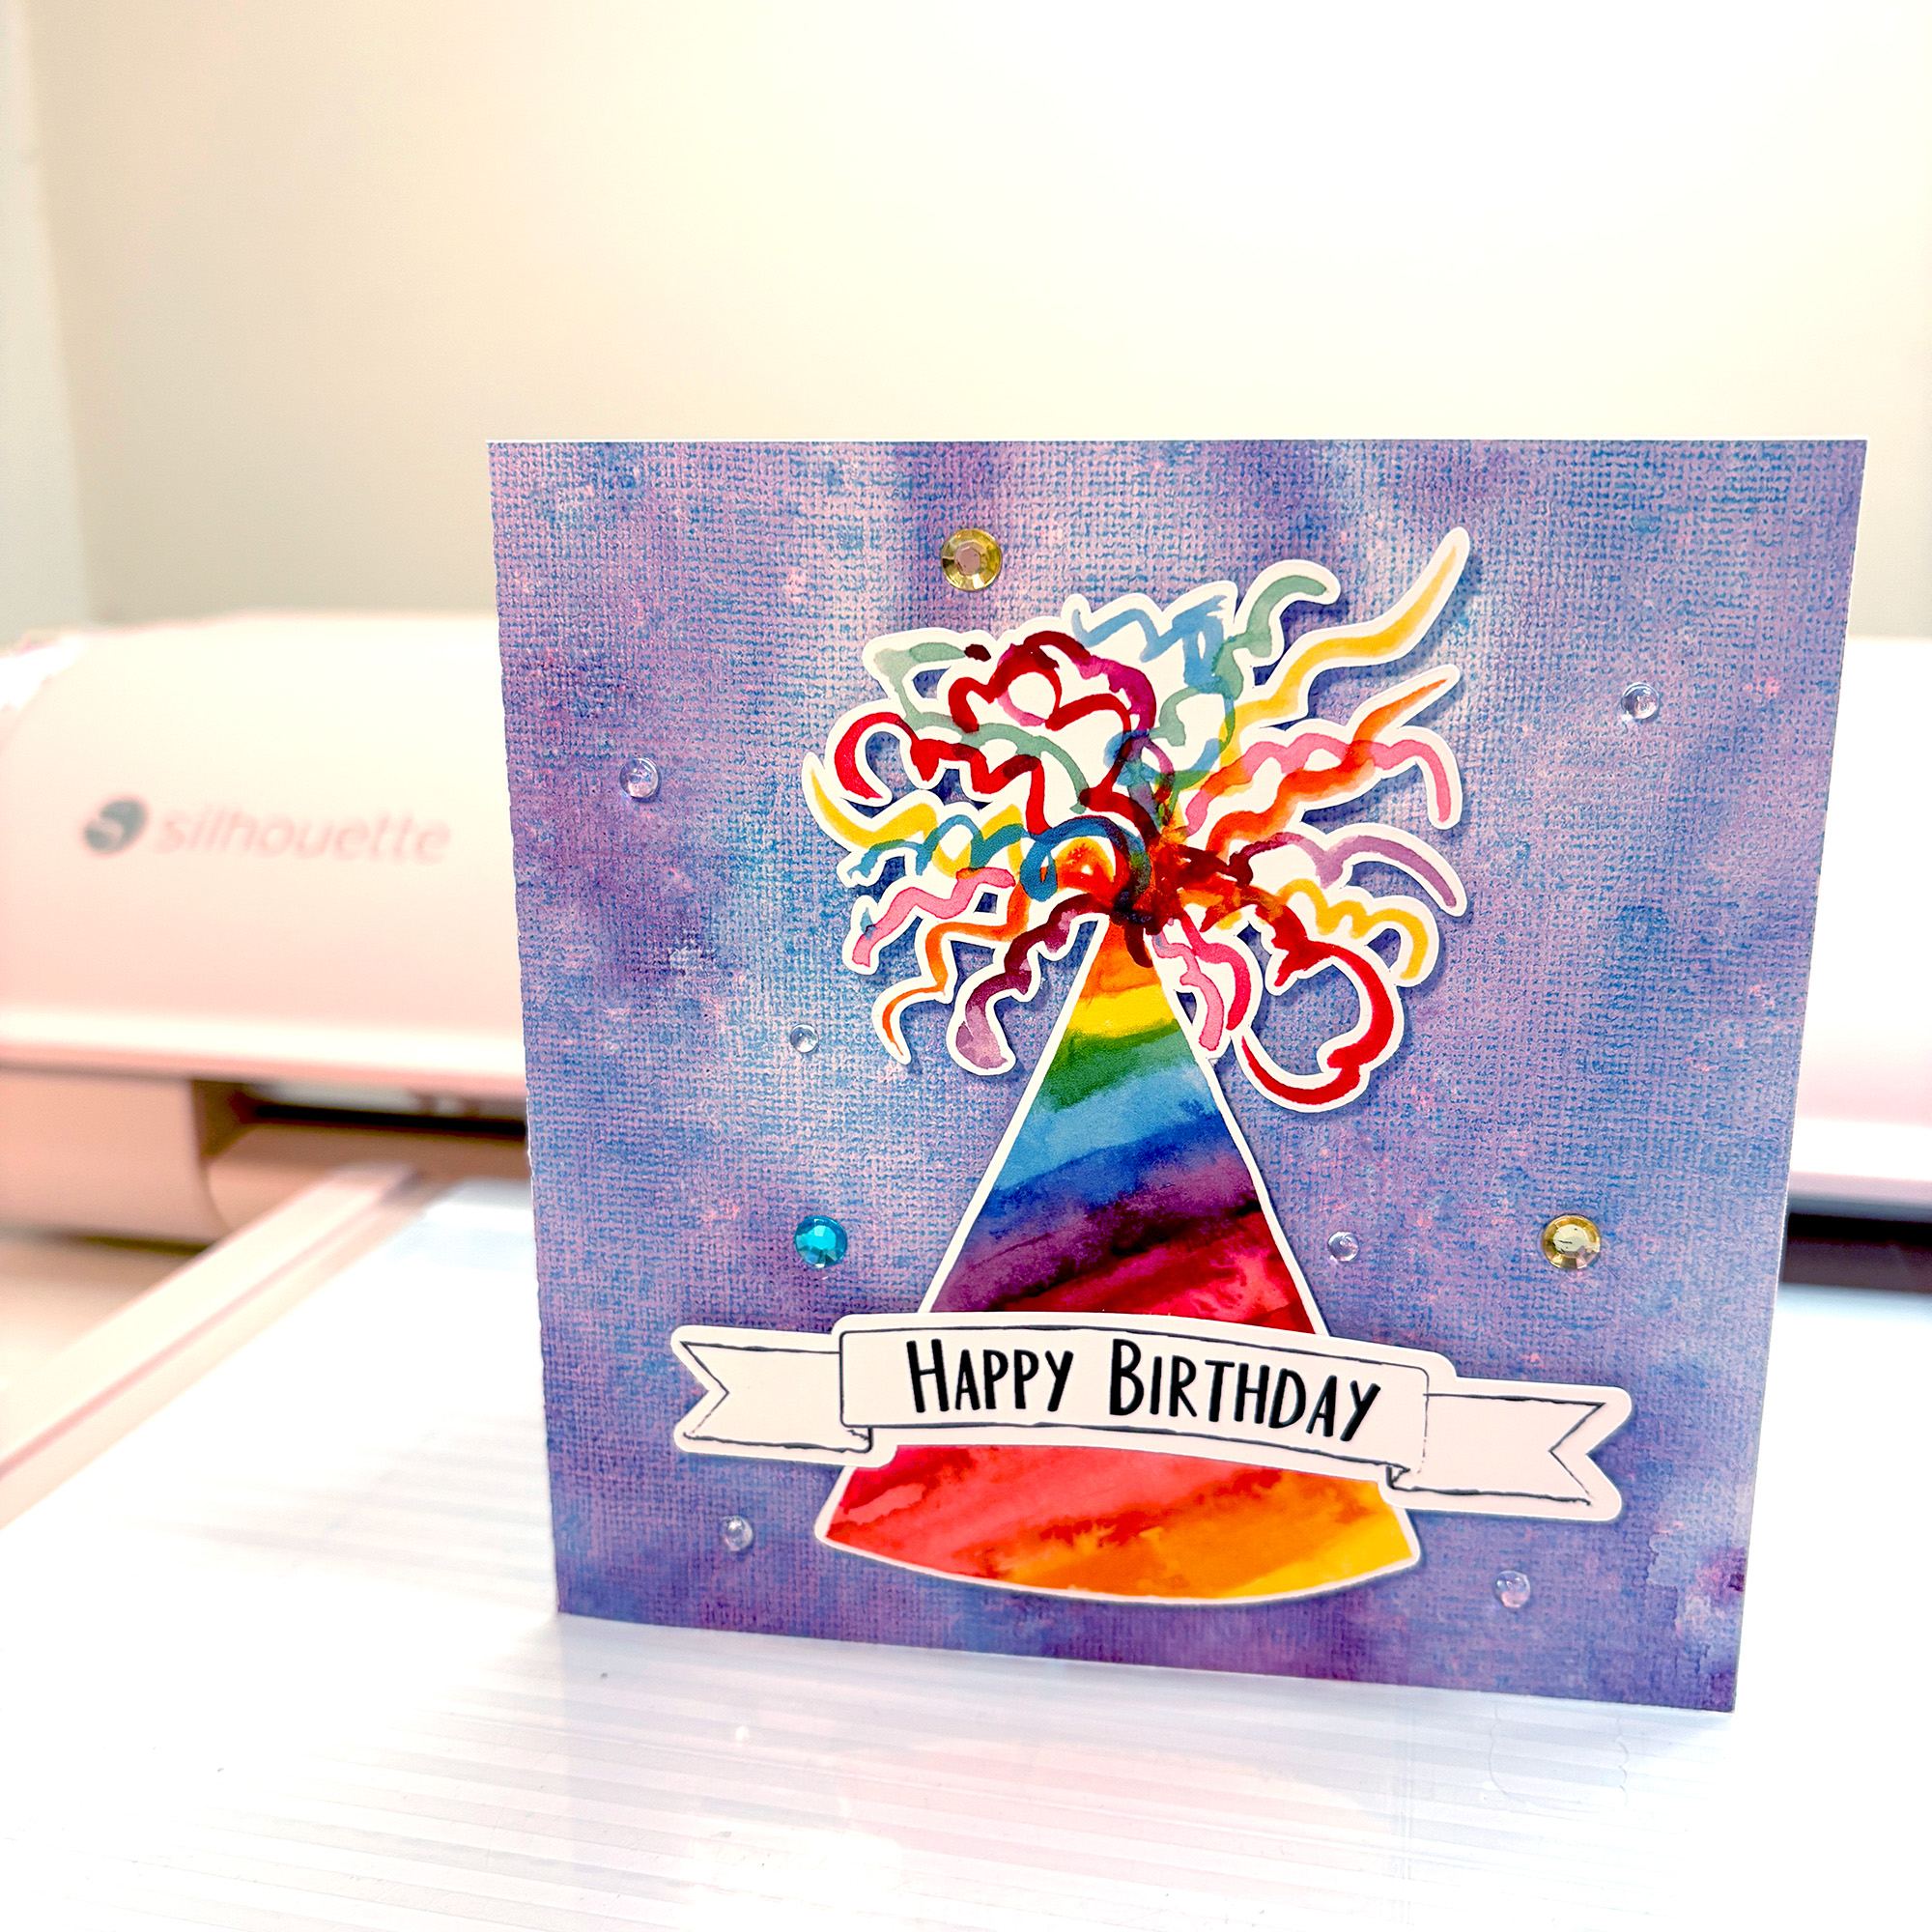
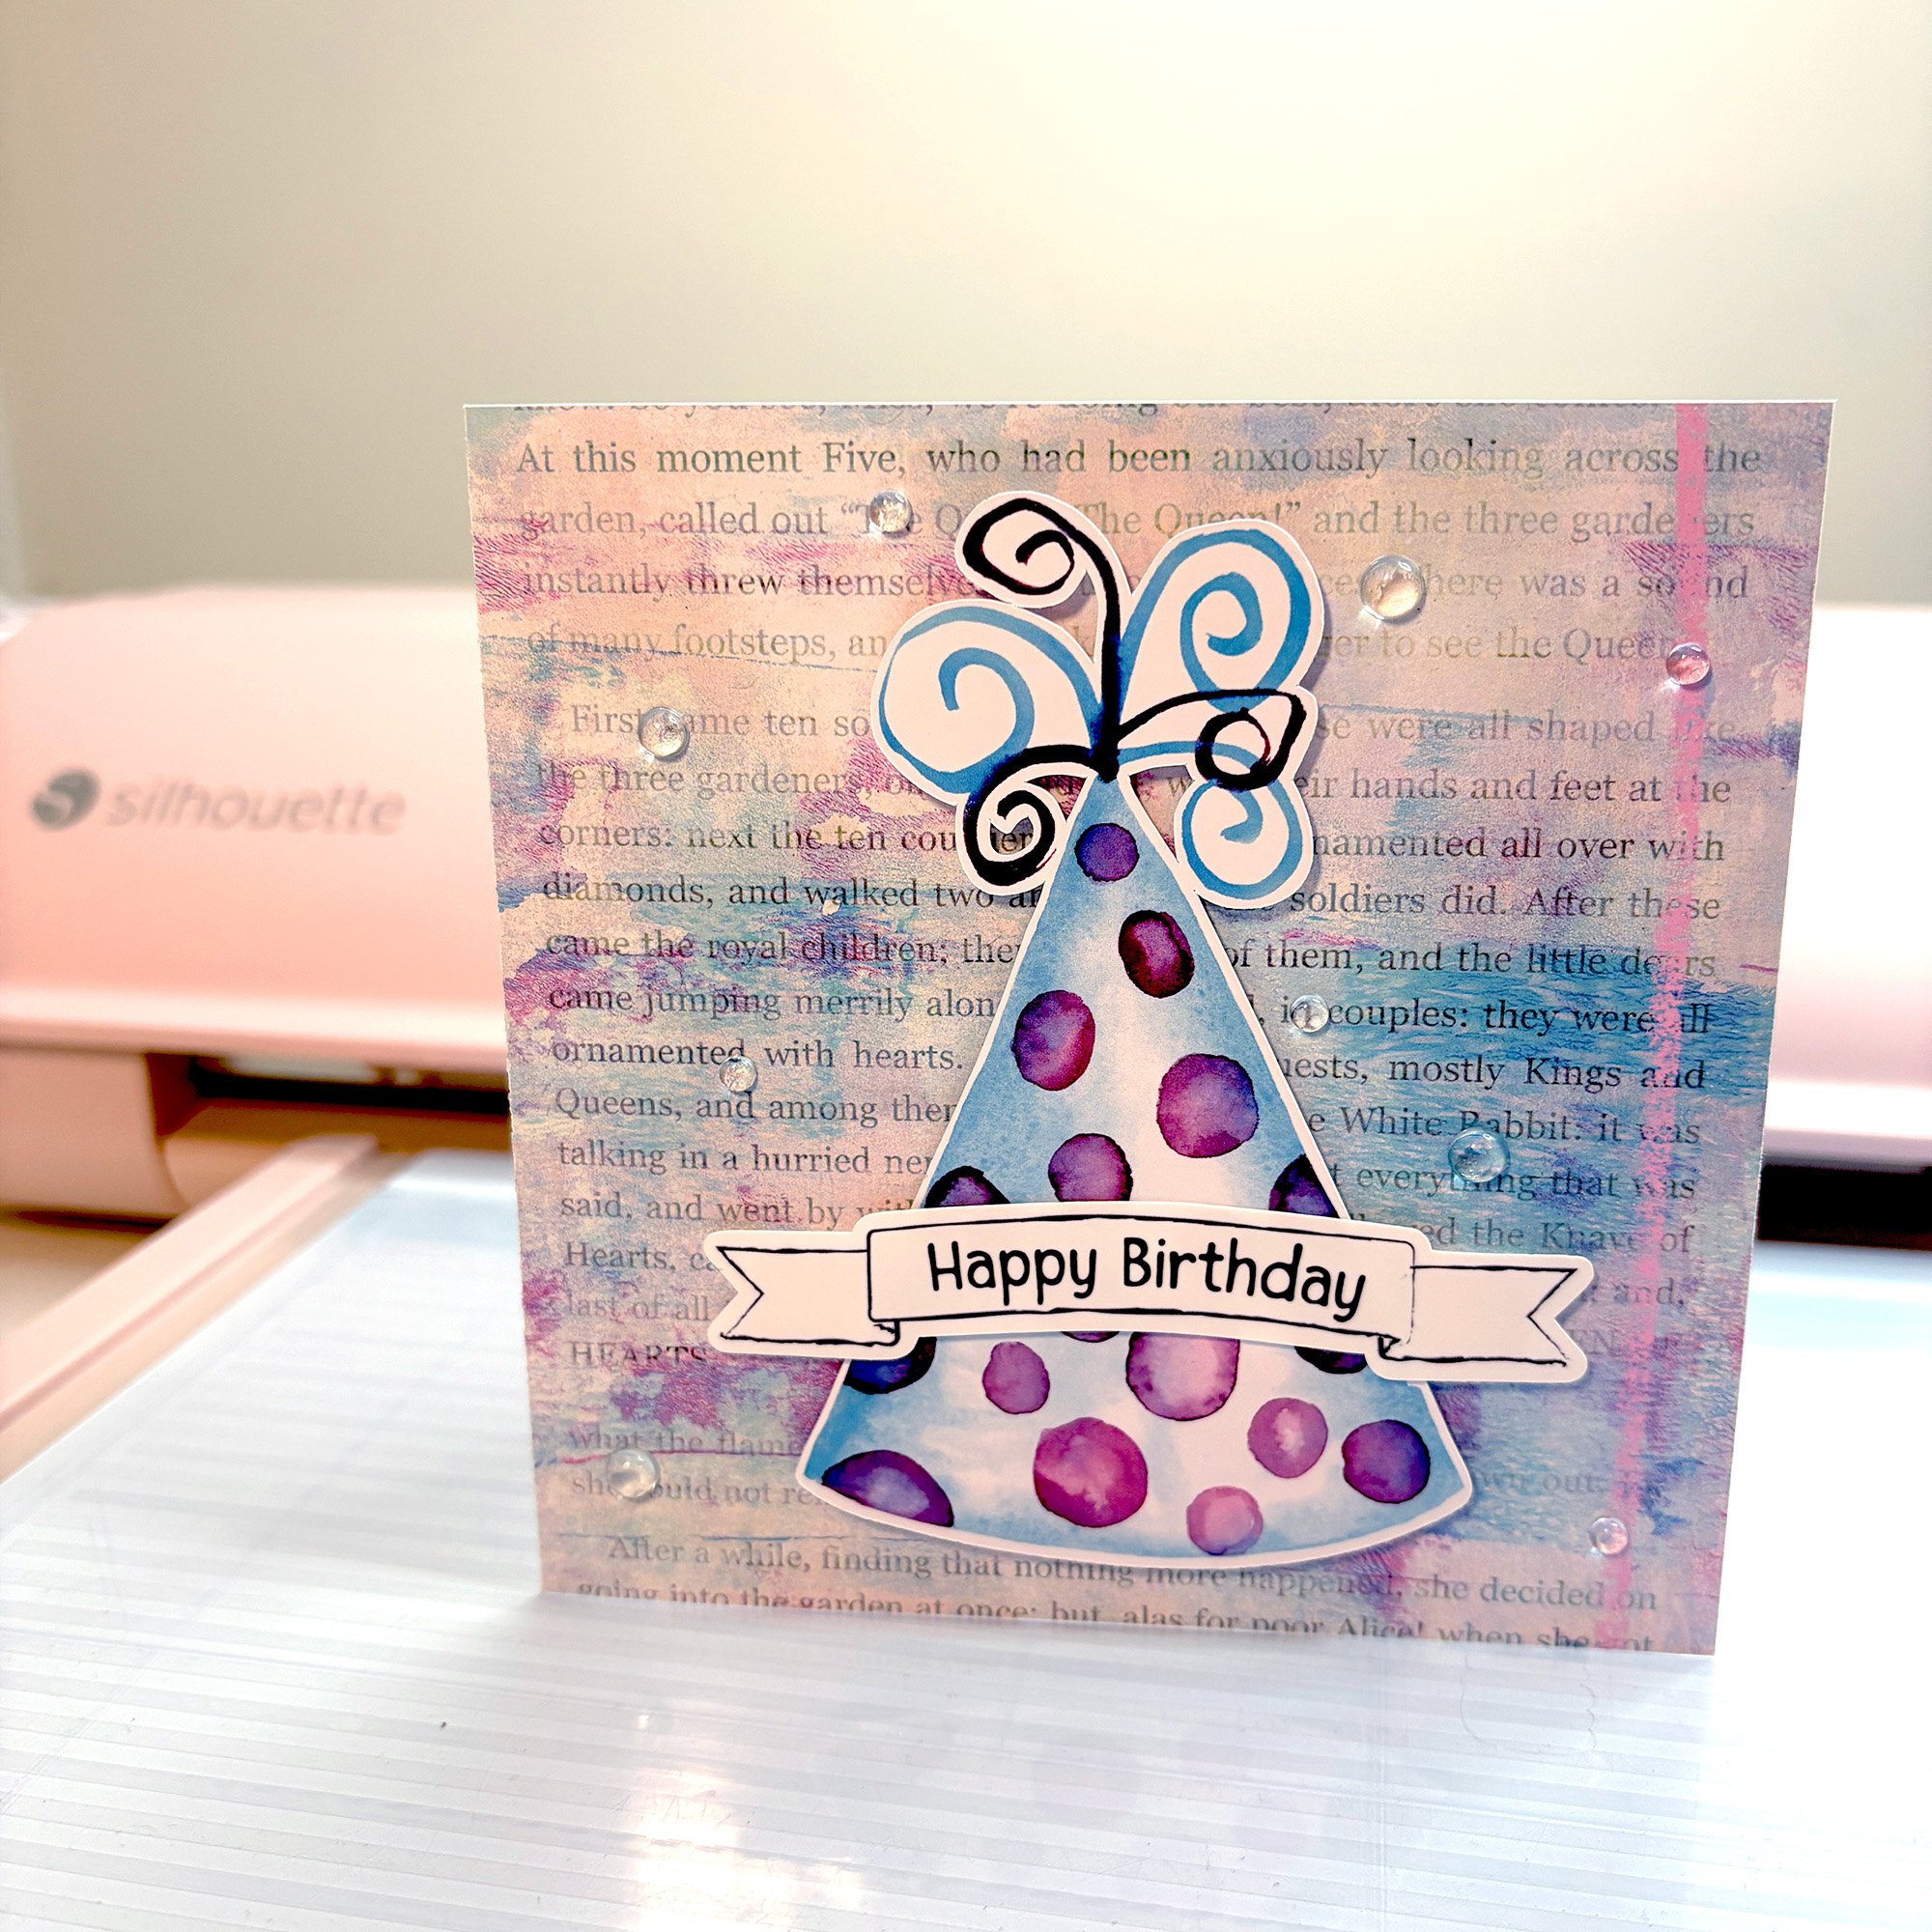
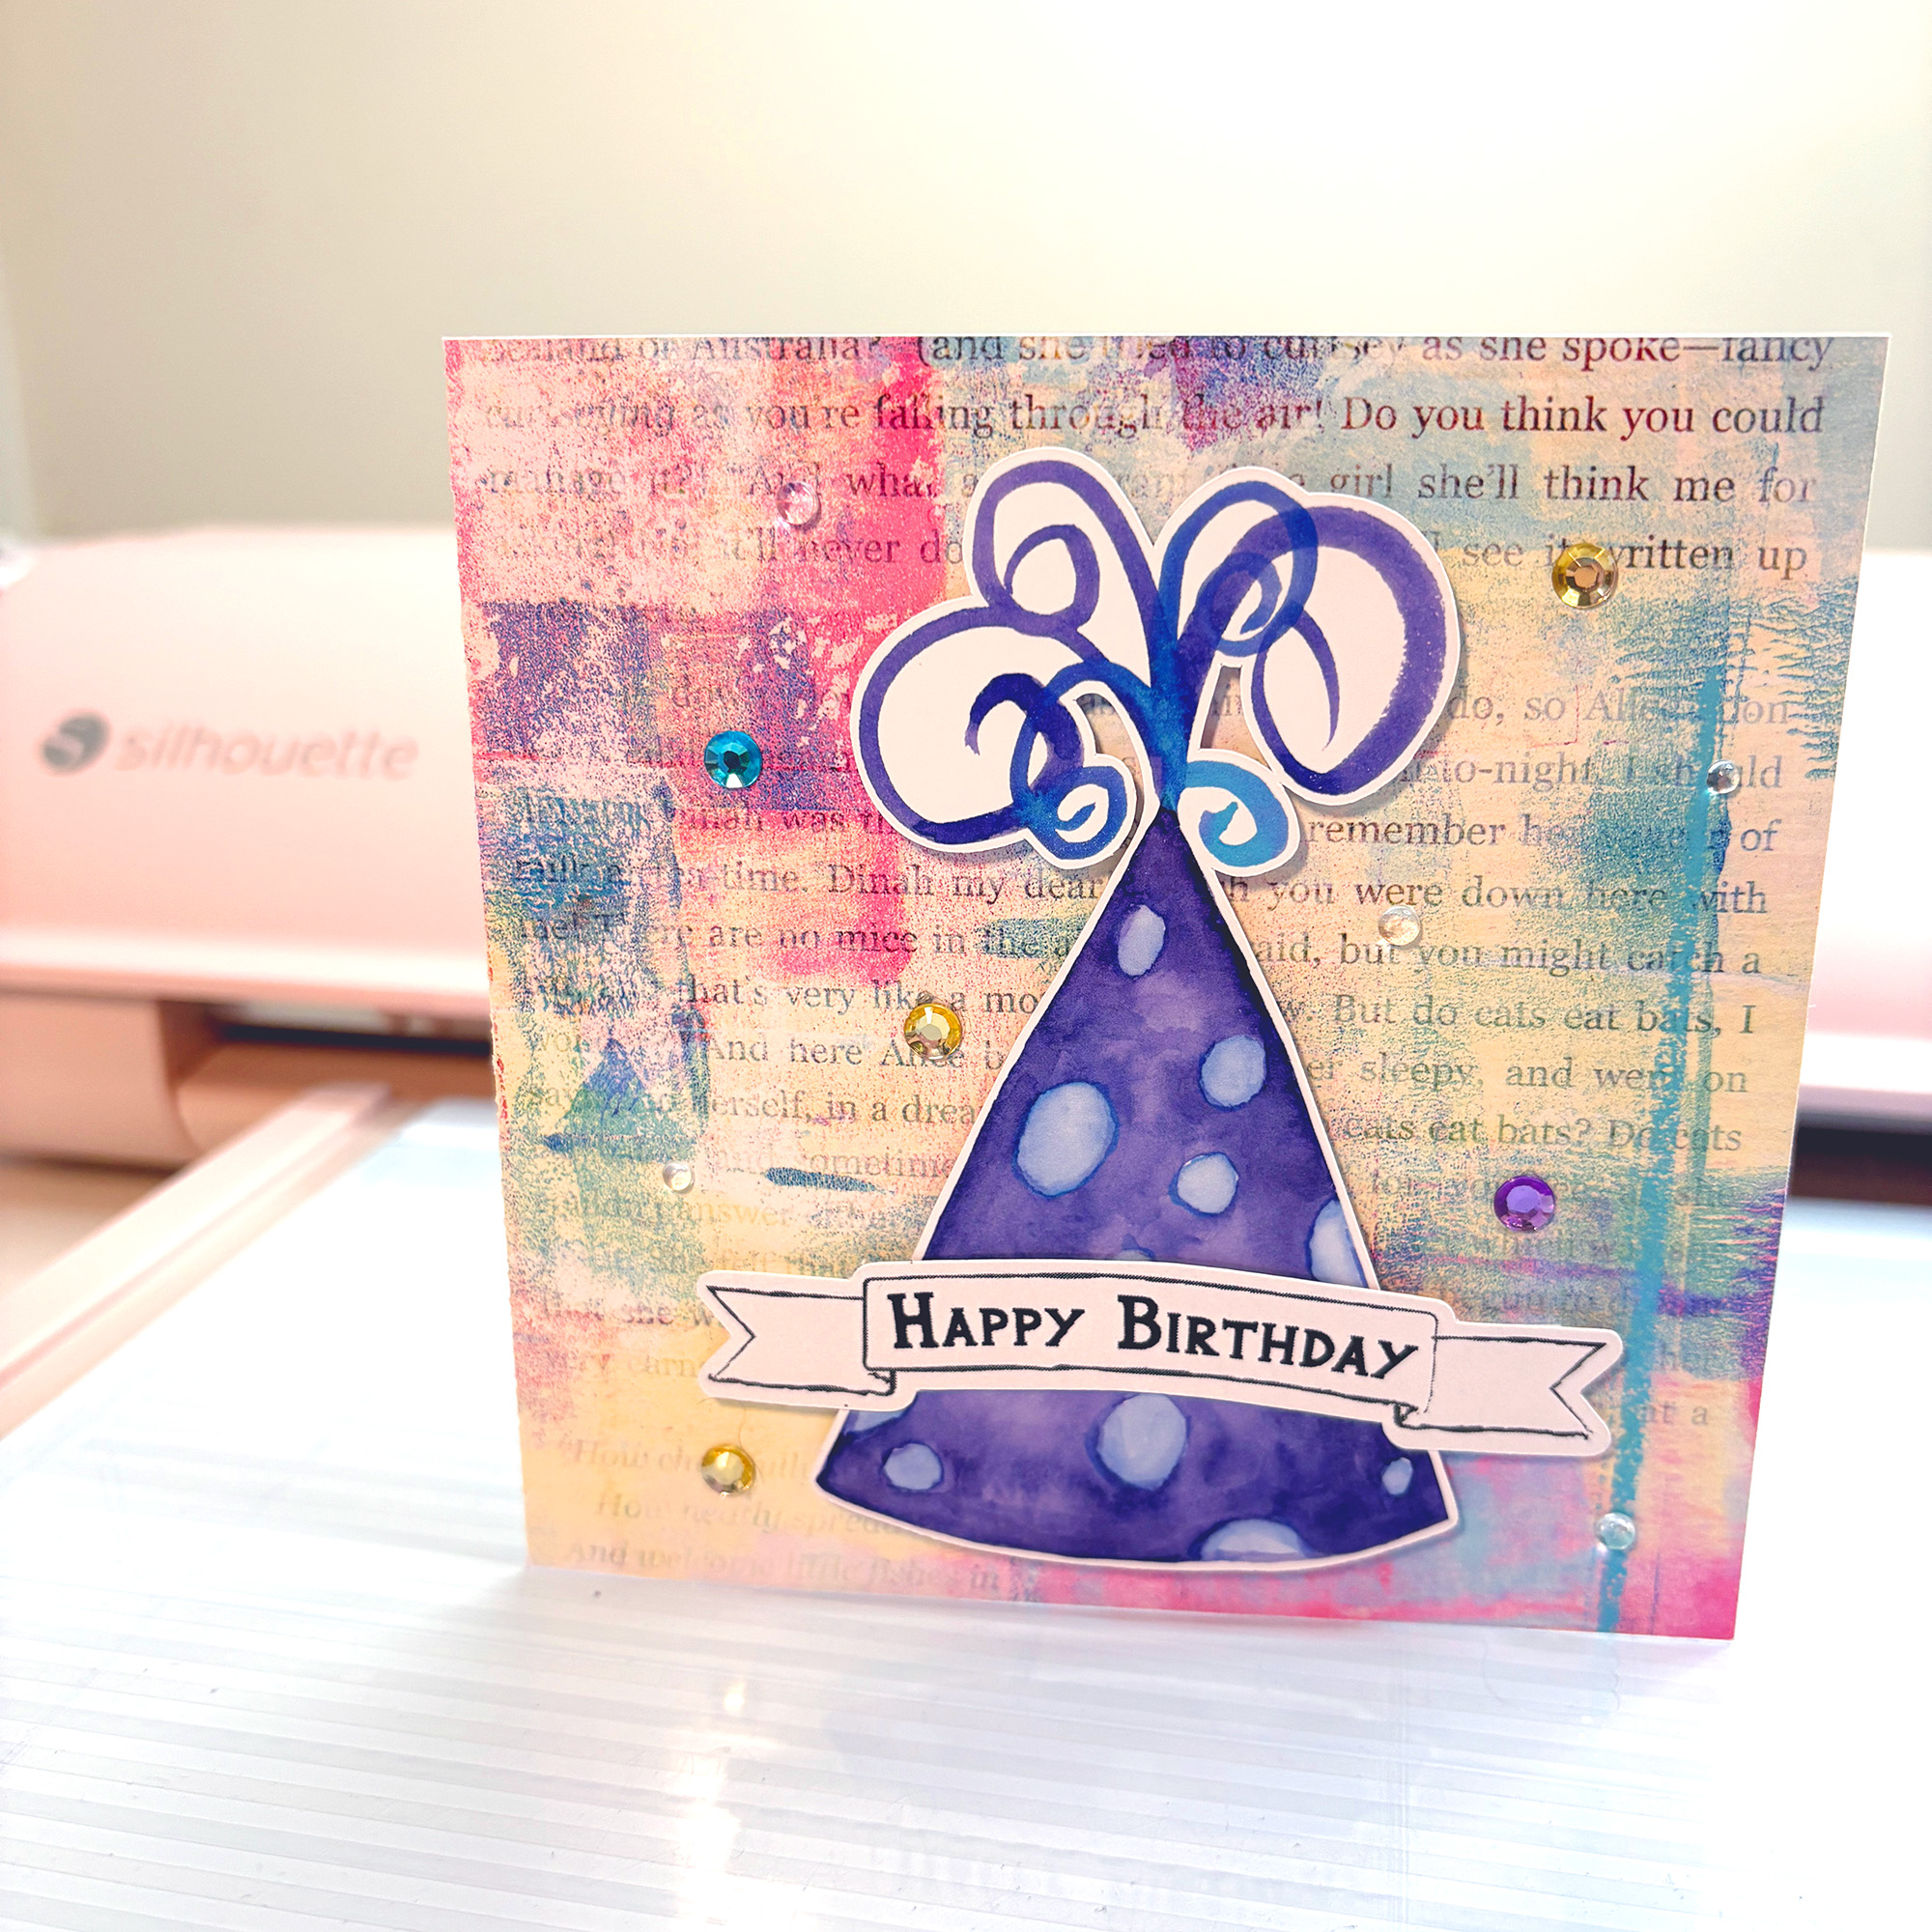
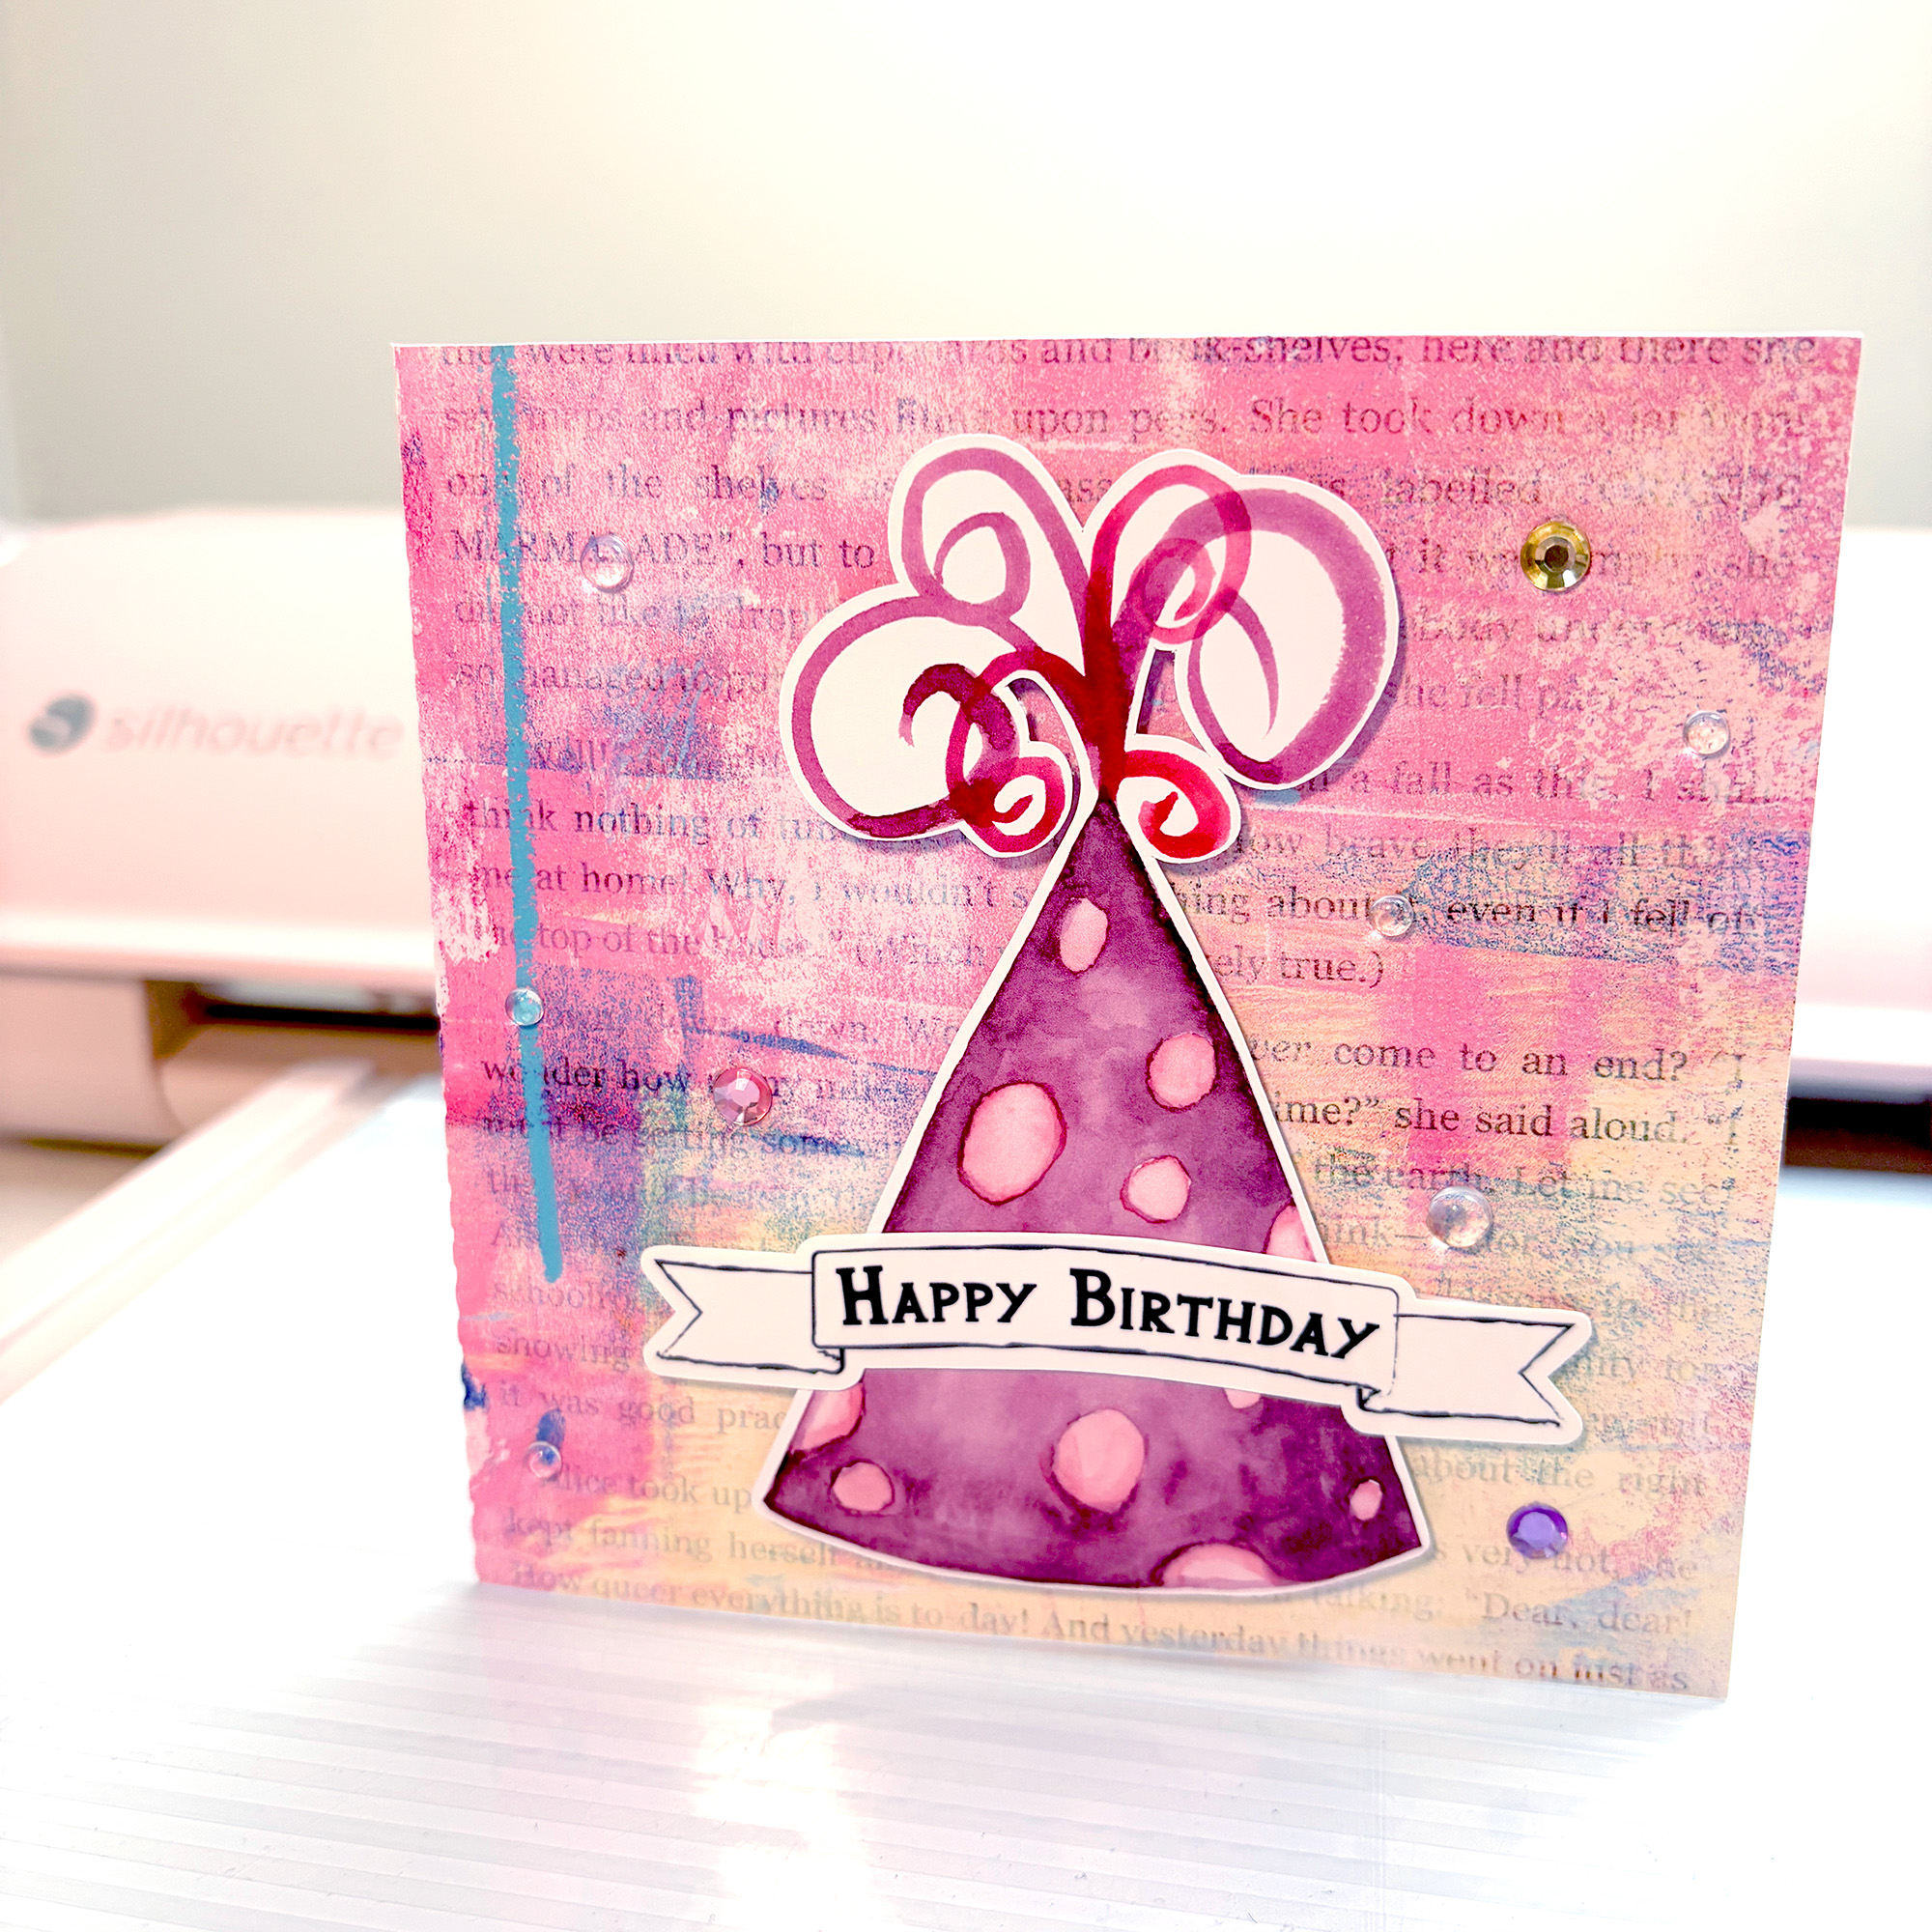
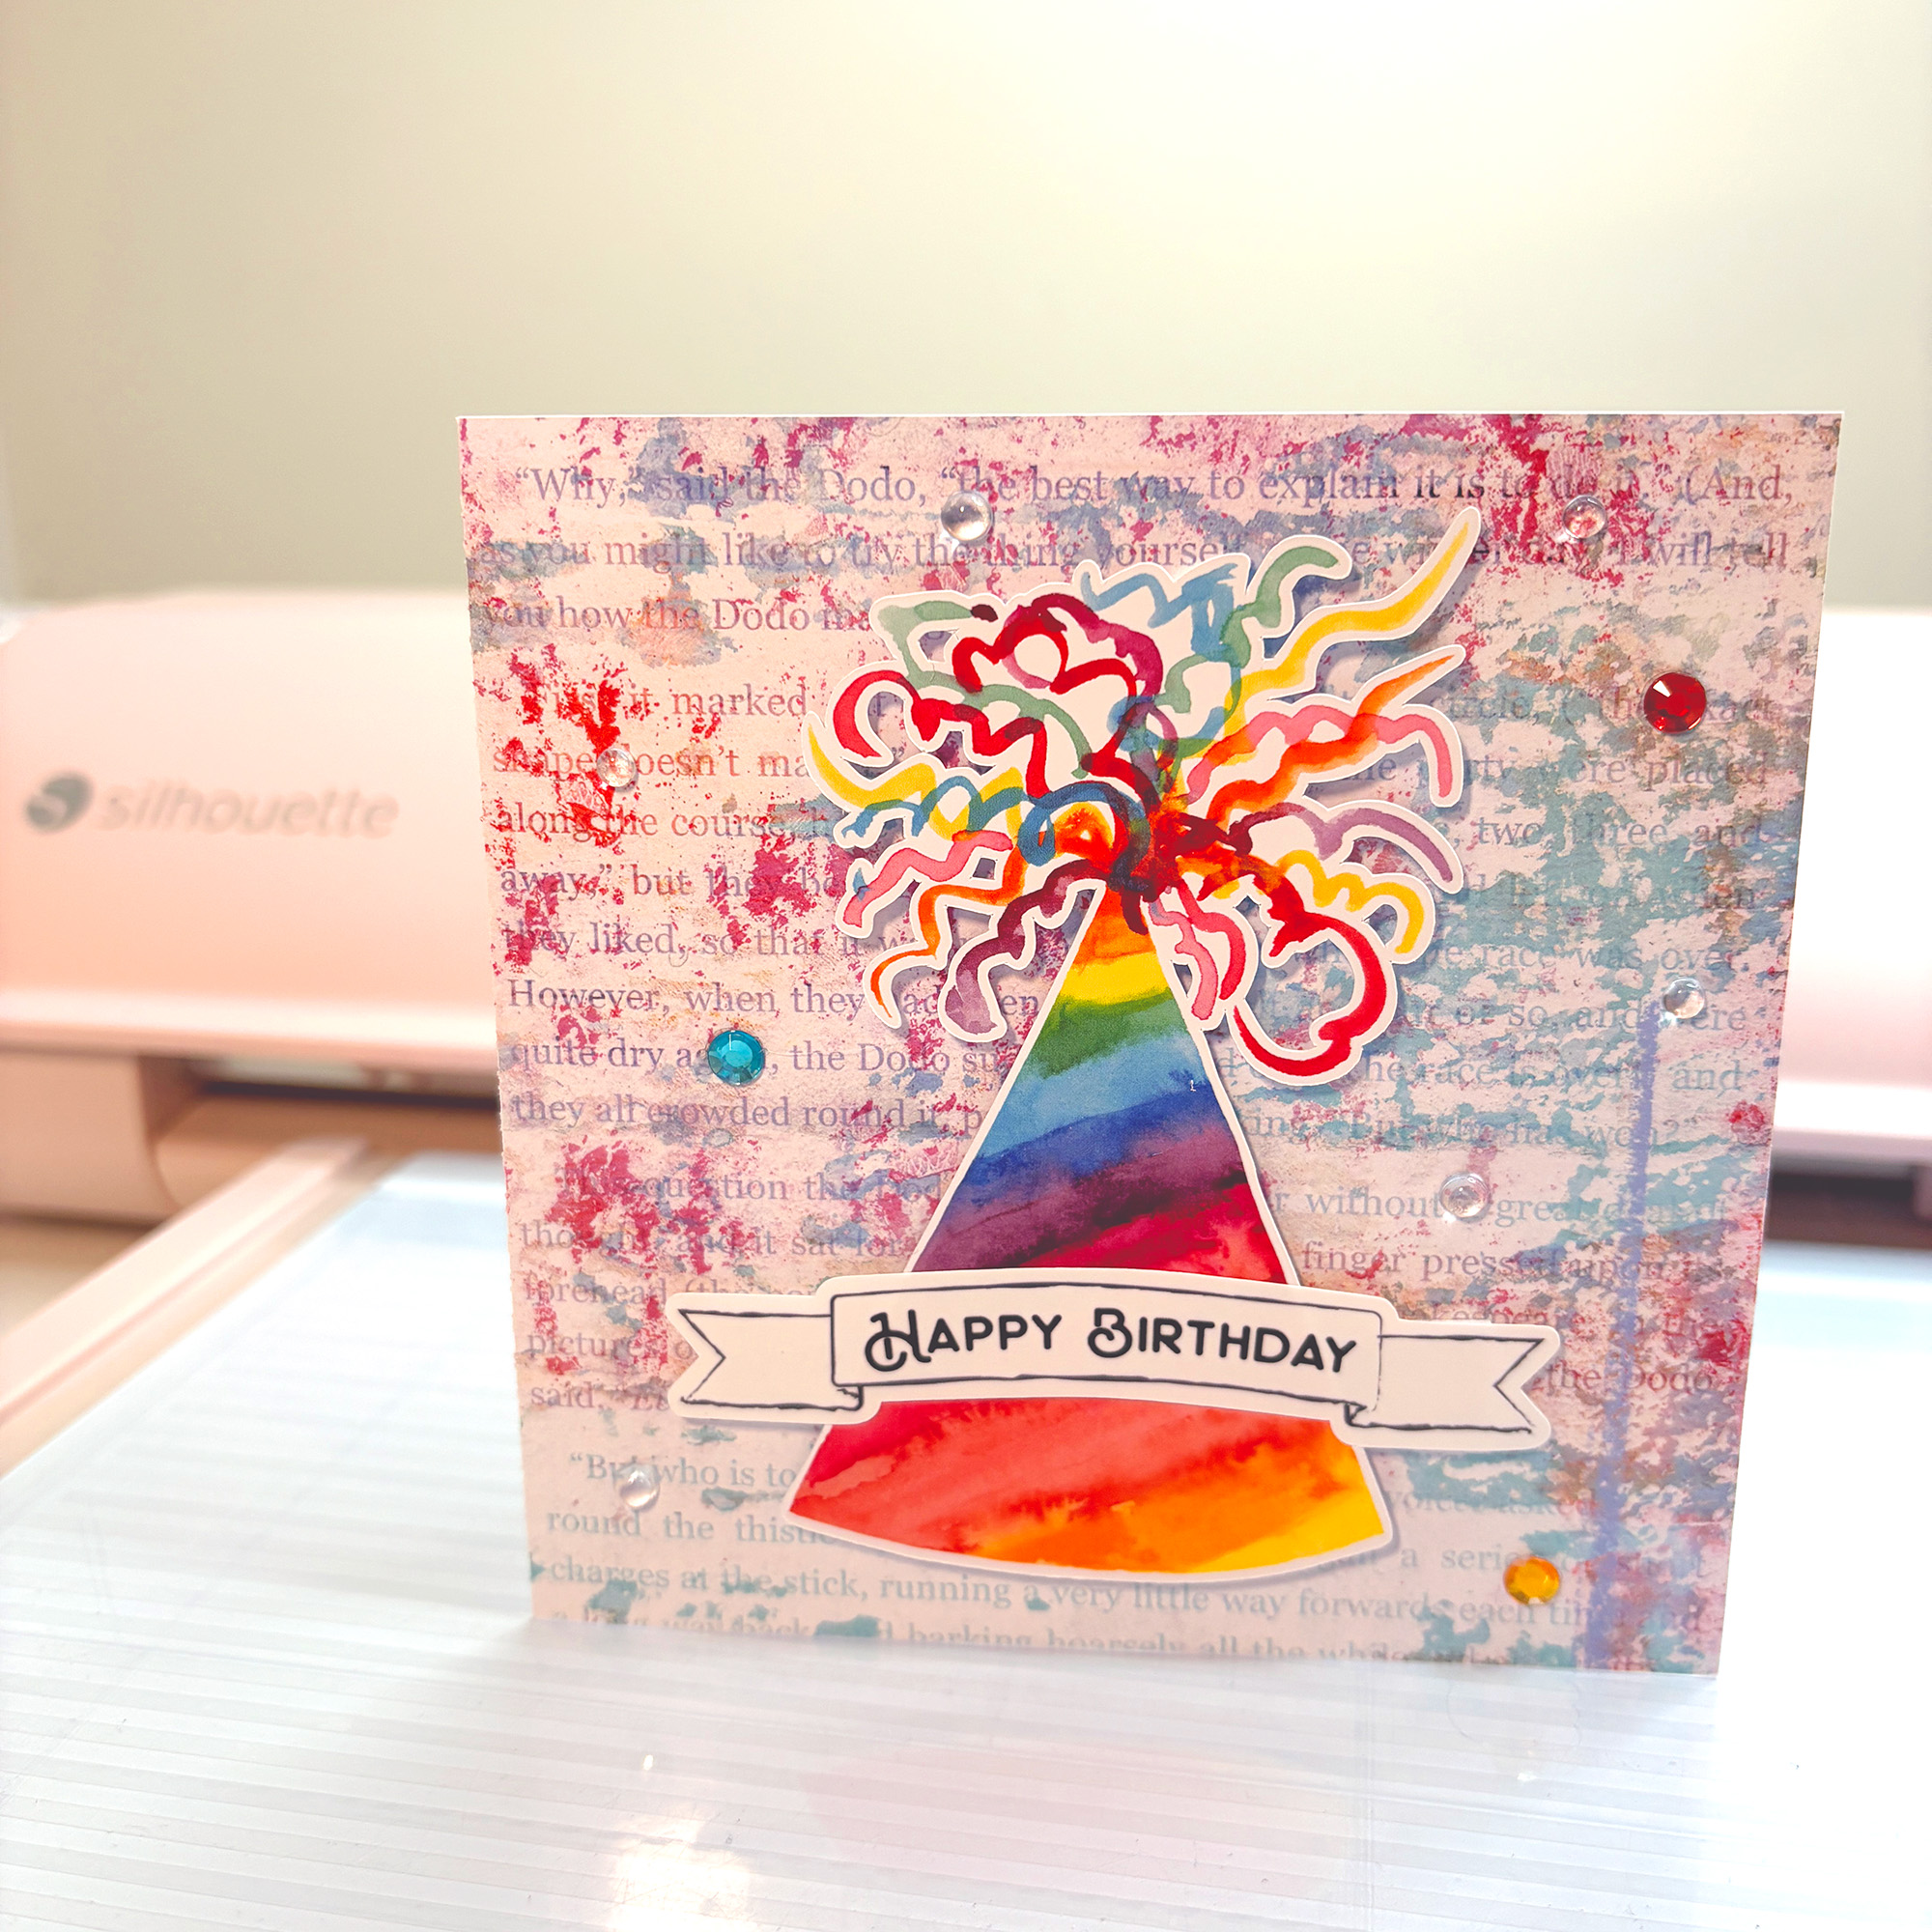
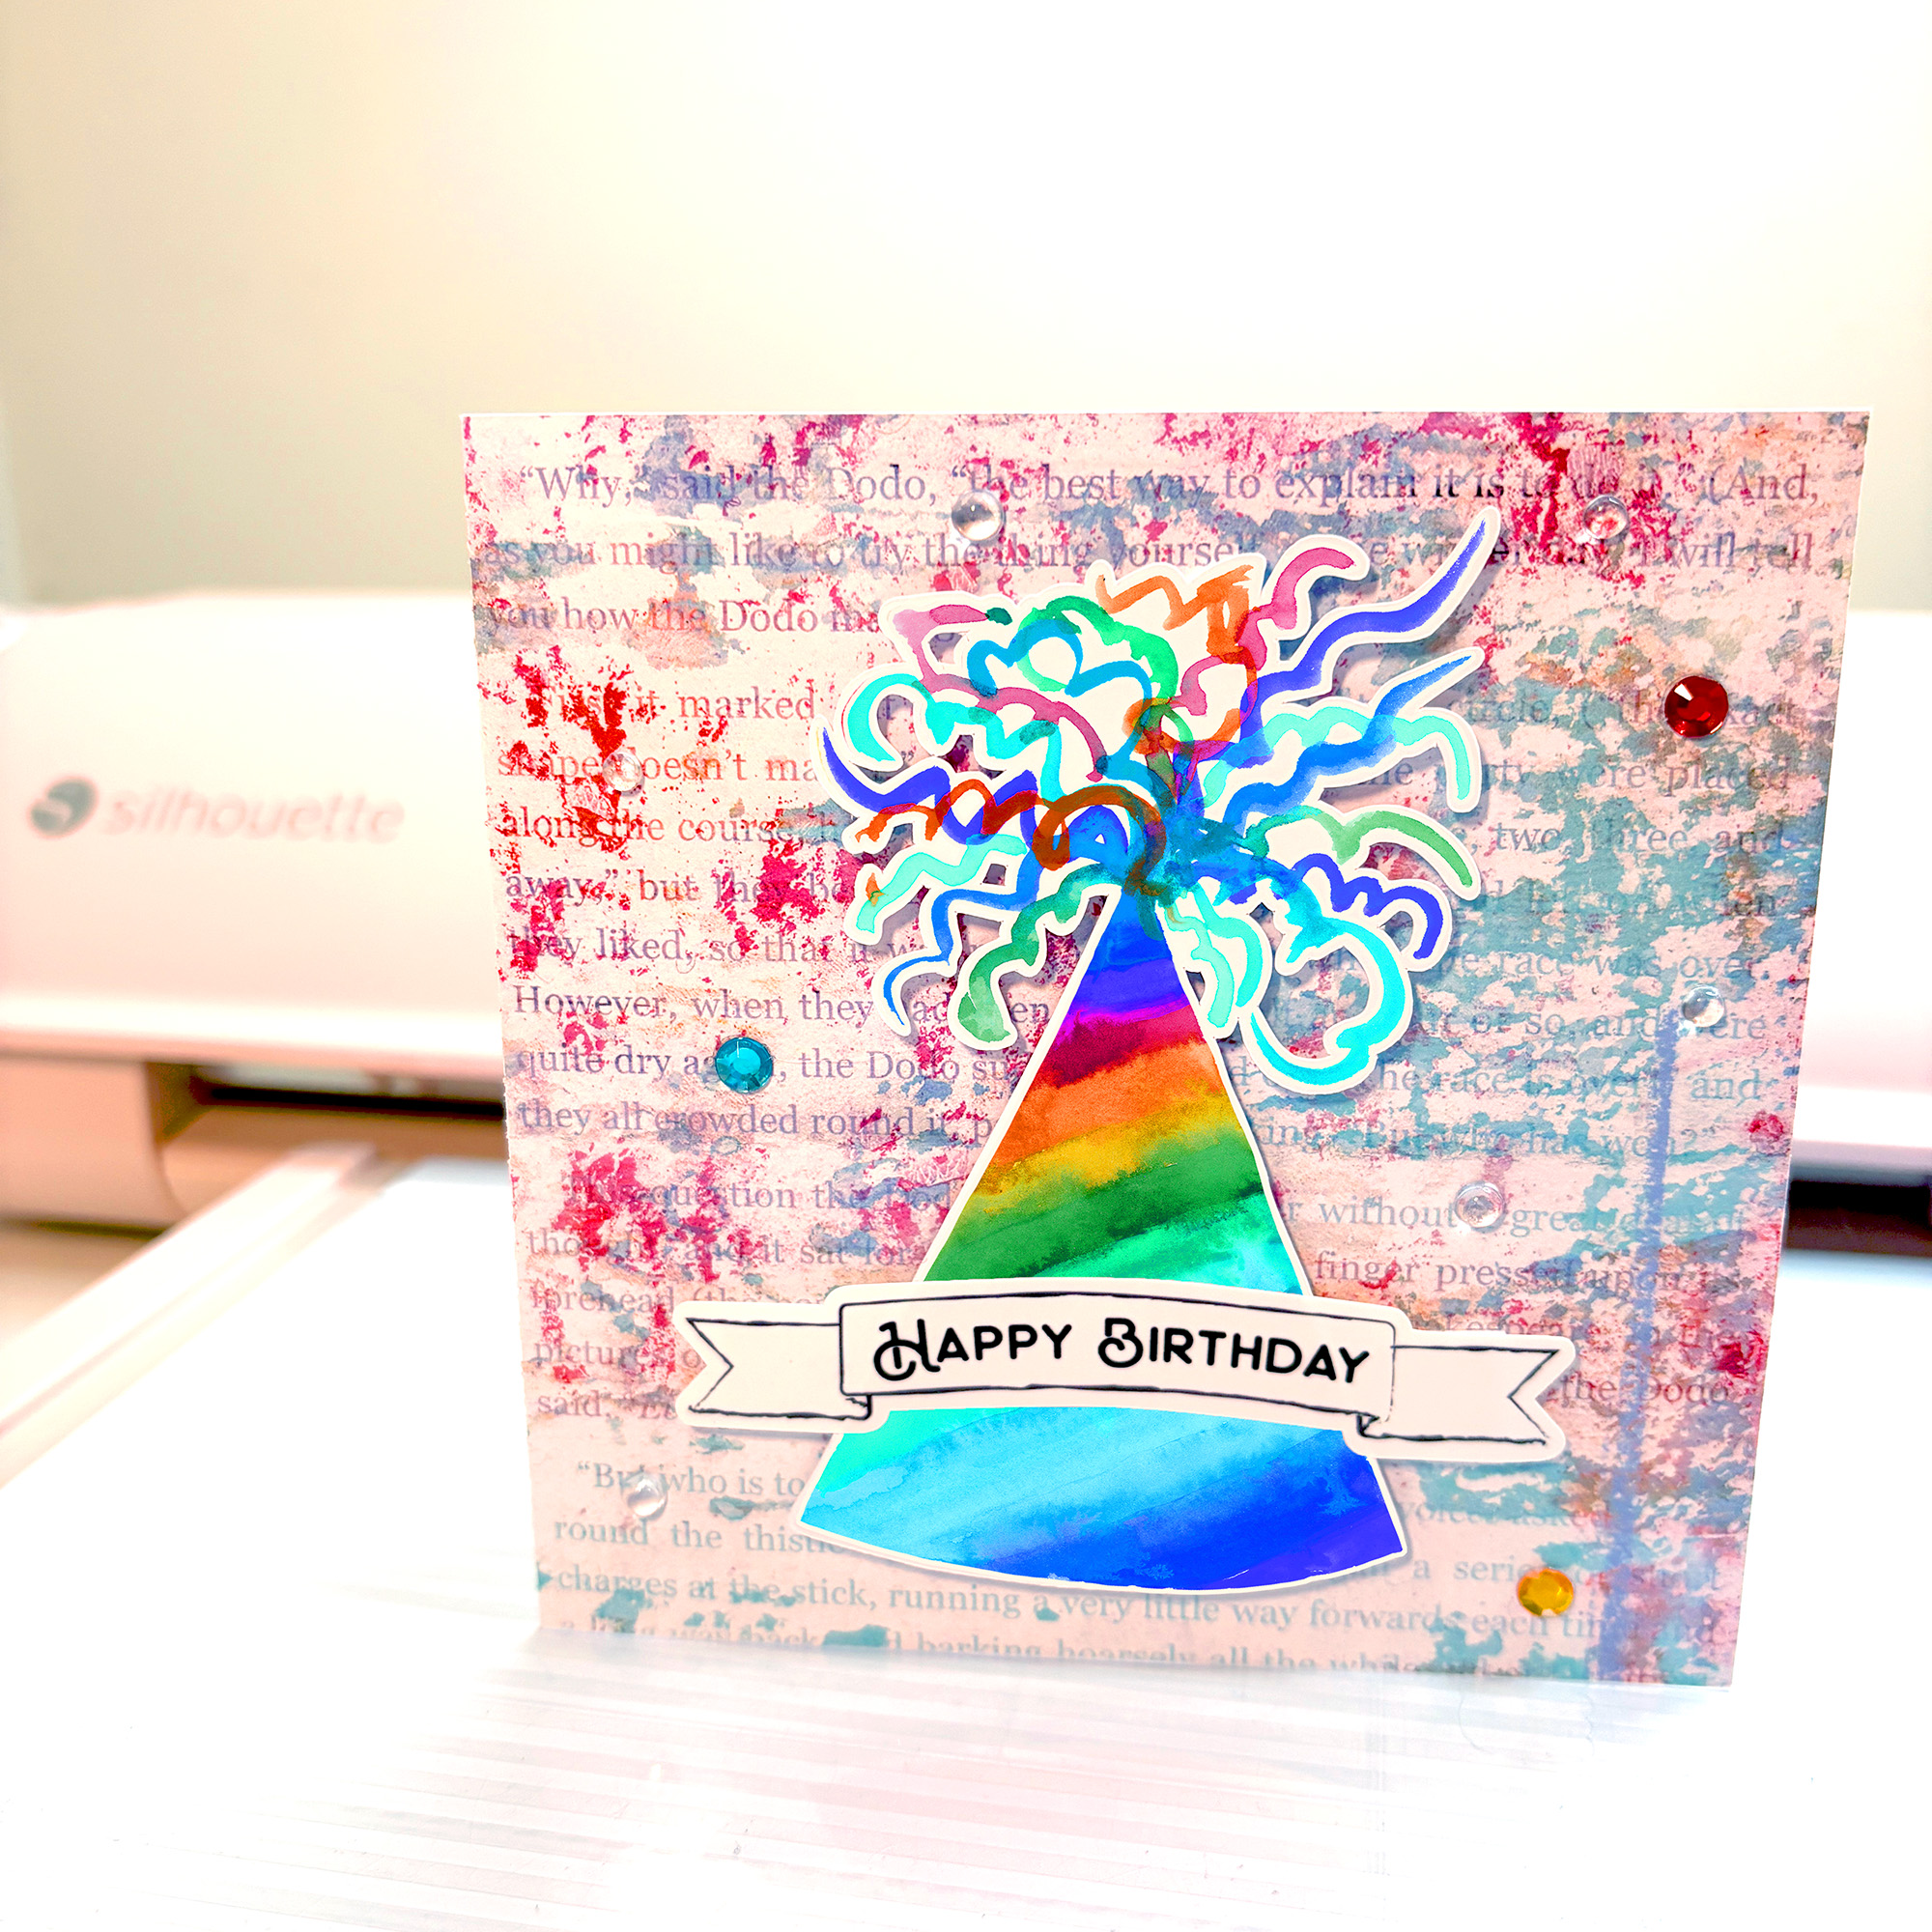
If you have been looking for a birthday card design that goes beyond a standard sentiment and a bow, these watercolor party hat print and cut designs might be exactly what you need. Seven hand-painted designs are now live in the Silhouette Design Store, and the sample cards below show just how many different looks you can pull from a single hat design depending on the background you choose.
All the printable backgrounds used on the cards in this post are my own designs, also available in the Silhouette Design Store.
The Doodled Happy Birthday Banners are a separate print and cut set that coordinates with all seven hats. Keep reading to see each design in action and find the full supplies list for every card.
About the Designs
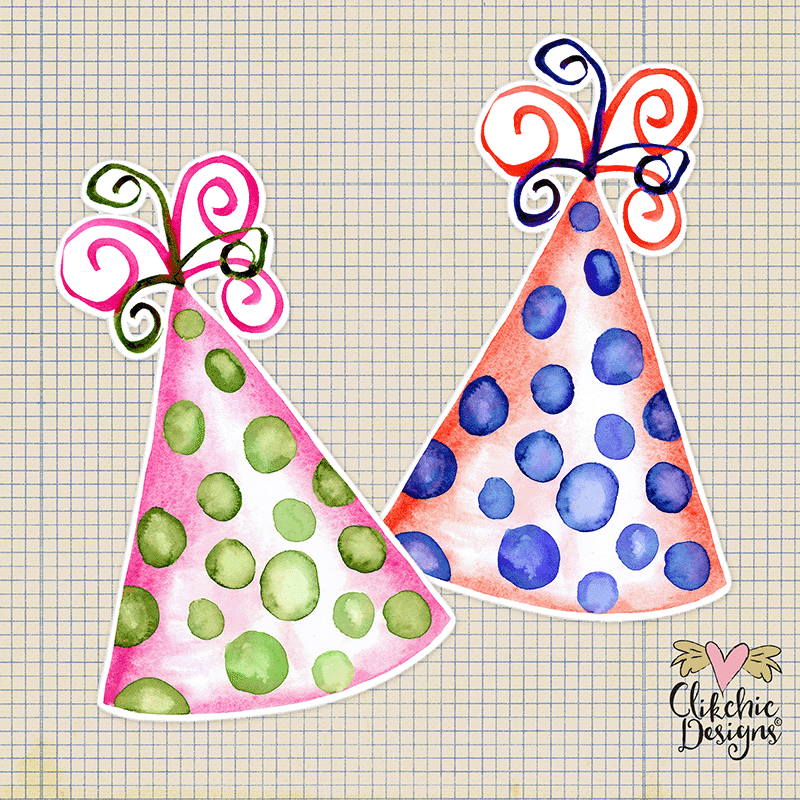
There are two distinct styles in this collection. Five of the hats feature a polka dot body with a pair of doodled curly ribbon streamers at the top. The other two are wide rainbow-banded hats with an explosive burst of multicolour curly streamers that really fill out a card front. All seven are hand-painted watercolor print and cut designs sized large so you can use them at full size for a bold focal point or scale them down in Silhouette Studio® for tags, smaller cards, or layered projects.
The Cards
Blue Purple Polka Dot Party Hat
The soft blue hat with purple and pink polka dots works beautifully against a mixed-media background with layered text and painted colour. The clipping mask on the background gives the card a shaped decorative edge that frames the hat without competing with it. Clear gems add a finishing touch without overcomplicating the design.
The deep purple hat with pale blue dots takes on a completely different feel against a bright multi-coloured painted background in pinks, yellows and blues. This one uses scattered rhinestones in mixed colours for a party-ready finish. It is a good example of how much the background influences the mood of the finished card.
The plum and pink combination is one of my favourites in the polka dot set. Paired here with a soft pink and lilac mixed-media background with text overlay, the hat sits beautifully without the two elements fighting for attention. The loosely painted magenta streamers at the top tie the hat colour back into the background perfectly.
The rainbow blues hat is full of vibrant colour and different just how differently it reads depending on your background choice. The first uses a cool blue and purple watercolor wash that lets the hat’s own colour range carry the card. The second pairs it with a soft blue speckled texture that gives the multicolour streamers room to really pop.
This design also works well for pride celebration projects. The rainbow bands suit a range of colour palettes beyond the traditional birthday context.
The cool-toned rainbow hat flows from cobalt blue and turquoise at the base up through green, yellow, orange and purple, finished with a wild burst of multicolour streamers. Shown here on an Alice in Wonderland text background in a soft pink and mixed-media palette. The warm tones in the hat pick up the pinks and reds in the background without being an exact match, which keeps the card from feeling flat. Red rhinestones scattered across the card tie the whole design together.
Hot pink with olive green polka dots is an unexpected pairing that works really well in print. The pink and green streamers keep the colour story consistent from top to bottom. A bright floral or botanical printed background would suit this one well. No card sample yet, but it is ready to shop now.
Orange Blue Polka Dot Party Hat
The warm orange-red hat with soft blue polka dots and red and navy streamers is a bold, high-contrast combination that would suit a vivid painted background or a darker textured paper. No card sample for this one yet, but it is available now in the store.
The Happy Birthday banners seen on every card in this post come from one set with several banner styles to choose from. It is designed to coordinate with print and cut focal elements and is available separately in the store.
All the printable backgrounds used on the sample cards in this post are my own designs and are available in the Silhouette Design Store. Each one is a printable design sized to fill a standard square card base as a print and cut design. I like to have the background design cover both the front and back of the card but the options are endless in how you can style the background for your cards.
Browse the Full Collection
All seven party hat designs are now live in the Silhouette Design Store.