One of the great advantages of digital scrapbooking is being able to edit your photos. If you have ever had trouble matching your photos to your layout, kit or if something just doesn’t look quite right, tinting your photo might be just what you need to do to make your layout pop. When opening an image, always use SAVE AS to save a to a new image file name so that you are not working on your original. This tutorial demonstrates some very simple Photoshop editing methods to tint your photos and make them POP!
In this tutorial we will start with this original photo.
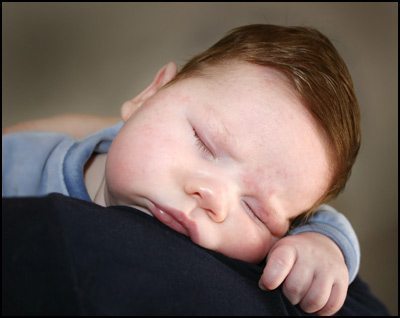
To start with it isn’t a bad image but there is room for improvement. Making an image monochrome can really make a difference to it. Tinting it a color such as sepia can make it suit your layout perfectly. Sepia of course isn’t the only way to go, there are many different colors you can tone your images to help suit your layout.
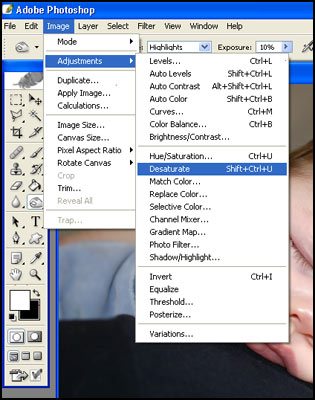
Firstly to tint an image it must first be made black and white. The way I find the easiest is to desaturate the image. To do so select Image> Adjustments > Desaturate.
Usually when desaturating an image it is necessary to boost the contrast a little. An easy way to do this can be to use the Auto Contrast tool in Image> Adjustments > and then select Auto Contrast. (also shown in menu above)
As an example here is the desaturated image below.
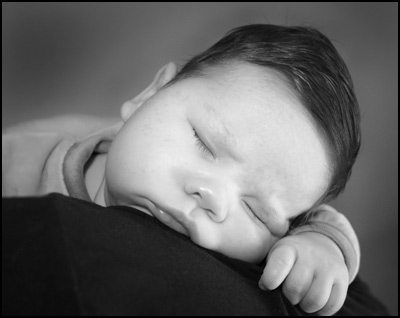
The contrast on this image hasn’t turned out too badly but often there are no real blacks and the image can look a little too grey. Boosting the contrast will give it more punch. If you wish to have a bit more control over the contrast it is sometimes more effective to use the brightness/contrast.
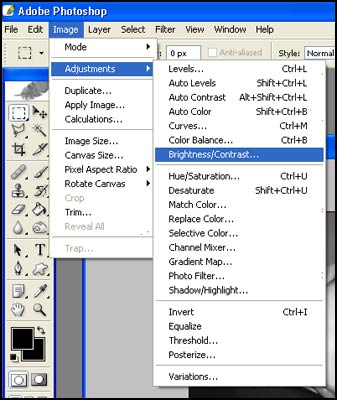
As you can see below, the second image has a bit more punch.

As is the image already is greatly improved on the original but it is only the beginning of what you can do.
Sepia toning is an age old photography technique. Photographers who did sepia toning would all have their own techniques and preferences in regard to the color of their sepia work. The digital age makes it much easier for us to experiment with sepia tones along with a myriad of other monochrome color effects.
Probably the easiest method is to use variations. Image> Adjustments> Variations
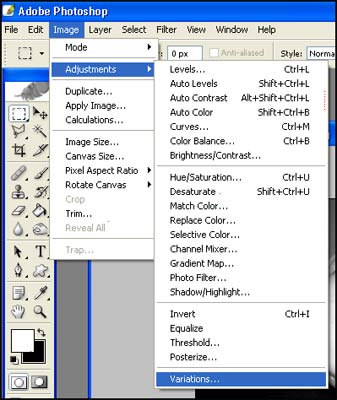
This gives you a selection of thumbnails where you can assess the color changes and easily choose the color change by clicking on the appropriate thumbnail.
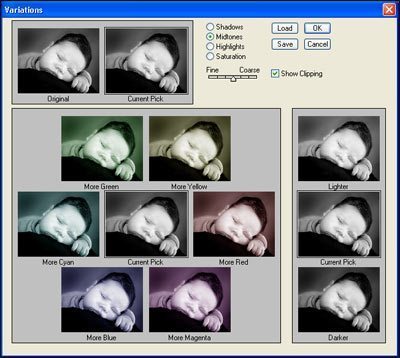
You can choose the extent of color variation by adjusting the Fine – Course slider. Simply adjust the image by selecting the appropriate thumbnail and clicking until you have achieved the desired colour tone and then click on Ok.
For sepia toning you are mainly working with the red tones. I like to adjust the slider to the fine level as it gives you more control and you can make the changes more gradually. Each click of a thumbnail adjusts the tonal change further.
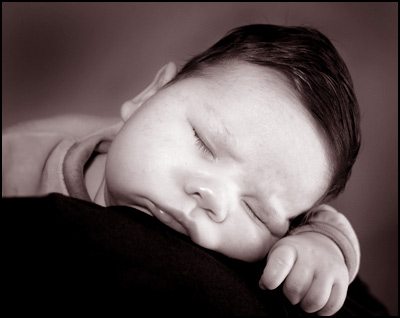
To achieve a sepia look, you would mostly use the ‘More Red’ thumbnail to achieve the desired look. You may also like to add some yellow to make it a more yellow sepia, or more magenta to make it a bit more pink. On the sample above the tonal changes are quite dramatic as the slider is set at halfway. The changes will be a lot more gradual when set at the fine end of the slider. On the example below, I set the slider to fine, and clicked on ‘More Red’ several times to get the desired effect.
You can achieve a variety of colors by experimenting with the variations. Sometimes it might be useful to make the image blue, green, purple or whatever color you wish. It really is up to you. Some images really benefit having a funky tone added to them and it can really boost your layout to have an image tone in with it.
In the layout below I used blue as the main tone for the image, and then also made use of sepia to make my son really stand out.

My favorite method of adjusting colors in images is using Hue and Saturation.
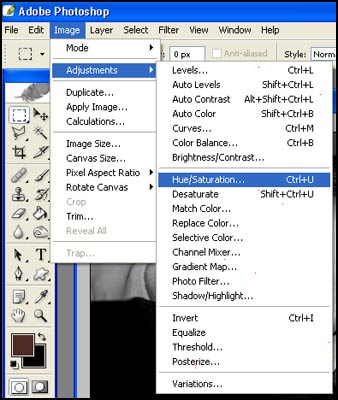
I find that this method gives you a great deal of control over the tonal range, shade and saturation of the color tinting.
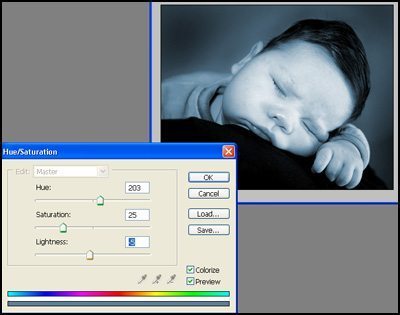
To colorize an image you need to ensure the ‘Colorize’ box is checked. You can then adjust the sliders to achieve the desired result. The Hue slider allows you to select the hue or color you would like to adjust to. You can use the rainbow strip at the bottom to give a guide as to the color range and its position on the slider.
The saturation allows you to adjust how much of that color is added to the image. The lightness slider allows you to adjust the brightness of the image overall. It is good to experiment with the effects of Hue and Saturation to see what you can do. It is a very versatile tool, not only for your photos, but your layouts, backgrounds and elements as well. Once you have achieved your desired result, simply click on OK and save your image.
© Clikchic Designs 2006,2009
Subscribe To Our Newsletter
Subscribe to receive the latest news and updates from Clikchic Designs. Get a FREEBIE just for subscribing!
You have Successfully Subscribed!