It’s been a while since I’ve shared new designs with you, and I wanted to take a moment to let you know why. I’ve been dealing with some health challenges over the past several months that have kept me away from my craft room and design table. While it’s been frustrating to step back from something I love so much, I’m grateful for the time to focus on healing.
But here’s the exciting news: I’m feeling better, and I’m back to creating! I’ve missed this creative community so much, and I couldn’t wait to share some fresh designs with you. Scroll on to find out more!
What’s New in the Shop
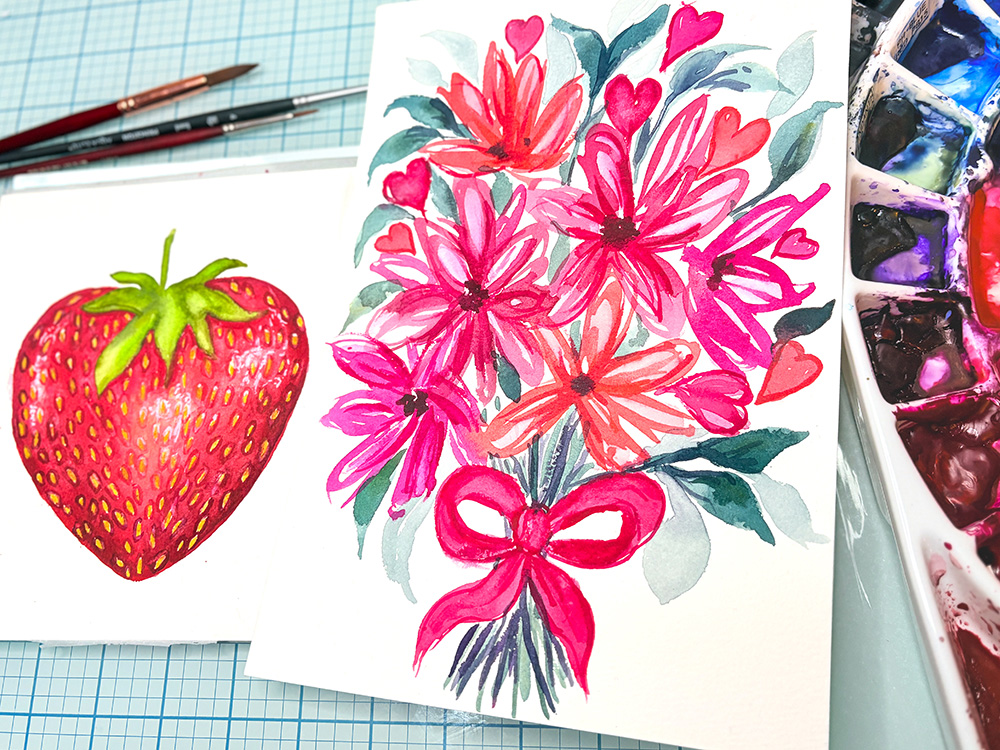
I’ve just released six beautiful new designs that I think you’re going to love:
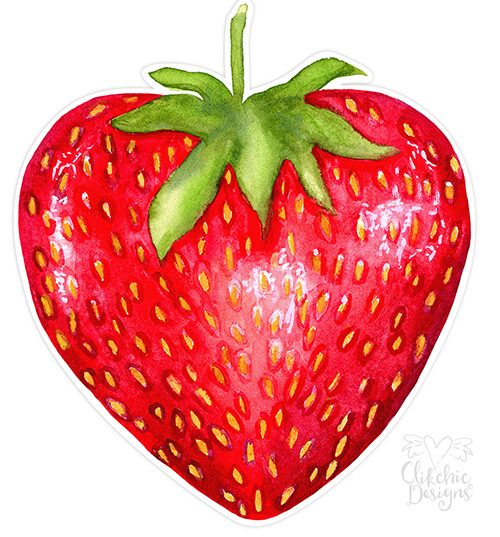
This sweet design combines the charm of watercolor strawberries in a heart shape. Perfect for Valentine’s Day projects, kitchen décor, or any project that needs a touch of berry sweetness. The print and cut format makes it super easy to create stunning results.
This adorable layered sentiment design brings together the berry theme with birthday wishes. The layered format creates beautiful dimension, and it’s surprisingly easy to assemble. Perfect for strawberry lovers and combines beautifully with the Print and Cut Strawberry for anyone who appreciates a punny birthday greeting!
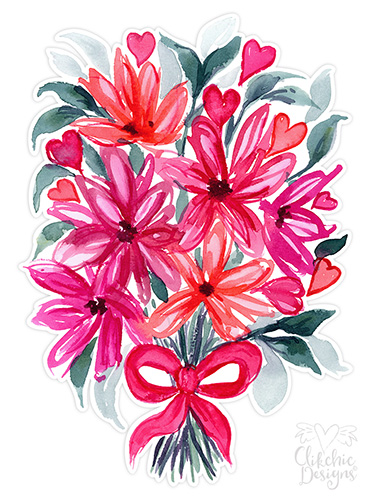
A romantic bouquet of hearts and flowers in gorgeous watercolor style. This design is ideal for cards, gift tags, scrapbook layouts, or home décor projects. The warm red and pink tones make it perfect for Valentine’s Day or any celebration of love.
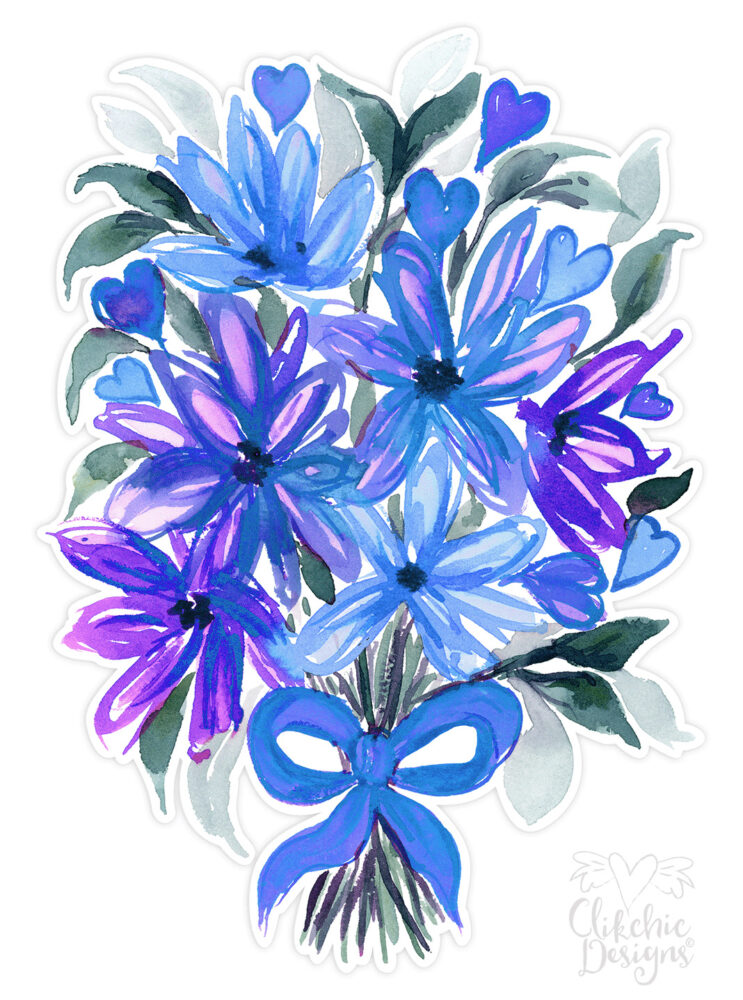
If you prefer cooler tones, this blue and purple version offers the same beautiful bouquet style with a serene, sophisticated color palette. Great for creating unique Valentine’s cards or gifts for those who love non-traditional color schemes.
A heartfelt thank you deserves a beautiful card, and this layered design delivers just that. The elegant sentiment layers create a polished, professional look that’s perfect for expressing gratitude. Whether you’re thanking a teacher, friend, or family member, this versatile design works for any occasion.
Celebrate a milestone birthday with this elegant layered sentiment! The 21st birthday is such a special occasion, and this design makes it easy to create a sophisticated card or décor piece. The layered elements add depth and visual interest that will make your project stand out.
Looking Ahead
I’m so excited to be creating again and have several more designs in the works. Thank you for your patience and continued support during my time away. Your enthusiasm for crafting and this wonderful community has been a real source of motivation for me.
I’d love to hear what you think of these new designs! Have you been working on any Valentine’s projects? What types of designs would you like to see more of? Drop a comment below and let me know.
Don’t forget to follow Clikchic Designs in the Silhouette Design Store to stay updated on all my latest releases.
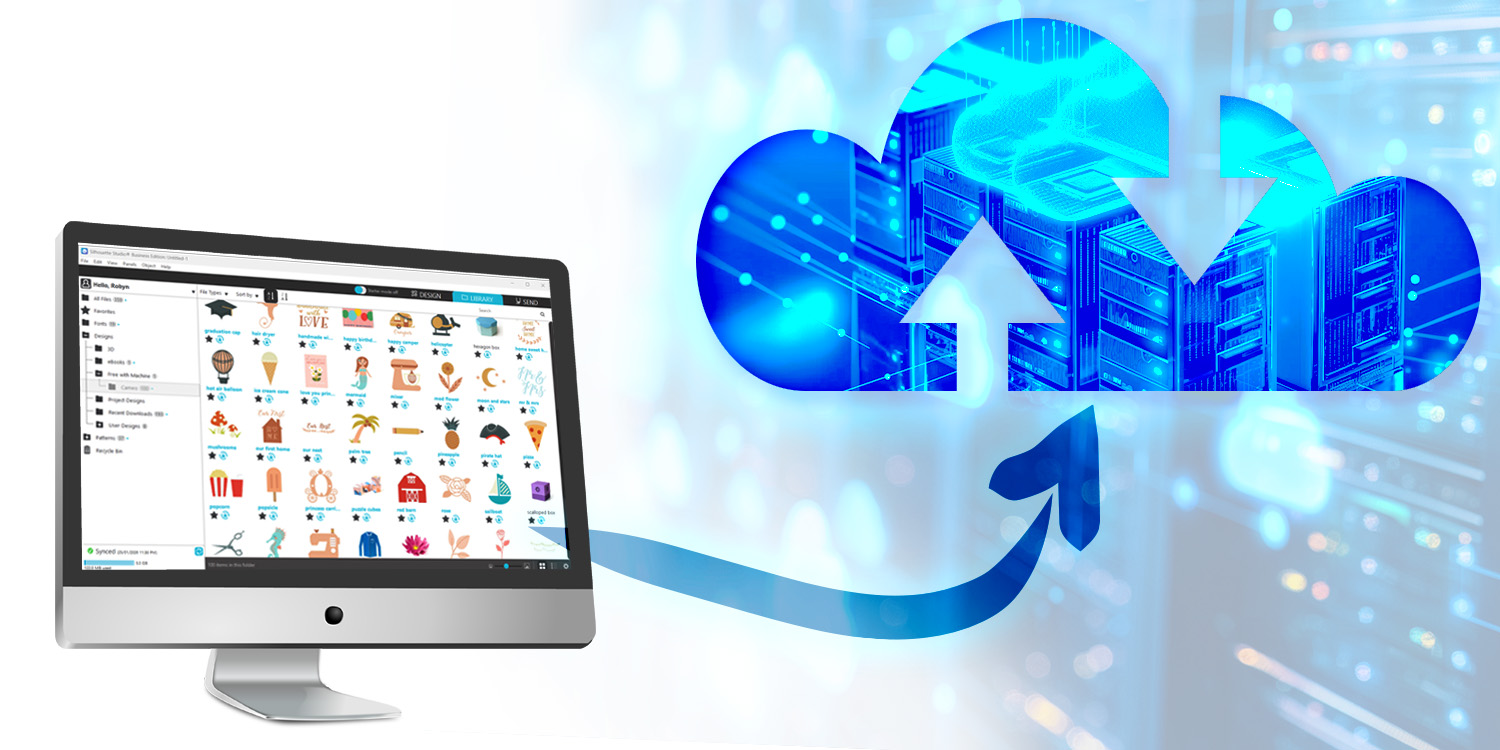
Silhouette Studio is a powerful design program used by hobby crafters, small business owners, and experienced makers alike. If you’re wondering how to save Silhouette Studio designs safely, understanding cloud storage limits is critical. Many users don’t realize that Silhouette’s cloud storage quota for user-created designs is limited—and how you save your files directly affects whether they count toward your storage limit. As Silhouette continues to evolve its platform and storage offerings, understanding how to backup Silhouette designs and optimize your workflow has never been more valuable.
Quick Answer
Silhouette Studio designs saved to your computer don’t count toward your cloud storage quota. Only designs synced to the Silhouette Library do. Free accounts get 1GB of cloud storage; Diamond subscribers and Club Silhouette members get 5GB. Design Store purchases don’t count toward your limit unless you re-import them manually.
Why Smart Storage Management Matters More Than Ever
Like many cloud-based creative platforms, Silhouette has evolved its storage infrastructure and policies over time. Recent storage adjustments and platform updates have reminded users of an important principle: the best workflow doesn’t depend on any single storage method.
Whether you’re managing quota limits, preparing for software updates, or simply want peace of mind, understanding how to balance local and cloud storage gives you full control over your creative work.
As long as these designs remain store-linked purchases in your Library, they do not use your cloud storage space. You can re-download them at any time.
Fonts Purchased from the Silhouette Design Store
Like Design Store purchases, fonts bought from the Silhouette Design Store do not count toward your cloud storage quota. Most fonts sync automatically to your Fonts folder in the Library when purchased.
Simple vs Premium Fonts:
Simple fonts (basic letters and numbers) typically install automatically when your Library syncs
Premium fonts (with extra glyphs and special characters) may need manual installation on your computer for full functionality
To manually install a font: Go to your Design Store account ? My Orders ? find your font purchase ? Download ? Install the OTF or TTF file on your computer, then restart Silhouette Studio.
Bonus: Once installed on your computer, these fonts work in other programs too (Word, Adobe, etc.), not just Silhouette Studio.
Designs That DO Count Toward Your Quota
Designs you create yourself in Silhouette Studio
SVGs, PNGs, DXFs, and other files imported from outside sources
Any file manually uploaded or re-imported into the Library
Fonts are a special exception since they need to be installed to your computer for use.
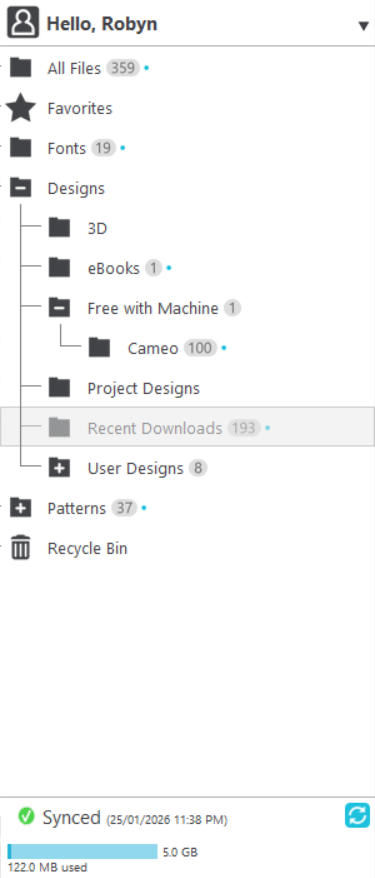
The Silhouette Library panel – your gateway to cloud storage. Notice the sync icon indicating cloud-connected designs.
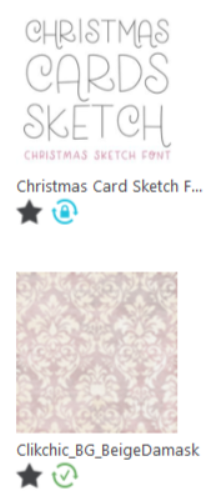
Spot the difference – Design Store purchases (top) show a padlock store icon and don’t count toward your quota. Re-imported purchases (bottom) appear as user files and DO count.
IMPORTANT: The Design Store Re-Import Trap
In general, Design Store purchases do not count toward your quota, as long as they stay store-linked.
However, if you download a Silhouette Design Store design to your computer and then manually upload or re-import it into the Library, Silhouette Studio treats it as a user-added file, not a store purchase.
Once added back into the Library this way:
The file WILL count toward your cloud storage quota
Even though you originally purchased it from the Design Store
This distinction matters for users who prefer managing files locally or rebuilding their Library structure manually.
Silhouette Studio Storage Limits By Subscription Plan (2026)
Silhouette cloud storage limits vary depending on your account and subscriptions. The following information reflects current limits at the time of writing and may be subject to change.
Free Silhouette Account
1 GB of cloud storage for user-created and imported designs
Purchased Design Store files do not count toward this limit
Sufficient for: Light users with occasional imports
Watch out if: You regularly import SVGs or save multiple design versions
Keep an eye on your storage usage indicator to avoid hitting your limit unexpectedly
Design Store Subscriptions
Silhouette Design Store subscriptions primarily provide monthly design credits and discounts.
At the time of writing:
Only the Diamond Design Store subscription includes increased cloud storage
Diamond subscribers receive 5 GB of cloud storage for user-created designs
Lower-tier subscriptions do not include additional storage beyond the free 1 GB
Ready to upgrade?Compare current Design Store subscription plans and see which storage option fits your workflow. All subscription plans include a 60 day credit rollover. After 60 days, unused credits gained through subscriptions will expire. 1 credit = $1 USD
Pro Tip: Storage allowances and benefits may change, so review your account details periodically.
Storage by plan – choose the option that matches your design workflow
Club Silhouette Membership
Members of Club Silhouette also receive 5 GB of cloud storage for user-created designs at the time of writing and subscribers receive machine supplies. Club Silhouette is available in the USA but may not be available in other countries.
Important:Club Silhouette is a separate membership from Silhouette Design Store subscriptions which are only for Silhouette Design Store Designs. As with all Silhouette plans, storage limits and benefits are subject to change, so independent backups are still essential.
Managing Your Cloud Storage Quota
When your Library reaches its storage quota, you may encounter errors when trying to:
Sync new designs
Upload additional files to the Library
Your existing designs are not immediately deleted, but syncing may stop until space is freed or storage is increased. Purchased Design Store files remain available regardless of storage limits.
How To Backup Silhouette Studio Designs: Building a Resilient Workflow
Silhouette’s cloud Library is a convenient syncing tool that works beautifully when you need multi-device access. But like any cloud service, it’s designed for synchronization, not long-term archival storage.
Storage policies can change, quotas may be adjusted, and platforms evolve—that’s true across the entire software industry. The solution isn’t to avoid cloud storage; it’s to build a workflow where you’re never dependent on just one storage method. This gives you flexibility, control, and confidence no matter what changes come.
Best Practice: Always Maintain Your Own Backups
Export user-created designs regularly and save copies to:
Your computer (organized folder structure)
An external hard drive
A personal cloud service (Google Drive, Dropbox, OneDrive)
Pro Tip: Set a recurring calendar reminder (monthly or quarterly) to export and backup your designs. It takes 10 minutes and could save hours of lost work.
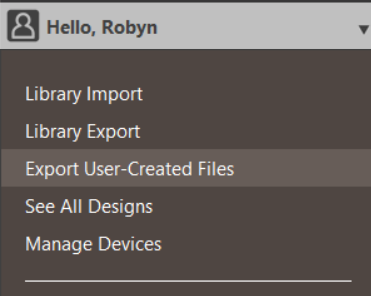
Exporting your designs is simple – Library Tab > Hello, YourName > Export User-Created Designs. Make this a regular habit.
Building a Confident, Flexible Workflow
The most successful Silhouette users don’t worry about storage changes or platform updates—because they’ve built workflows that give them complete control:
Your Computer = Your Foundation
Save all projects locally as your primary copy
You control organization, access, and backups
Work offline anytime, no internet required
Cloud Library = Your Convenience Layer
Sync only what you need across devices
Great for designs you’re actively using
Keeps your most-used files accessible anywhere
Personal Backups = Your Safety Net
Regular exports to external drives or personal cloud services
Protects against computer failures, accidental deletions, or any unexpected changes
Result: You’re never caught off guard by storage adjustments, platform updates, or quota changes. Your work is secure, accessible, and completely under your control.
Pro Tip: Many experienced Silhouette users have shifted to a local-first workflow and report better results: faster design work offline, no storage limit concerns, and the ability to work even with unreliable internet. Cloud syncing becomes an optional convenience rather than a necessity, which is exactly how it should work.
Workflow Tips For Managing Designs Without Storage Stress
Follow these practical strategies to keep your design workflow smooth:
1. Design and save locally first Create your projects and save them to your computer. Only sync to the Library when you need cross-device access.
2. Sync only what you need across multiple devices Not every design needs to be in the cloud. Be selective about what you upload to the Library.
3. Periodically review Library storage usage Check your usage indicator monthly and clean out designs you no longer need synced.
4. Remove unnecessary synced files Delete or move designs from the Library back to local storage when you’re done with a project.
A well-organized local file system is your first line of defense against storage issues
Quick Checklist: Protecting Your Silhouette Studio Designs
Before saving or syncing designs to your Library, ask yourself:
? Is this a Design Store purchase or a user-created/imported file?
? Do I need this design available on multiple devices?
? Have I saved a local copy outside Silhouette Studio?
? Am I close to my cloud storage quota?
? Have I recently exported and backed up my user-created designs?
If you can’t confidently check all five, it’s time to review your storage and backup workflow.
Choosing The Right Subscription For Your Workflow
If you regularly create, import, or modify designs, additional cloud storage can be helpful, but it should support your workflow, not replace proper backups.
For users who rely heavily on Silhouette Studio, reviewing current Design Store subscription options may help determine whether added storage fits your needs:
Design Store purchases are quota-free (unless re-imported manually)
Always maintain your own backups outside Silhouette’s cloud
Export user-created designs regularly to external storage
Be selective about cloud syncing—not everything needs to be in the Library
Frequently Asked Questions
Do Silhouette Design Store purchases count toward my storage limit?
No, as long as they remain store-linked purchases in your Library. However, if you download them and manually re-import them, they will count as user files.
How much cloud storage do I get with a free Silhouette account?
Free accounts receive 1GB of cloud storage for user-created and imported designs.
What happens when I reach my Silhouette cloud storage limit?
You won’t be able to sync new designs until you free up space or upgrade your storage. Existing designs remain accessible.
How do I backup my Silhouette Studio designs?
Go to File > Library > Export User-Created Designs and save to your computer, external drive, or personal cloud service.
Does Club Silhouette include extra cloud storage?
Yes, Club Silhouette members receive 5GB of cloud storage at the time of writing (January 2026).
Can I use both local storage and cloud storage?
Absolutely! Most experienced users save locally as their primary method and sync only select designs to the cloud for multi-device access.
Final Thoughts
Your designs represent time, creativity, and often income. Understanding how Silhouette Studio’s storage works—and building a workflow that puts you in control—means you can create with confidence.
By saving locally first, backing up regularly, and using cloud storage strategically, you’re no longer dependent on any single storage method. Quota changes don’t stress you. Platform updates don’t disrupt you. You have the flexibility to adapt to any evolution in the software while keeping your creative work safe and accessible.
That’s the kind of workflow that lets you focus on what matters: making amazing designs.
Found this helpful? Share it with your Silhouette crafting community or save it for future reference when setting up your backup workflow.
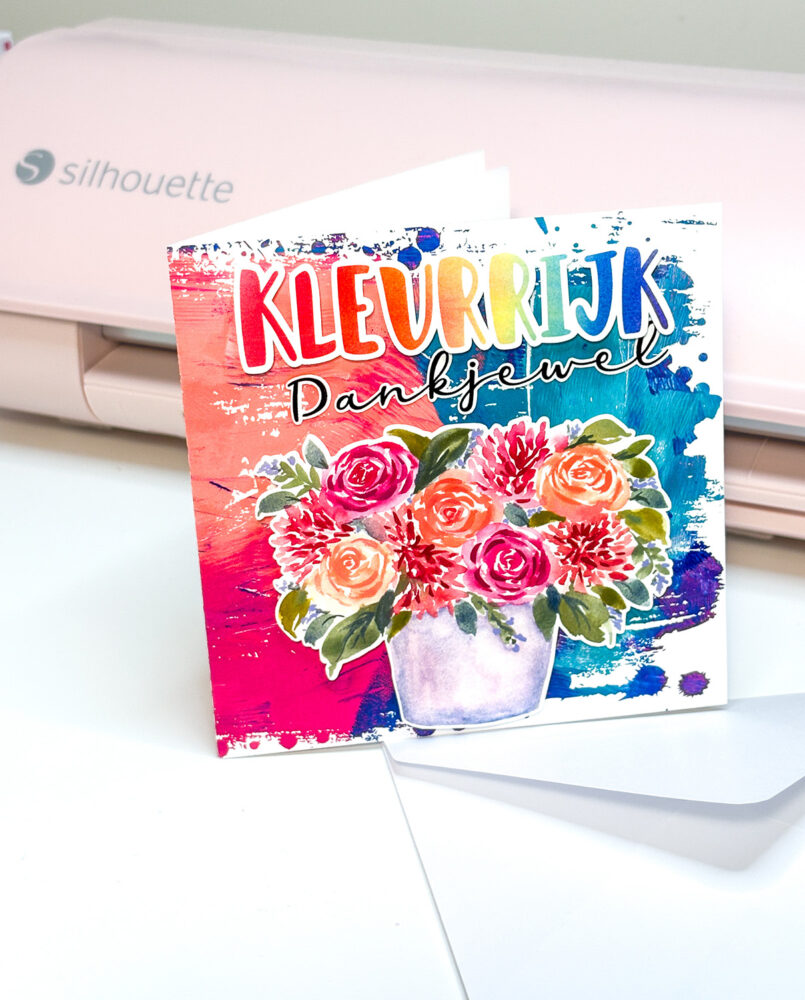
Creating your own handmade Thank You cards is a wonderful way to share appreciation in a personal and creative way. With digital crafting, it’s easier than ever to design professional-looking cards for a friend or family member using beautiful watercolor backgrounds, floral illustrations, and stylish sentiments. In this tutorial, I’ll show you how to make a unique Thank You card using my designs from the Clikchic Designs Silhouette Store. This project combines a textured grunge-style base, vibrant watercolor florals, and a soft rainbow ombre sentiment to create a heartfelt card perfect for any occasion.
For a quick look at how the project comes together, you can watch the short tutorial video below :at the end of this article. Scroll on to find out what you need.
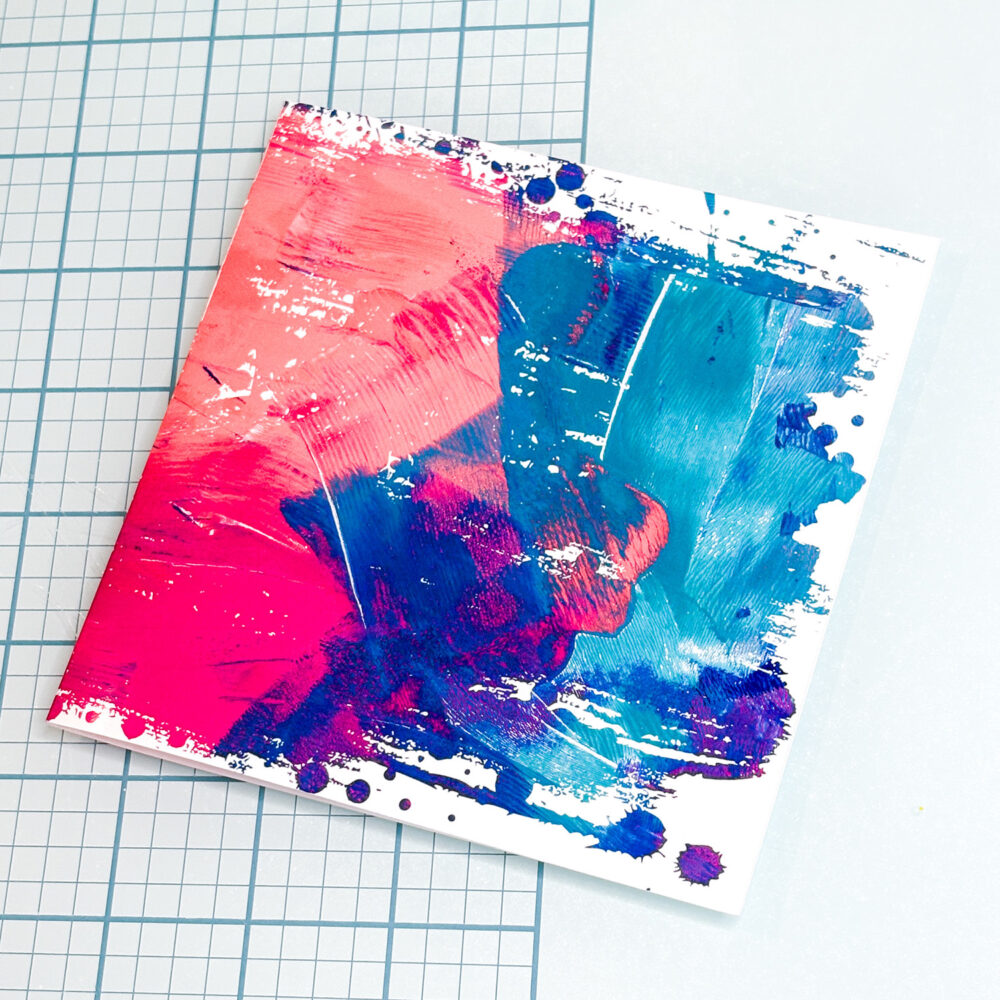
Open the Dotted Mess Urban Grunge Clipping Mask and size to suit your card base. Drag the Fuschia Peach Teal Blue Abstract Grunge Background in Silhouette Studio® to the Dotted Mess Urban Grunge Clipping Mask, hover patiently till the shape fills with the design and then release your mouse. (see this tutorial for more info on this process) Resize it to fit your card base (perfect for a 5×5” folded card). Place the over the background and use it to create a distressed edge effect. Create a rectangle to use as a card base surrounding the grungy framed image and add a score line or snag this freebie to use for this over and over for your square cards. Print and cut this layer on photo paper for a polished finish. (make sure the cut lines on the grungy outline are turned off)
Step 2: Add the Floral Feature
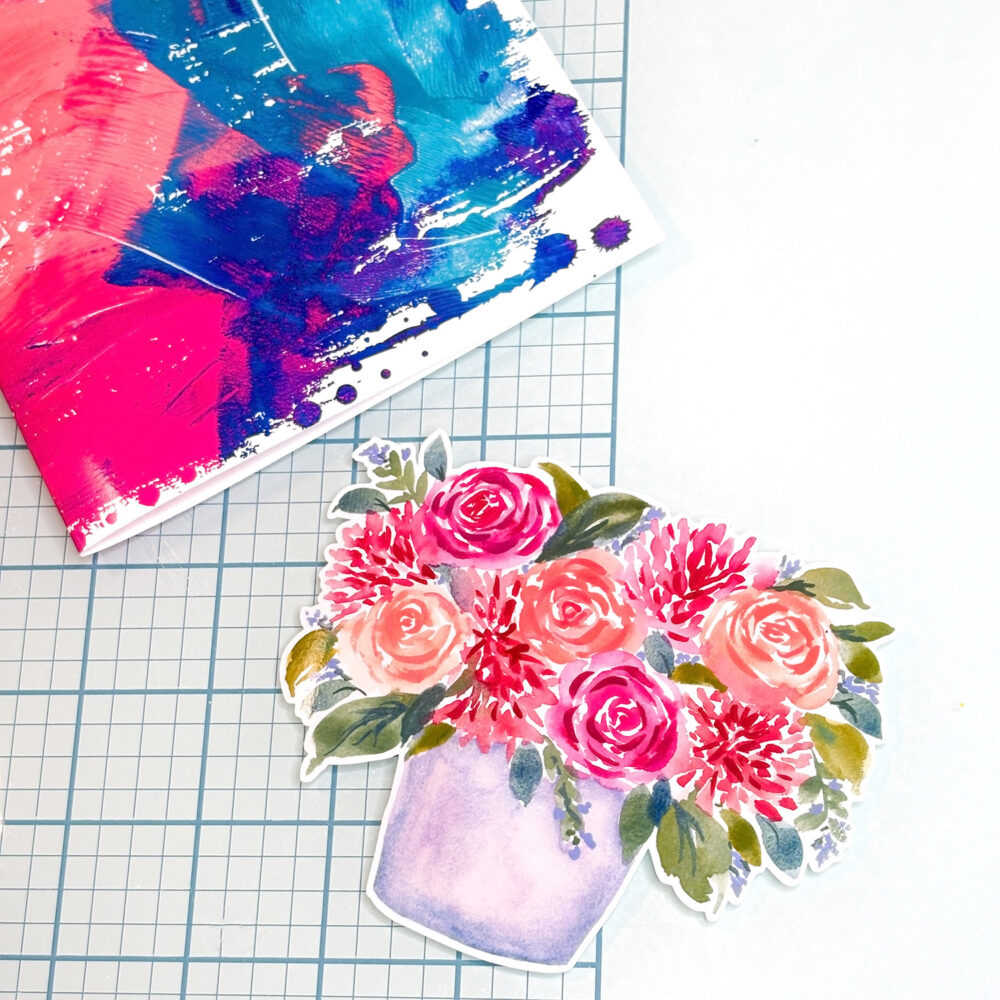
Bring in the Pink Peach Watercolor Roses & Dahlias Flowers in Pot Print & Cut design. Print and cut the floral piece, then attach it to the centre of your card front using foam tape or adhesive for added depth. The delicate watercolor roses and dahlias create a vibrant, eye-catching focal point.
Step 3: Design the Sentiment
Use the Rainbow Ombre Watercolor Gradient Background to craft your “Colourful Thank You” sentiment. Type your message in Silhouette Studio®, fill the letters for “colourful” (Kleurrijk) with the gradient background. Add an offset to the Colourful and thank you that suits you and cut them out using your cutting machine. Position the sentiment above the floral arrangement on the card base using your chosen glue method to complete your design with a cheerful burst of colour. I used foam squares for the flowers and “Colourful” (Kleurrijk) and a glue pen for the “Thank You” (Dankjewel) which is a script font with an offset.
Step 4: Assemble and Finish
Layer your pieces onto the grunge background base. Adjust until balanced, then secure with foam squares or preferred method. The combination of abstract watercolor textures, painterly florals, and a rainbow gradient greeting makes this card a joyful way to show your appreciation.
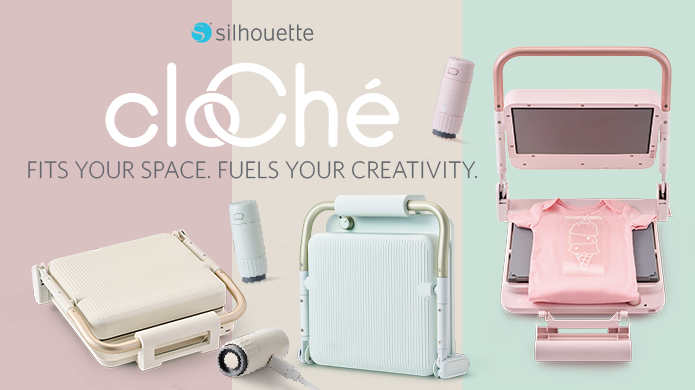
Why the Silhouette cloChé is Turning Heads in the Crafting World
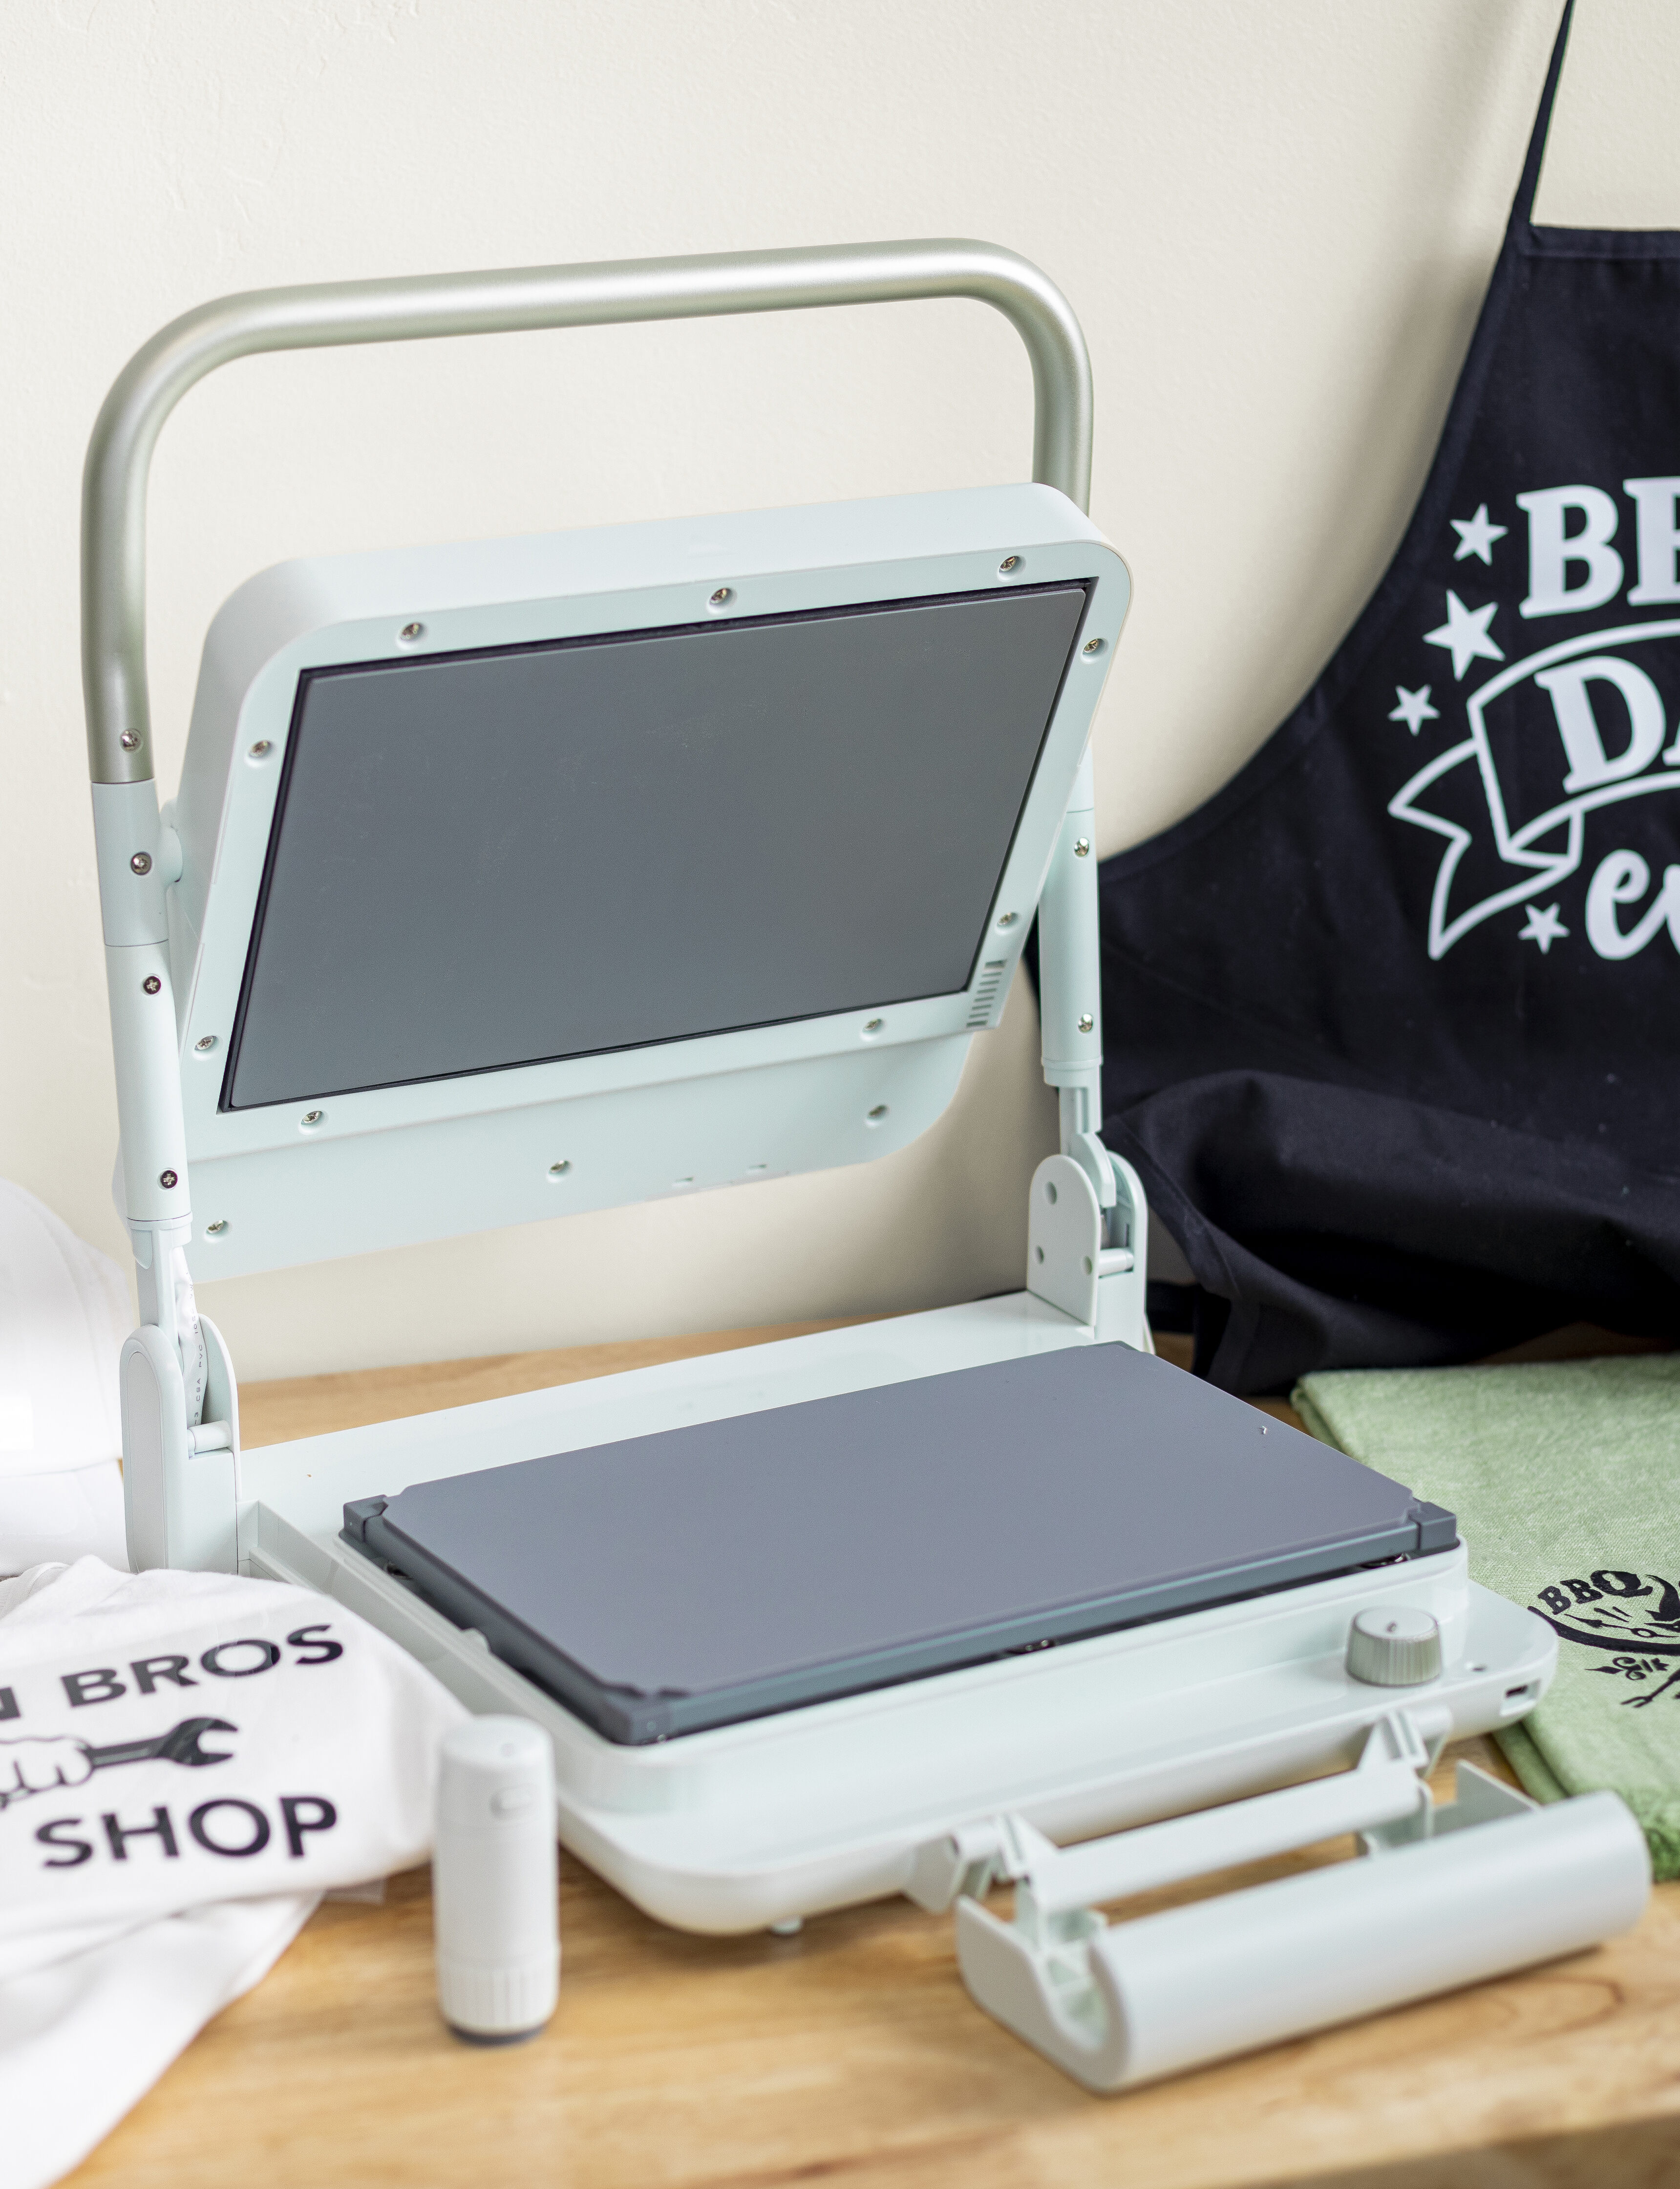
The Silhouette cloChé heat press isn’t just another crafting tool—it’s a game changer for anyone who wants professional-quality heat transfer results without sacrificing style or space. With its sleek, compact design and clever folding mechanism, this heat press fits beautifully into a home studio or even a small crafting nook. But don’t let its size fool you—under the hood, it’s packed with the same power and precision you’d expect from a full-size press.
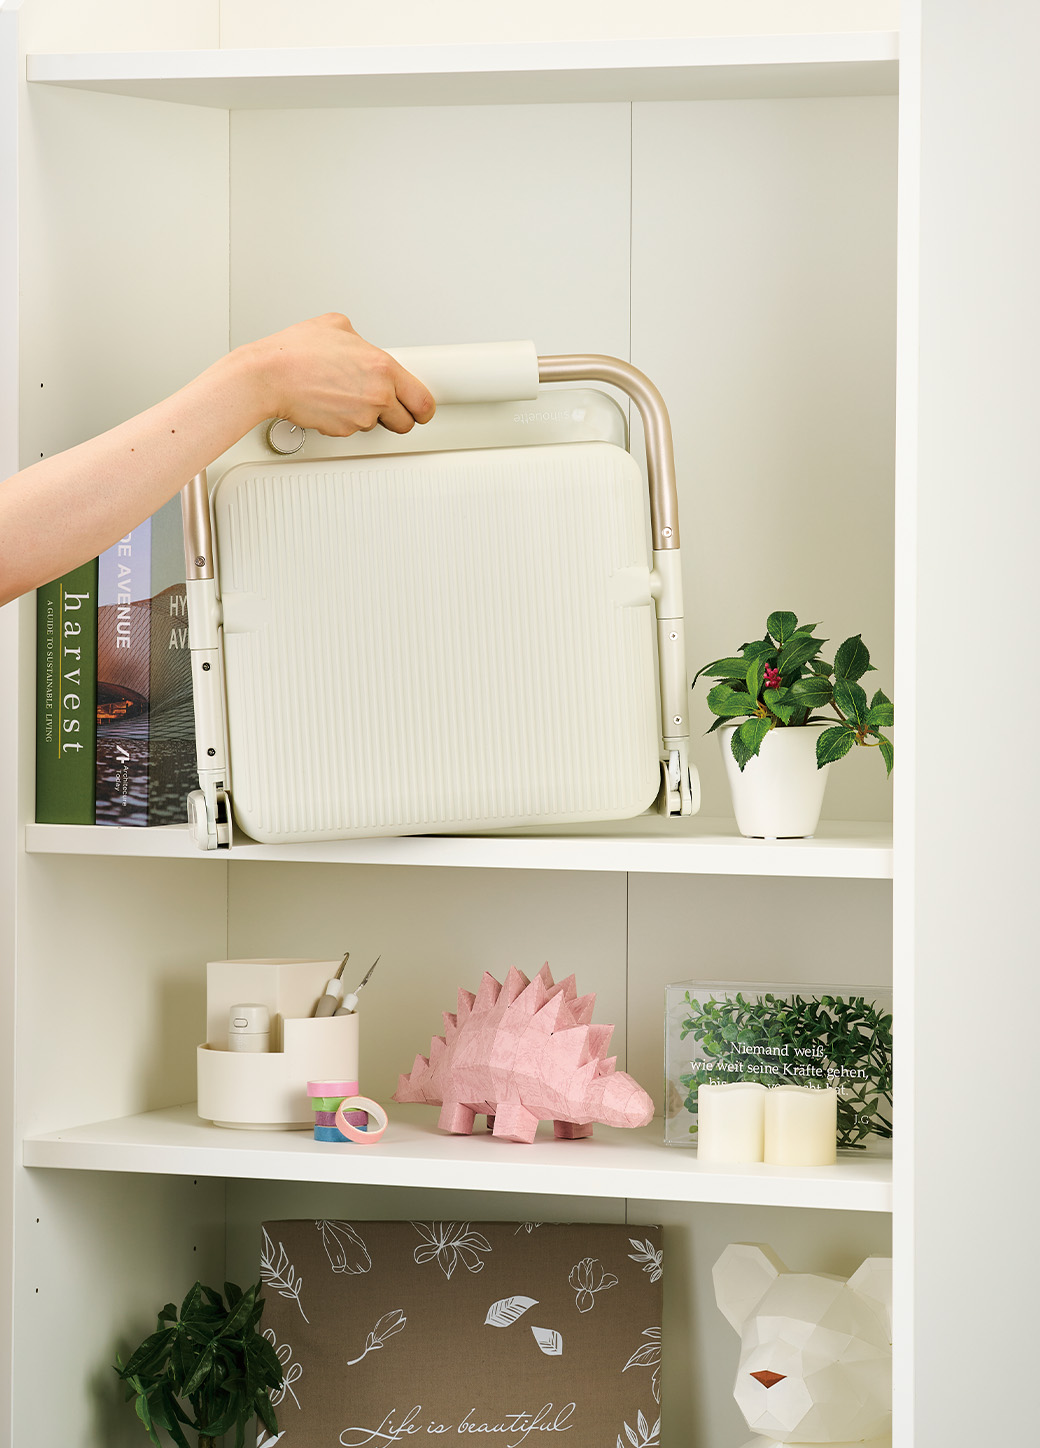
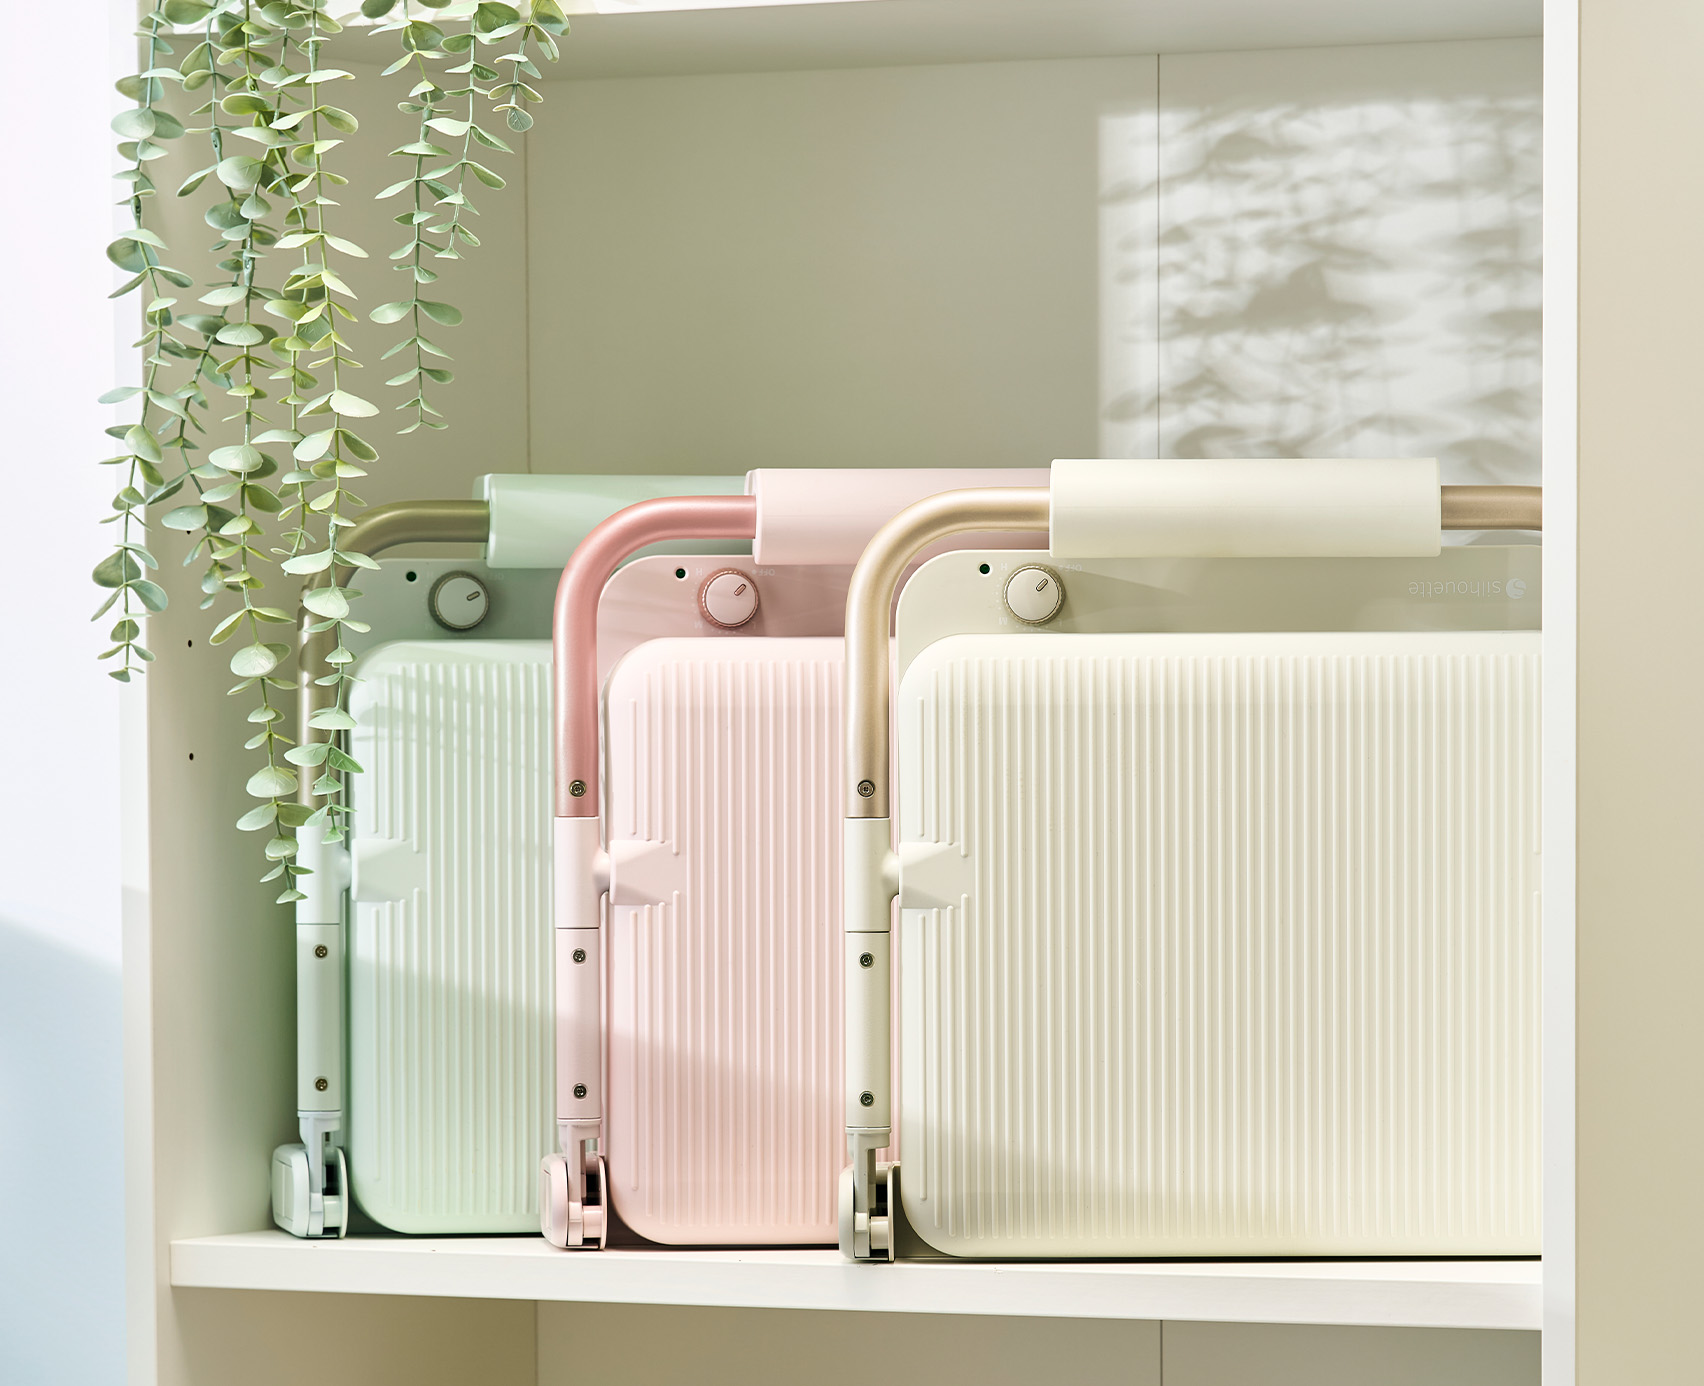
One of the standout features of the cloChé is its space-saving footprint. Measuring approximately 13.8” × 13.3” × 4.2” when folded, it slips neatly onto a shelf or into a cupboard. At just 11 lbs, it’s lightweight enough to move around, making it perfect for portable craft setups or small studios.
The soft pastel tones and clean lines give it a look that blends beautifully into any creative space—no industrial bulk here, just chic functionality.
Heating Technology for Perfect Presses Every Time
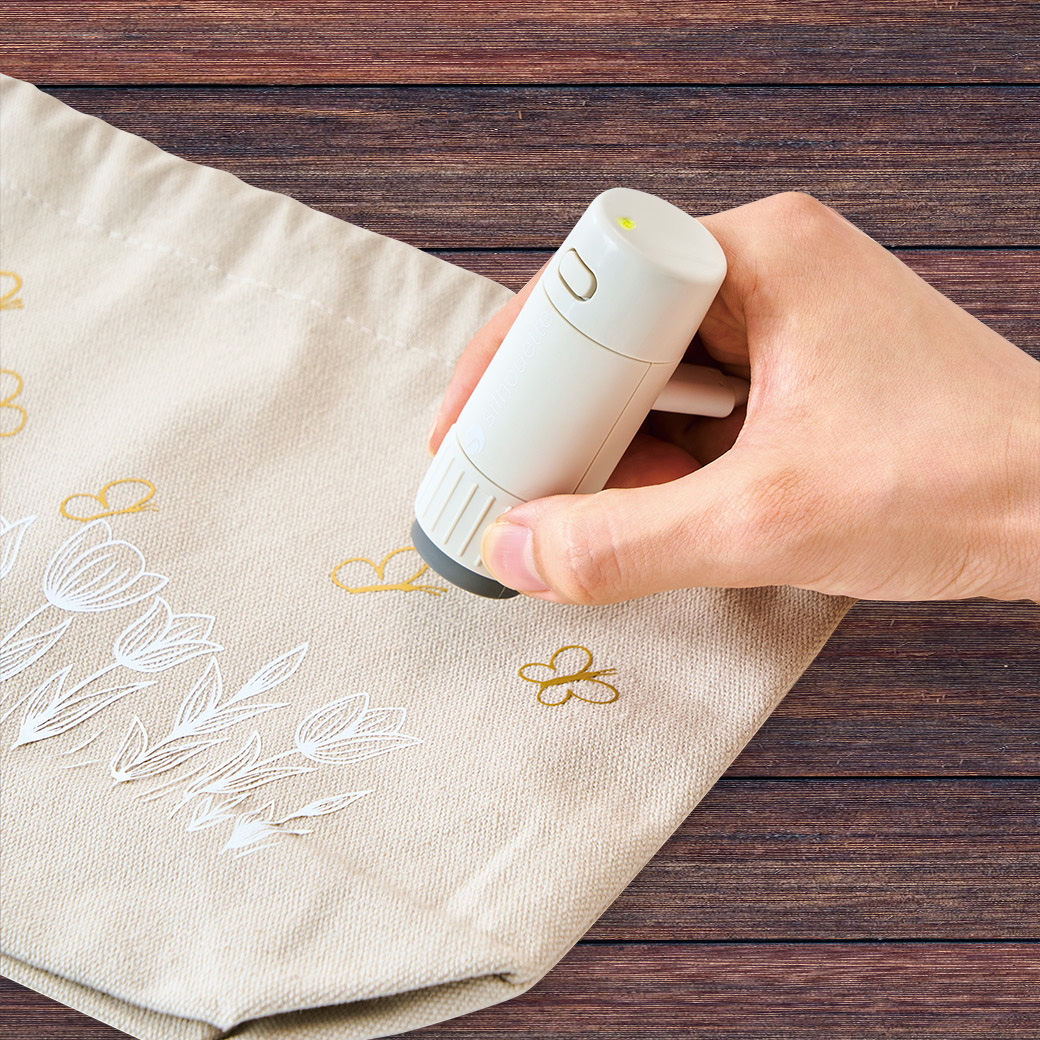
The cloChé features a 6” × 10” heating platen that provides consistent, even heat across your project surface.
This is key for flawless results—whether you’re pressing vinyl onto a t-shirt, adding designs to a tote bag, or creating heat-applied embellishments.
Heating Technology for Perfect Presses Every Time
The cloChé features a 6” × 10” heating platen that provides consistent, even heat across your project surface. This is key for flawless results—whether you’re pressing vinyl onto a t-shirt, adding designs to a tote bag, or creating heat-applied embellishments.
You can choose from three heat settings—Low (248 °F / 120 °C), Medium (320 °F / 160 °C), and High (392 °F / 200 °C)—with the option to fine-tune in between for precise control. This flexibility allows you to work with a variety of materials, from delicate fabrics to durable canvas.
User-Friendly Controls for Hassle-Free Crafting
No complex digital panels or intimidating menus—just a simple, intuitive dial to set your temperature. This makes the cloChé especially welcoming for beginners while still offering enough precision for experienced crafters.
Once set, the heat press warms up quickly, letting you dive into your projects without long wait times.
Safety Features You Can Rely On
Silhouette has built smart safety features into the cloChé to give you peace of mind. After approximately 45 seconds of pressing, an audible alarm will sound to remind you to check your project. If the alarm is ignored, the machine will automatically power down after two minutes. Additionally, if you leave the machine idle for 15 minutes, it will switch off completely.
These safeguards not only protect your materials but also help prevent accidents in busy crafting environments.
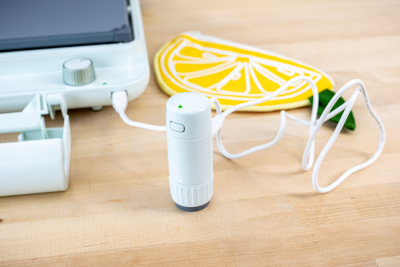
The cloChé Petite Accessory for Precision Pressing
Included with the cloChé is the adorable yet powerful cloChé Petite, a miniature heat press designed for small or awkward surfaces like hats, shoes, or curved areas. Its compact size makes it perfect for applying designs to tricky spots without over-pressing surrounding material.
The Petite stores neatly on the main unit, so you won’t lose track of it, and it’s ready to go whenever your project calls for fine detail work.
Practical Applications for Crafters
The cloChé isn’t limited to t-shirts (though it does an excellent job with them).
Here are just a few ways you can put it to work:
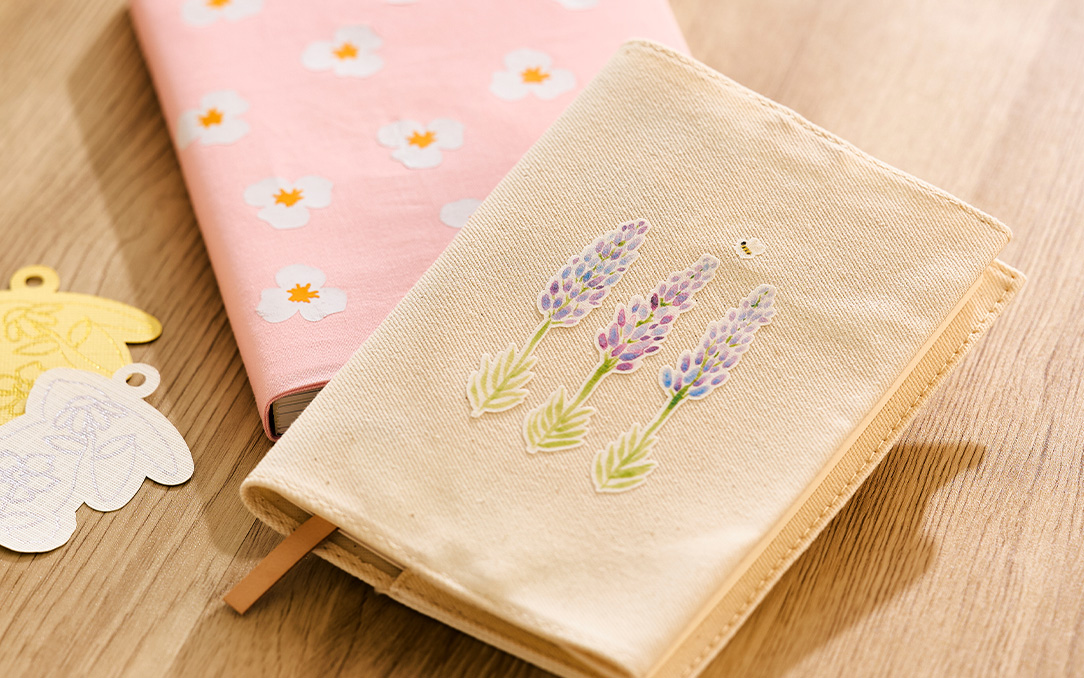
Custom tote bags for markets or gifts
Personalised tea towels or aprons
Heat transfer vinyl on felt projects
Monogrammed pillow covers
Small runs of merchandise for craft fairs
Its portability makes it a great option for live events or crafting demonstrations where you want to press on the spot.
How It Compares to Other Heat Presses
While larger swing-arm or clamshell presses might offer more pressing area, they often take up significant space and can be heavy to move. The cloChé delivers an excellent balance—small enough for home use, but powerful enough to handle a wide range of projects.
Compared to mini handheld presses, the cloChé offers more consistent pressure and a stable working surface, giving you more professional results.
Pro Tips for Getting the Most Out of Your cloChé
Pre-press your fabric to remove moisture and wrinkles for better adhesion.
Use a pressing cloth to protect delicate fabrics.
Test on scrap material when working with a new vinyl or fabric type.
Keep it clean—wipe the platen after use to avoid residue buildup.
Frequently Asked Questions
Is the cloChé suitable for beginners?
Yes! The simple dial and safety features make it easy for anyone to start using right away.
What materials can I use with it?
It’s compatible with heat transfer vinyl, sublimation transfers, and certain fabric paints or adhesives.
Can I use it for mugs or ceramic items?
No, it’s designed for flat or slightly curved fabric surfaces.
Is the cloChé Petite sold separately?
Currently, it comes included with the main cloChé unit.
Final Thoughts: A Beautiful Blend of Form and Function
The Silhouette cloChé heat press is an elegant solution for crafters who want professional heat transfer capability in a stylish, compact package. With its thoughtful safety features, intuitive controls, and versatile accessory, it’s a worthy addition to any creative workspace.
If you’re looking to upgrade your crafting tools or start exploring heat transfer projects, the cloChé offers an excellent mix of performance, portability, and design appeal.
Affiliate Disclosure: This post contains affiliate links. If you purchase through the links on this page, I may earn a small commission at no extra cost to you. I only share products I genuinely love for crafting.
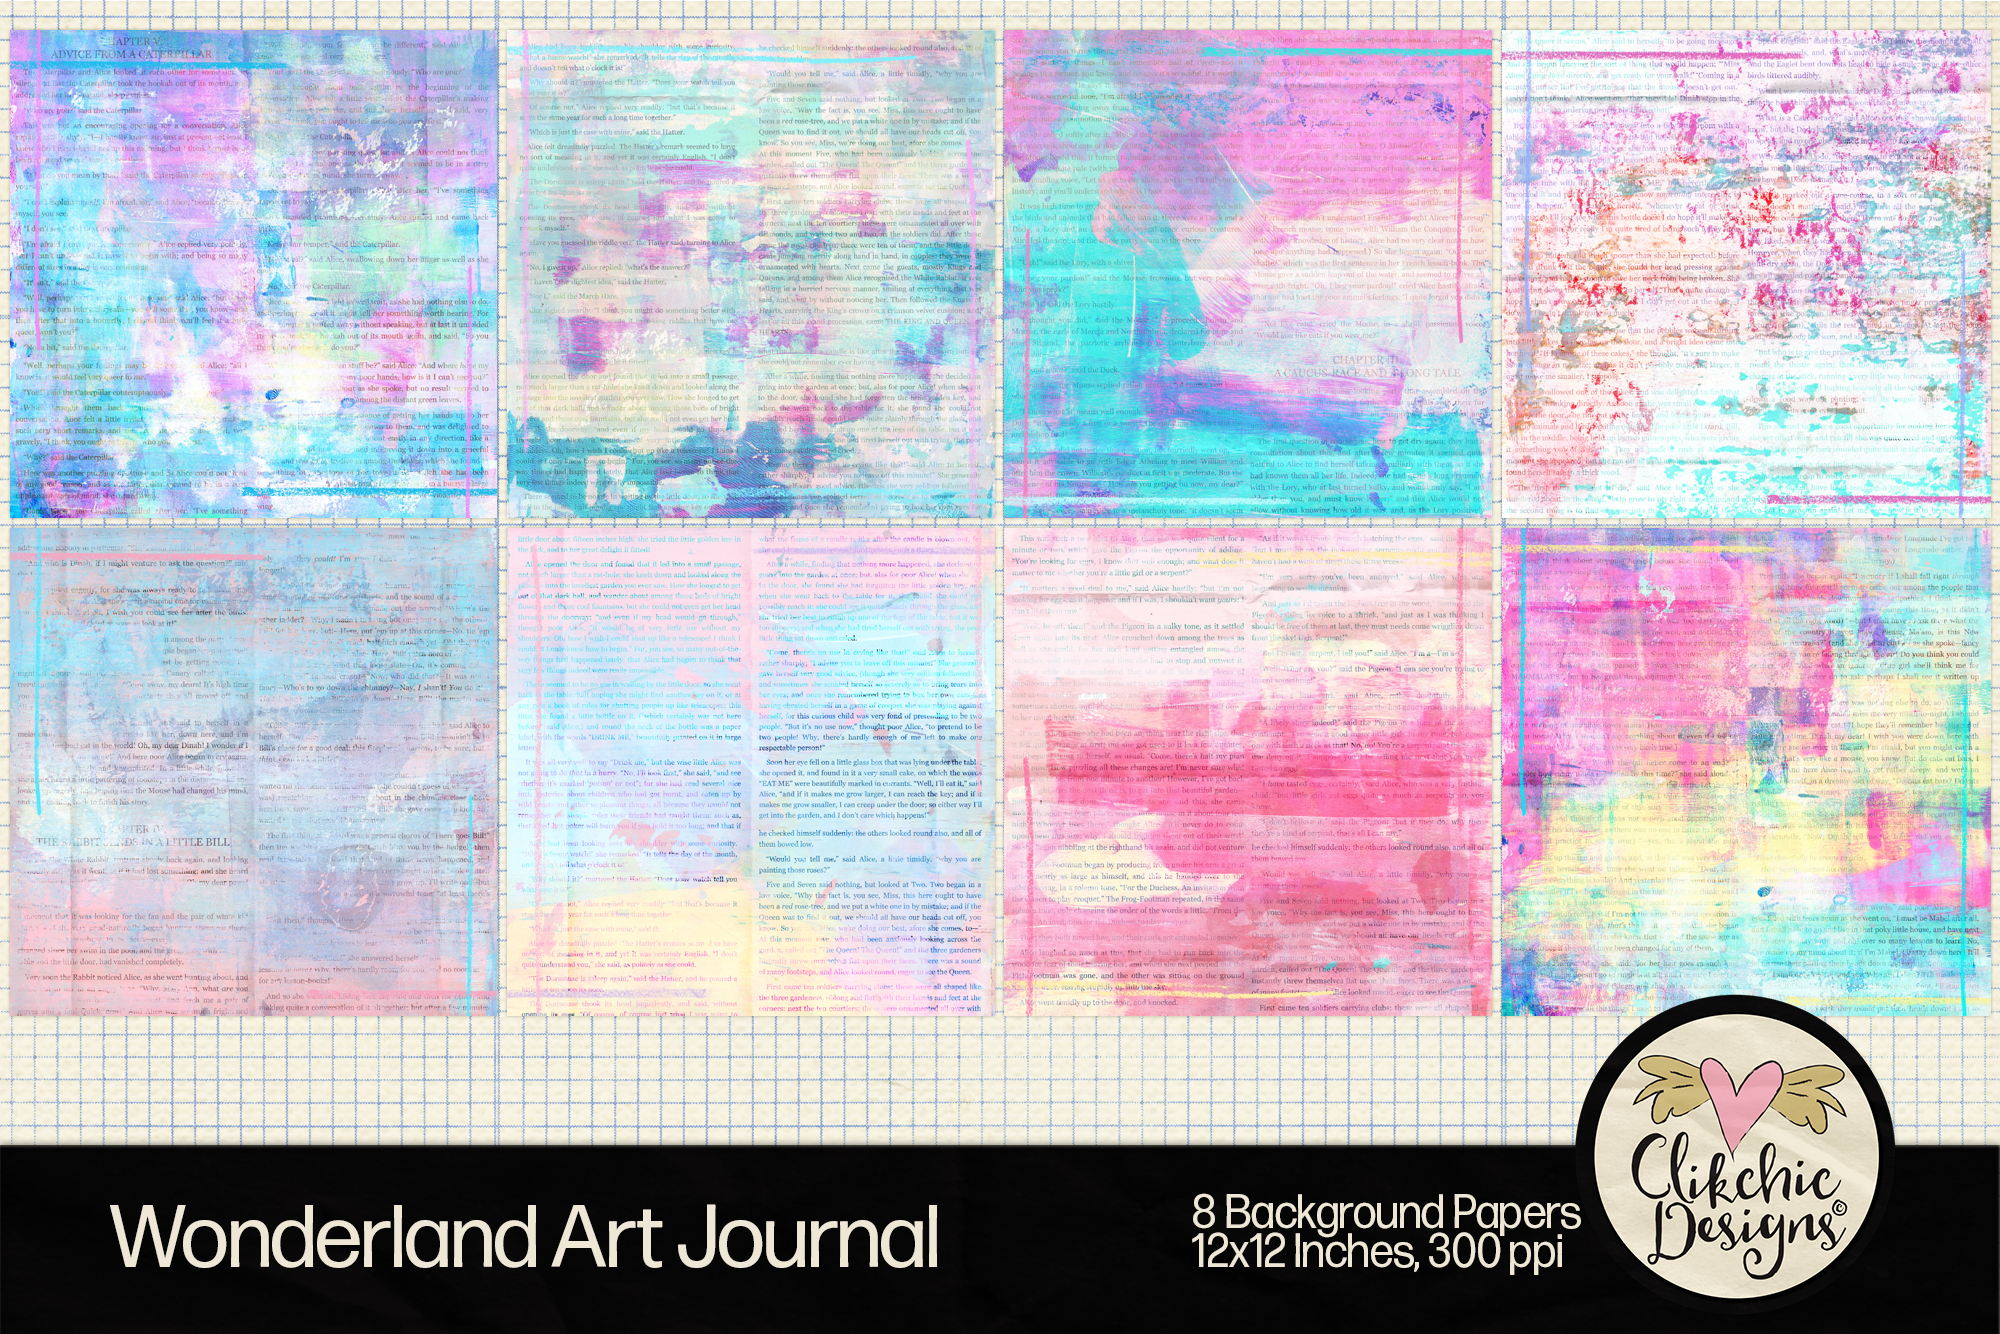
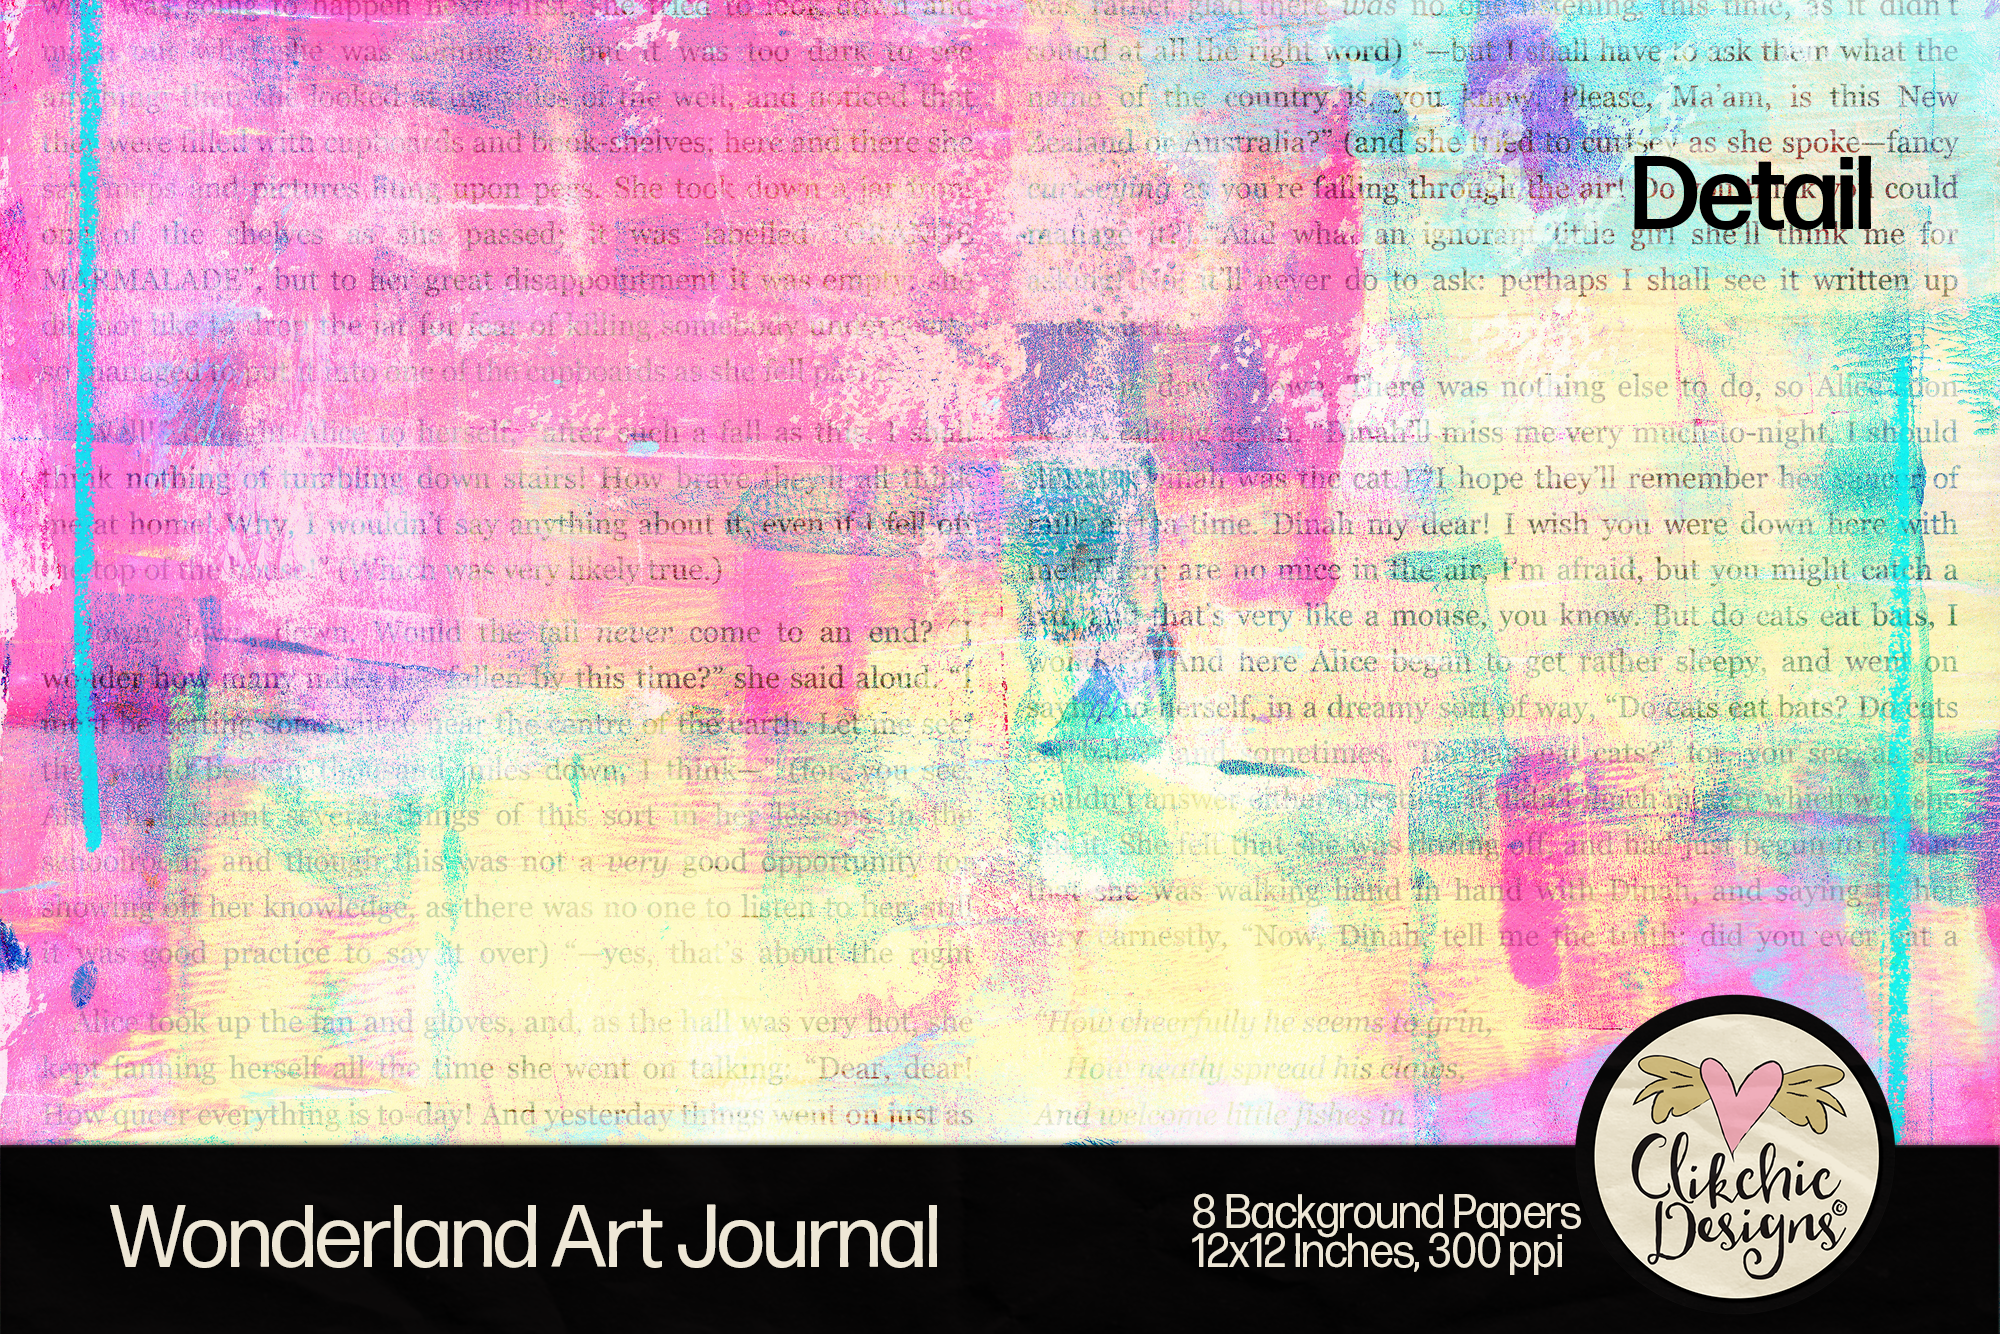
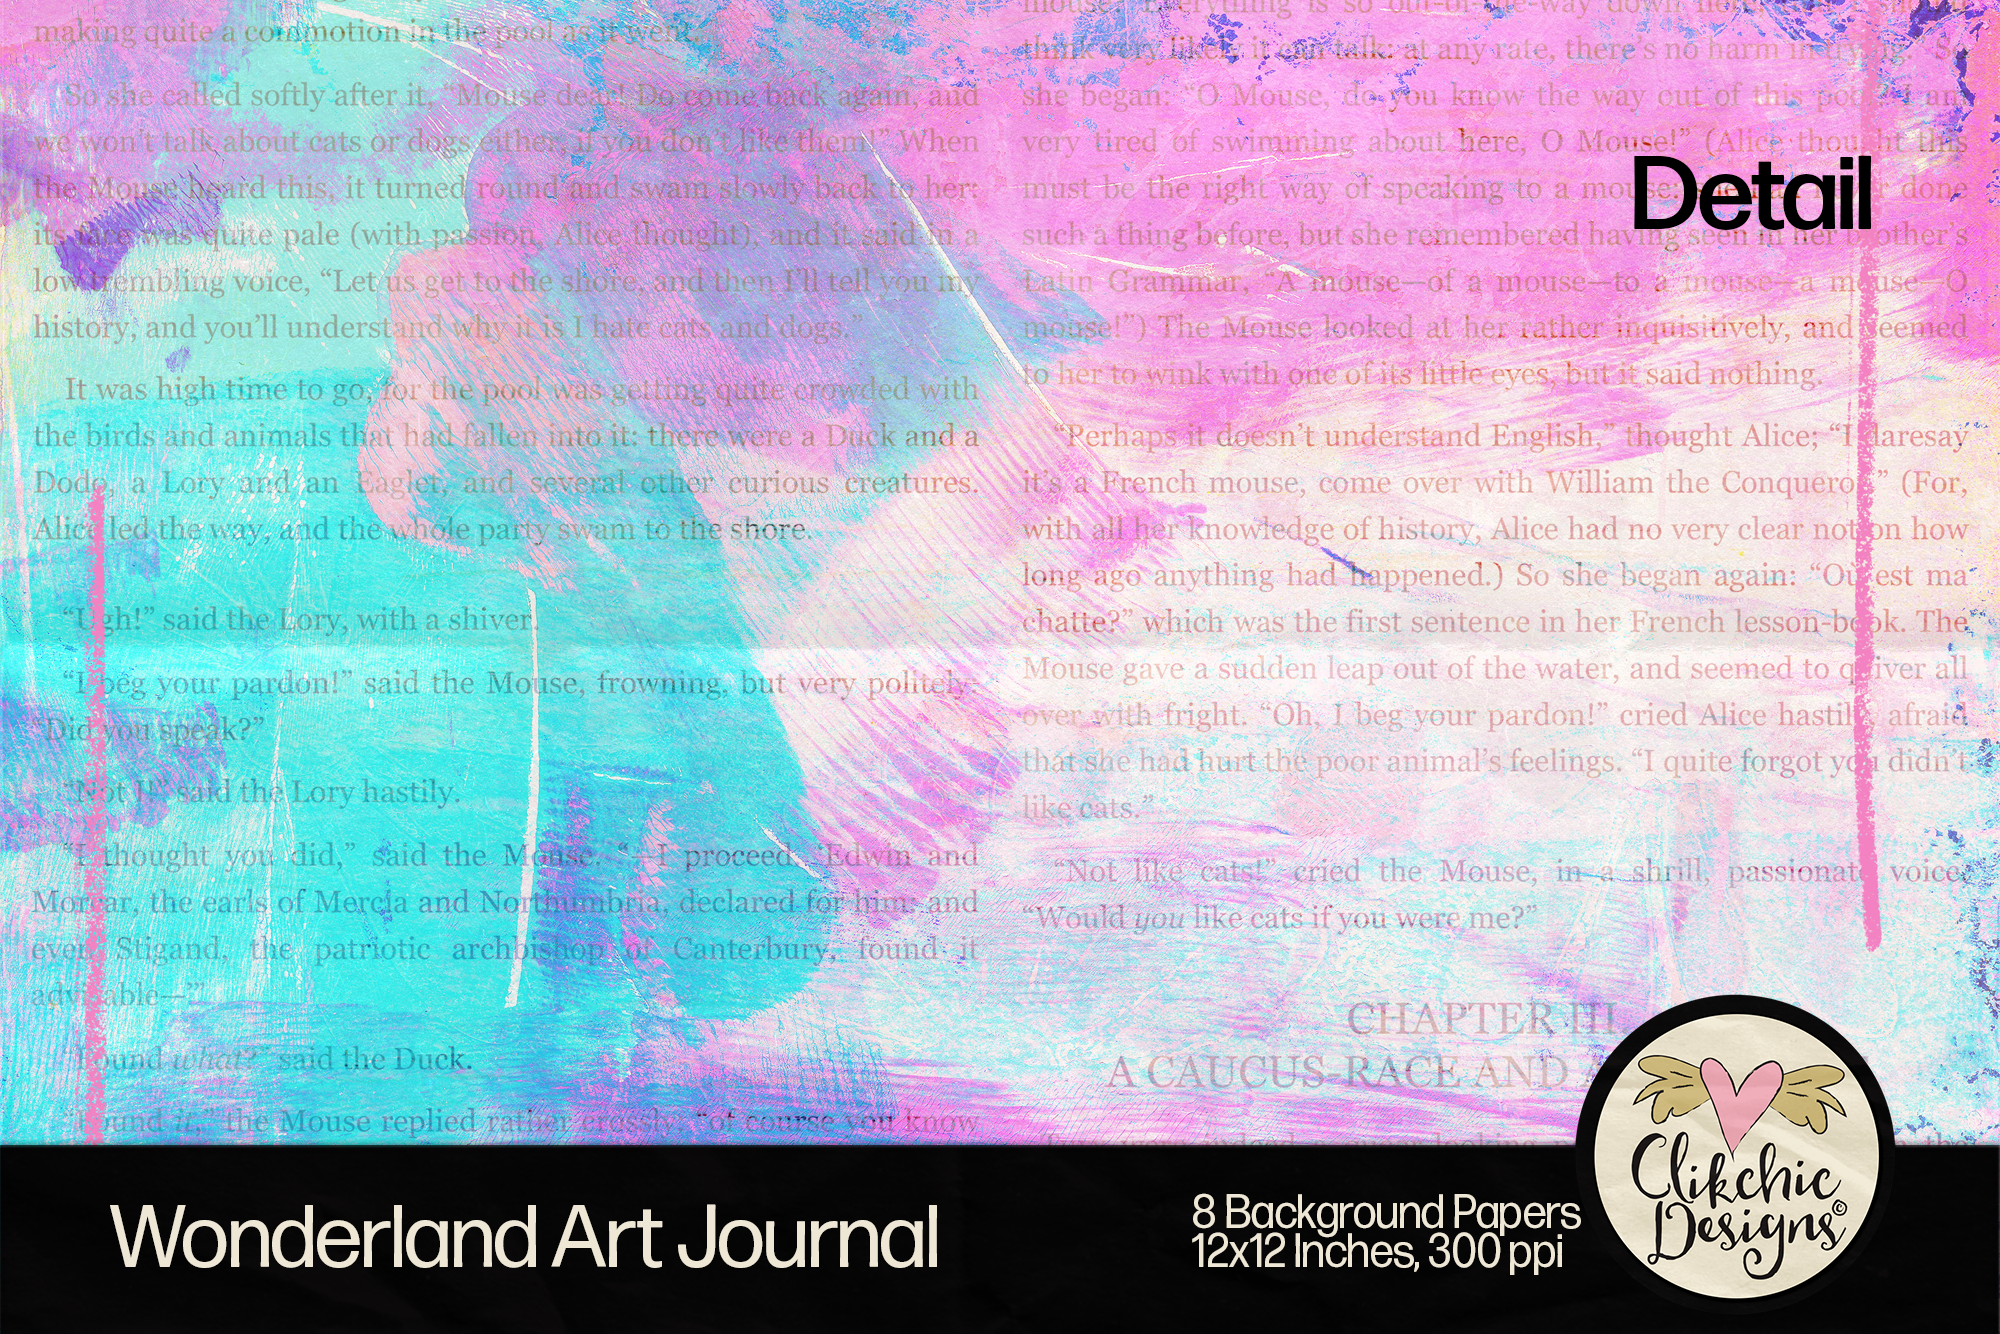
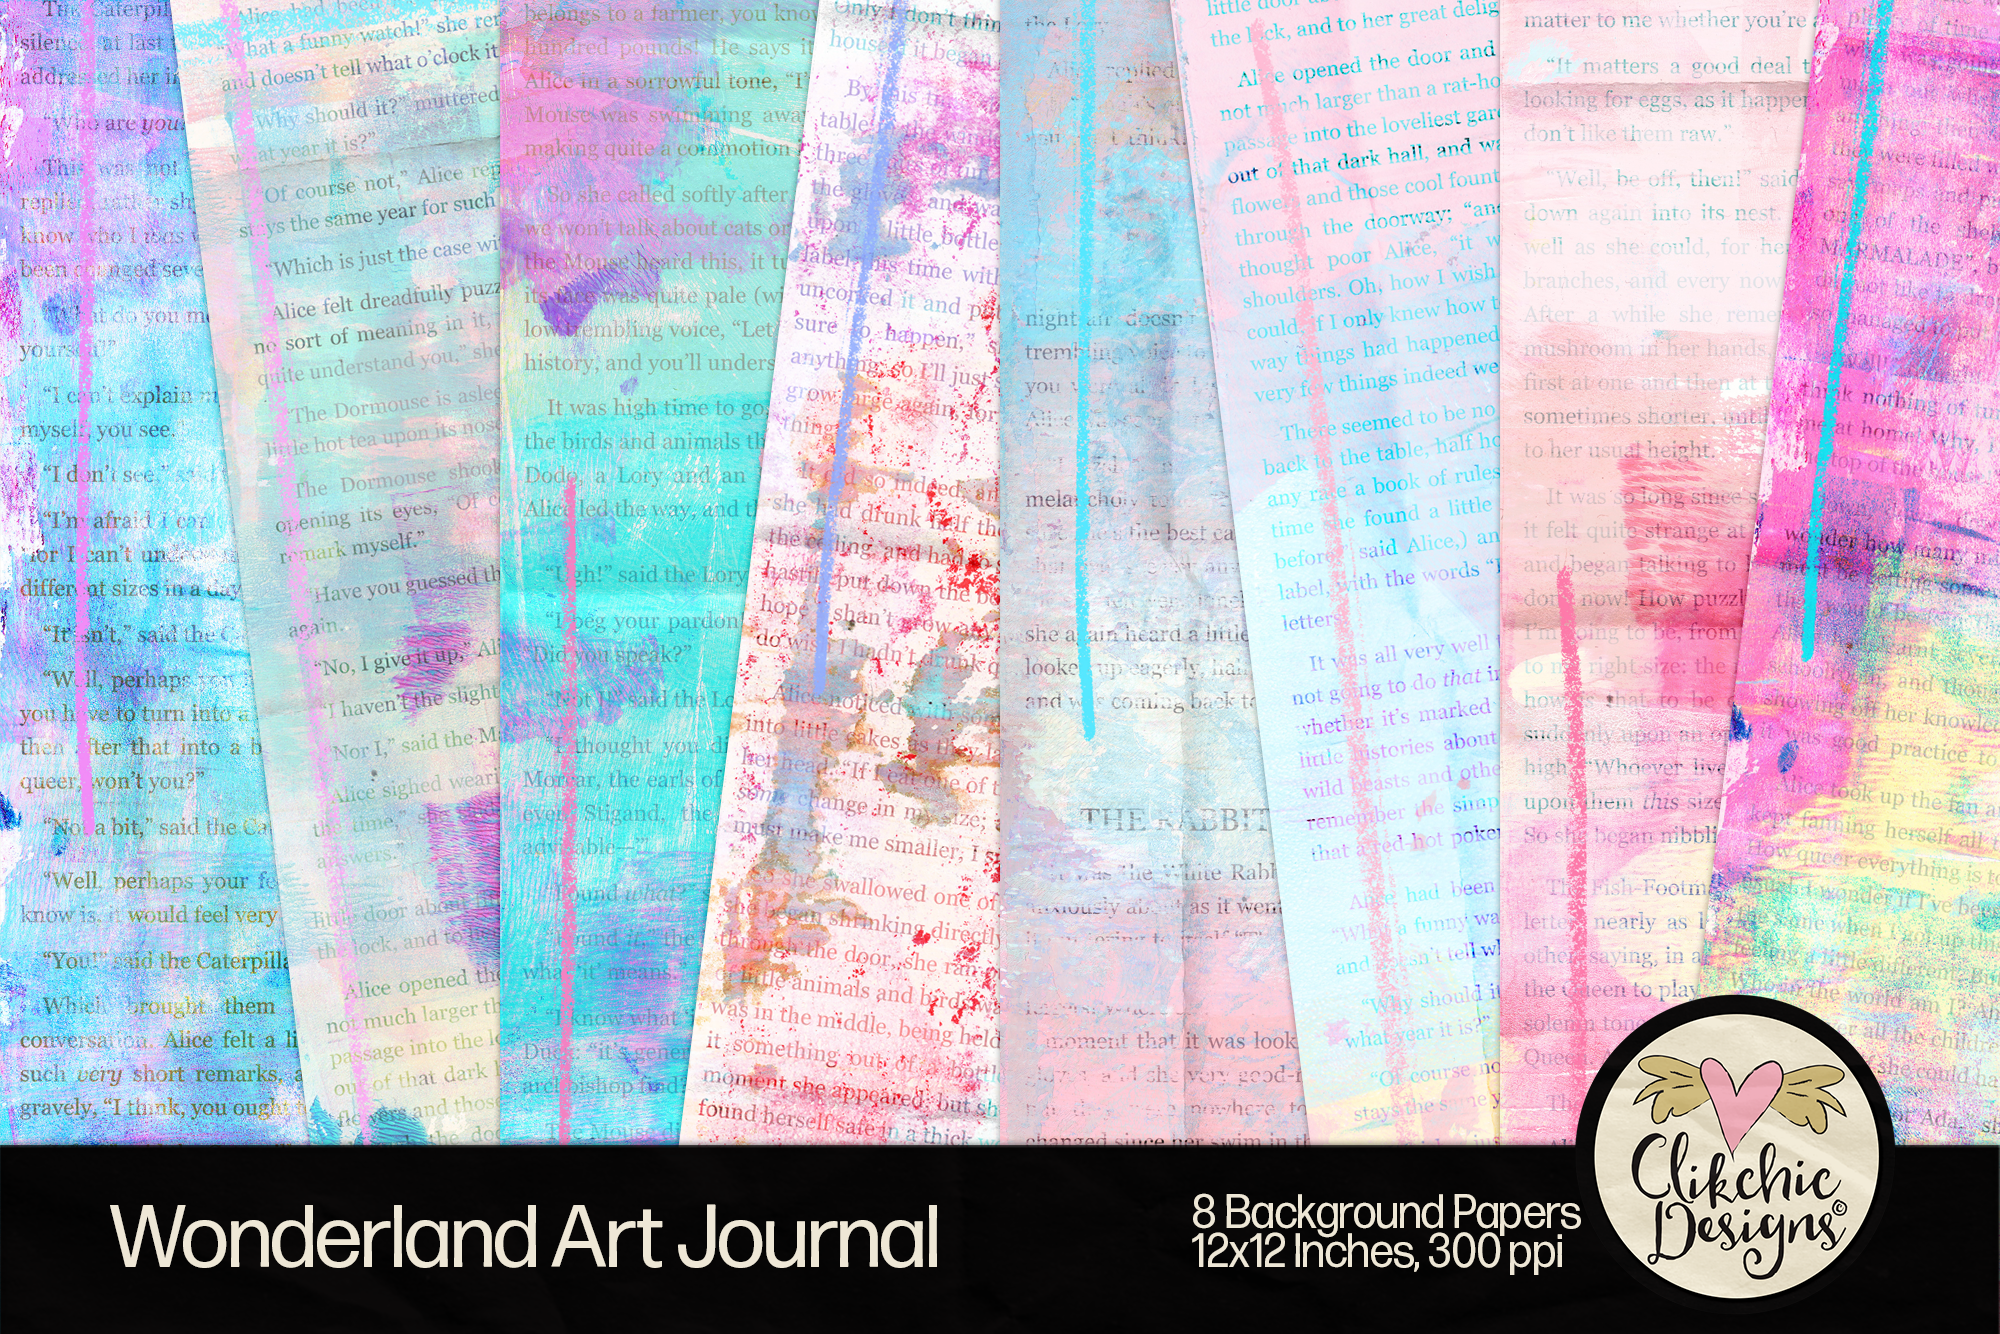
If you love dreamy pastels and vintage whimsy, you’ll adore this enchanting collection of Wonderland Art Journal Backgrounds. Inspired by the timeless charm of Alice in Wonderland, these 8 unique designs combine textured watercolour washes with original book text to create truly magical backdrops. Perfect for printable art journals, scrapbooking, handmade cards, and mixed media projects.
Each background features soft, delicate colours like pink, turquoise, lilac, and yellow, overlaid with authentic Alice in Wonderland text for a nostalgic literary touch.
Purchase the individual backgrounds via Silhouette Design Store:
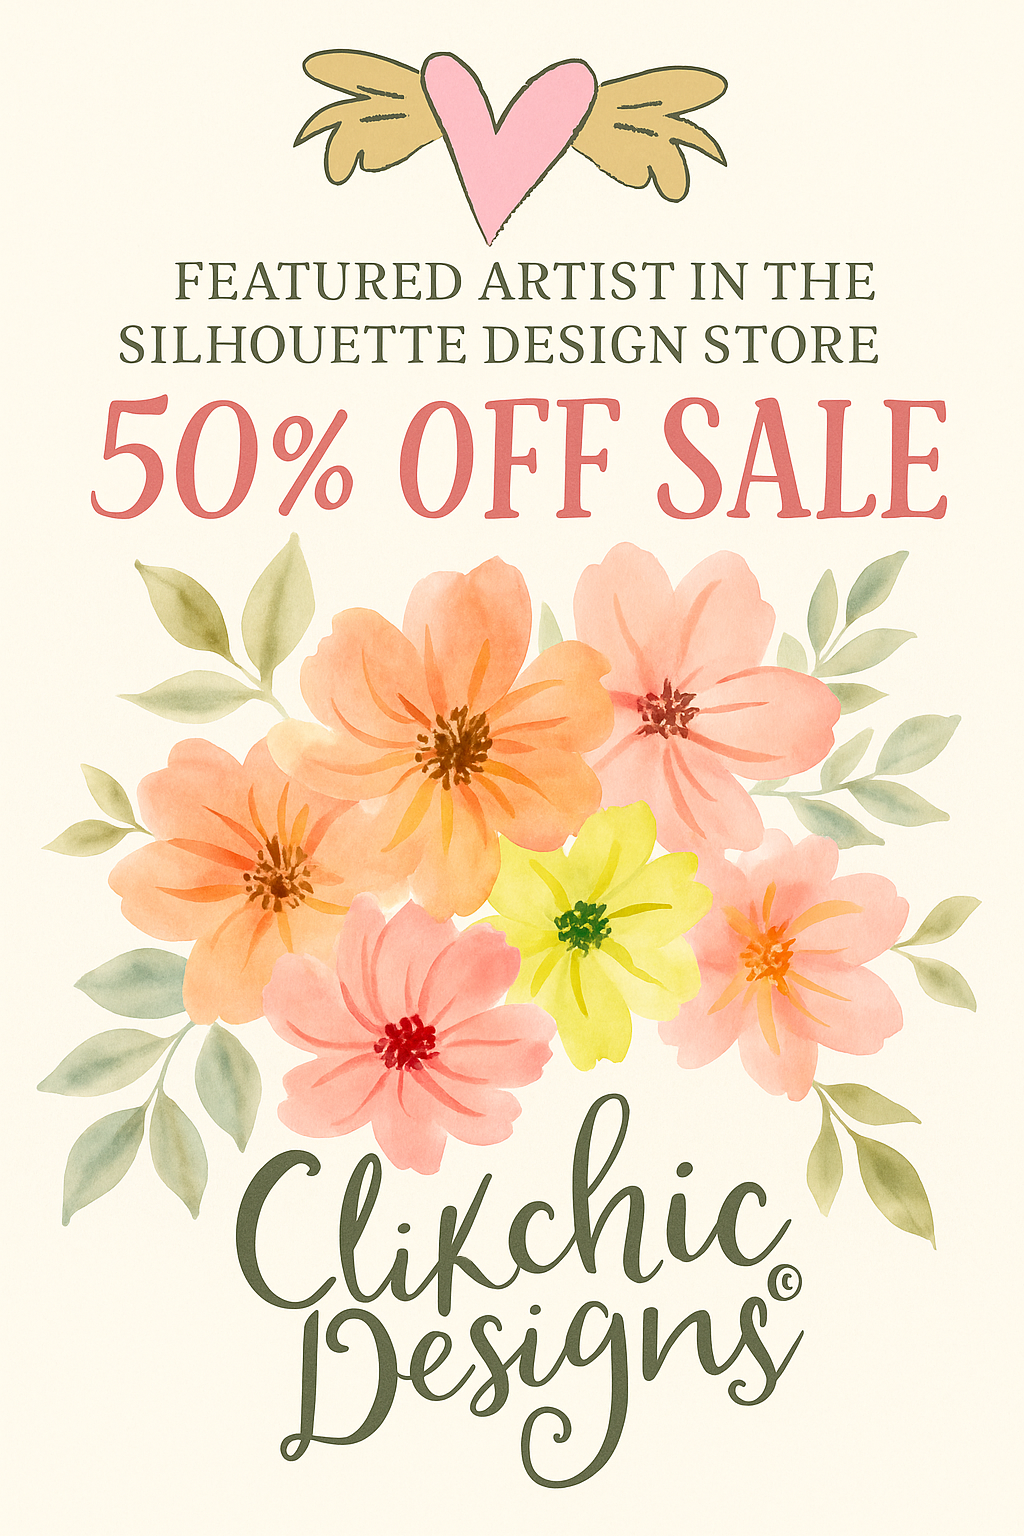
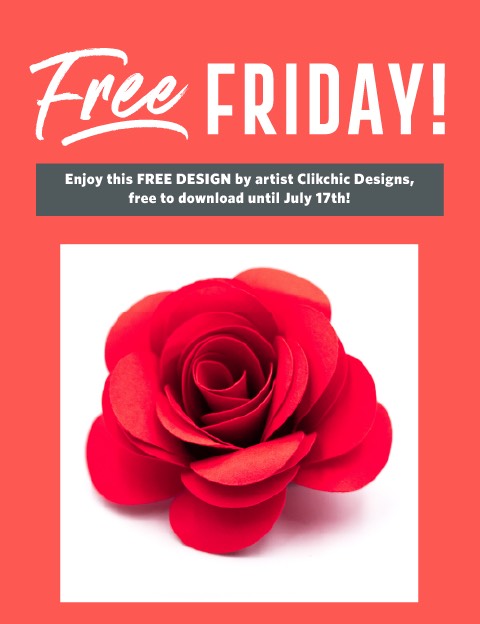
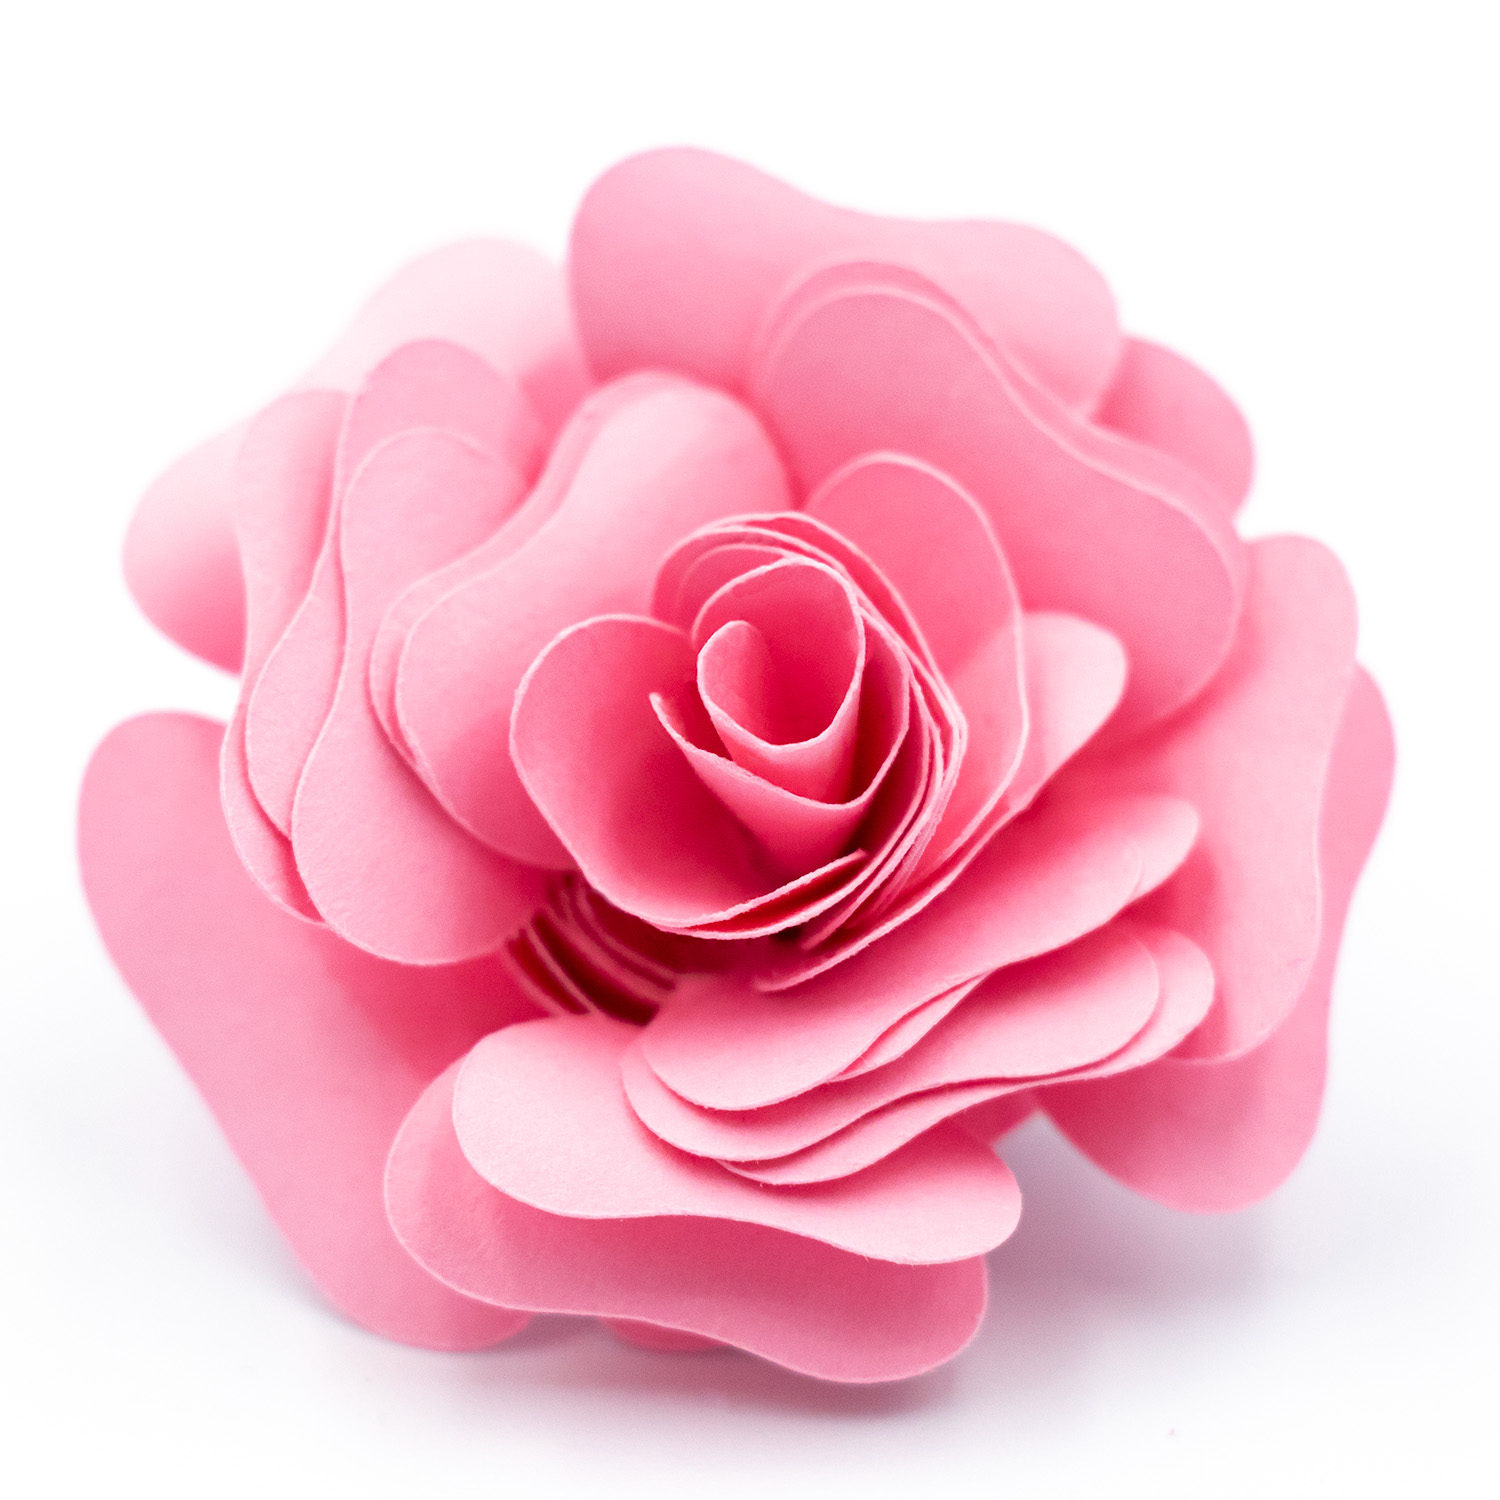
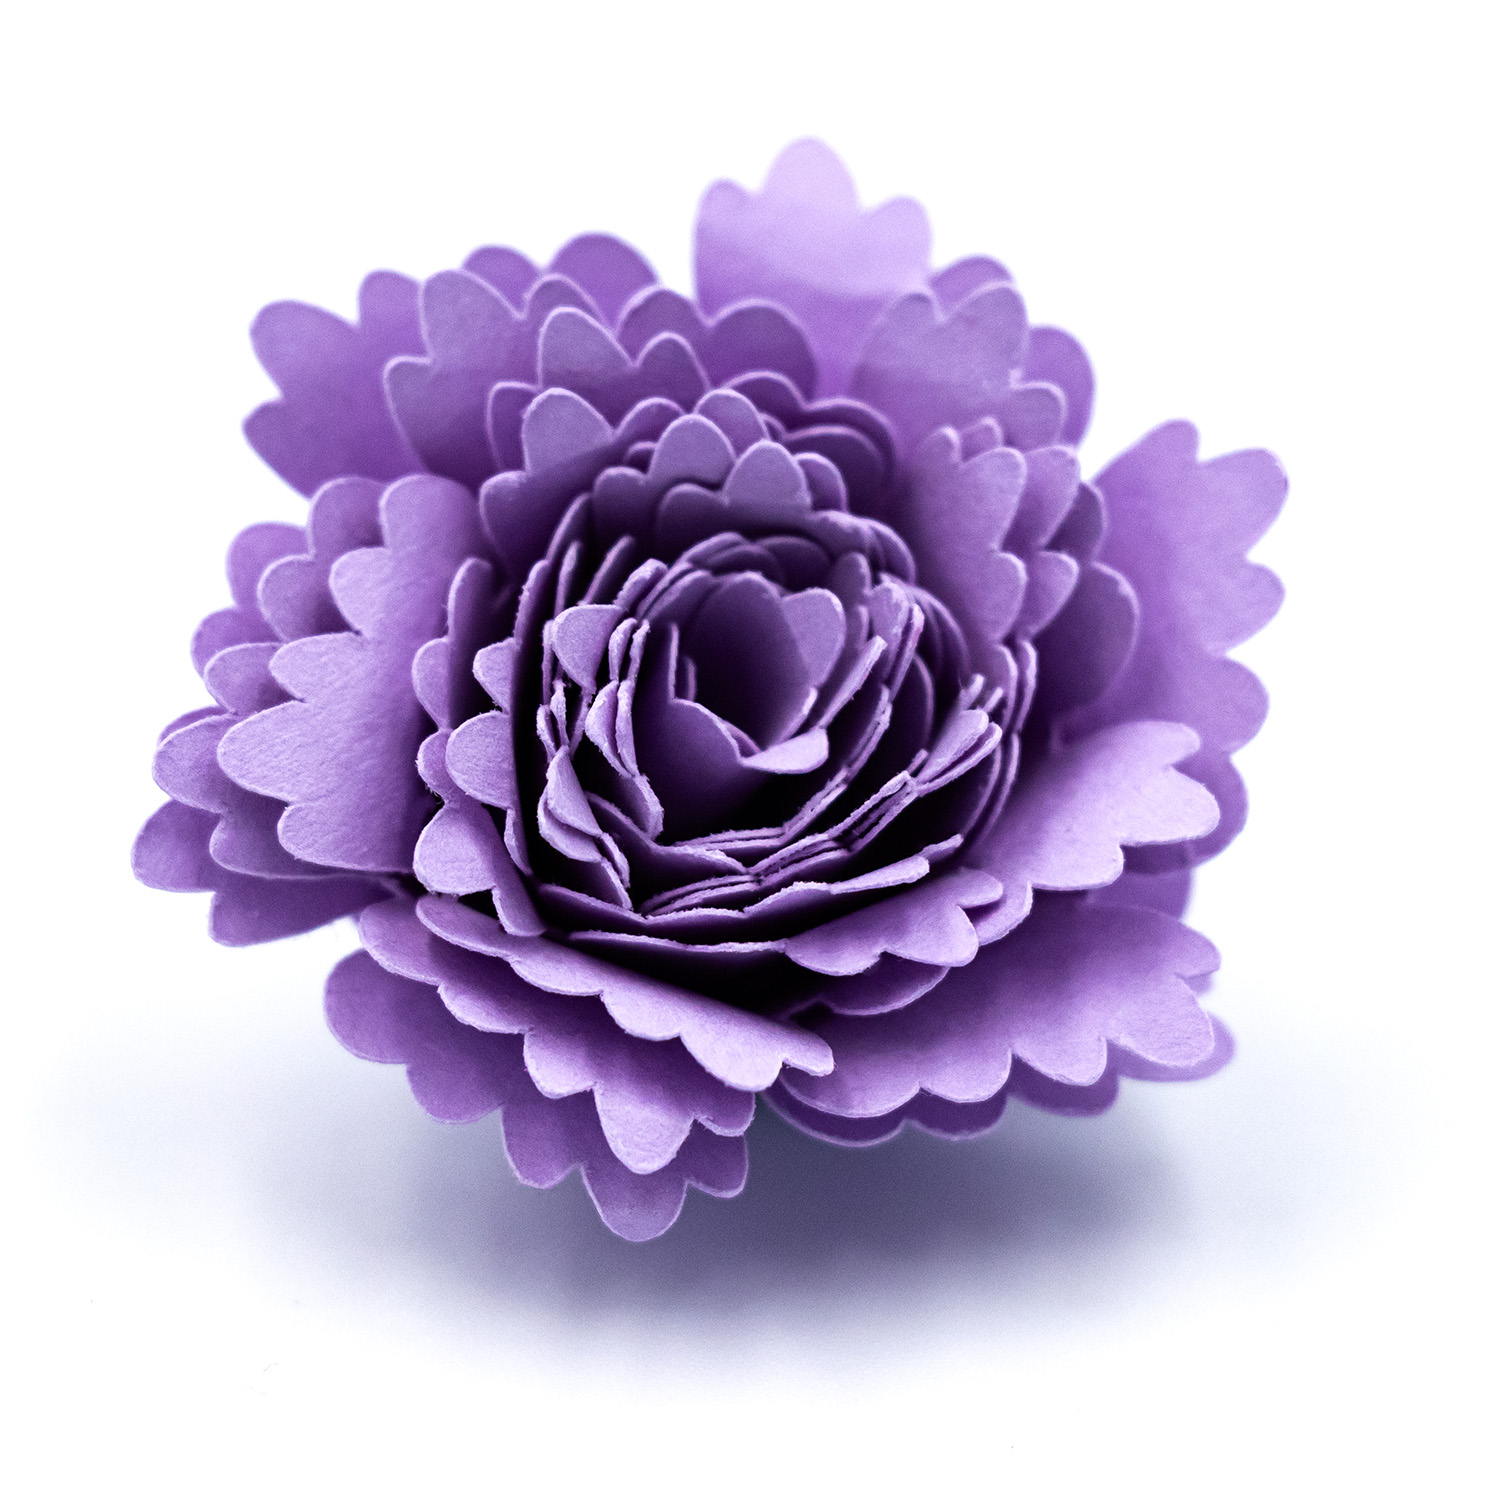
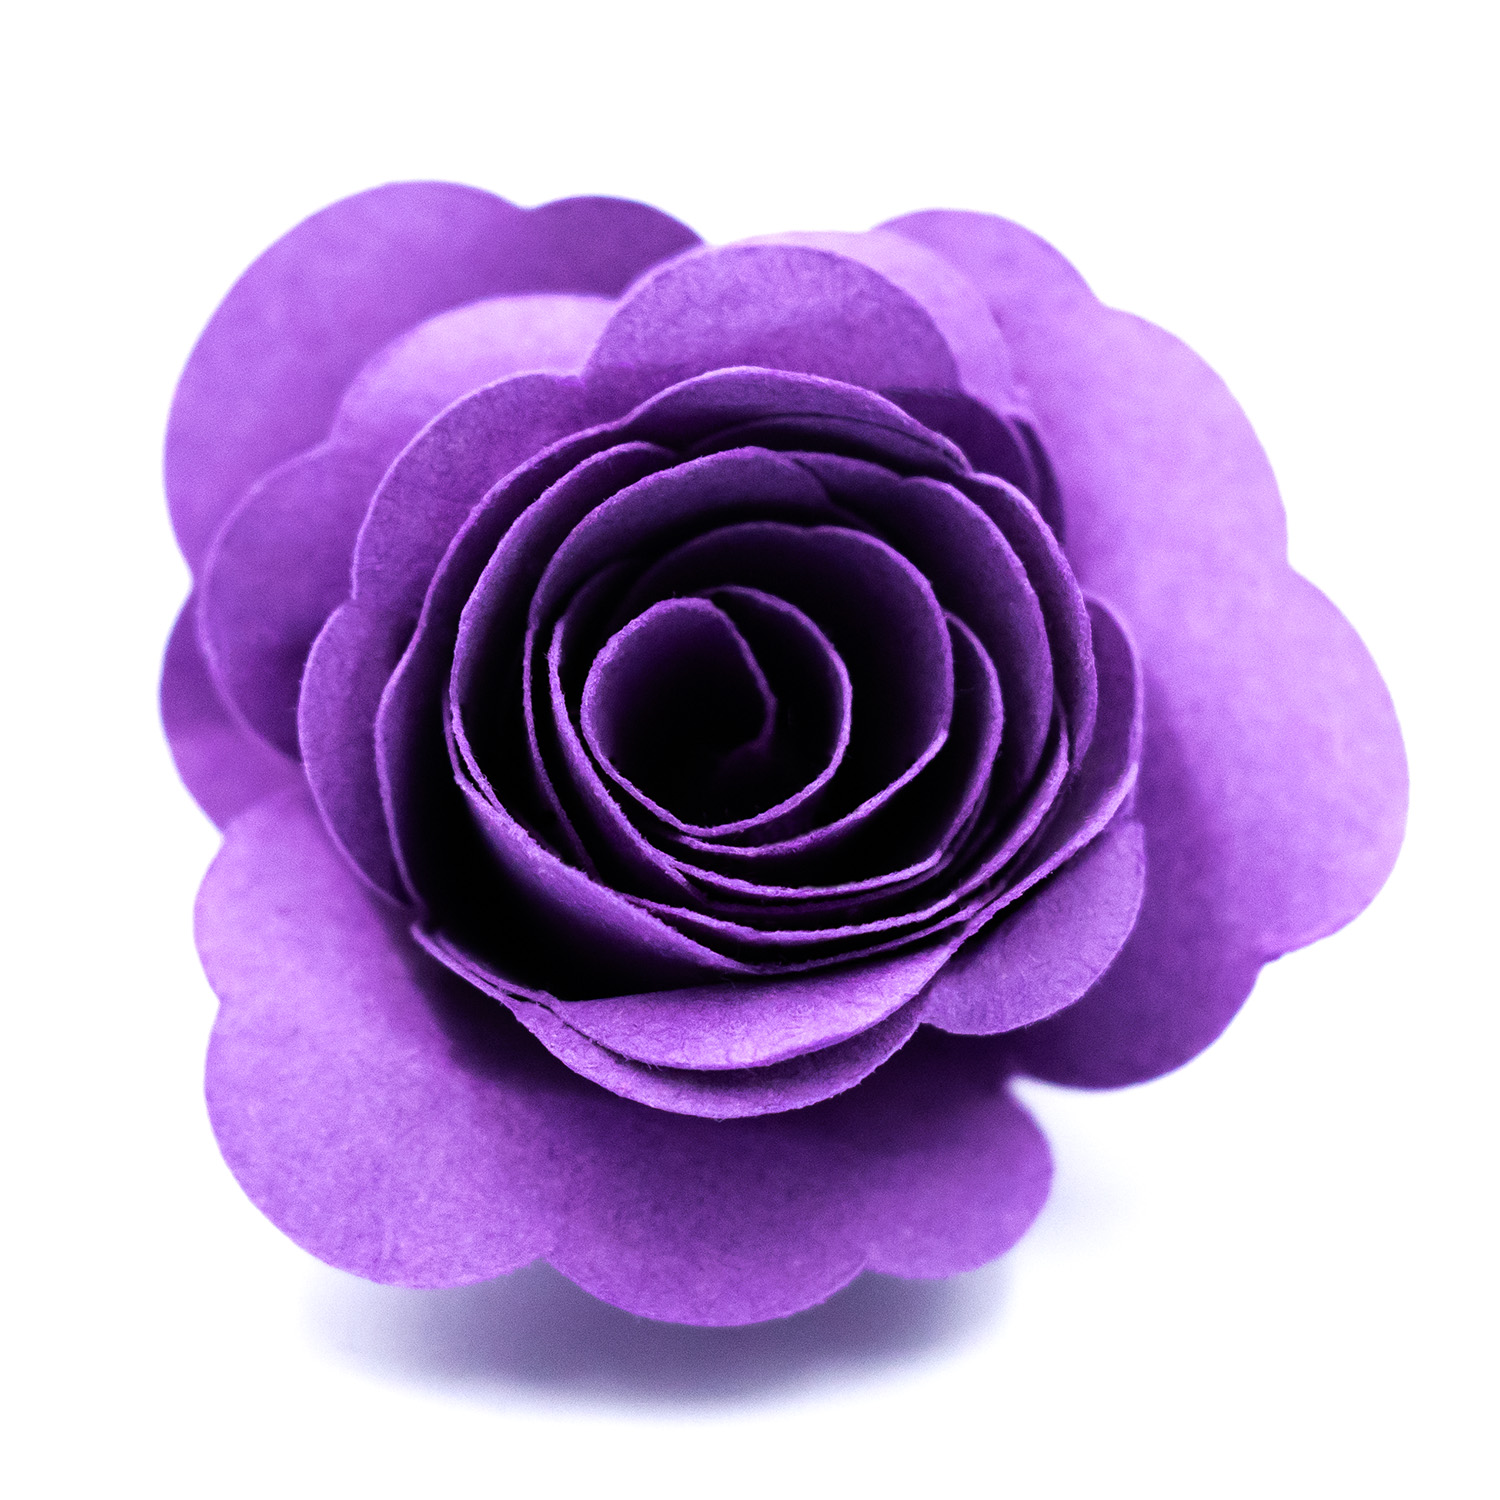
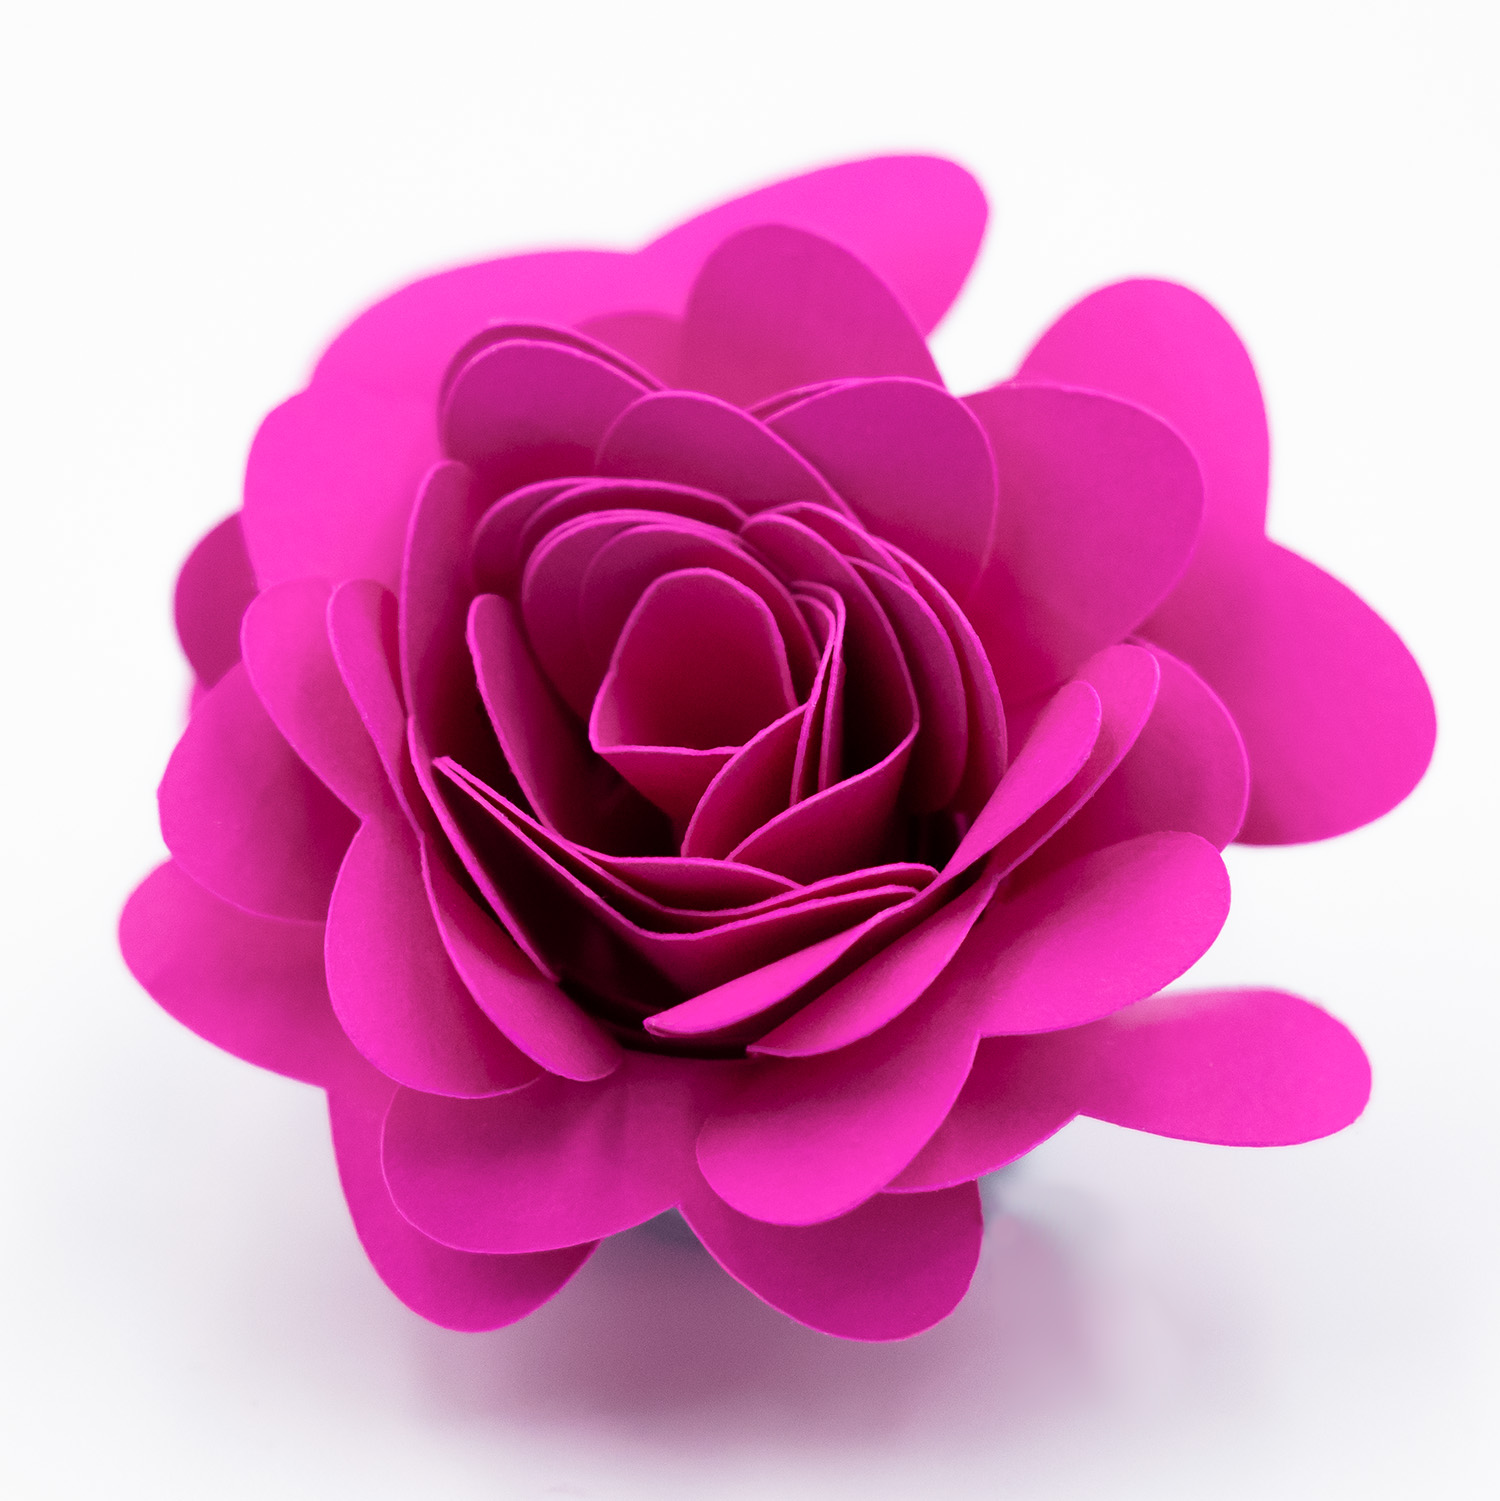
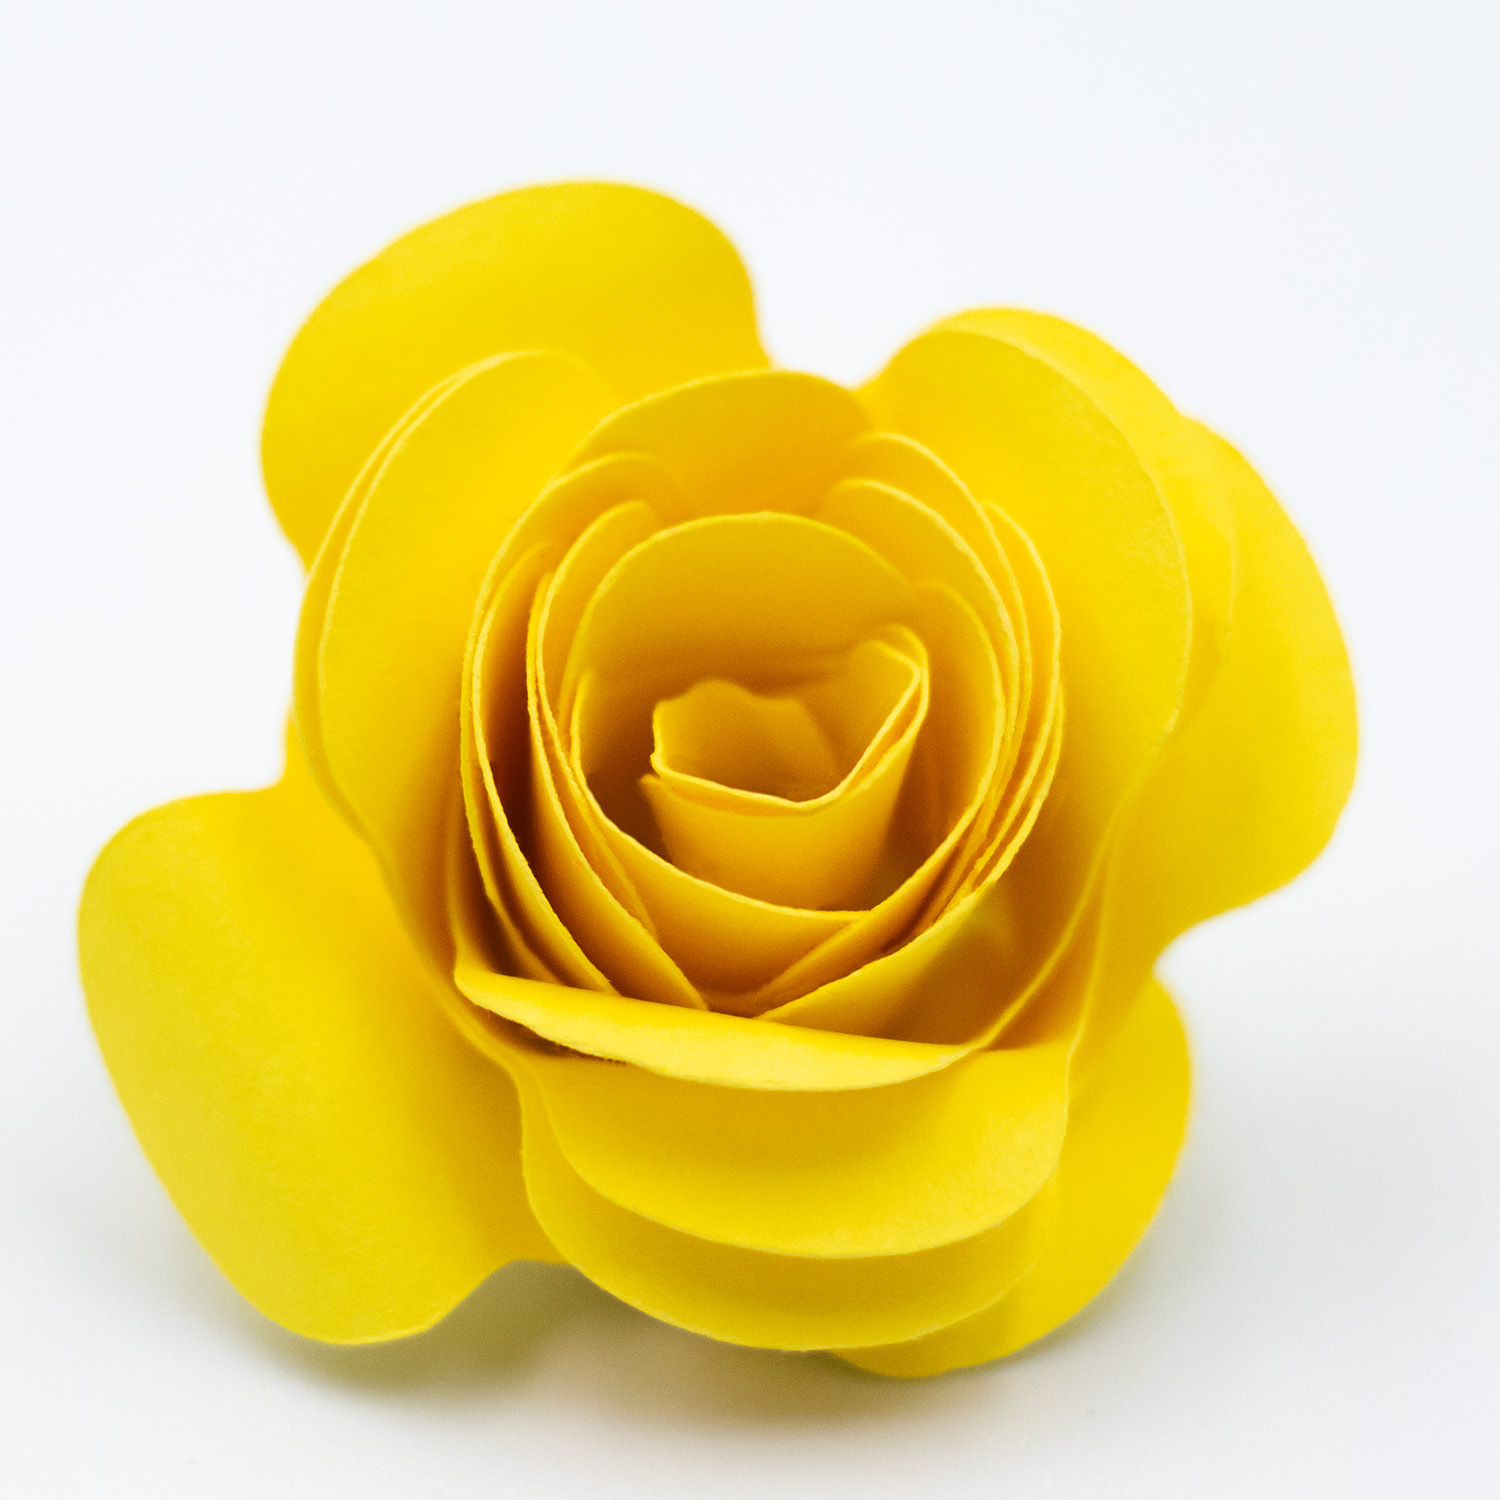
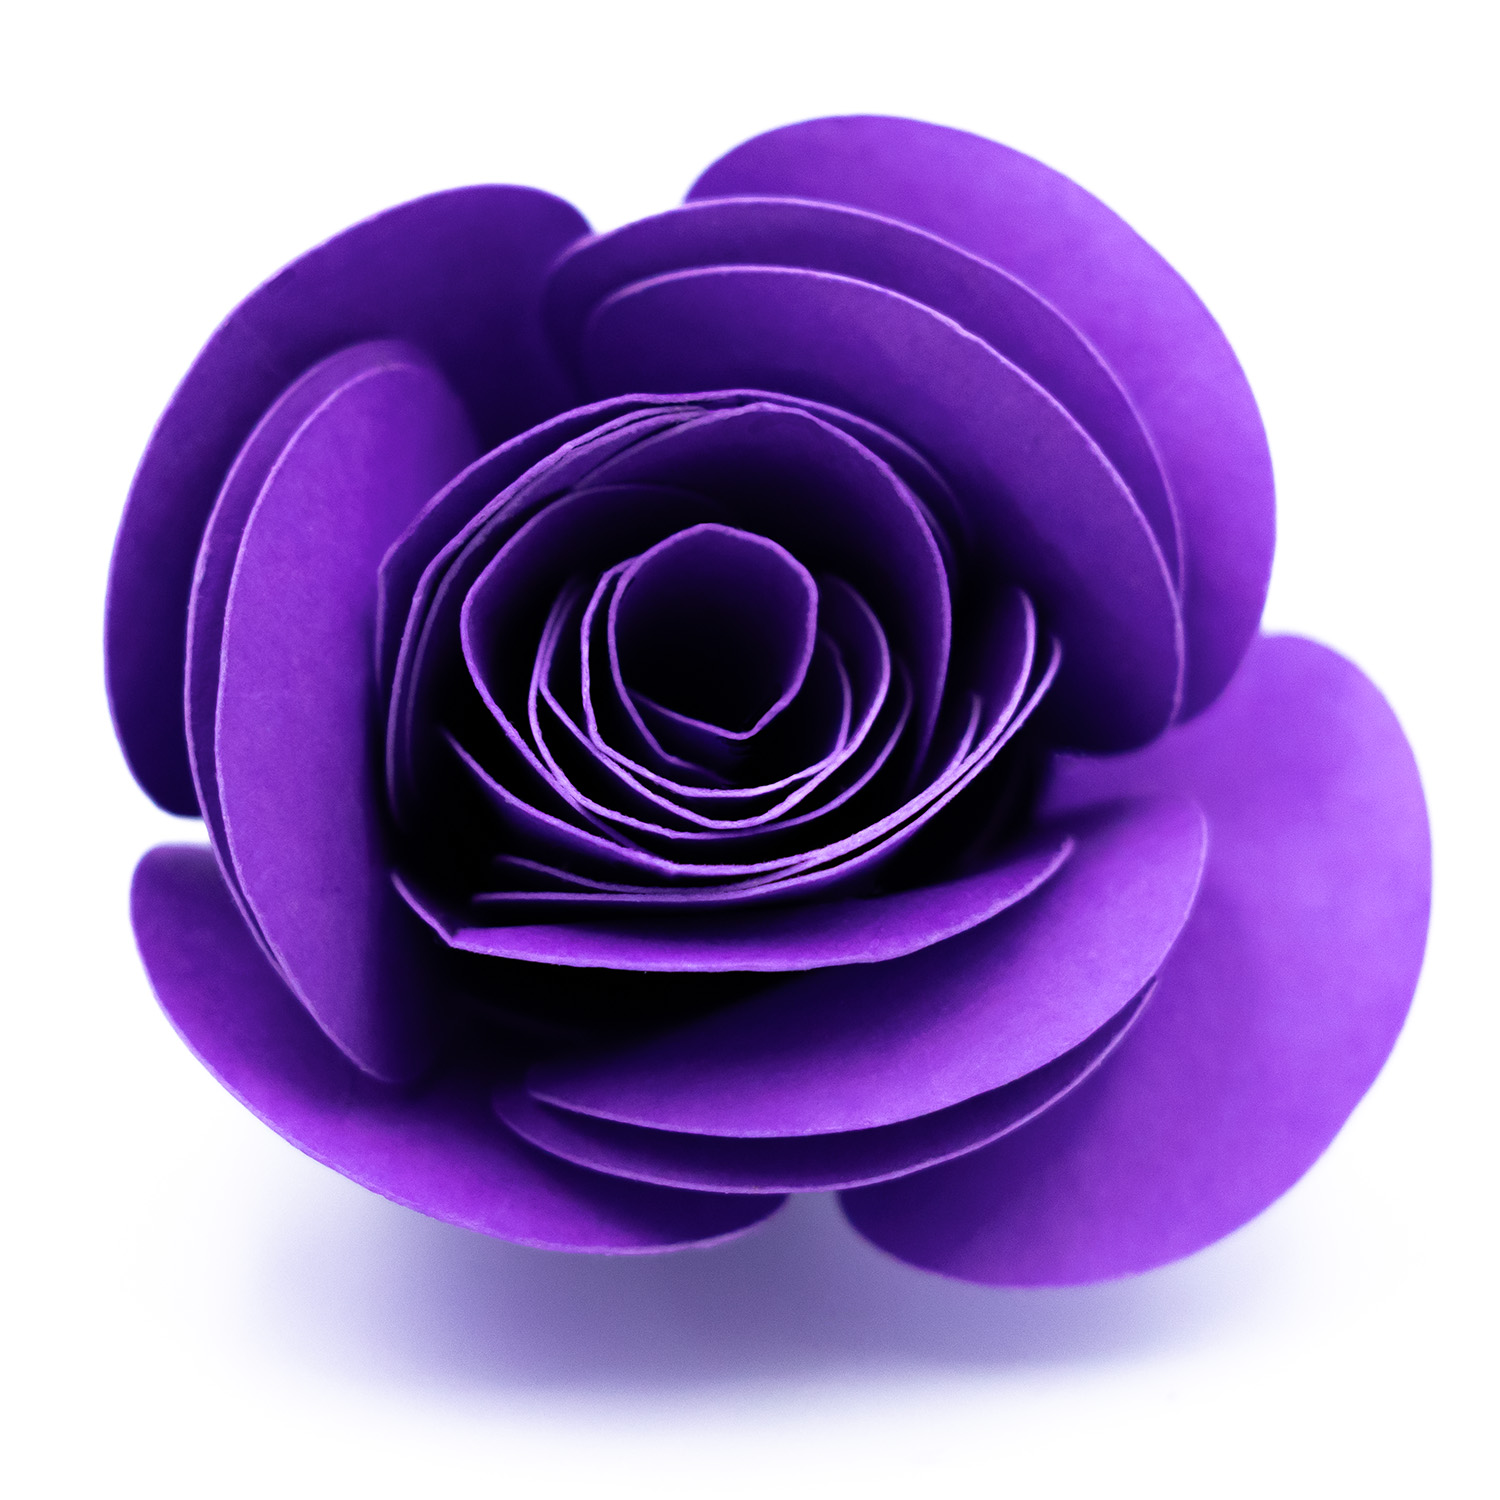
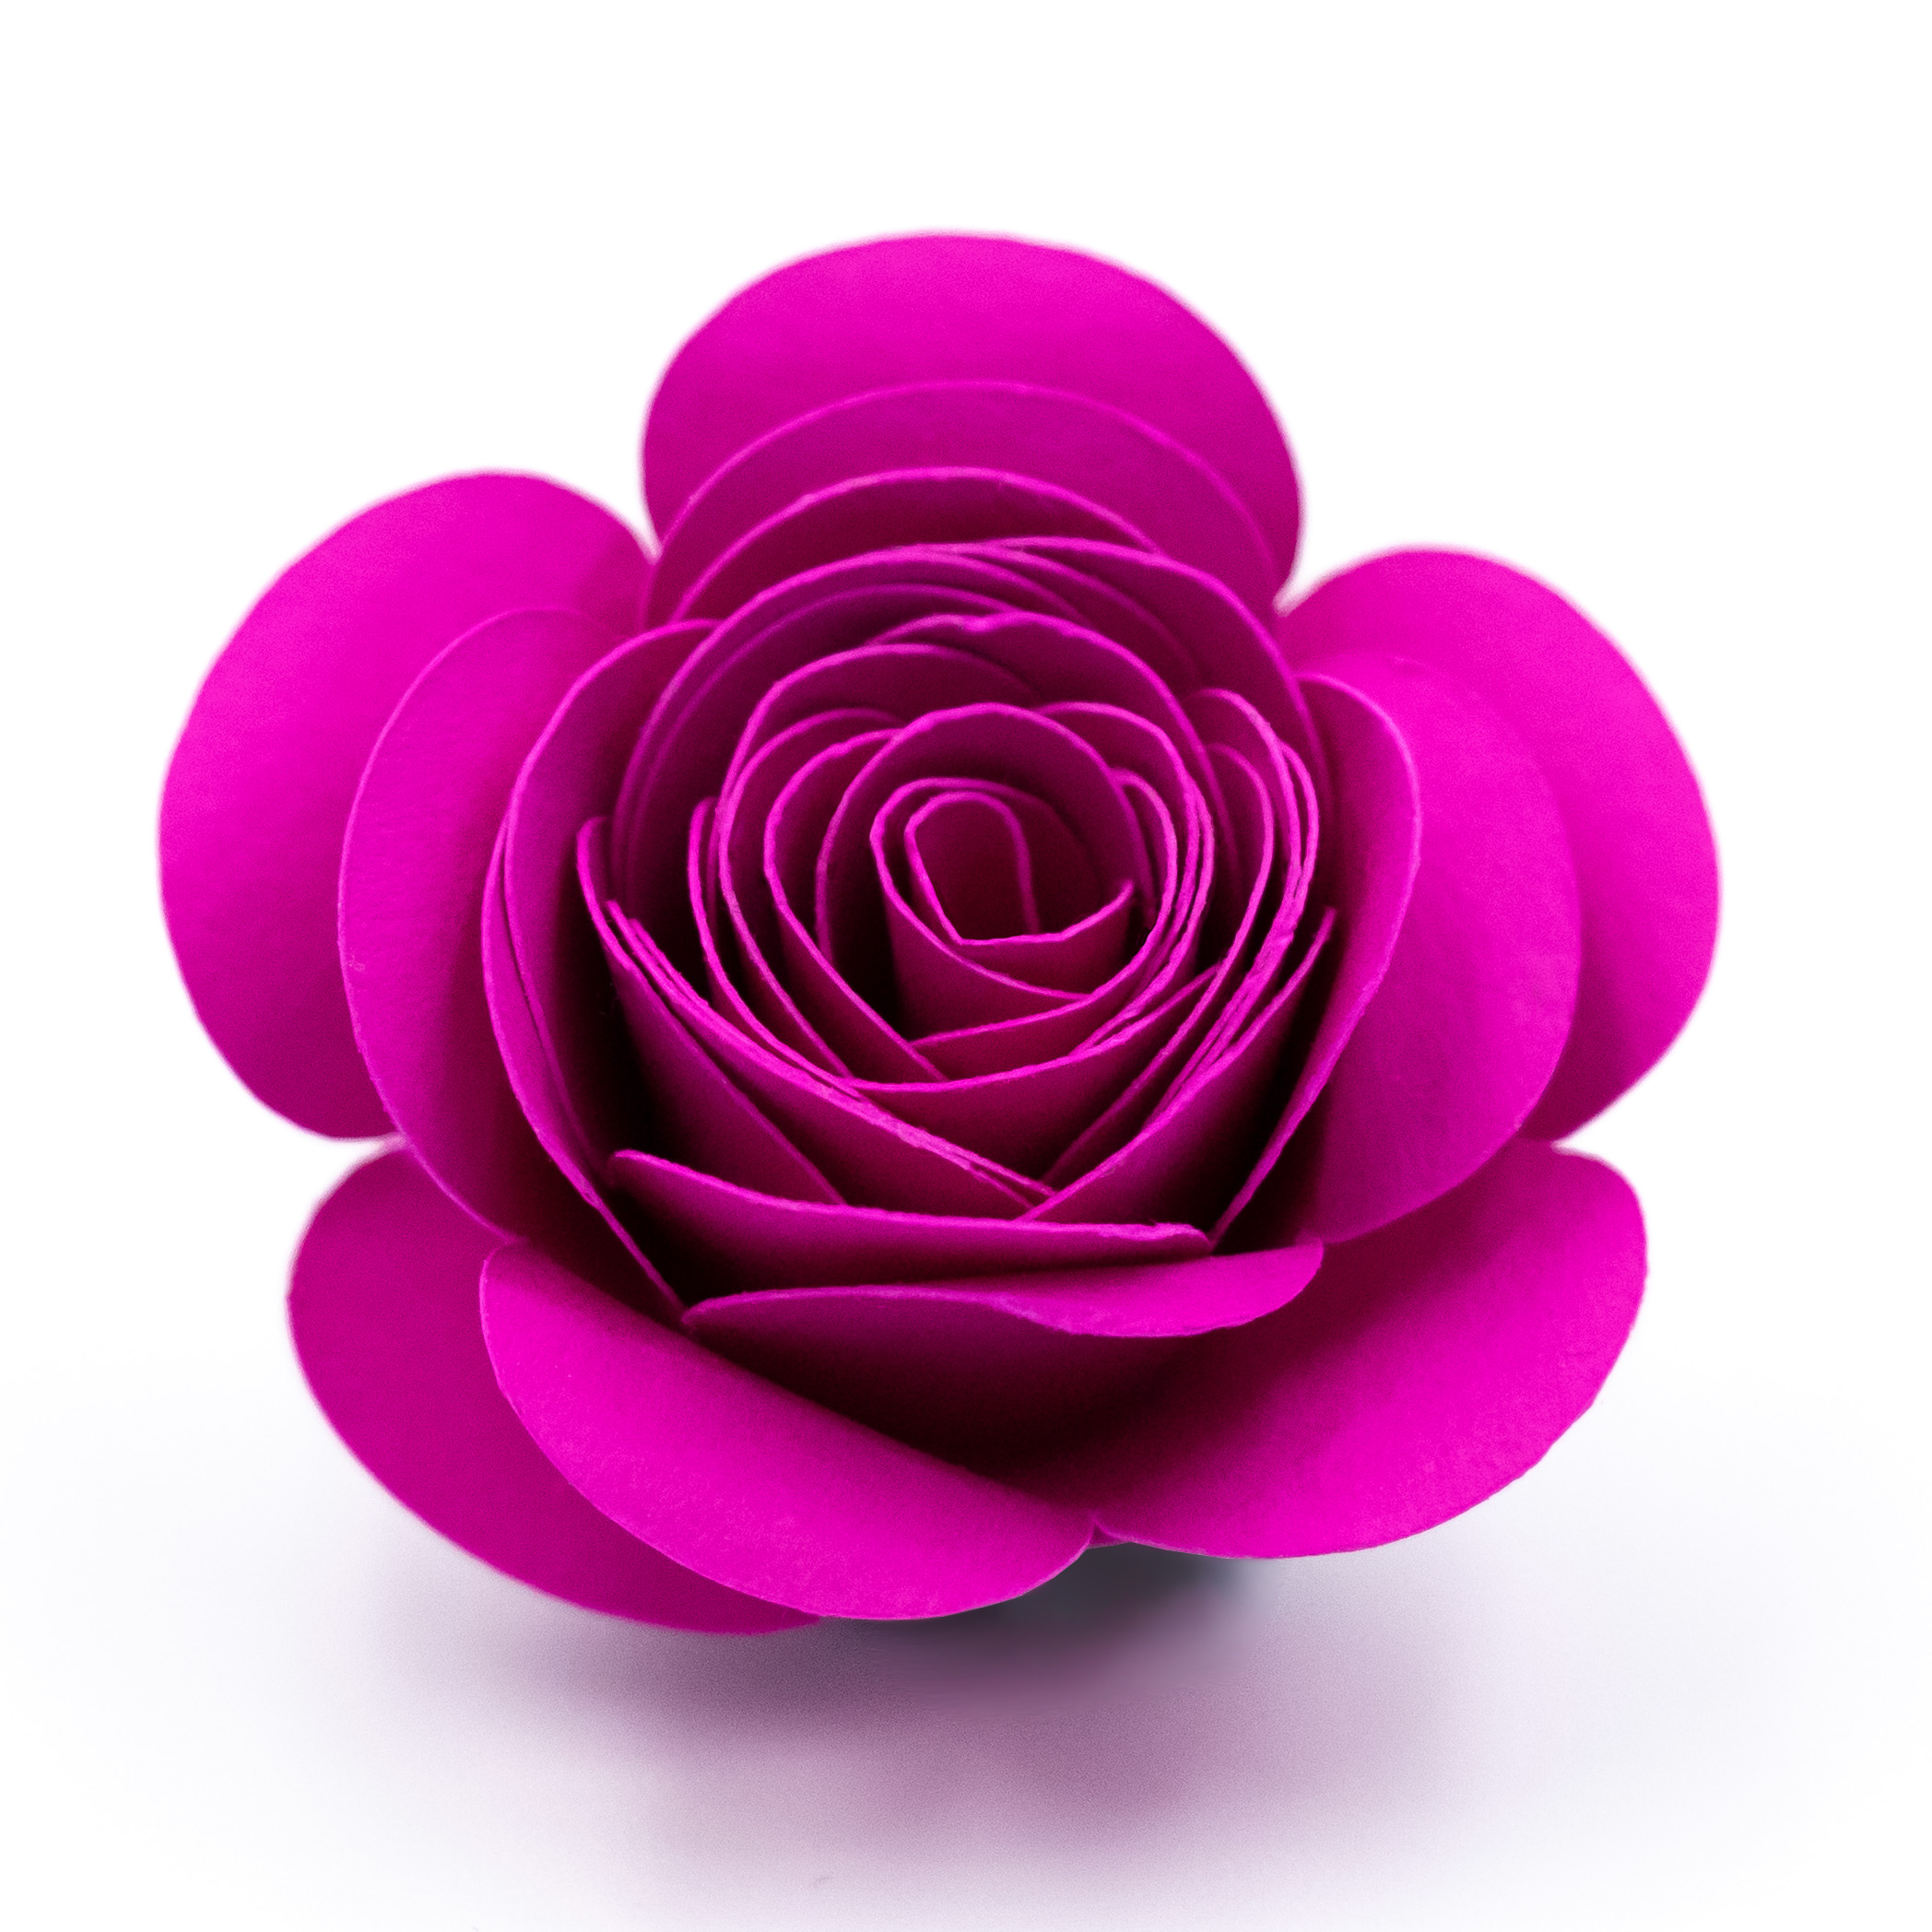
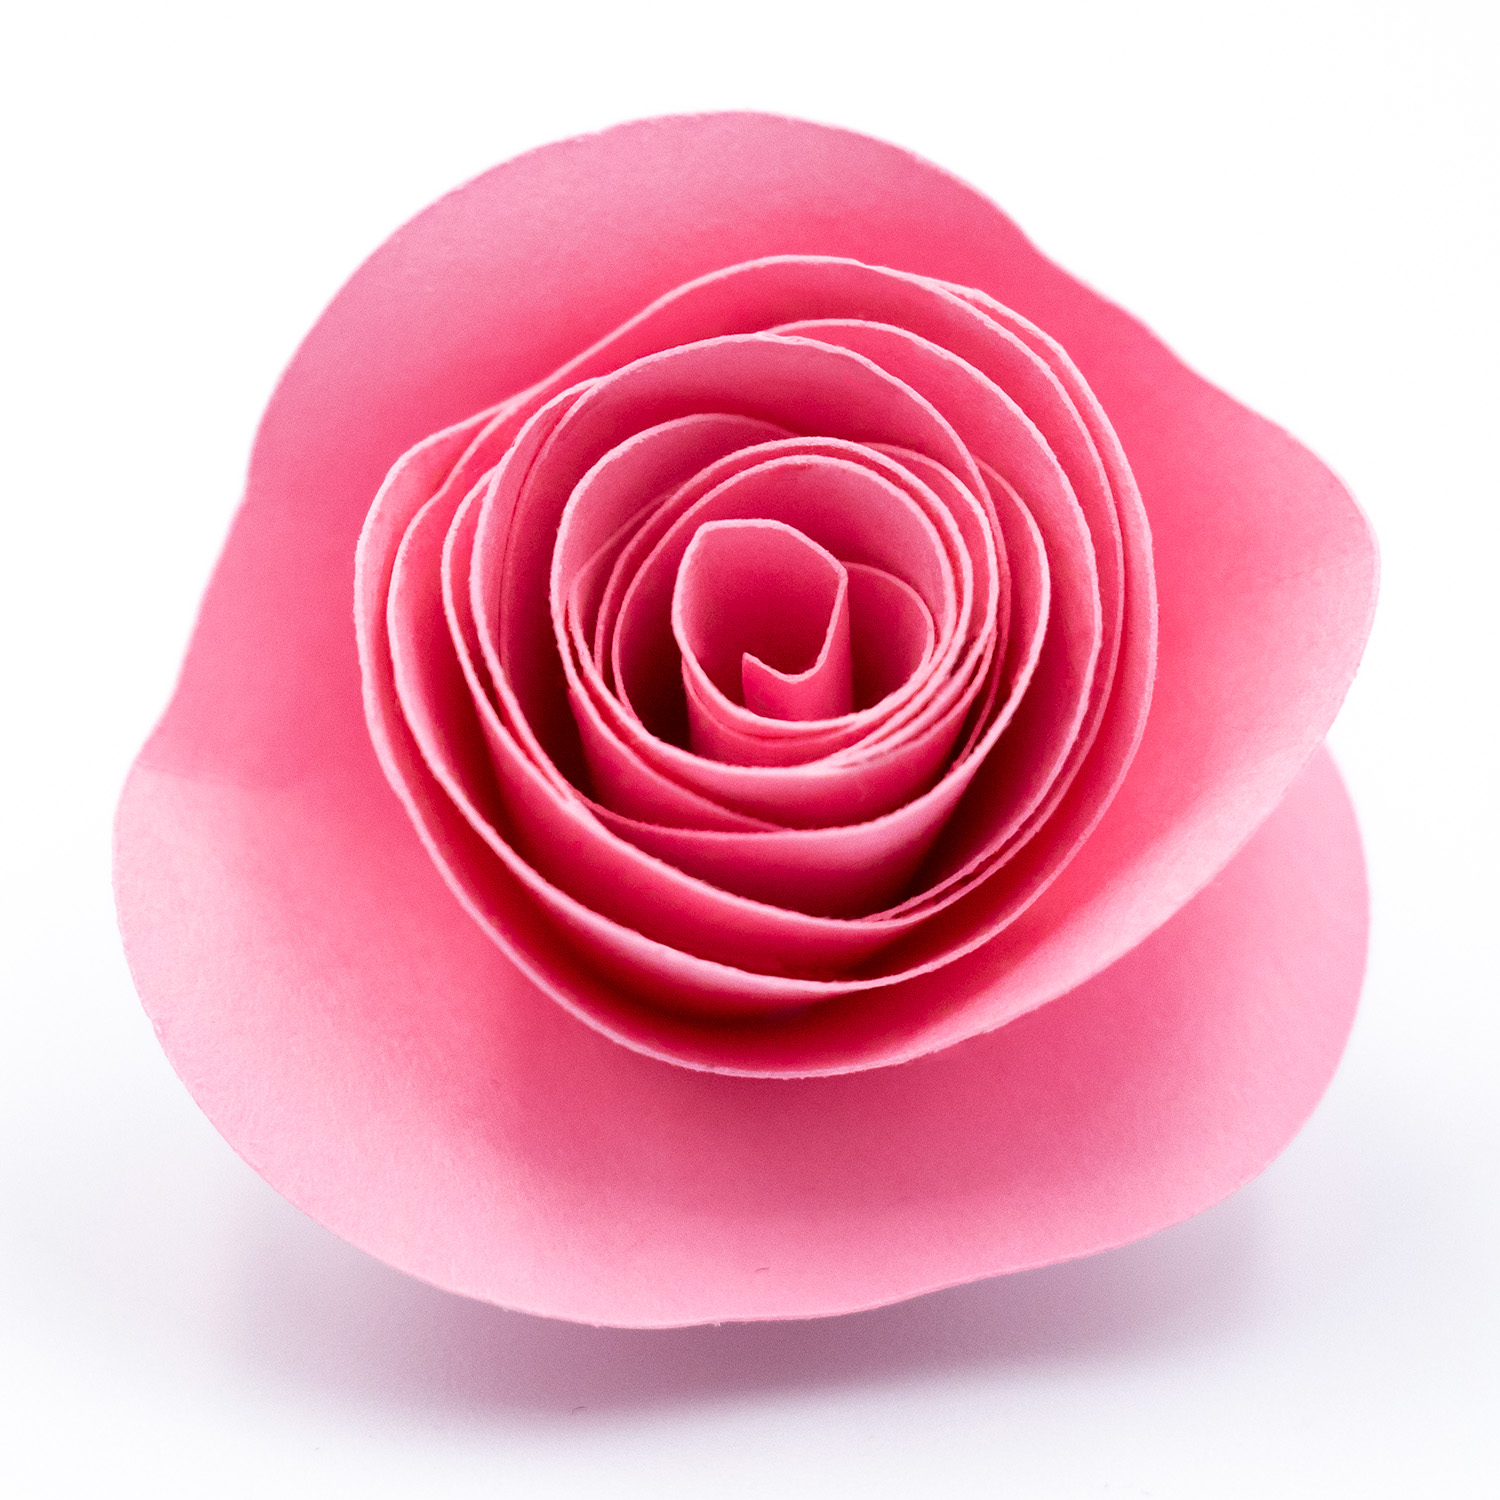
I’m so excited to be the featured artist in the Silhouette Design Store this week! To celebrate, all my designs are 50% off through July 17th, and you can also download an exclusive free design—a beautiful rolled paper flower—during the promotion!
The freebie, the Rose Style Rolled Flower with Round Petals, is an elegant layered SVG that creates a soft, realistic rose. The finished flower measures approximately ¾ to 1½ inches (can be resized) depending on how loosely it’s rolled, making it perfect for cardmaking, paper bouquets, shadow boxes and more.
My Silhouette shop includes a wide range of designs—from easy-to-assemble paper flowers and detailed cards to vibrant Print & Cut elements. Many are created using traditional techniques like watercolour and Gelli printing, giving your projects a one-of-a-kind look.
Visit the store to explore the full collection and grab your 50% off favourites before the sale ends!
Don’t miss the Rose Style Rolled Flower with Round Petals available at the Silhouette Design Store this week! Make adorable flowers for your card making, scrapbooking, party decorating and home decor.
If you’ve ever wondered how I get my Print & Cut designs to look so vibrant, crisp, and just a little bit extra shiny—you’re not alone! One of the most common questions I get is, “How do you make your printed designs look so good?” The secret? I use gloss photo paper and a high-quality inkjet printer—and it makes a huge difference.
In this post, I’ll walk you through why gloss photo paper is my go-to for Print & Cut crafts, how it compares to regular cardstock, and why your choice of printer (inkjet vs laser) also plays a big role in the final result.
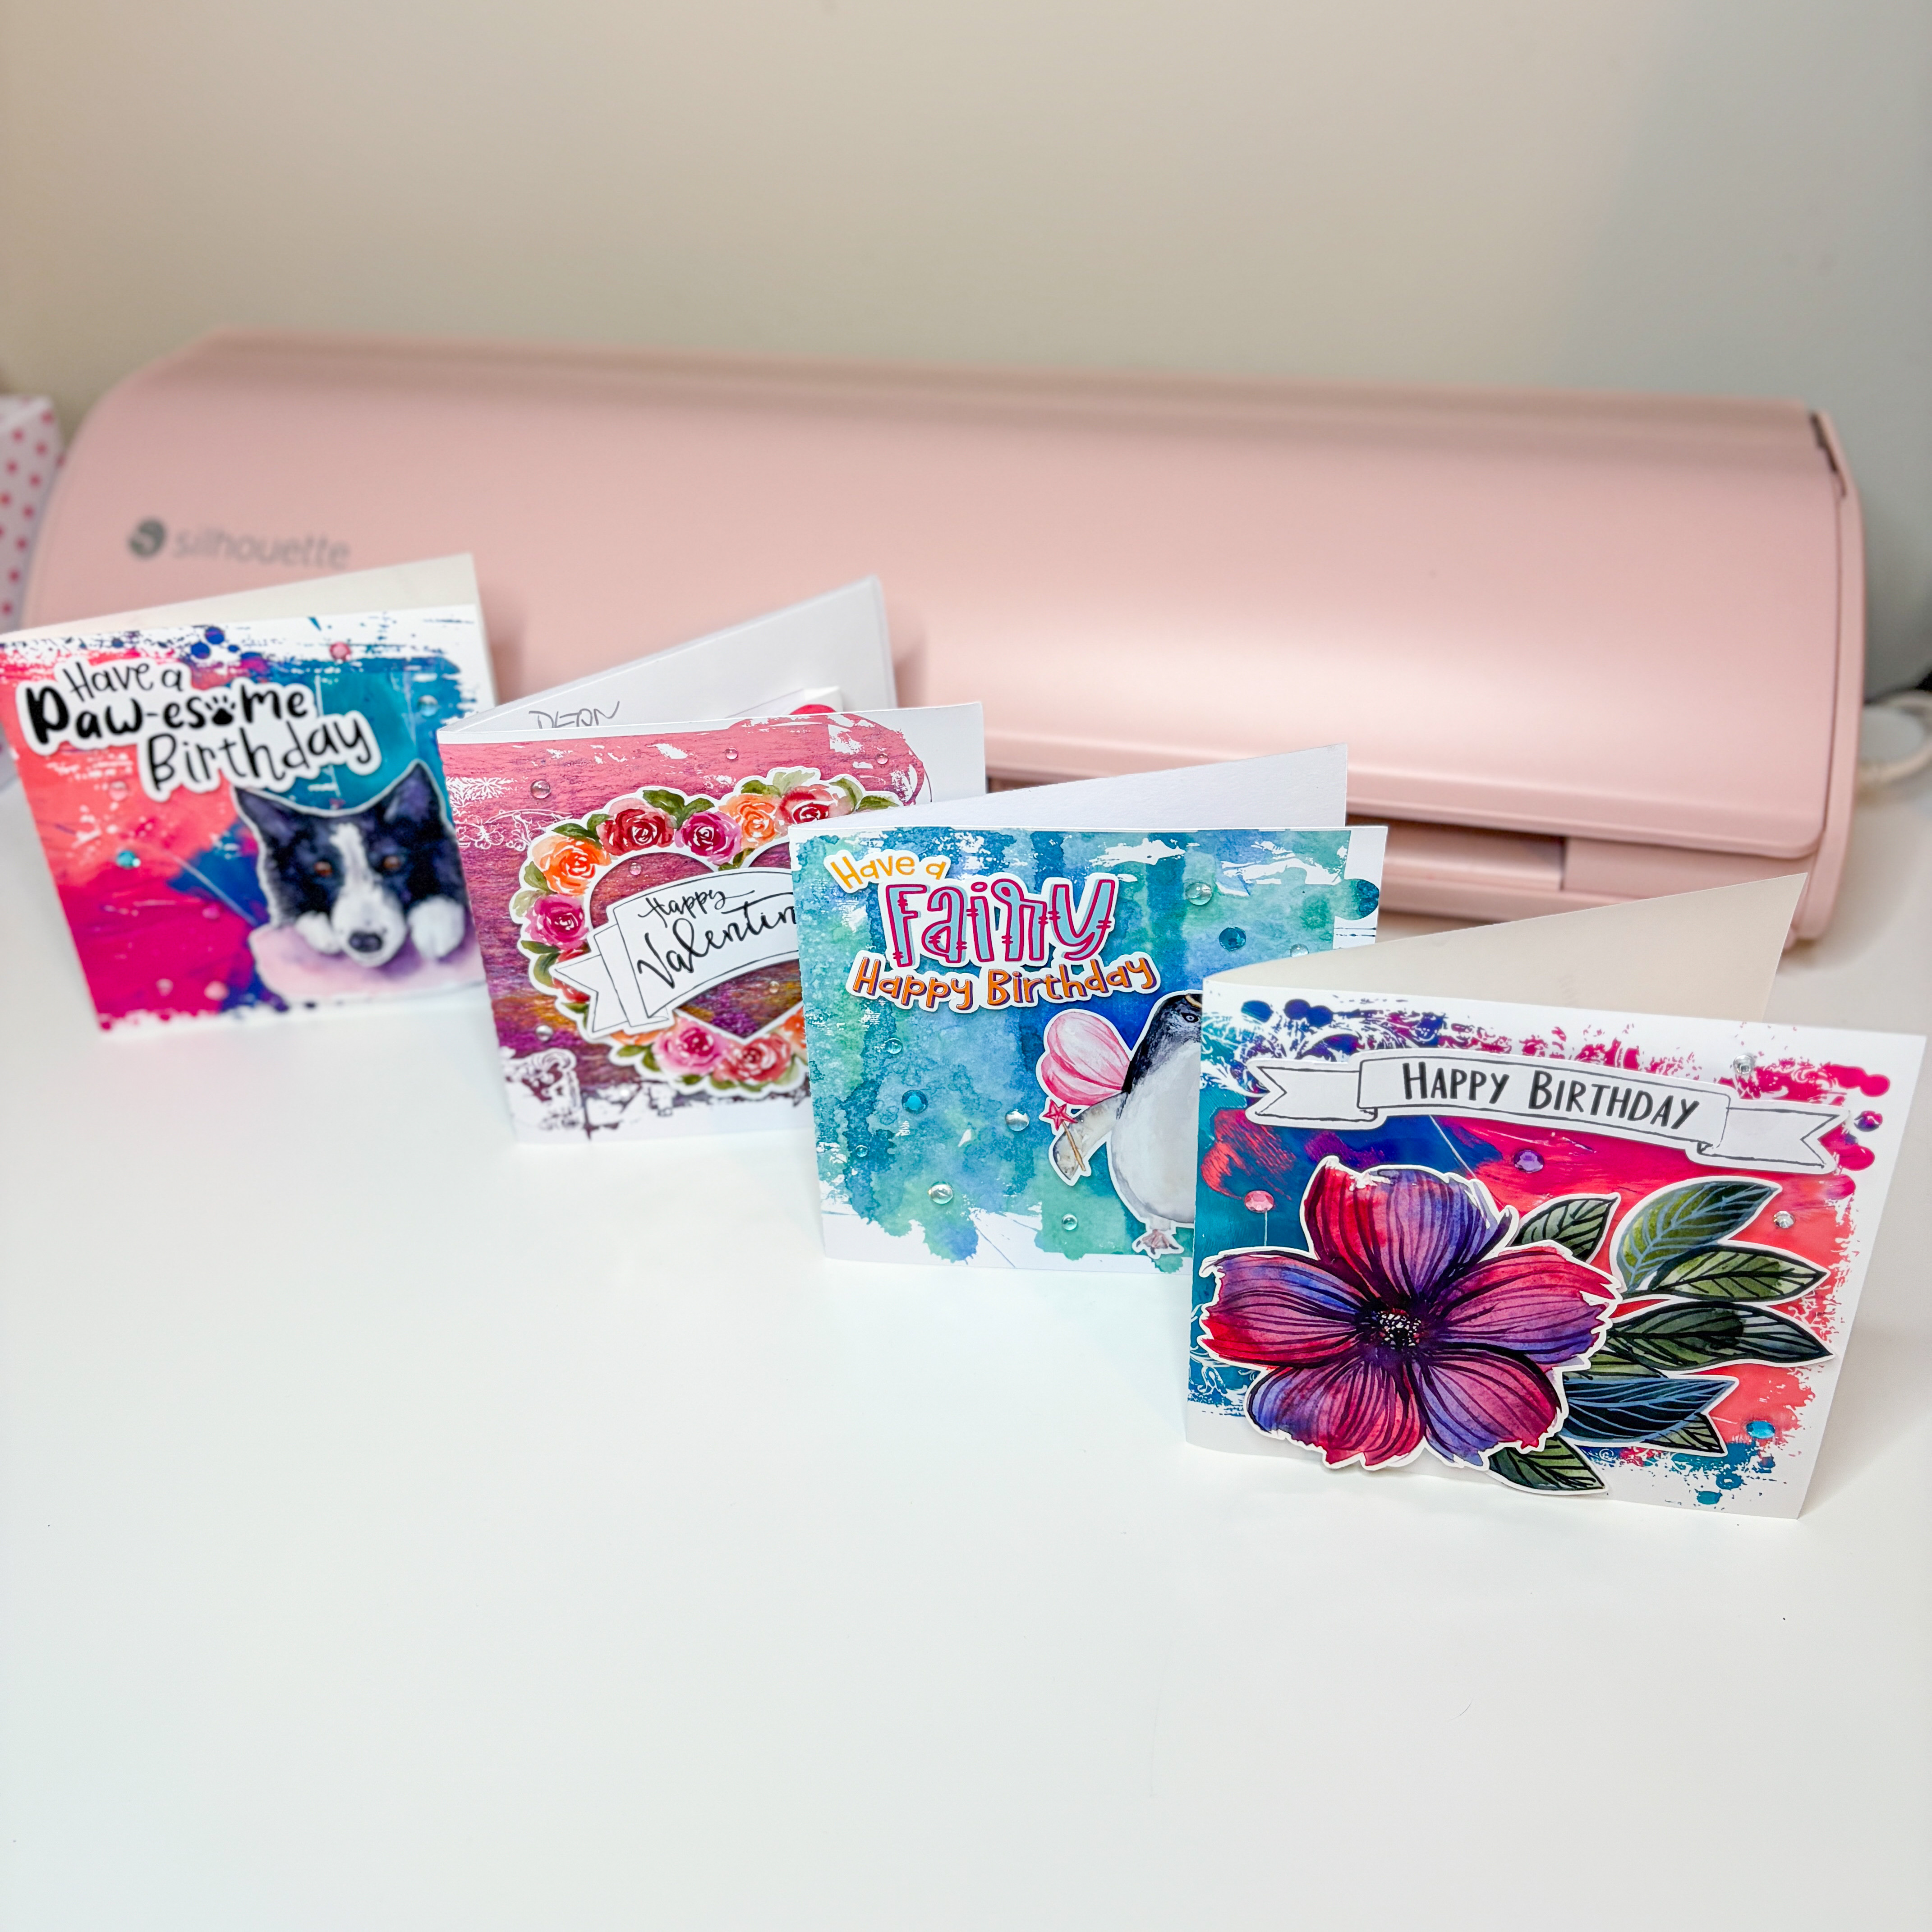
If you would like to check out some of the designs in my store used in the photo to the right, check out my store here. I specialise in watercolor print and cut designs.
What Makes Gloss Photo Paper So Special?
Gloss photo paper is specifically designed for high-quality image printing. It has a smooth, coated surface that enhances colours, contrast, and detail. Here’s why it’s a game changer:
Vibrancy: The glossy coating helps the ink stay on the surface instead of being absorbed into the paper fibres, which means richer, brighter colours.
Sharp Detail: Photo paper gives you cleaner lines and finer details—great for intricate designs or watercolour textures.
Professional Finish: That shiny, polished surface gives your project a more finished and professional look. Think sticker-quality prints without the need for extra lamination.
Quick Drying: High-quality photo papers are quick-drying and smudge-resistant, which is ideal for Print & Cut projects where precision matters.
Gloss Photo Paper vs Regular Cardstock
Cardstock is thick and sturdy, which makes it great for structural elements like cards or boxes. But when it comes to image quality—especially for decorative elements like florals, labels, or illustrations—it doesn’t stand a chance against gloss photo paper.
Feature
Gloss Photo Paper
Regular Cardstock
Colour Vibrancy
High
Moderate
Print Detail
Crisp and defined
Slightly muted
Surface Finish
Glossy & smooth
Matte or slightly textured
Ink Absorption
Minimal (stays on top)
High (absorbs into paper)
Best Use
Decorative print elements
Card bases, sturdy pieces
Inkjet vs Laser Printers: What’s the Difference?
This one often surprises people: inkjet printers and laser printers use entirely different methods for printing, and each affects your output in different ways—especially when printing on photo paper.
Inkjet Printers
Use liquid ink droplets
Best suited for photo-quality, full-colour prints
Ideal for glossy or coated papers
Produces vibrant, rich colours and subtle gradients
Best choice for Print & Cut when using photo paper
Laser Printers
Use toner (powder) fused with heat
Better for high-speed, high-volume text printing
May not bond well with glossy surfaces
Can result in flaking, dull colours, or blurred images on photo paper
Not ideal for glossy photo paper—results may be patchy or prone to smudging
Tips for Using Gloss Photo Paper in Print & Cut Projects
Use the right print settings: Select “photo paper” or “glossy paper” in your printer settings to optimise ink distribution.
Let it dry: Even quick-dry paper needs a few minutes before handling—especially if you’re layering or cutting straight away.
Use a light tack mat: Glossy paper can stick too well to high-tack mats and may tear when removing.
Cut settings: Adjust your Silhouette or Cricut blade settings for thicker coated paper—do a test cut first.
Final Thoughts
If you’re aiming for that wow factor in your Print & Cut designs, switching to gloss photo paper and an inkjet printer is one of the easiest upgrades you can make. The difference in print quality is instantly noticeable—more vibrant colours, sharper details, and a gorgeous glossy finish that truly elevates your projects.
So if your prints have been looking a little dull or flat, give photo paper a try. Your crafts will thank you—and so will your followers!
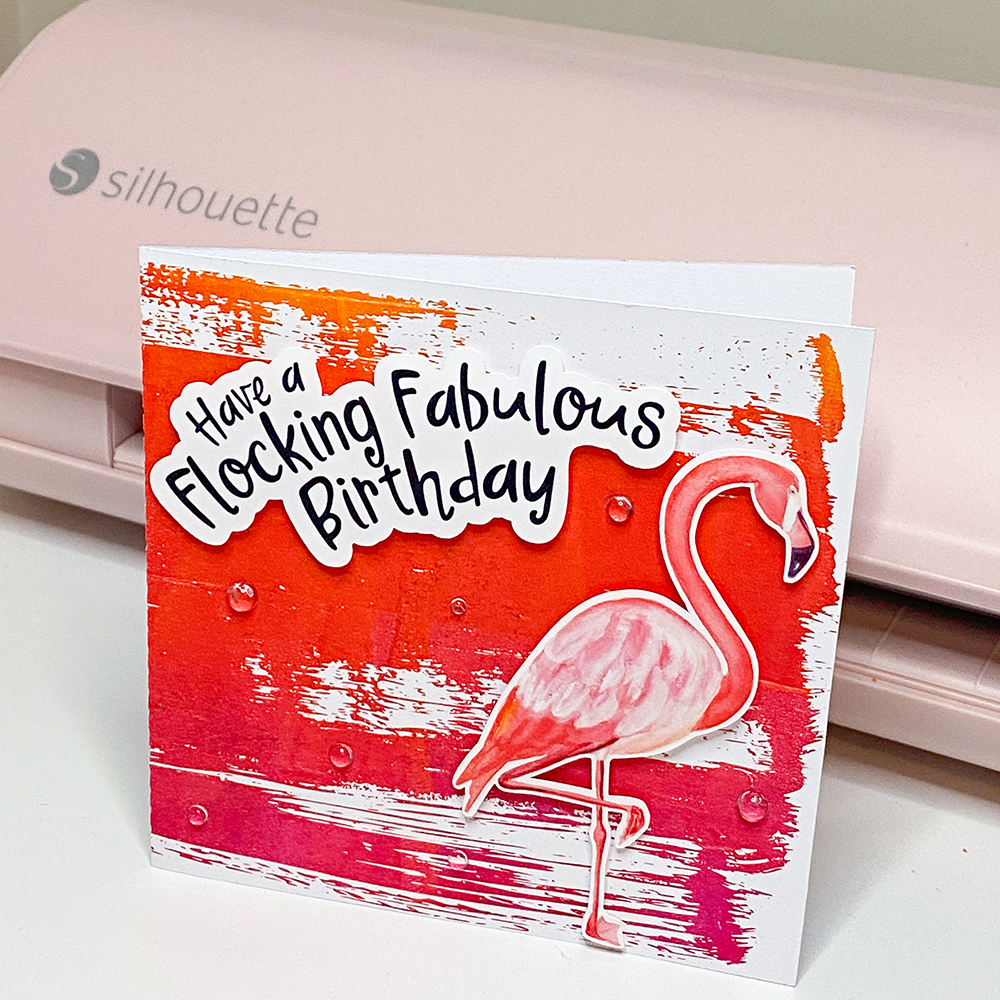
Looking for a handmade birthday card with bold tropical vibes? This flamingo-themed birthday card is bright, cheerful, and so much fun to make. Using a Print & Cut flamingo, a cheeky sentiment, a painted monoprint background, and a dry paint-style clipping mask frame, this project is perfect for Silhouette Studio users who love combining painterly effects with clean digital design.
To recreate this look, you’ll need these Silhouette Design Store files: Flamingo Watercolor Print & Cut (D-1270614) Download here Flocking Fabulous Birthday Sentiment (D-1270612) Download here Yellow Red Magenta Monoprint Background (385854) Download here Dry Paint Grunge Clipping Mask Frame (D-368127) Download here
Cut the sentiment from coordinating cardstock, or print and cut using the include offset.
Assemble the card using glue or foam tape to add depth and dimension.
The finished result is a fun, layered birthday card perfect for summer celebrations and flamingo fans alike. See the full process in the Instagram Reel! (don’t forget to follow!)
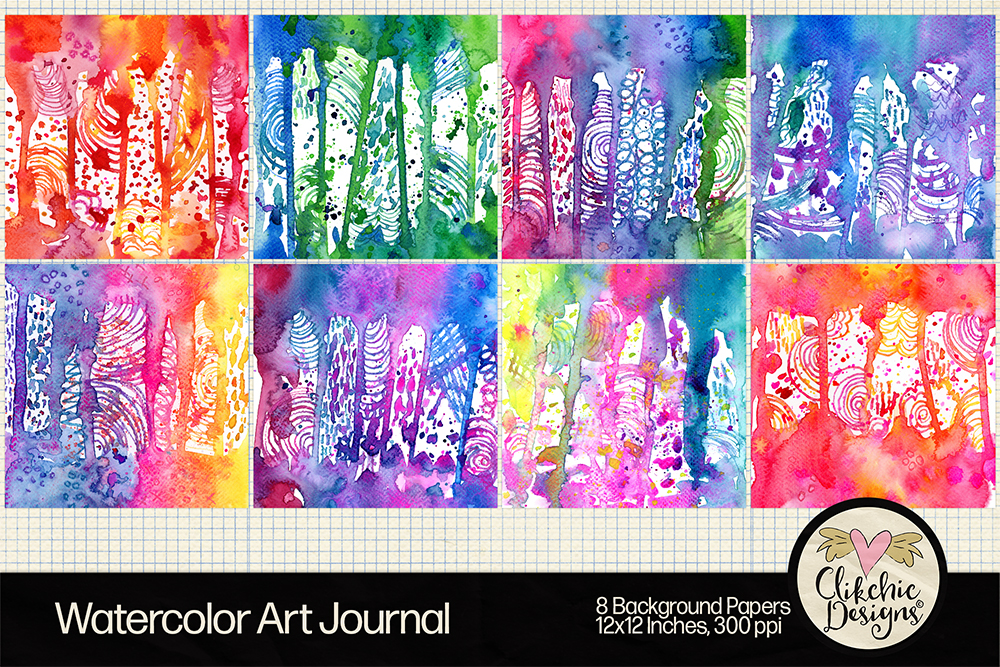
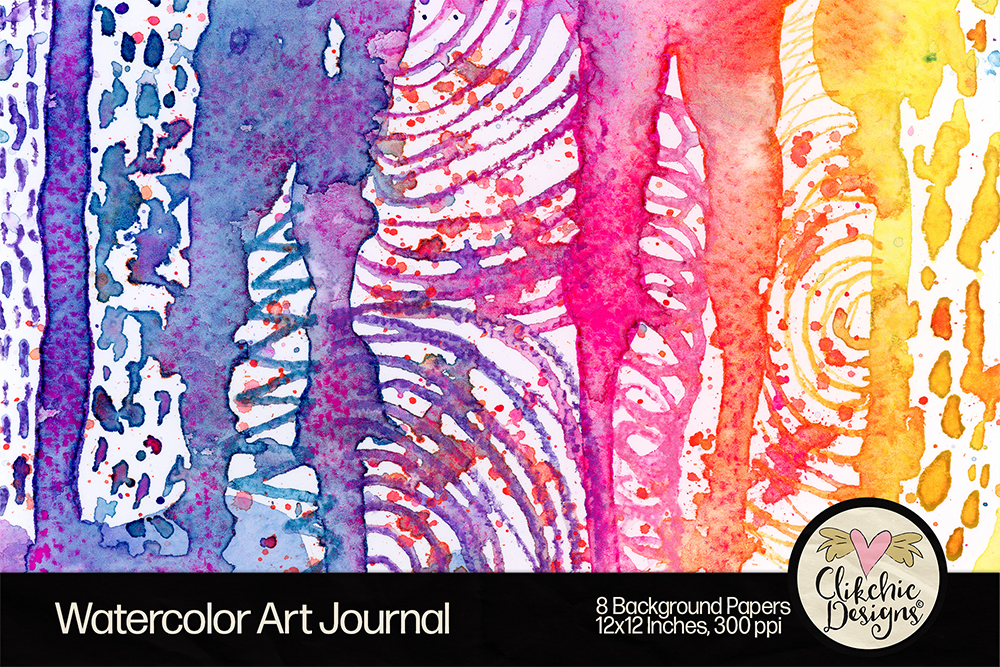
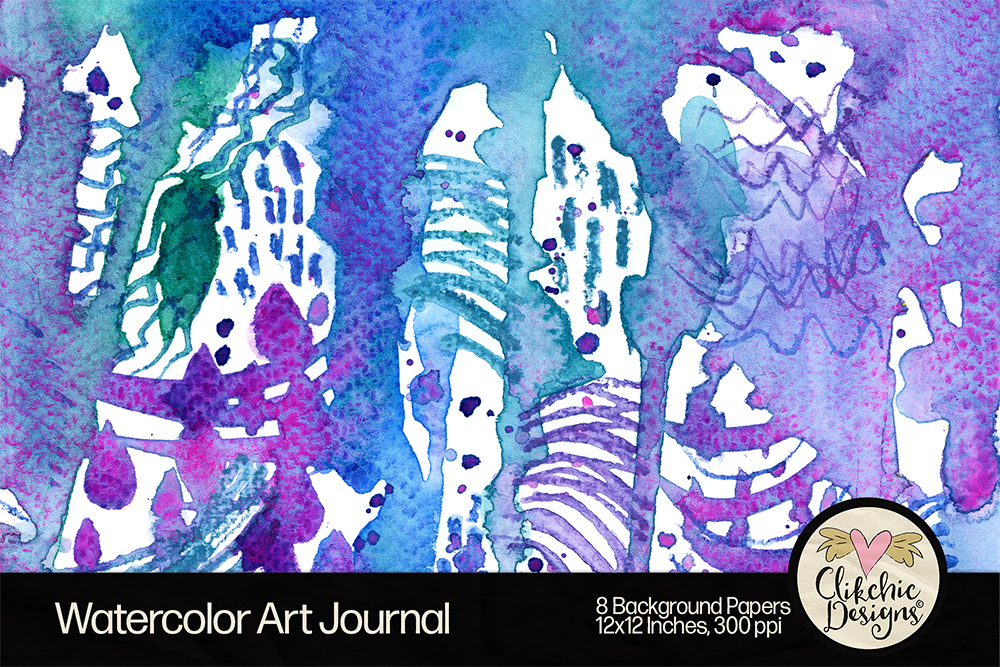
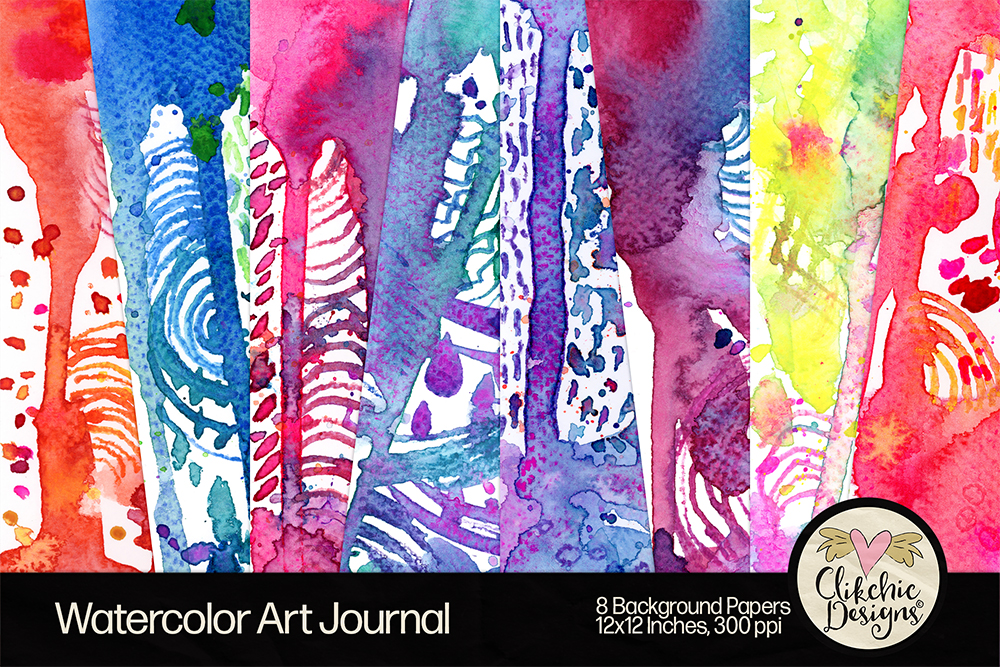
Looking to add bold, expressive colour to your next creative project? These vibrant Watercolor Art Journal Backgrounds by Clikchic Designs are the perfect blend of abstract texture and painterly charm. With layered brushwork, rich colour palettes, and hand-painted details, they’re ideal for junk journaling, digital scrapbooking, card making, and mixed media art.
Each background is a high-resolution printable and designed to fill cuttable shapes in Silhouette Studio® for stunning print & cut designs. Whether you prefer warm reds and pinks or cool purples and blues, you’ll find the perfect match among these eight unique backgrounds.
Give your crafts that expressive, hand-painted touch with Clikchic Designs. Whether you’re designing cards, ephemera, or digital pages, these backgrounds are sure to spark your creativity.
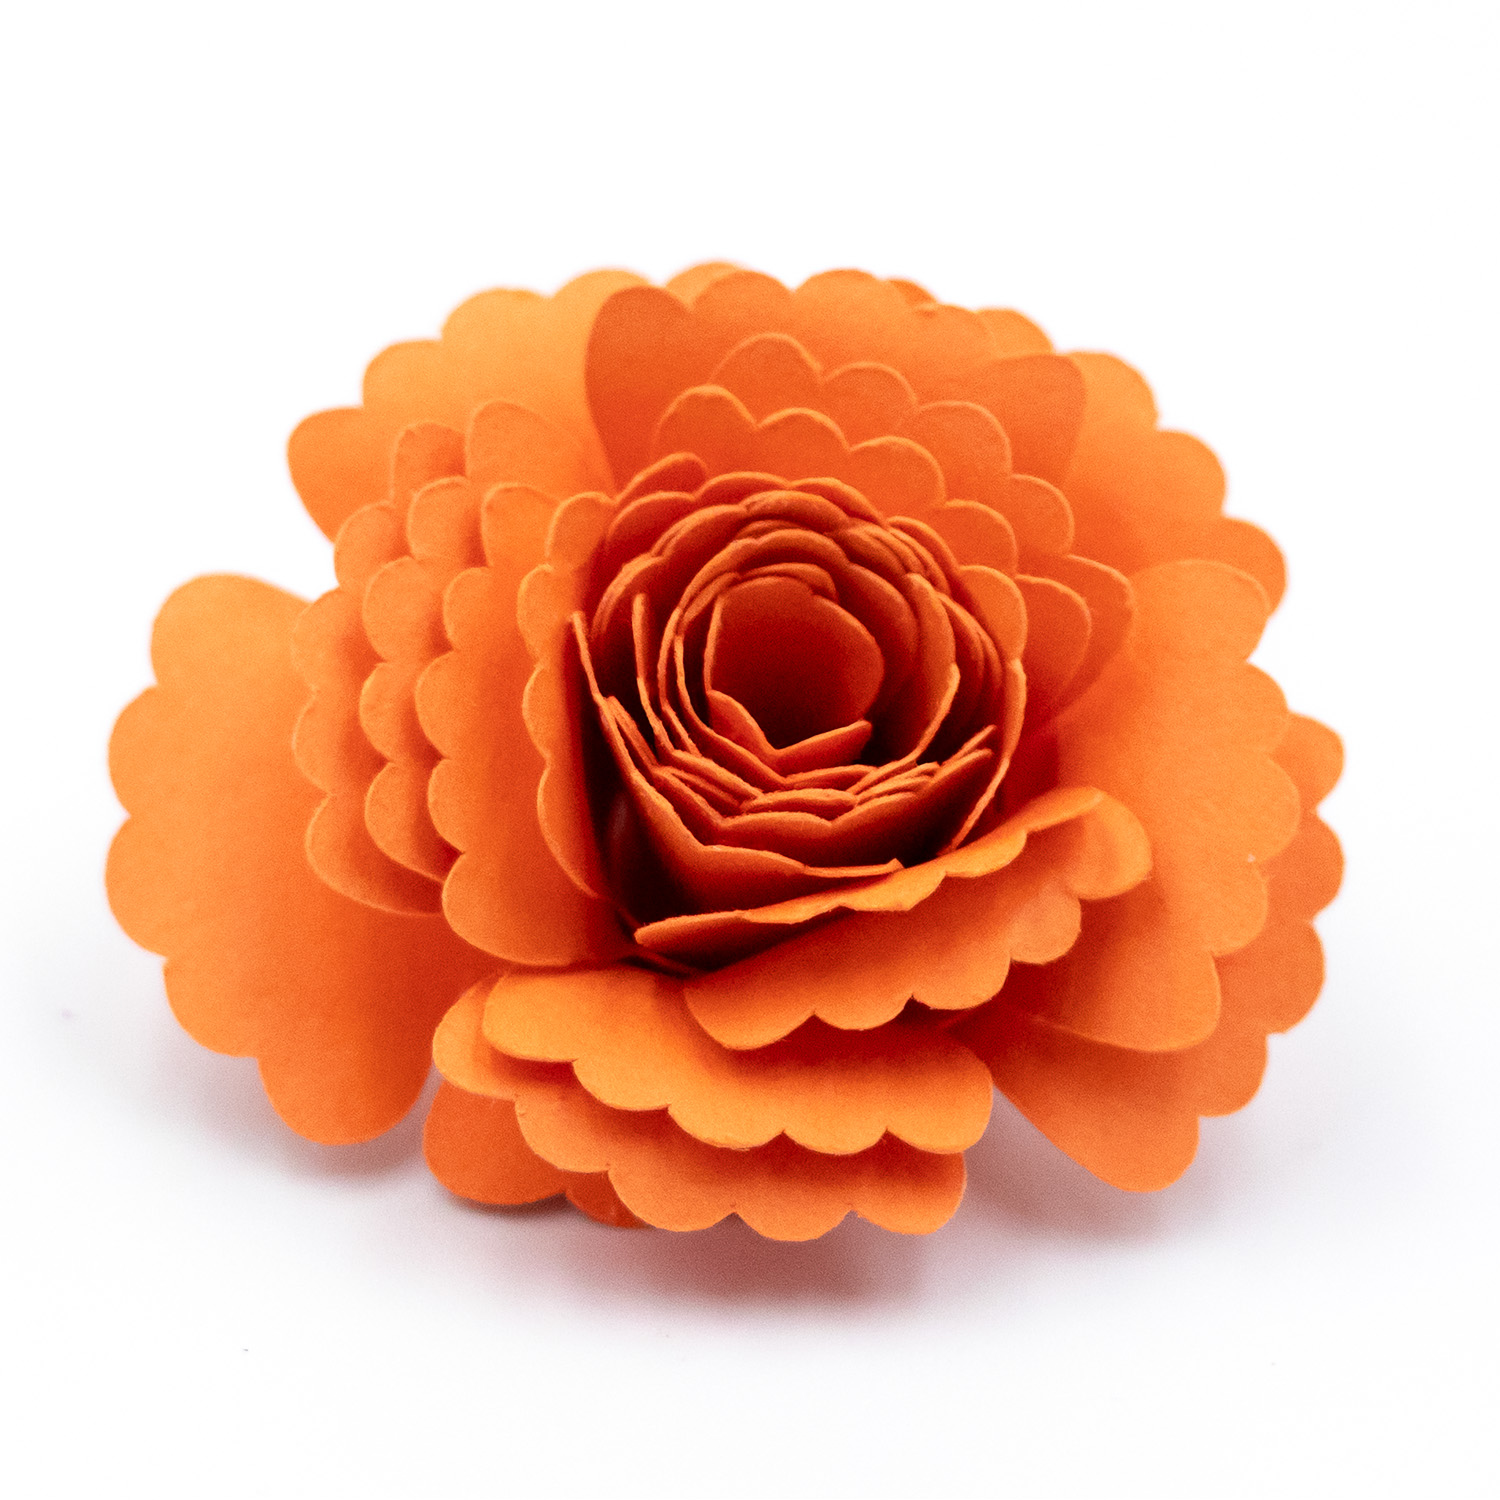
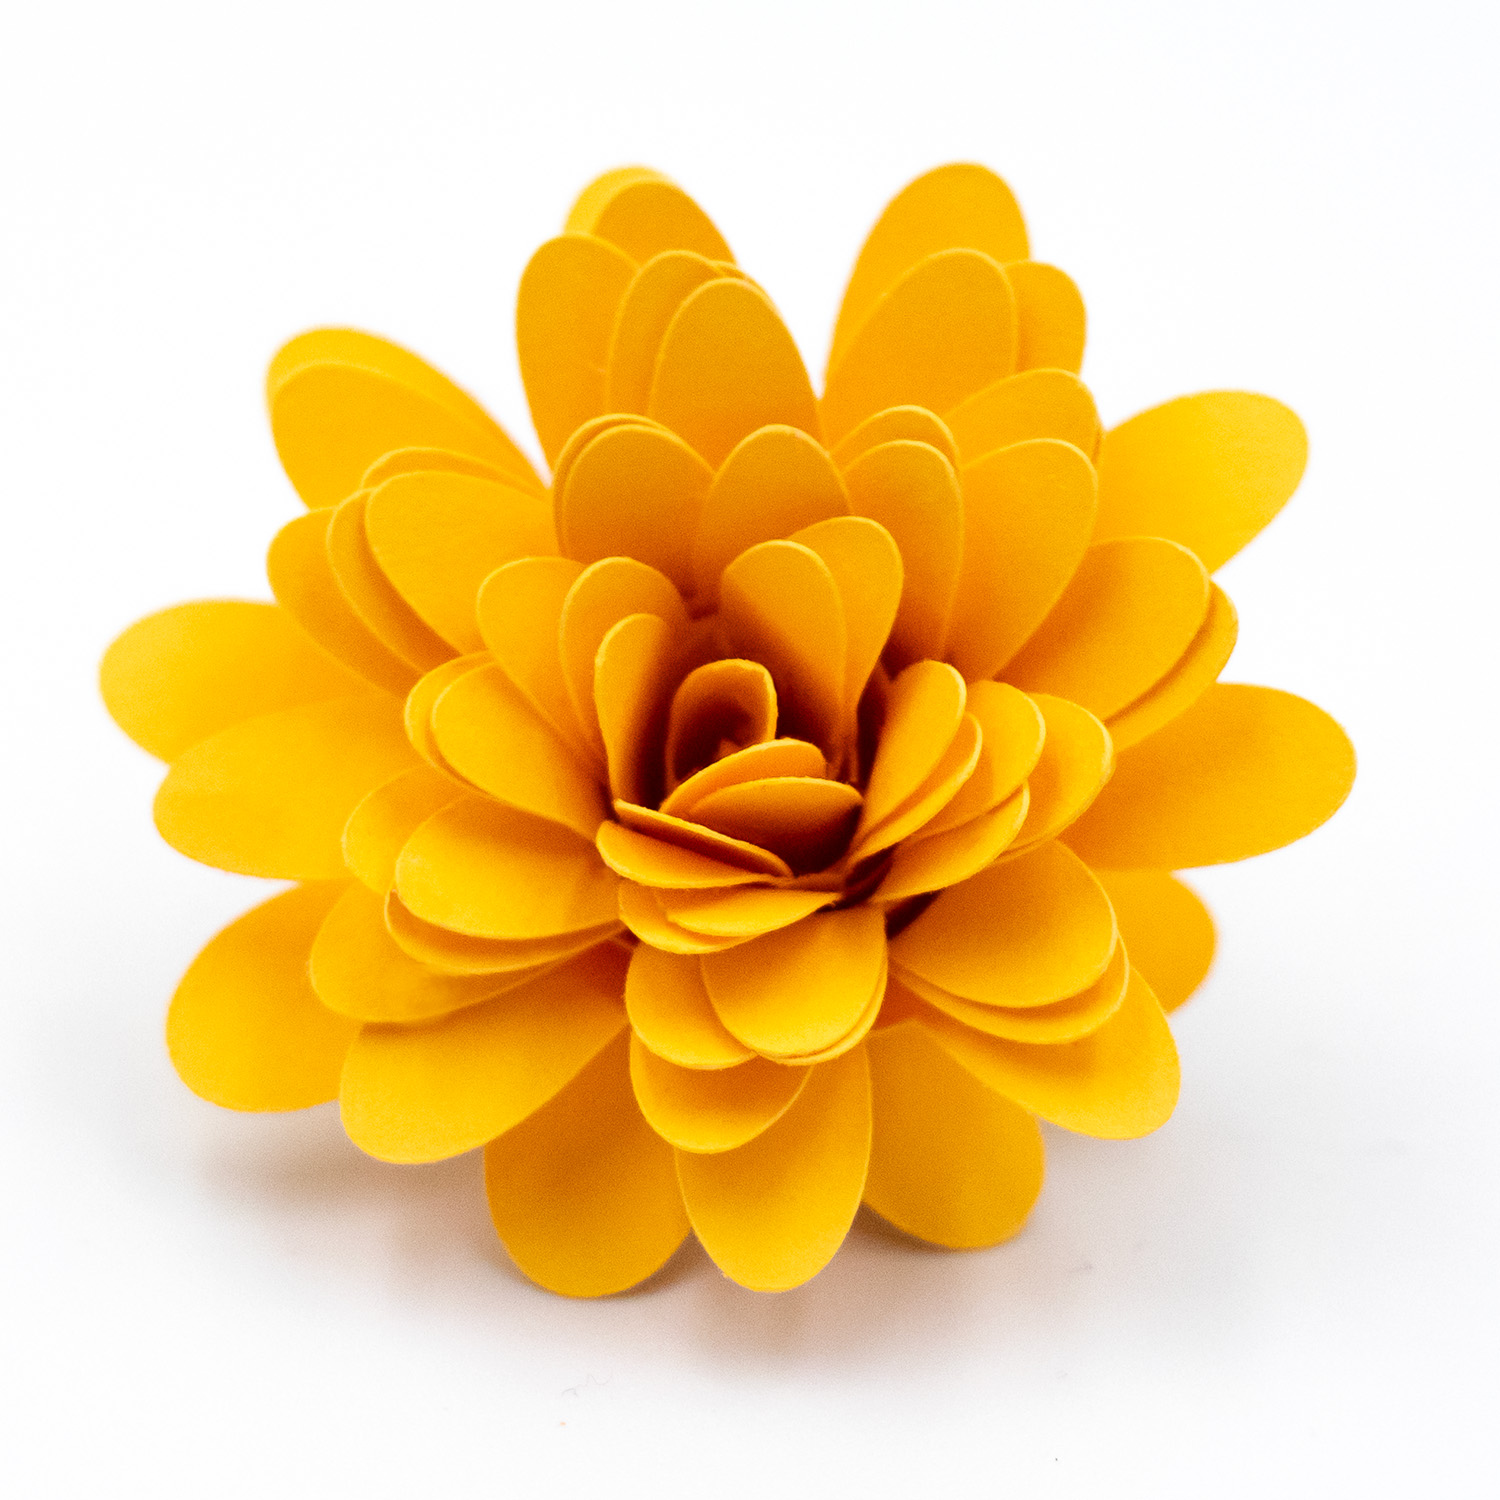
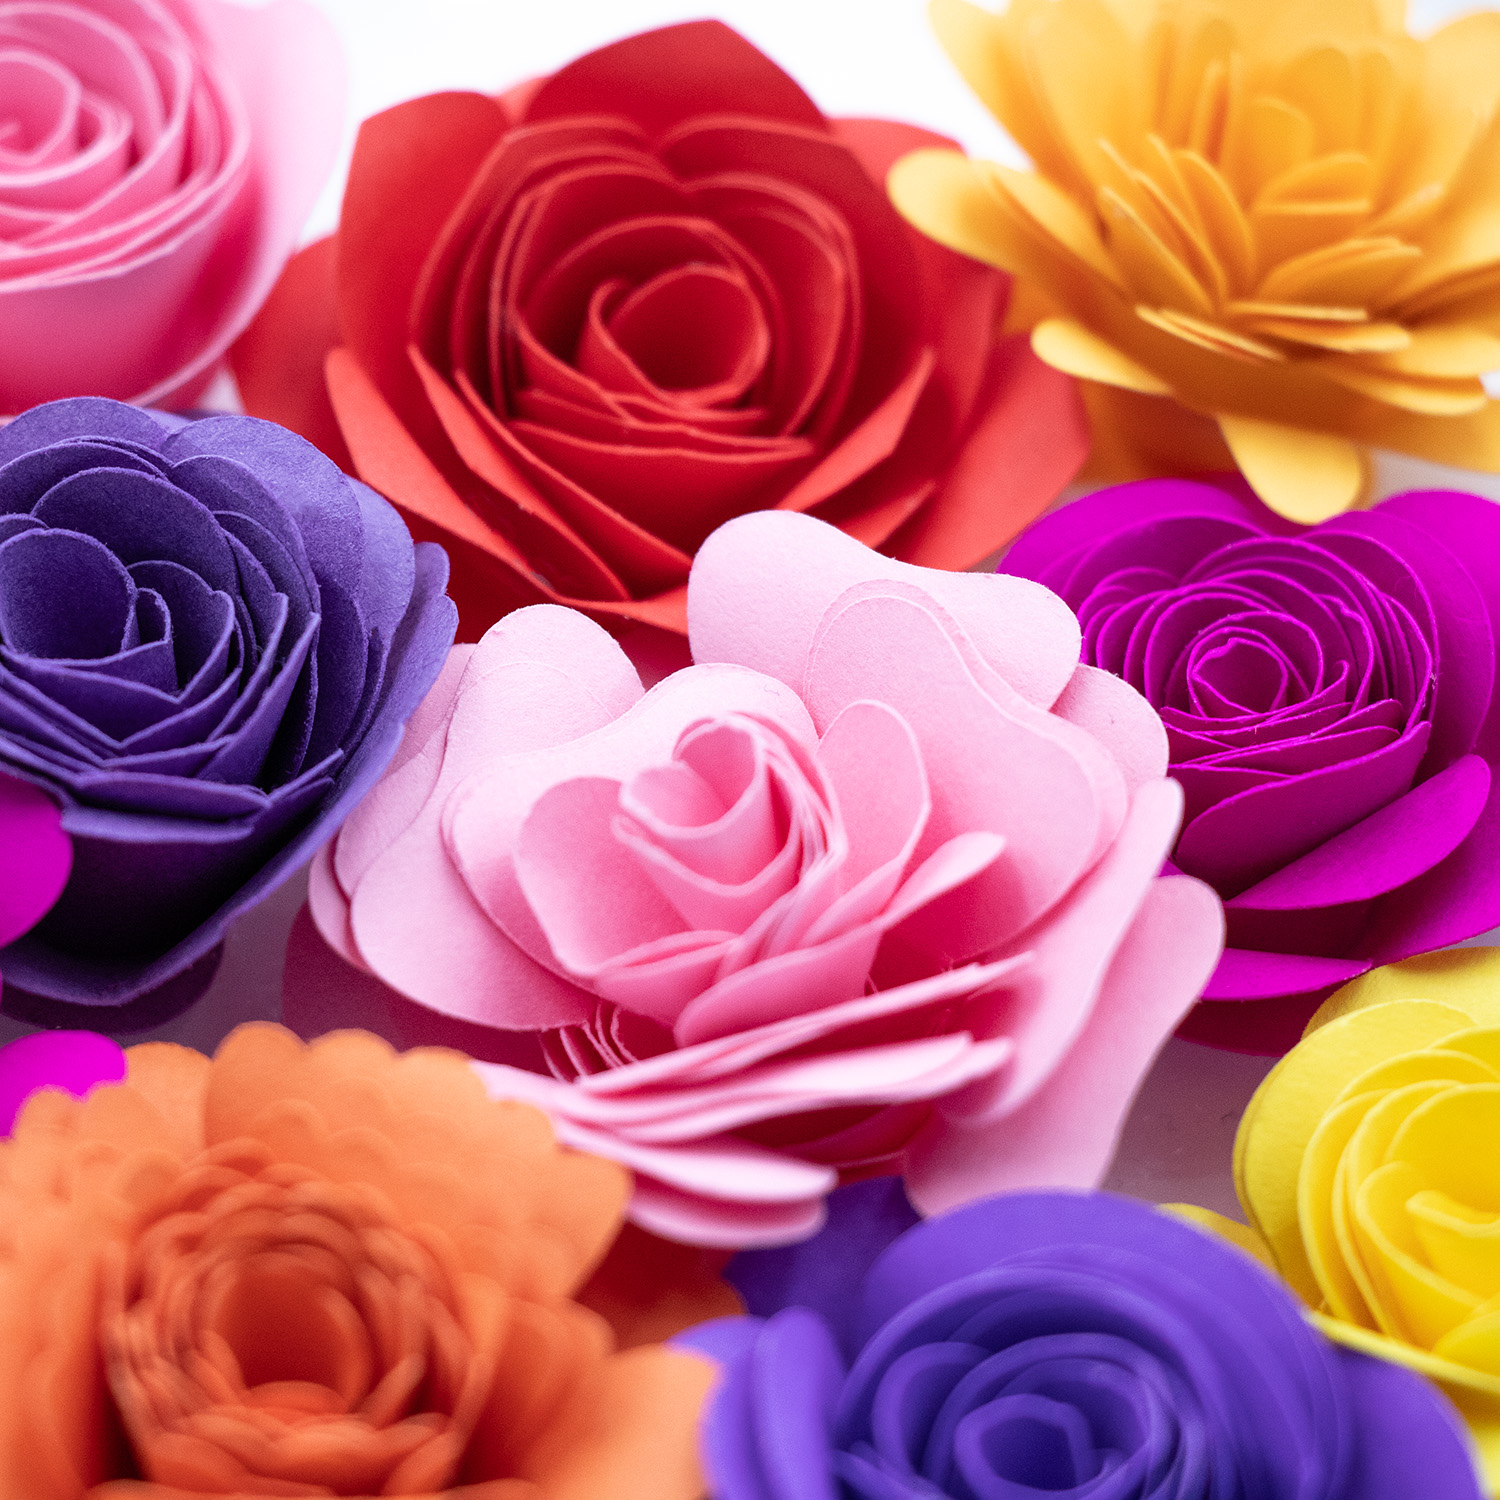
Rolled paper flowers are a beautiful, easy-to-make craft perfect for cardmaking, scrapbooking, home décor, and party decorations. With just a few supplies, you can create realistic blooms in minutes. Prefer to watch and learn? Scroll on to the tutorial or further to the bottom to watch the step-by-step video on YouTube.
Cut the Spiral Shape: Use your cutting machine or scissors to cut out a spiral flower shape from your chosen paper. The design should have scalloped or curved edges for the petal effect.
Start Rolling from the Outside: Begin at the outer edge of the spiral. Use a quilling tool or tweezers to start rolling the paper inward, keeping the bottom edge aligned as much as possible. Wider petal designs with gaps between them require a little more care to ensure petals fold in as you wind the spiral.
Roll to the Centre: Continue rolling until you reach the flat circle at the centre of the spiral. This circle acts as the flower’s base.
Let It Loosen Slightly: Once rolled, gently release the flower so the petals can relax into a more natural shape. Adjust tightness to your liking.
Glue the Base: Apply a generous amount of hot glue to the centre circle and press the rolled petals into it. Hold for a few seconds until secure.
Finish & Shape: You can lightly curl the petal edges outward with your fingers or a shaping tool like a thin paintbrush or similar tool. Add ink or embellishments if desired.
Tips:
For more realistic flowers, use double-sided cardstock or ink the edges.
Larger spirals create fuller flowers; tighter rolls form buds.
Use a thin paintbrush handle or similar to gently curl petals outward for added dimension.
Rolled paper flowers can be layered, grouped, or used alone for endless DIY possibilities.
This tutorial contains affiliate links. If you purchase through them, I may earn a small commission at no extra cost to you.